TSI Incorporated SIDEPAK AM510 User manual

SIDEPAK™ PERSONAL
AEROSOL MONITOR
MODEL AM510
USER GUIDE


Copyright ©
TSI Incorporated / Revision J / 2002–2012 / All rights reserved.
Address
TSI Incorporated / 500 Cardigan Road / Shoreview, MN 55126 / USA
Fax No.
(651) 490-3824
Limitation of Warrantyand Liability (effective June 2011)
Seller warrants the goods sold hereunder, under normal use and service as described in the
operator's manual, shall be free from defects in workmanship and material for 24 months, or
if less, the length of time specified in the operator's manual, from the date of shipment to the
customer. This warranty period is inclusive of anystatutory warranty. This limited warranty is
subject to the following exclusions and exceptions:
a. Hot-wire or hot-film sensors used with research anemometers, and certain other
components when indicated in specifications, are warranted for 90 days from the date of
shipment;
b. Pumps are warranted for hours of operation as set forth in product or operator’s manuals;
c. Parts repaired or replaced as a result of repair services are warranted to be free from
defects in workmanship and material, under normal use, for 90 days from the date of
shipment;
d. Seller does not provide anywarrantyon finished goods manufactured by others or on any
fuses, batteries or otherconsumable materials. Only the original manufacturer's warranty
applies;
e. Unless specifically authorized in a separate writing by Seller, Seller makes no warranty
with respect to, and shall have no liability in connection with, goods which are
incorporated into other products or equipment, or which are modified byany person other
than Seller.
The foregoing is IN LIEU OF all other warranties and is subject to theLIMITATIONS stated
herein. NO OTHER EXPRESS OR IMPLIED WARRANTY OF FITNESS FOR
PARTICULAR PURPOSE OR MERCHANTABILITY IS MADE. WITH RESPECT TO
SELLER’S BREACH OF THE IMPLIED WARRANTY AGAINST INFRINGEMENT, SAID
WARRANTY IS LIMITED TO CLAIMS OF DIRECT INFRINGEMENT AND EXCLUDES
CLAIMS OF CONTRIBUTORY OR INDUCED INFRINGEMENTS. BUYER’S EXCLUSIVE
REMEDY SHALL BE THE RETURN OF THE PURCHASE PRICE DISCOUNTED FOR
REASONABLE WEAR AND TEAR OR AT SELLER’S OPTION REPLACEMENT OF THE
GOODS WITH NON-INFRINGING GOODS.
TO THE EXTENT PERMITTED BY LAW, THE EXCLUSIVE REMEDY OF THE USER OR
BUYER, AND THE LIMIT OF SELLER'S LIABILITY FOR ANY AND ALL LOSSES,
INJURIES, OR DAMAGES CONCERNING THE GOODS (INCLUDING CLAIMS BASED
ON CONTRACT, NEGLIGENCE, TORT, STRICT LIABILITY OROTHERWISE) SHALL BE
THE RETURN OF GOODS TO SELLER AND THE REFUND OF THE PURCHASE PRICE,
OR, AT THE OPTION OF SELLER, THE REPAIR OR REPLACEMENT OF THE GOODS.
IN THE CASE OF SOFTWARE, SELLER WILL REPAIR OR REPLACE DEFECTIVE
SOFTWARE OR IFUNABLE TO DO SO, WILL REFUND THE PURCHASE PRICE OF
THE SOFTWARE. IN NO EVENTSHALL SELLER BE LIABLE FOR LOST PROFITS OR
ANY SPECIAL, CONSEQUENTIAL OR INCIDENTAL DAMAGES. SELLER SHALL NOT
BE RESPONSIBLE FOR INSTALLATION, DISMANTLING OR REINSTALLATION COSTS
OR CHARGES. No Action, regardless of form, may be brought against Seller more than 12
months after a cause of action has accrued. The goods returned under warranty to Seller's
factory shall be at Buyer's risk of loss, and will be returned, if at all, at Seller's risk of loss.
Buyer and all users are deemed to have accepted this LIMITATION OF WARRANTY AND
LIABILITY, which contains the complete and exclusive limited warranty of Seller. This
LIMITATION OF WARRANTY AND LIABILITY may not be amended, modified or its terms
waived, except by writing signed by an Officer of Seller.

4
Service Policy
Knowing that inoperative or defective instruments are as detrimental to TSI as they are to
our customers, our service policy is designed to give prompt attention to any problems. If
any malfunction is discovered, please contact your nearest sales office or representative, or
call TSI's Customer Service department at (800) 874-2811 (USA) or (001 651) 490-2811
(International).

i
CONTENTS
SAFETY INFORMATION ................................................................... III
SidePak AM510 Rating Label .......................................................iv
Intrinsic Safety Rating Information................................................iv
CHAPTER 1 UNPACKING AND PARTS IDENTIFICATION ........... 1
CHAPTER 2 SETTING-UP................................................................ 5
Supplying Power to the SidePakTM Aerosol Monitor.....................5
Battery Information........................................................................6
Installing the NiMH Rechargeable Battery Pack..................... 6
SidePak NiMH Battery Maintenance ......................................7
Getting Started........................................................................7
Charging Procedure................................................................ 7
Storage of NiMH Battery Packs Between Uses...................... 8
Installing the AA Battery Pack ................................................9
Replacing the Cells in the AA Battery Pack..........................10
Using the Power Supply .......................................................10
Keypad Functions........................................................................12
Setting the Real-Time Clock Using the Keypad..........................12
Setting the Date Format:.......................................................12
Setting the Current Time:......................................................13
Setting the Current Date:......................................................13
Installing TrakPro Data Analysis Software..................................14
Connecting the SidePak AM510 Personal Aerosol
Monitor to Your Computer for the first time..............................14
Connecting the SidePak AM510 Personal Aerosol
Monitor to Your Computer once the drivers are installed........15
CHAPTER 3 OPERATION.............................................................. 17
Overview......................................................................................17
Keypad Functions........................................................................18
Identifying SidePak AM510 Features..........................................19
Power Up.....................................................................................19
Power Down................................................................................20
Survey Mode ...............................................................................20
Main Menu...................................................................................20
Data Log ...............................................................................21
Setup Menu...........................................................................29
Statistics................................................................................37
Zero Cal................................................................................ 37

ii
CHAPTER 4 MAINTENANCE.........................................................39
Maintaining Rechargeable Battery Packs ...................................39
Charging a NiMH Battery Pack.............................................39
Zeroing the AM510......................................................................41
Using and Maintaining Built-in Impactors....................................41
Using and Maintaining the Respirable Cyclone ..........................44
Cleaning the Cyclone............................................................45
AM510 Field Service Kit..............................................................46
CHAPTER 5 TROUBLESHOOTING...............................................47
APPENDIX A SPECIFICATIONS....................................................51
Battery Information ......................................................................54
Typical Battery Life......................................................................54
APPENDIX B CUSTOM CALIBRATIONS......................................55
Determining the Calibration Factor for a Specific Aerosol ..........56
APPENDIX C CONVERTING STORED DATA TO
CALIBRATED DATA ..................................................................59
APPENDIX D CSA CERTIFICATE OF COMPLIANCE..................61
APPENDIX E AM510 QUICK REFERENCE GUIDE ......................65

iii
Safety Information
When operated according to the manufacturer’s instruction, this
device is a Class I laser product as defined by U.S. Department of
Health and Human Services standards under the Radiation Control
for Health and Safety Act of 1968.
A certification and identification label like the one shown below is
affixed to each instrument.
SidePak AM 510 Aerosol Monitor
S/N 02050026 MFD: May 2002
COMPLIES WITH 21 CFR 1040.10 AND 1040.11
TSI INC
Shoreview, MN
Made in USA
There are no user-serviceable parts inside this instrument.
Performing services other than those described in this manual may
result in exposure to harmful (visible) laser radiation. A warning label
like the one shown below is affixed to the internal laser device.
DANGER: VISIBLE LASER
RADIATION WHEN OPEN. AVOID
DIRECT EXPOSURE TO BEAM
WARNING: NO USER SERVICEABLE
PARTS INSIDE. REFER SERVICING
TO QUALIFIED PERSONNEL.
!
WARNING
Use of USB connection to be used only in an area
known to be nonhazardous.
Battery pack can only be changed/charged in an area
known to be nonhazardous.
iv
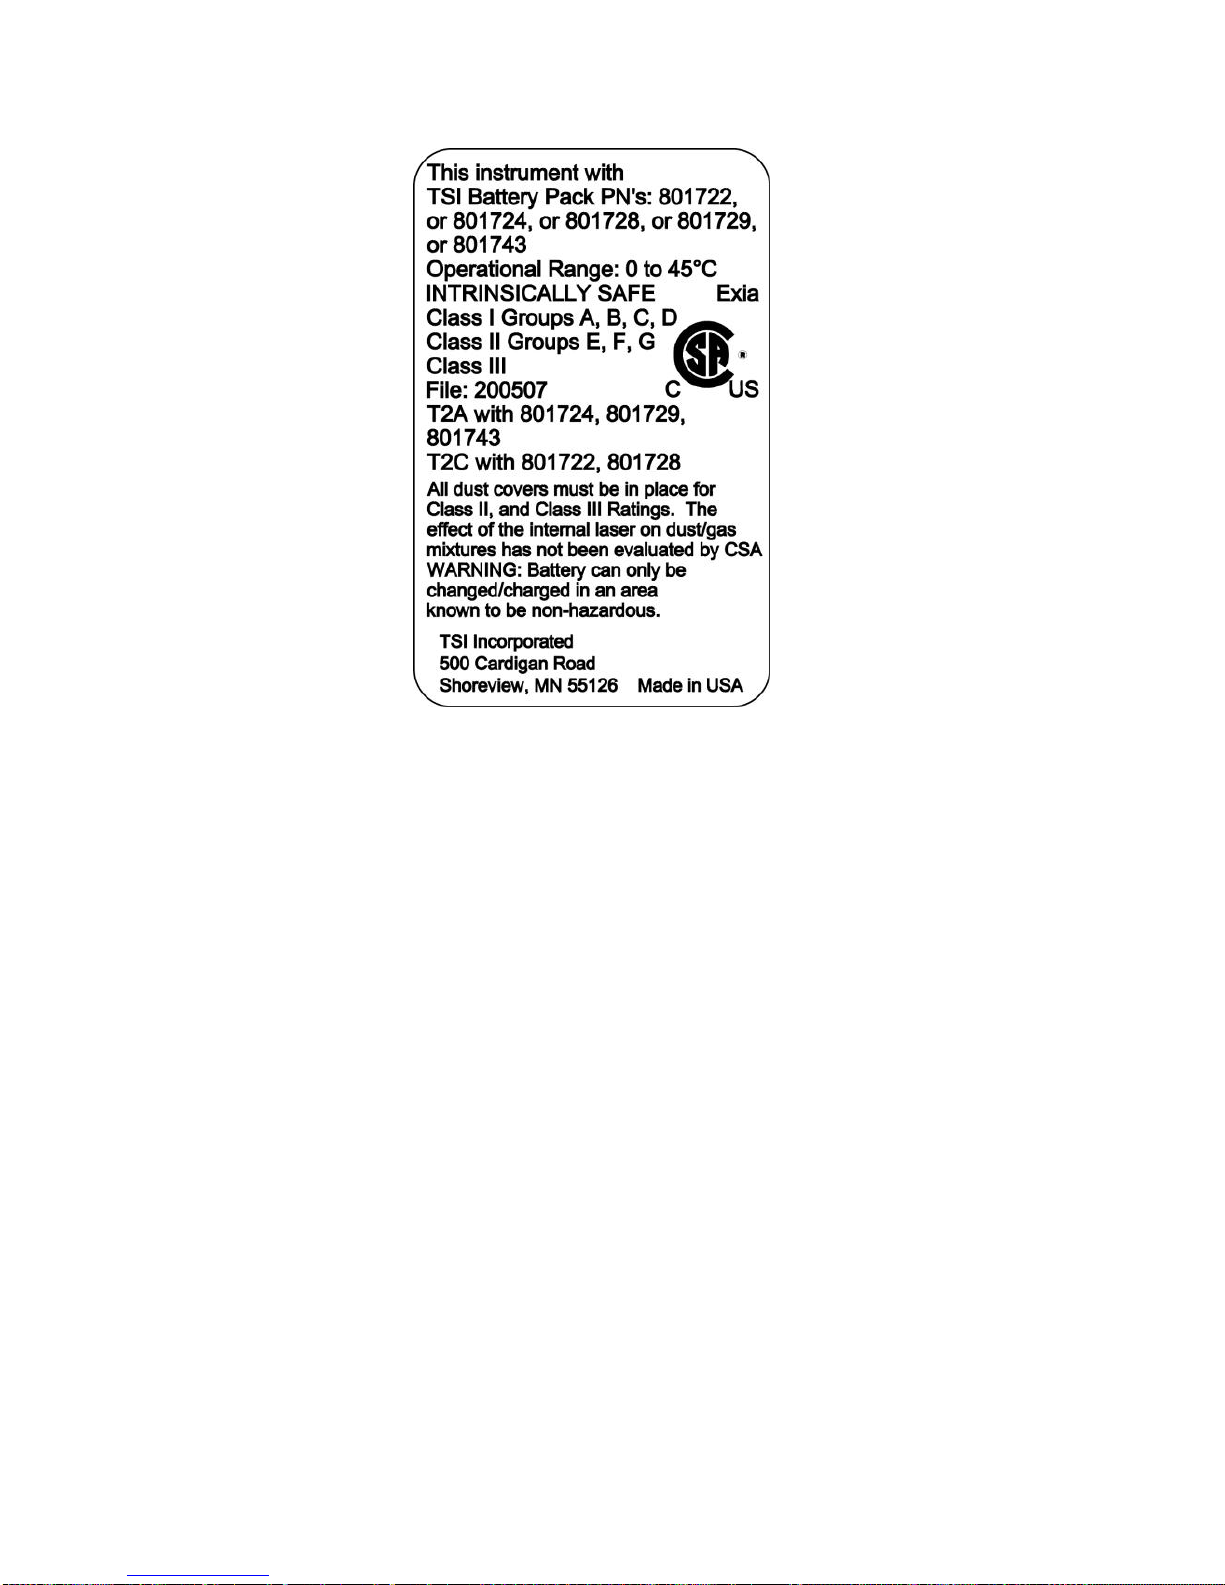
SidePak AM510 Rating Label
Intrinsic Safety Rating Information
TSI Battery Pack P/Ns 801722, 801724, 801728, 801729 or
801743
INTRINSICALLY SAFE CSA
Exia
T2A with 801724,801729 or 801743
T2C with 801722 or 801728
Class I Groups A, B, C, D
Class II Groups E, F, G
Class III
File: 200507

1
Chapter 1
Unpacking and Parts Identification
Carefully unpack the Model AM510 SidePak Personal Aerosol
Monitor from the shipping container. Use the table below to determine
which components are included with the kit or single unit you
purchased. A photo and description of each item follows the table. If
any parts are missing, contact TSI immediately.
AM510 Single-unit Kit with all accessories shown
Item Description
Part/Model
Reference Picture
AM510 Personal
Aerosol Monitor
(shown with battery pack)
AM510-1000
Battery Pack,
1600 mAH
1650 mAH
801723
801724/
801729/
801743
2 Chapter 1
Item Description
Part/Model
Reference Picture
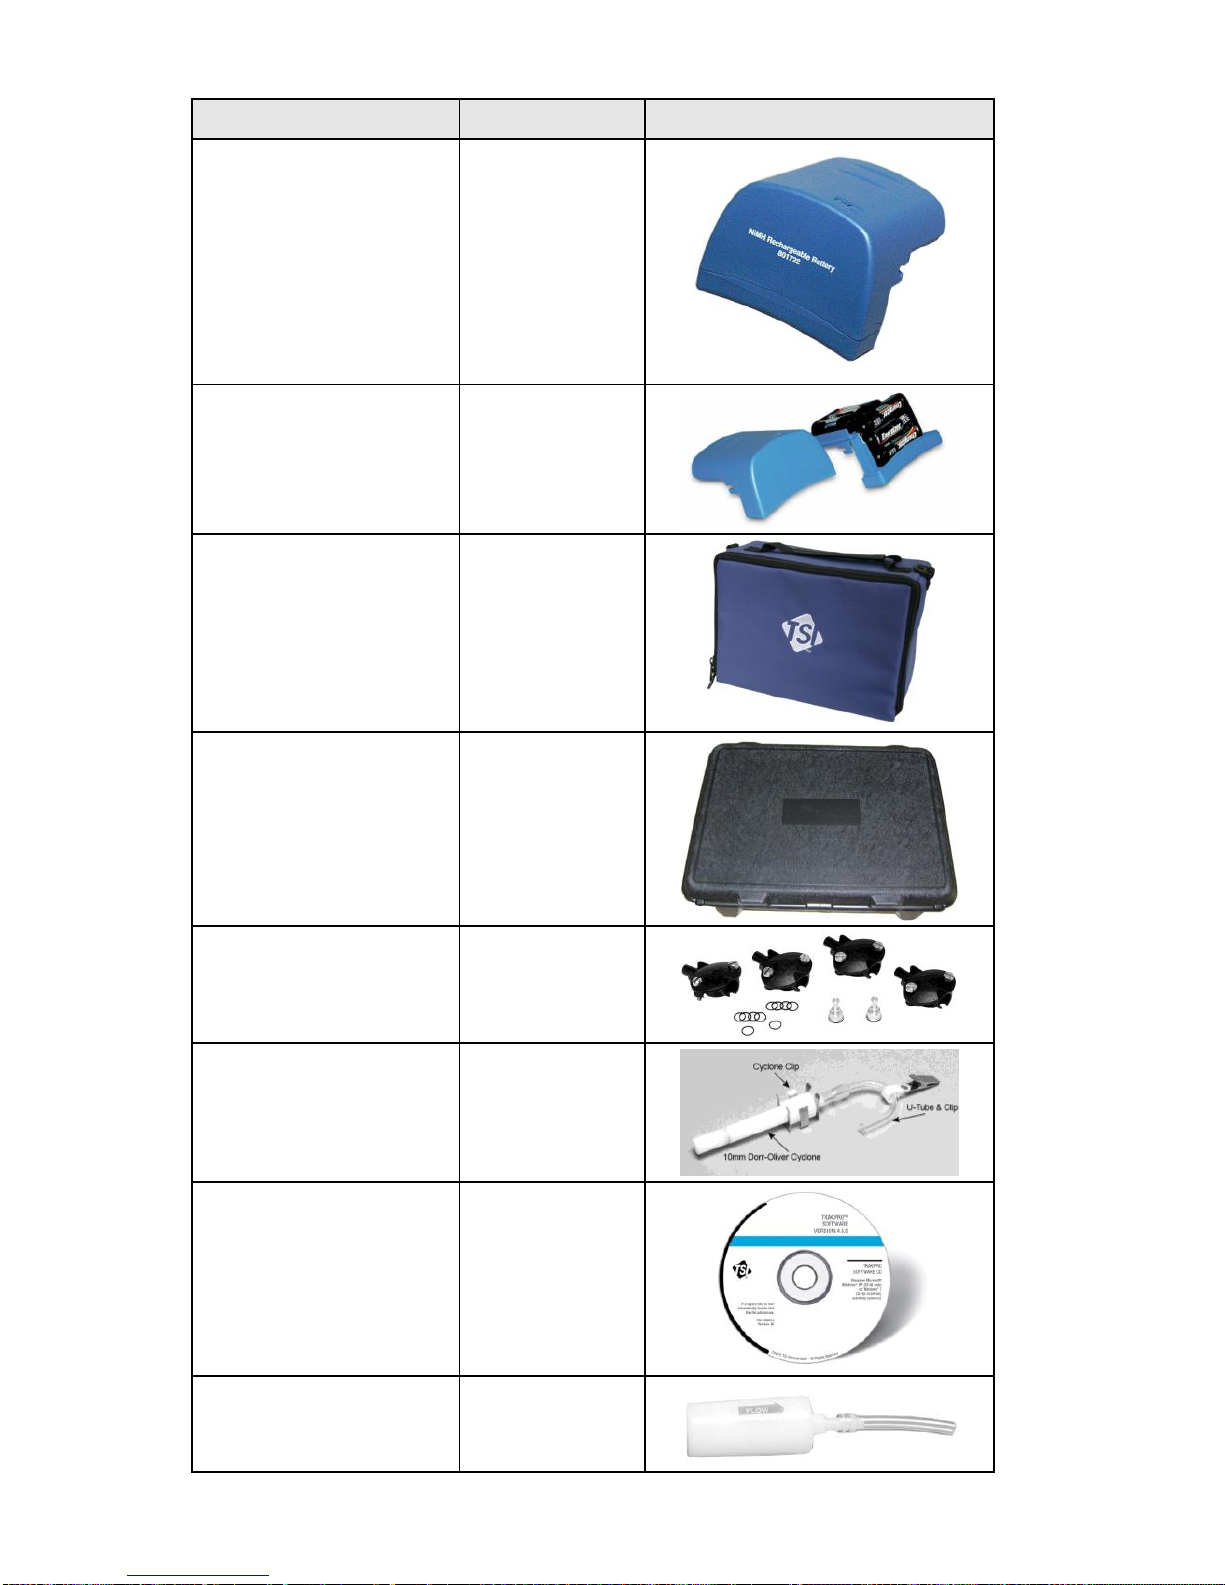
Battery Pack, 2700
mAH
801722/
801728/
801735
AA Battery Pack
801708/
801736
Single Carry Case
11.25” x 9” x 4.25”
1319289
3-Unit Carry Case
17” x 12.5” x 4.2”
1500134
Impactor Kit
801702
Cyclone Kit
801701
TrakPro™Software
CD
1090014
Zero Filter
800663

Unpacking and Parts Identification 3
Item Description
Part/Model
Reference Picture
Power Supply
2613210
USB Cable
1303754
Sample Tube
801703
Screwdriver,
Reversible Phillips Flat
3012094
Calibration Certificate
N/A
User Guide
1980456
4 Chapter 1
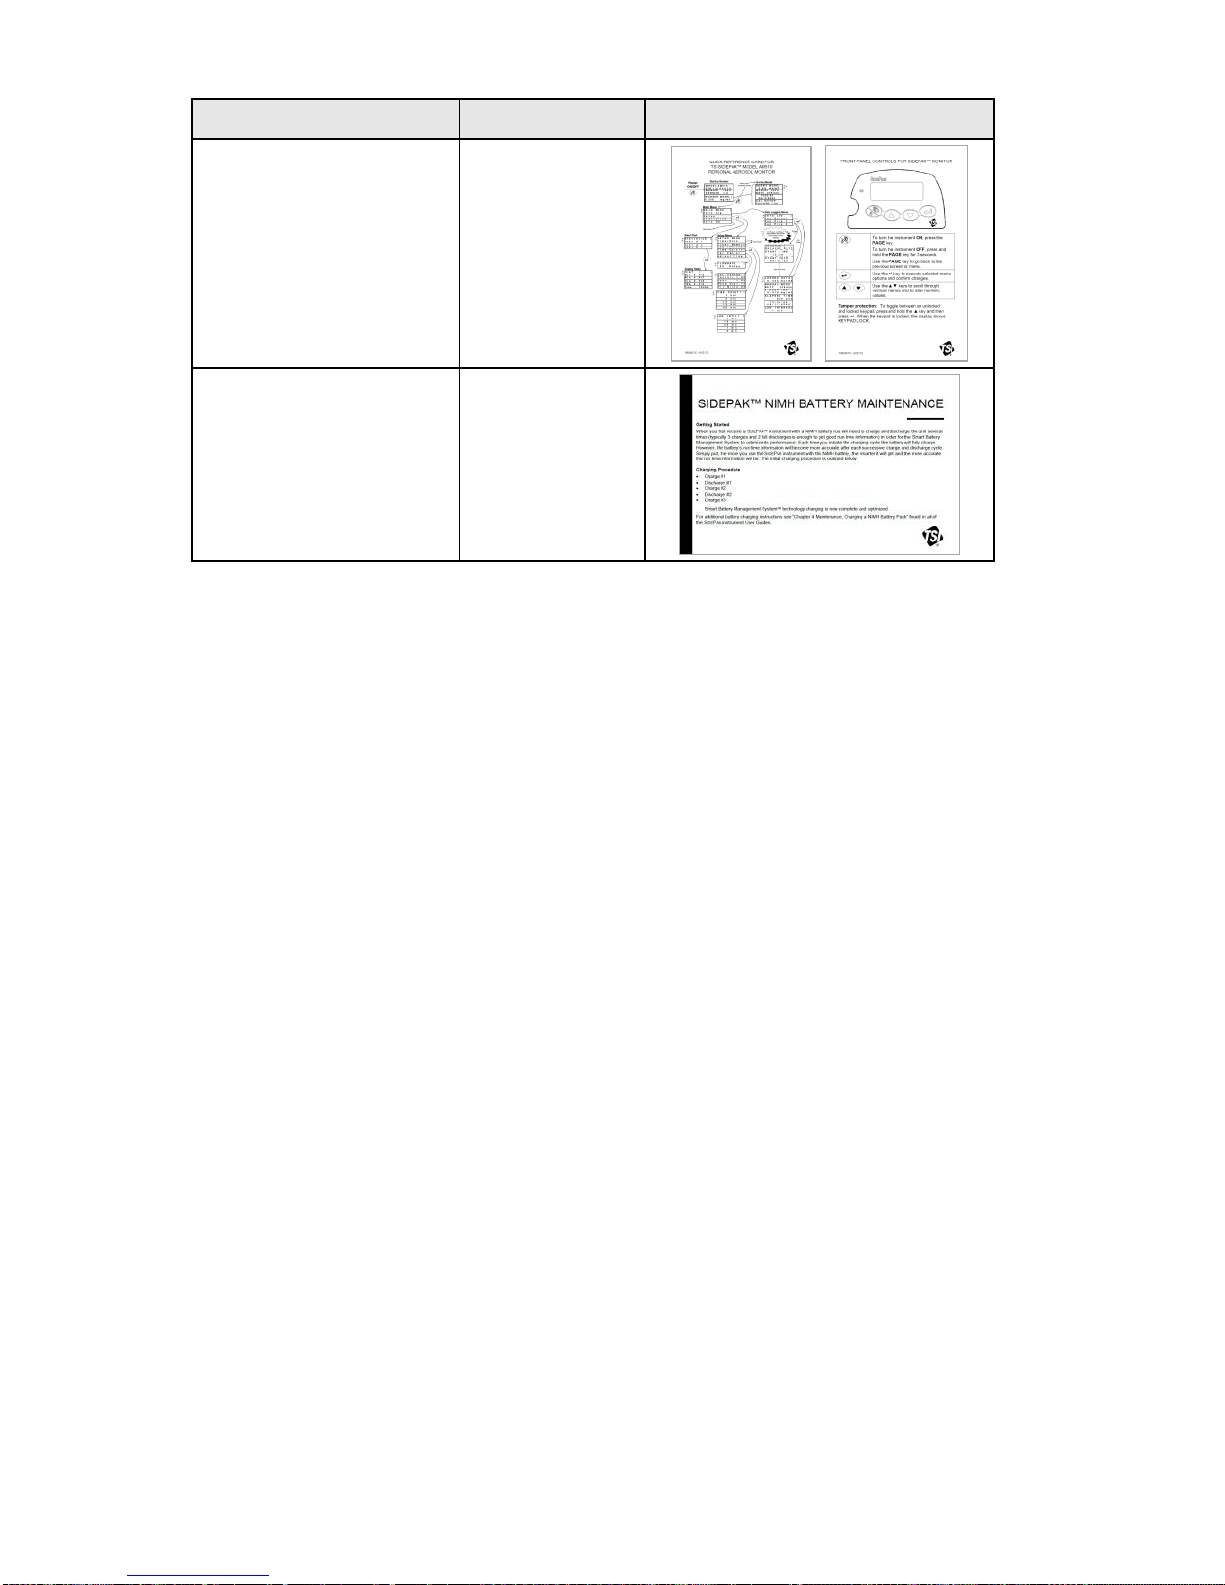
Item Description
Part/Model
Reference Picture
Quick Reference Card
1980461
SidePak NimH Battery
Maintenance Card
1980534

5
Chapter 2
Setting-Up
Supplying Power to the SidePakTM Aerosol Monitor
You must attach a battery pack to the SidePak Personal Aerosol
Monitor Model AM510 prior to use. There are four different TSI
battery packs designed for the AM510: 1650 and 2700 mAH
rechargeable nickel metal hydride (NiMH) battery packs, AA battery
pack that allows you to use standard AA-size batteries, and 1600
mAH rechargeable nickel-metal hydride battery. You may also power
the AM510 with the power supply, with or without a battery pack
attached.
The SidePak monitor has a miniature internal backup battery cell that
keeps stored data intact while the unit is turned off. Changing the
main battery pack or disconnecting the power supply/charger will not
cause data to be lost. The backup battery will last for many years. TSI
will install a new battery, if necessary, when the unit is returned to the
factory for service. The backup battery is not user-accessible.
The NiMH battery packs are approved and rated intrinsically safe
(see battery information table below). The AA battery pack is not
intrinsically safe. The following battery information table provides the
intrinsic safety rating information.

Chapter 2
6
Battery Information
Battery Option
Charge
Time1
Intrinsically
Safe
CSA Rating
1600 mAH NiMH
Pack (P/N 801723)
3.0
hours
No
N/A
1650 mAH NiMH
Pack (P/N 801724,
801729 or 801743)
3.5
hours
CSA2
Exia T2A/
Class I Groups A, B, C, D
Class II Groups E, F, G
Class III
2700 mAH NiMH
Pack (P/N 801722
or 801728)
5.5
hours
CSA2
Exia T2C/
Class I Groups A, B, C, D
Class II Groups E, F, G
Class III
2700 mAH NiMH
Pack (P/N 801735)
5.5
hours
No
N/A
6-Cell AA-size Pack
(P/N 801708 or
801736)
N/A
No
N/A
1Of a full depleted battery
2All dust plugs and dust gaskets must be installed
Installing the NiMH Rechargeable Battery Pack
Battery packs slide on and off the AM510 in the direction shown
below. There are serrations (teeth) that help hold the battery pack
firmly onto the AM510 body in addition to the two screws. Sliding
the battery on/off requires firm pressure in the proper direction.
!
WARNING
Battery pack can only be changed/charged in an area
known to be nonhazardous.
Battery Pack, 1600 mAH Battery Pack, 2700 mAH
Battery Pack, 1650 mAH

Setting-Up
7
Place the battery pack on top of the AM510 body and push firmly
to slide it on. Make sure that the front edge of the battery fits
under the lip near the keypad. Once the battery pack is fully
seated and the screw holes are lined up, fasten it in place using
the two battery screws provided.
Note: When installing any of the NiMH battery packs for the first
time, you should charge the battery before using the
AM510 to ensure proper operation. See “Using the Power
Supply” later in this chapter or the Maintenance chapter
for charging information.
SidePak NiMH Battery Maintenance
All TSI SidePak instruments can be used with all of the SidePak
Nickel Metal Hydride (NiMH) Batteries that incorporate the Smart
Battery Management System™technology. These NiMH batteries
provide many advantages over older battery technologies (e.g.,
NiCad with their memory issues). However, the NiMH batteries
require care and maintenance to ensure their optimal function.
Getting Started
When you first receive a SidePak instrument with a NiMH battery
you will need to charge and discharge the unit several times
(typically three (3) charges and two (2) full discharges is enough
to get good run time information) in order for the Smart Battery
Management System™technology to optimize its performance.
Each time you initiate the charging cycle the battery will fully
charge. However, the battery’s run time information will become
more accurate after each successive charge and discharge cycle.
Simply put, the more you use the SidePak instrument with the
NiMH battery, the smarter it will get and the more accurate the
run time information will be. The initial charging procedure is
outlined below:
Charging Procedure
Charge #1
Discharge #1
Charge #2
Discharge #2
Charge #3
Smart Battery Management System™technology charging is now
complete and optimized.
™Smart Battery Management System is a trademark of TSI Incorporated.

Chapter 2
8
For additional battery charging instructions see Chapter 4,
“Maintenance; Charging a NiMH Battery Pack” found in all of the
SidePak instrument User Guides.
To discharge the various SidePak instruments use the following
procedure to minimize the time to discharge the battery:
Go to the MAIN MENU Setup Adjust Flow
FLOWRATE 150 Range (adjust flow setting via ▼▲
keys) with no sampling train attached in open flow mode
and wait for the battery to run down and the instrument to
shut off. Then, recharge the battery.
Note: It is always recommended that you charge your
SidePak instrument with NiMH battery pack after
each use to optimize and maintain the Smart Battery
Management System™technology between uses.
Battery life indicator is not considered accurate until
battery has been optimized.
1600 mAH battery display will not indicate 100% on
the first charge.
Storage of NiMH Battery Packs Between Uses
Remember that all rechargeable battery technologies (NiMH,
NiCad, LiIon, Lead Acid, etc.) will lose charge over time due to
charge dissipation. If you store your SidePak instruments
between uses for more than 2 months (60 days) make sure that it
is completely charged before doing so. Storage of exhausted
batteries (from not recharging and storing after use), or from
extended storage intervals exceeding 2 months (60 days), may
result in the NiMH batteries becoming unusable over time. Deep
battery discharge is possible if this occurs and it may not be
possible to recondition the NiMH battery once this has happened
and this is not covered under warranty.
During storage it is recommended that you discharge then charge
your SidePak instruments every 4 to 6 weeks to ensure that the
NiMH battery is maintained and charged and the Smart Battery
Management System is optimized. Simply follow the discharging
and charging procedure described above or from any of the
SidePak instrument User Guides in Chapter 4, “Maintenance.”
Not following this recommendation could lead to requiring the
“Getting Started” procedure to be repeated again or battery
replacement (not covered under warranty) due to deep battery
discharge.
Setting-Up
9
Installing the AA Battery Pack
Note: Alkaline battery cells are included with the AA battery
pack. TSI recommends size AA alkaline batteries for best
performance.
The power supply may be used to power the AM510 while
the AA battery pack is attached to the AM510 body. The
AM510 will sense the presence of the AA battery pack and
automatically disable the charging function.
AA-size rechargeable batteries may be used in the AA
battery pack; however they cannot be recharged by the
SidePak aerosol monitor charging system. An external
charger will be needed. Instrument run-time with AA-size
rechargeable cells may be unacceptably short (see
"Typical Battery Life” specifications).
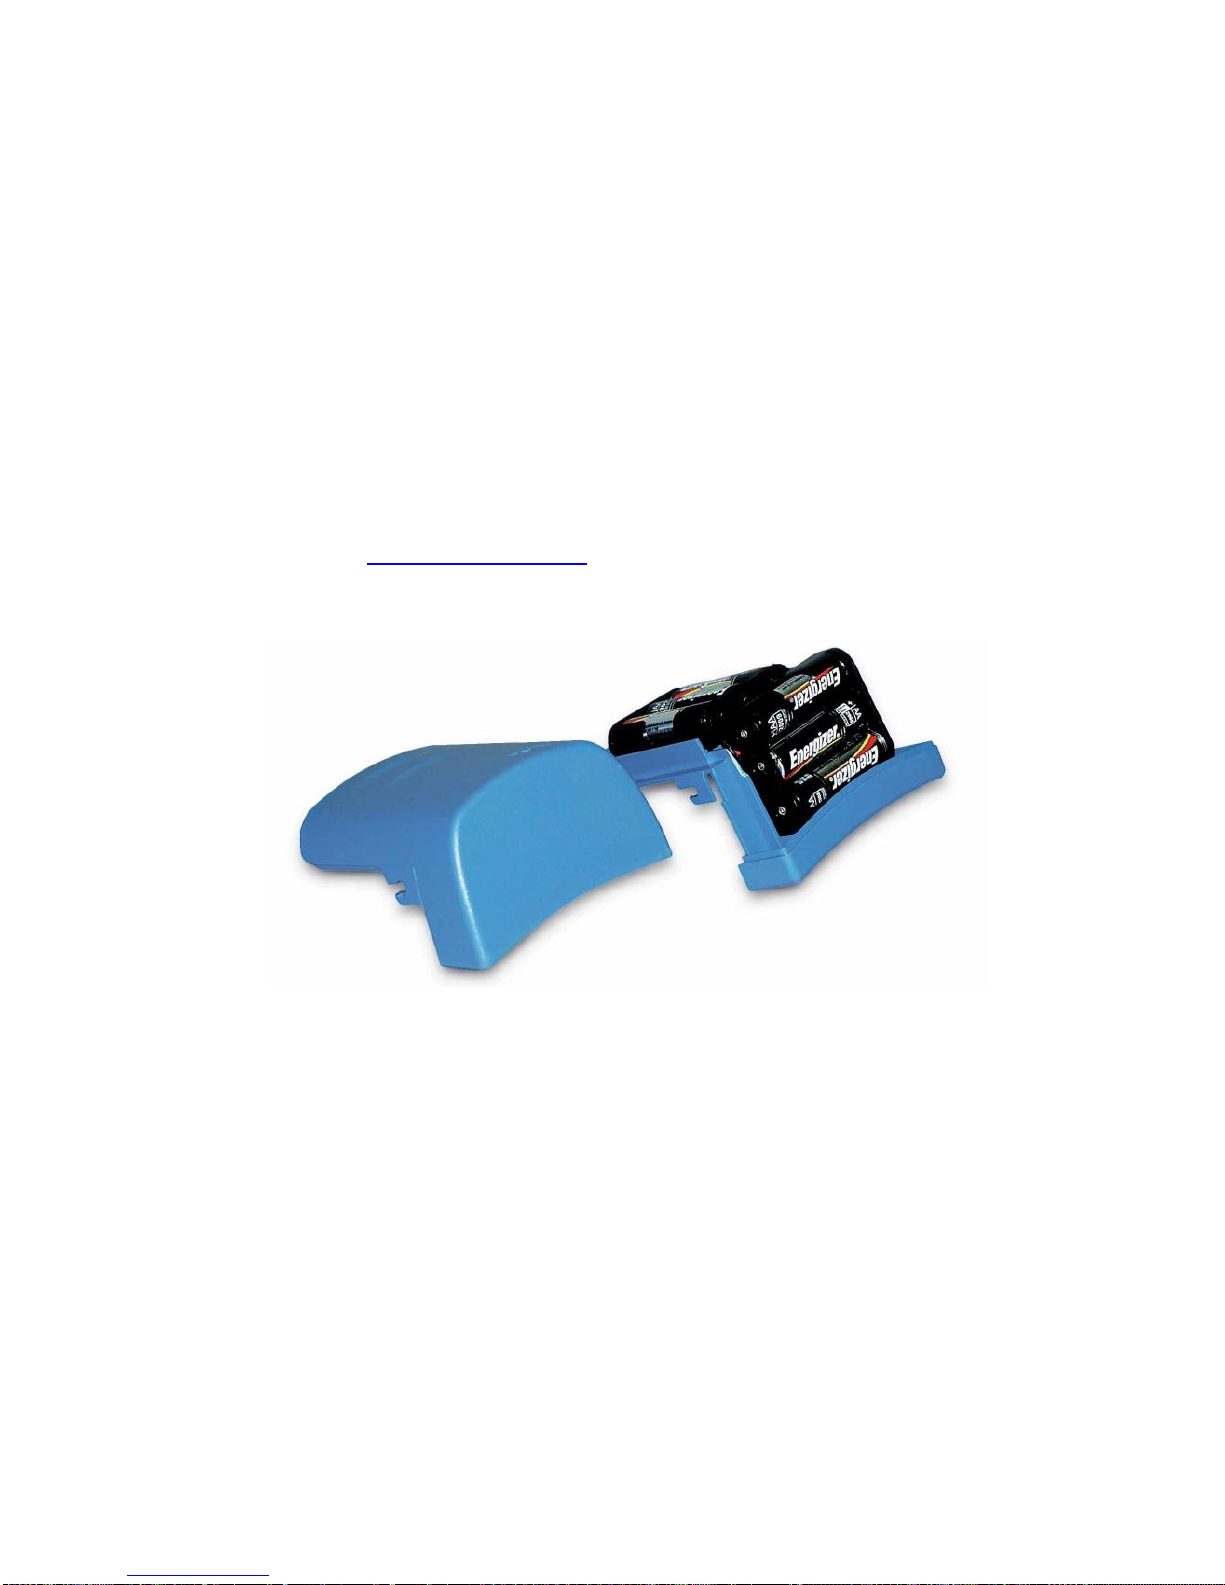
The AA battery pack opens into two pieces.
Install six AA-size battery cells. Make sure the cells are installed
in the proper direction by matching the polarity markings on the
cell holder with the markings on the battery cells.
Attach the battery cover by carefully placing it in the forward
position shown. Slide the cover forward, and under the lip on the
instrument. Fasten it in place with two screws.

Chapter 2
10
Replacing the Cells in the AA Battery Pack
To replace the disposable cells in the AA battery pack, remove
the battery pack. Loosen the two side screws about half way.
Slide the cover back until it is free of the screws, then lift up and
remove.
Open the battery pack. Remove the old batteries and dispose of
them according to local jurisdiction. It may be helpful to use the
flat-bladed screwdriver to gently pry up the positive (+) end of the
battery cells.
Close the battery pack. Slide the battery pack into position
placing the tab in place first. Push the battery pack snuggly into
position and secure with the two screws on the sides.
Using the Power Supply
The power supply allows you to power the SidePak monitor from
an AC wall outlet, or to charge any of the TSI NiMH battery
packs. Connect the power supply to an AC wall outlet and plug
the other end into the power port on the side of the AM510.
!
C a u t i o n
Many power supplies look alike. Make certain you are
using the proper power supply for the AM510. Using the
wrong power supply may permanently damage the
instrument and void the warranty.

Setting-Up
11
!
WARNING
Use of USB connection to be used only in an area known
to be nonhazardous.
The power supply cannot run the SidePak monitor and charge the
battery at the same time. Make sure the instrument is turned off
to initiate the charging cycle. If the display does not show
CHARGING BATTERY, it is not charging.
When the power supply is first plugged into the AM510, the
display will first show the message DETECTING BATTERY
TYPE. If any of the TSI NiMH battery packs are detected, the
display will show CHARGING BATTERY. Once the battery is fully
charged, the display will show CHARGING COMPLETE. The
instrument may be turned on at any time during or after the
charging process by pressing the PAGE key. Turning the
instrument on during the charging process will abort charging.
If the AA battery pack is detected (regardless of installed cell
type) or there is no battery pack at all, the display will show
CHARGING OFF after 30 seconds. Press the PAGE key to turn
the instrument on or off at any time.

Chapter 2
12
Keypad Functions
To turn the instrument ON, press the PAGE key.
The model number, serial number, firmware revision and remaining
battery charge are displayed for a few seconds before entering
Survey Mode.
To turn the instrument OFF, press and hold the
PAGE key for three (3) seconds.
Release when the countdown reaches
"0 SECONDS."
Use the PAGE key to go back to the previous
menu.
Use the key to execute selected menu options
and confirm changes.
Use the ▲▼ arrow keys to scroll through vertical
menus and to change numeric values.
To toggle between an unlocked and locked keypad
(tamper prevention), press and hold the ▲ key and
press . When the keypad is locked, the display
shows KEYPAD LOCK.
Setting the Real-Time Clock Using the Keypad
Setting the Date Format:
The date format is user-selectable. The formats available are:
yyyy/mm/dd (default)
mm/dd/yyyy
dd/mm/yyyy
where yyyy is the 4-digit year, mm is the 2-digit month, and dd is
the 2-digit day of month.
Table of contents
Other TSI Incorporated Test Equipment manuals


Popular Test Equipment manuals by other brands


Inficon
Inficon TC1000 operating manual

Nidec
Nidec DT-725 Operation manual

Bacharach
Bacharach Fyrite INSIGHT Operating & maintenance instructions

Eaton
Eaton CEAG AT-S+ Series Mounting and operating instructions

SPX
SPX Power Team HT50A operating instructions

Macurco
Macurco AimSafety PM 100 User instructions


