TSL ROI-E200 Series User manual
ROI-E200 SERIES
LED user manual
Installation and Operating Instructions

introductions:
PLEASE READ
THESE INSTRUCTIONS
BEFORE USING
THE PRODUCT
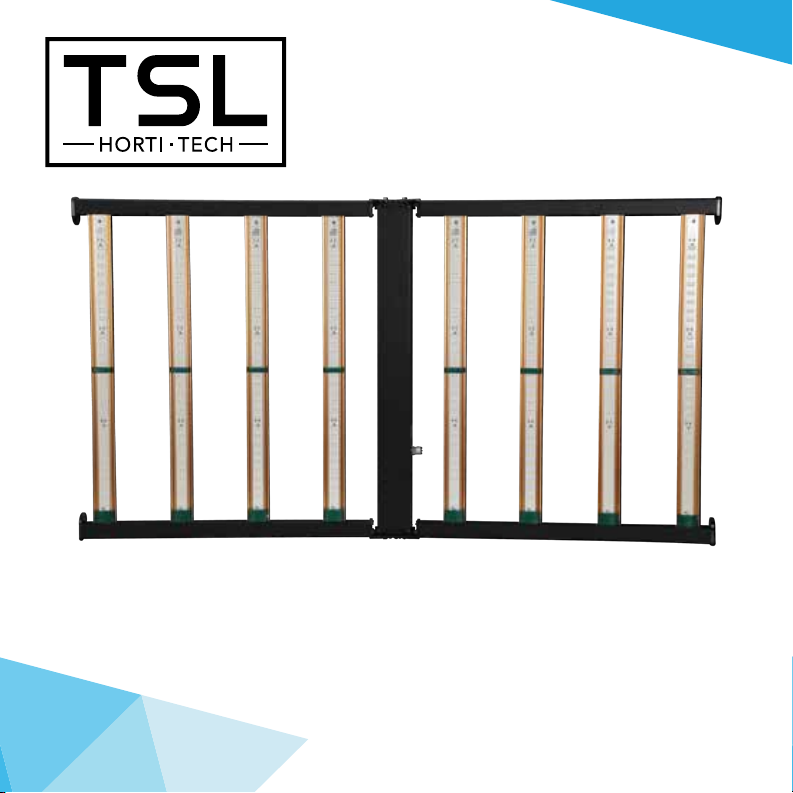
The ROI-E200 is the newest member of the ROI-E series. With it’s
versatile compact design and high intensity 5k spectrum this fixture is
excellent for commercial cultivators that need reliable low profile lights
that perform excellent in all stages of growth and excel in veg. The
ROI-E200 was also designed to be a functional seed to flower fixture,
for the hobbyist looking to cultivate a quality garden in limited space.
01 02
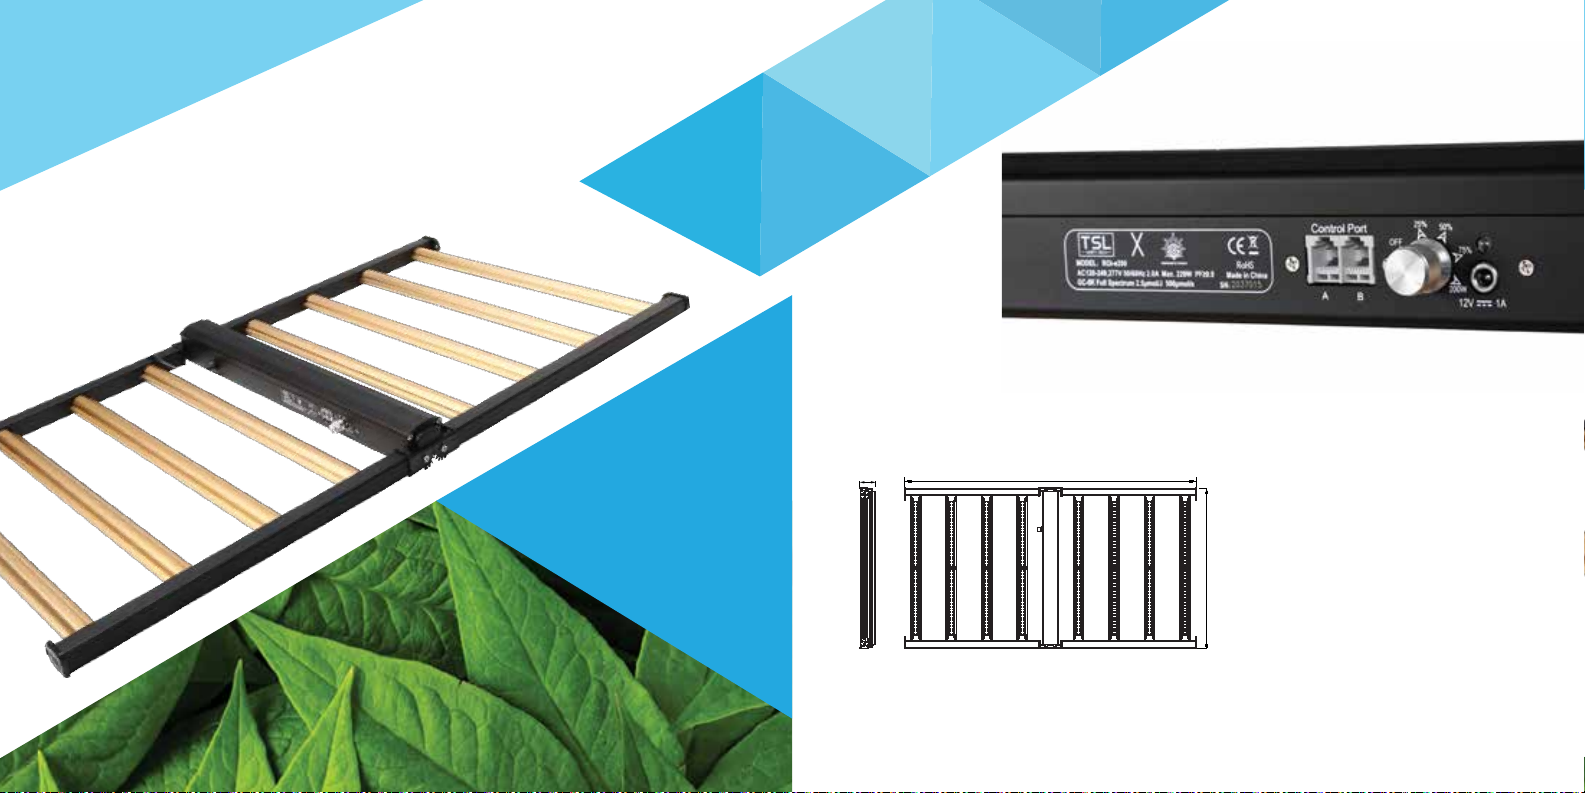
Technical Specifications:
Light Source
Spectrum
PPF
Max Input Power
Efficacy
Fixture Dimension | Weight
Mounting Height
Thermal Management
Max. Ambient Temperature
Dimming
Light Distribution
Lifetime
Power Factor
Certifications
Warranty
≥6” (15.2cm) Above Canopy
Passive
104°F / 40°C
0-10V
120°
L90: >54,000 hrs
>90%
UL 8800, UL 1598, IP 65, DLC
5 Years Standard Warranty
LED
GC-5K
500 umol/s
200W
2.5 μmol/s
43.2”L x 23.3”W x 2.3” H / 12.57lbs
109.6cm L x 59.2cm W x 5.9cm H / 5.7kg
SPECIFICATIONS
MAX AMPERAGE BY VOLTAGE SERVICE
VOLTAGE
120V 208V 240V 277V
AMPERAGE 1.75A 1A 0.87A 0.75A
03 04
* PPF calculations complied using our
in-house integrating sphere measurements
and typical spectroadiometric data for
each LED to determine the fixture
performance. Actual photometric results
may vary within the LED's manufacturer's
bin tolerance.
* Wattage values are typical expected
values. TSL Horti Tech maintains a
tolerance of +/- 10% range on flux and
power consumption. Target light level can
vary from projected levels depending on
ambient temperature, room reflections
values, and other conditions.
23.3”(59.2CM)
43.2”(109.6CM)
2.3”
(5.9CM)

Safety
Warnings:
The ROI series LED system is
passively cooled with absolutely
no moving components. Do not
try to open or disassemble the
fixture, it contains no service
parts inside. Doing so may
cause harm to the fixture and
void warranty.
05 06
• Always adhere to the local rules and
regulations when installing or using the fixture.
• Wearing protective gloves and glasses is
recommended during installation.
• Always disconnect from the mains before
performing any maintenance to the fixture.
• The fixture will get hot during operation. Do
not touch while the light is on. Keep this
product away from children.
• Always allow at least 10 minutes for the
fixture to cool down before handling.
• Do not touch the LED diodes.
• Keep the power cord away from hot
surface.
• Do not plug this system into a supply
voltage other than what is instructed on
the fixture.
• Do not use the fixture when the power
cord is damaged.
• Do not use the fixture when the unit has
been dropped, or its enclosure or bars are
damaged.
WARNING
Risk of electrical shock.
To reduce the possibility
of serious injury, always
take the proper precautions
and unplug the fixture
before moving or cleaning.
CAUTION
To reduce the risk of
overheating or fire, never
place operating fixtures
face down on a flush
surface. Always allow for
adequate ventilation of
fixtures and power supplies.
CAUTION – RISK OF PERSONAL INJURY
Disconnect power before servicing or installing luminaire. Lighted fixture
may be hot. To reduce risk of injury, turn off or disconnect power and
allow to cool before handling. Fixture must be grounded in accordance
with appropriate codes. Failure to do so may result in serious injury or
death. Be sure all power is off prior to installing fixture.
CAUTION
LED and heat sink surfaces
may be hot. Allow sufficient
cooling time before handling.
CAUTION
To prevent eye damage,
avoid looking directly at the
unshielded LEDs.
WARNING
Light bars and power supply are
splash-proof but not waterproof. In the
event that the light bar becomes
submersed, first disengage the circuit
breaker, then unplug the fixture before
proceeding to remove from water.
07 08
Contents:
• ROI-E200 Series LED System
• 1’ Connecting Cable
• 9ft 240V - M25 Plug
• Information Page
• 120/240 Adaptor
• User Manual
• Rope Ratchet
Not Included:
• Lighting Controller
• RJ Data Cable
• Glasses

installation:
• Switch off mains power
• We always recommend using certified or qualified
installation professional to ensure optimal performance
and safety.
• Unbox fixture and place on flat,
stable surface.
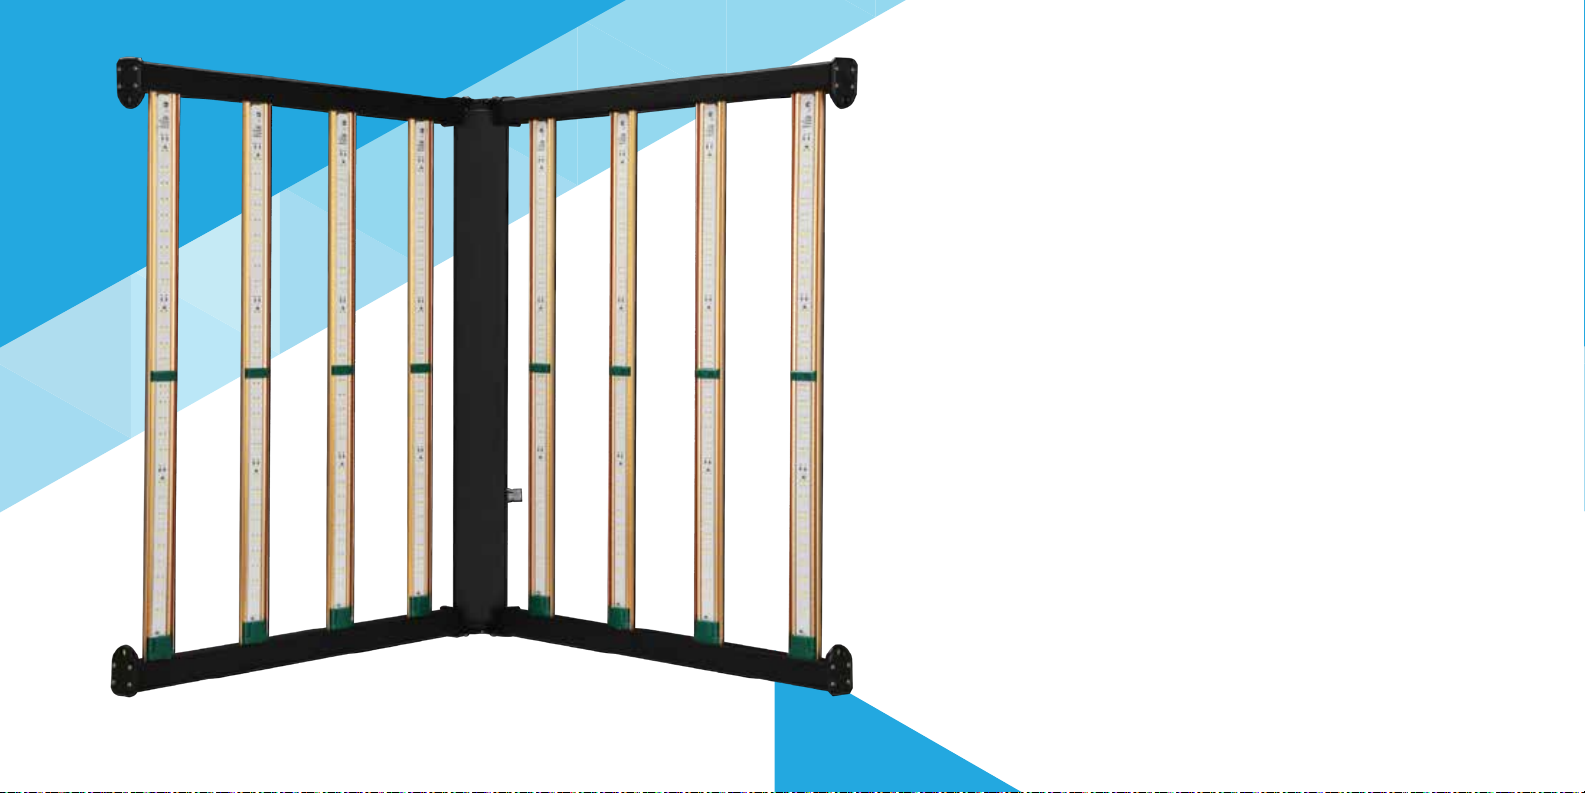
• Unfold the fixture with LEDs facing down.
09 10
• Warning: Do not handle the fixture using the LED bars as it can result
damage to the light and performance.
Only lift from the primary fixture structure as shown below.
• The ROI Series can be mounted to the supporting structure or frame by suspending
with carabiner cables (not provided) or other suspension means using the four
mounting rings on the fixture. Maximum fixture weight: 13 lbs
• Mount the light bars at least 6'' from the top of your canopy for optimal light
efficiency and uniformity. Always allow for adequate ventilation of fixture. The rope
ratchet kit provided with luminair.
6”(15CM)
6”
(15CM)
2”
(5CM)

installation:
• Inspect the contents for any obvious physical damage. If damage has
occurred, contact the shipper of the hardware. If replacement part are
required.
• Some minimum clearances around the grow environment are required
for proper operation of the cooling system and to prevent over heating:
• The maximum ambient temperature of the grow environment opera-
tion is 0 to 40°C.
Ensure that the maximum ambient temperature is not exceeded. A
mechanical ventilation or cooling system is required to maintain
temperatures within the growing space below 104°F (40°C) when the
horticultural luminaire is in operation.
The Storage temperature range is -40°C to 70°C.
This unit is designed for damp locations.
Ceiling clearance: 2”
Fixture to fixture clearance: 2”
Fixture to wall clearance: 6”
Fixture to plants: 6”
Fixture to other objects: 6”
11 12
• THIS PRODUCT MUST BE INSTALLED IN ACCORDANCE
WITH THE APPLICABLE INSTALLATION CODE BY A
PERSON FAMILIAR WITH THE CONSTRUCTION AND
OPERATION OF THE PRODUCT AND THE HAZARDS
INVOLVED.
• Wiring must be in compliance with
horticultural, local, and national standards
and requirements. Before applying power
to the light fixture, verify that your product
is configured properly for your particular
application.
The Greenhouse Light Fixture is shipped
with a cord (whip) that is connected
internally to the fuxture. This cord is
equipped with M25-Nema 6-15P
For proper connection of a Fixture shipped
with a plug - ensure that the proper mating
receptable is available. Simply plug in
fixture to this receptacle.
• When wiring the light fixture, ensure the
following:
•
Power is disable when connecting cords
or plugs.
•
Power cords are not concealed or extended
through bulkheads, flooring, ceiling, or
other parts of the building structure.
•
Power cords are not located above the
ceiling (including dropped ceilings)
•
Power cords are not permanently attached
to the building structure.
•
Power cords are protected from physical
damage.
•
Power cords are not subjected to strain
and are bearing weight of the fixture
•
Power cords should be visible over the
entire cable length.
•
Power cords are used within their rated
ampacity as determined for the maximum
temperature of the installed environment
specified in the instructions.
DISCONNECT POWER BEFORE SERVICING. Hazardous
voltages may be present when covers are removed.
Qualified personnel must use extreme caution when
servicing this equipment.
WARNING

13 14
Warranty:
TSL Horti Tech warrants the mechanical and electronic components of
their product to be free of defects in material and workmanship if
used under normal operating conditions for a period of five (5) years
from the original date of purchase. If the product shows any defects
within this period and that defect is not due to user error or improper
use, TSL Horti Tech shall, at its discretion, either replace or repair the
product using suitable new or reconditioned products or parts. TSL
Horti Tech arranty liability extends only to the replacement cost of the
product. In case TSL Horti Tech decides to replace the entire product,
the limited warranty shall apply to the replacement product for the
remaining initial warranty period.
TSL Horti Tech shall not be held responsible
for any damage caused by the operation of
the unit, be it incidental or consequential or
any type including, without limitation, damage
or injury caused to other products or
machinery or buildings. Nor will responsibility
be accepted for loss of time or profit, loss of
finished product, or for any inconvenience
caused in any way whatsoever.

TSL ROI-E200 LED System Instructions revised - October 16, 2020
Tel: (909) 972-8419
E-mail: [email protected]
Website: www.growersc.com
Address: 1500 S Milliken Ave, Suite B, Ontario, CA, 91761
Table of contents
Other TSL Lighting Equipment manuals


Popular Lighting Equipment manuals by other brands


S.R.Smith
S.R.Smith Power Tower PT-6002 installation instructions

Energizer
Energizer EZLSPB10 user guide

Intex
Intex 52" owner's manual

Source
Source SEM-EXB-P04 installation instructions

Honeywell
Honeywell 138560.10 instruction manual

Current
Current Dual-Lite PLD7 Installation, operation and service instructions


