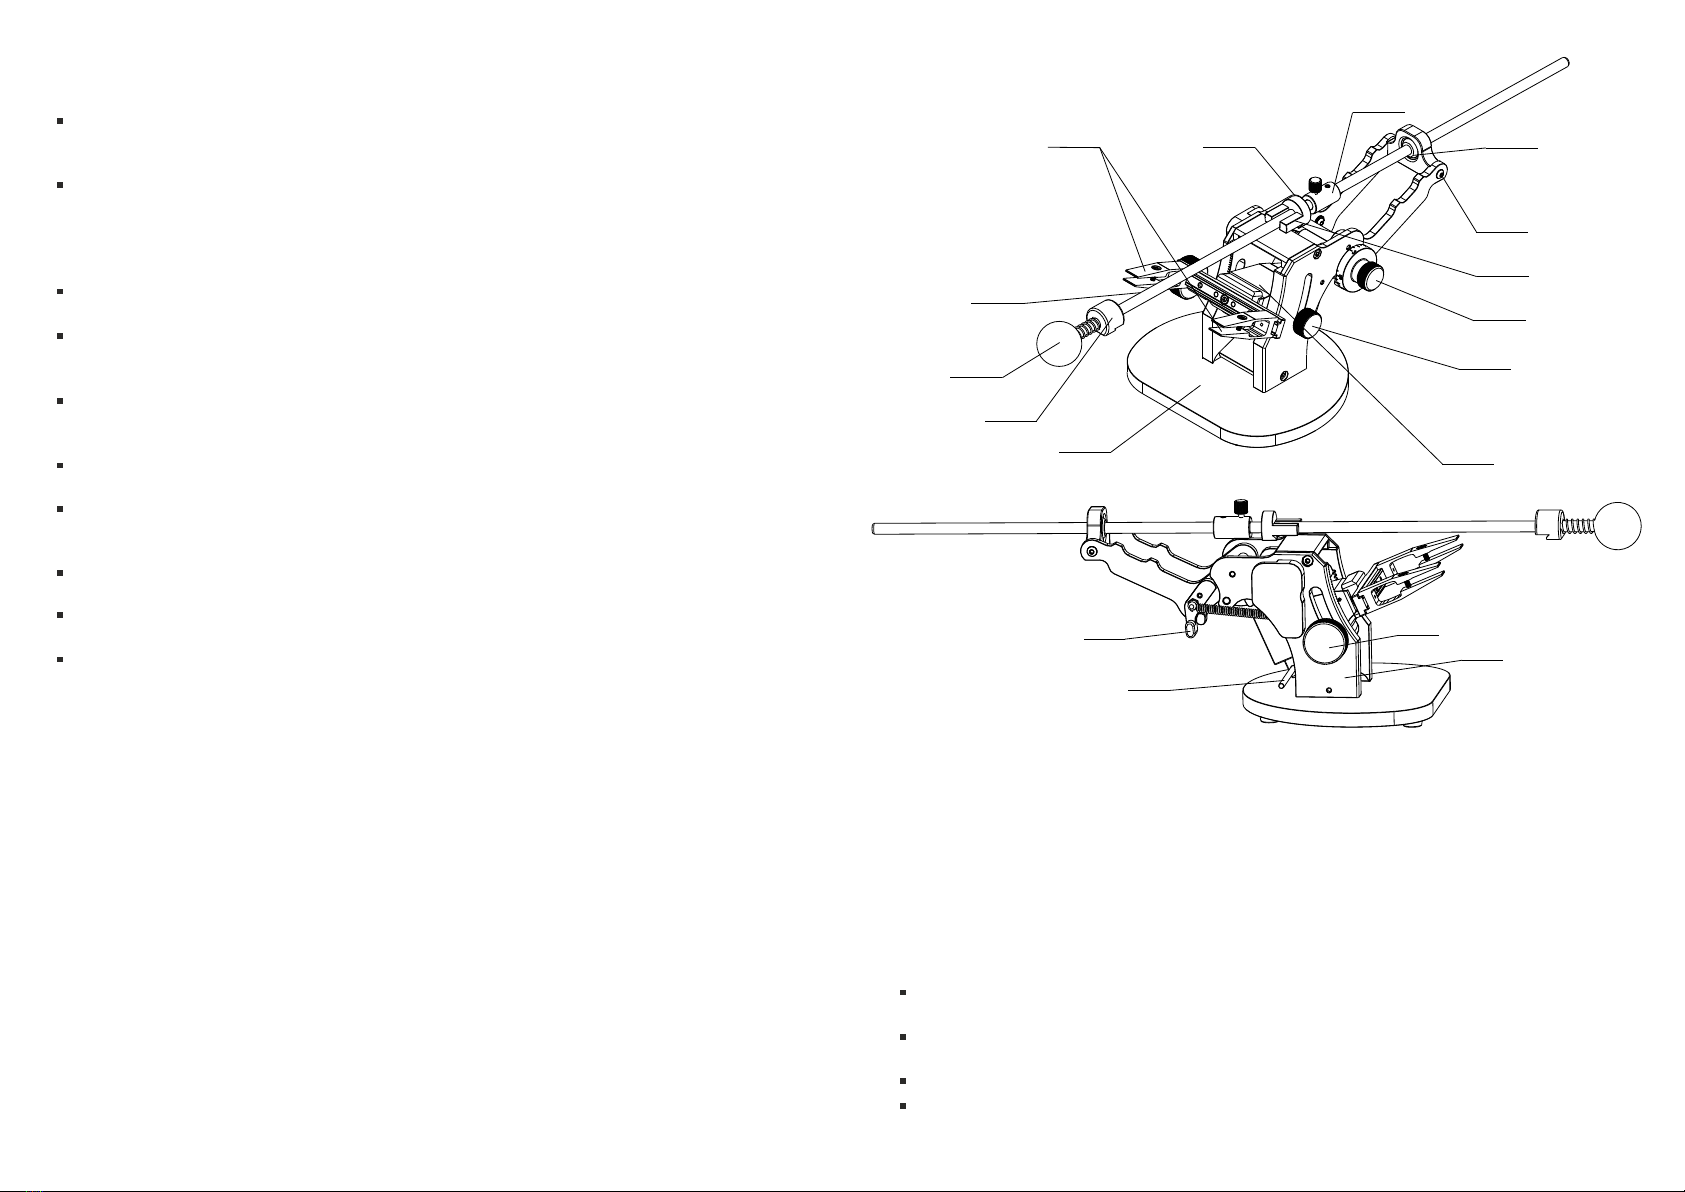
11 12
ОК
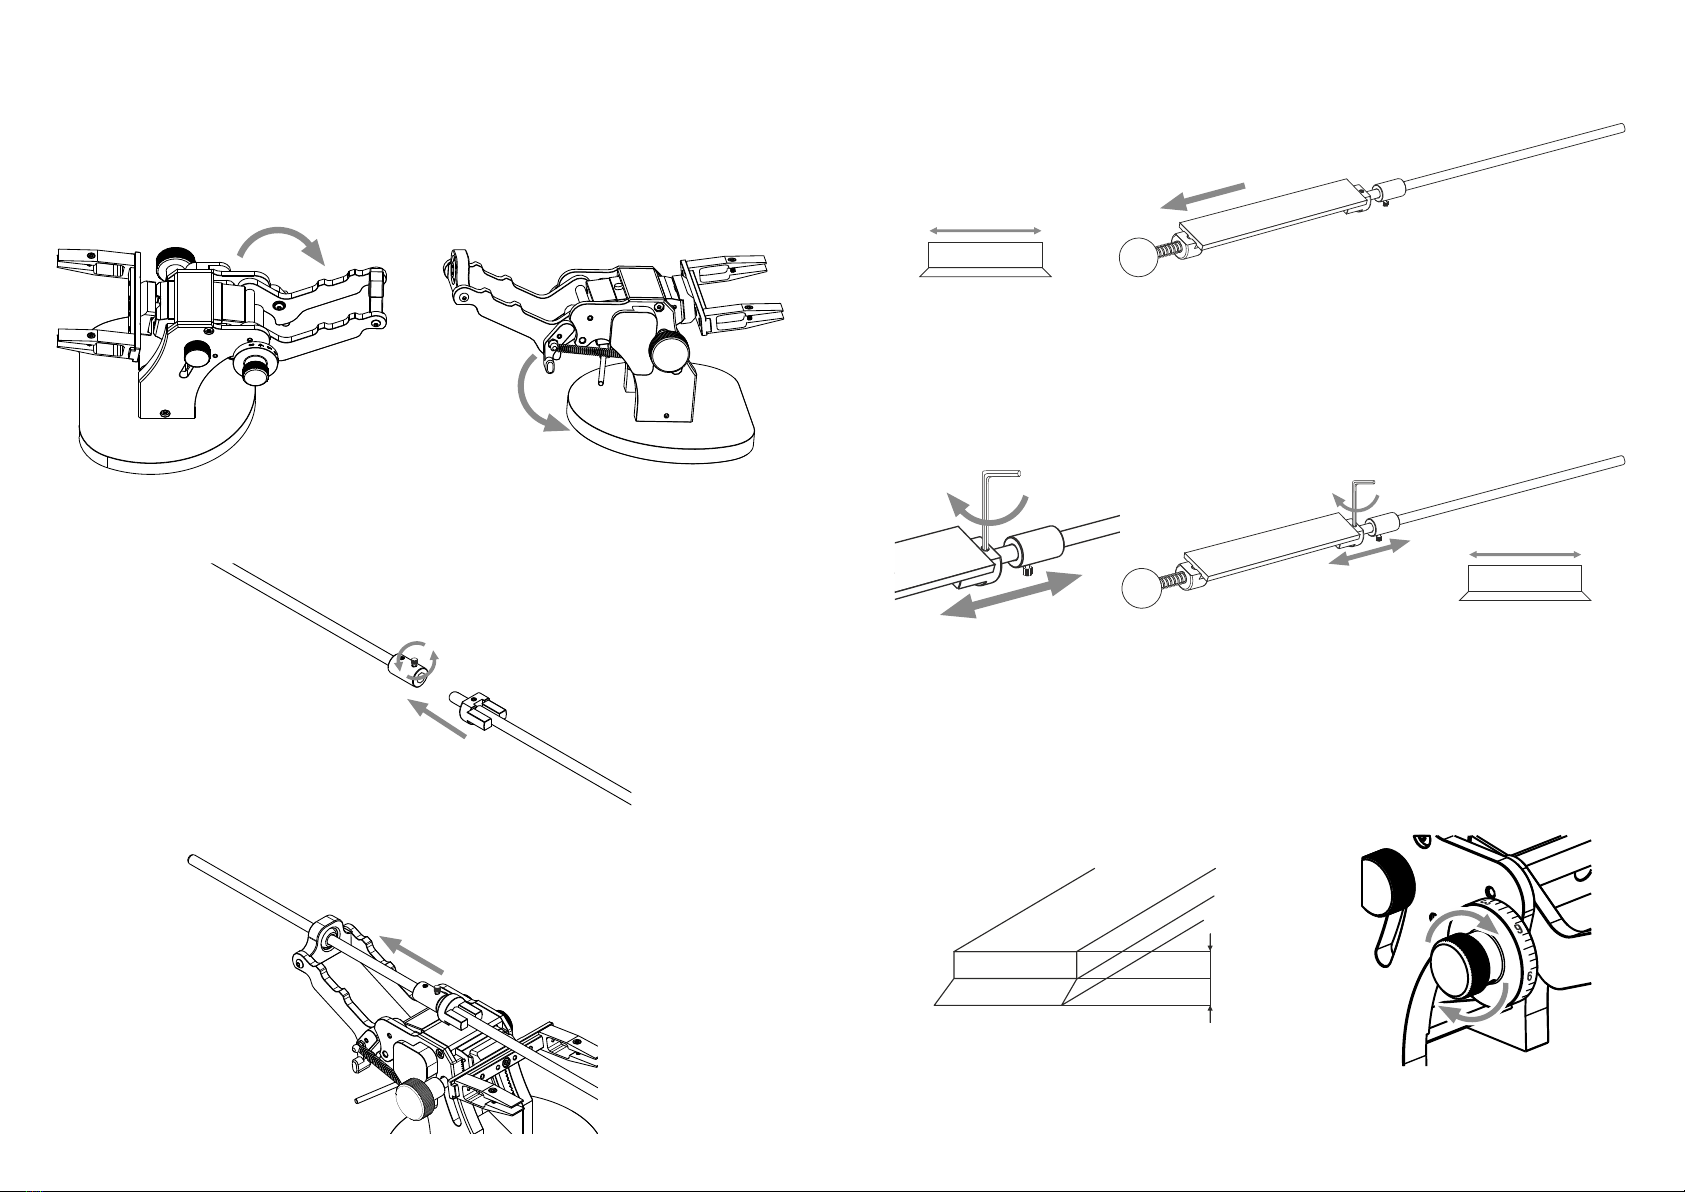
7.1 Select the clamp installation option that matches the shape and size of your knife. Place the
.7
OPERATING PROCEDURE
7.1
knife in the clamps so that the blade reaches the edge of the jaws as close as possible to 17 mm.
7.1
Tighten the clamps with a screwdriver for clamps of 2 mm from the package. The jaws of the
7.1 clamp should fit tightly without gaps to the knife, but excessive force should not be applied when
7.1
tightening, so as not to damage the jaws and screws of the clamps (Fig.14).
(Fig. 15)
(Fig. 16)
reverse side (Fig. 16).
180 degrees (Fig. 16). Sharpen the second side of the knife also until the burr appears on the
pull the abrasive holder (4) to the side, pull the flip lever (16) and turn the frame with the knife
7.3 Sharpen the knife until there is a burr along the entire cutting edge on the reverse side,
15).
the track, adjust the sharpening angle so that in one movement the paint is sanded along the entire
on, apply a marker mark on the sharpening edge of the knife, run an abrasive along it and, focusing on
17 mm
(Fig. 14)
use a syringe (Fig. 17).
to add 2 drops of oil every 2-3 months to the oil tank, closed with a rubber stopper. For convenience,
with industrial oil. There is a certain amount of oil in the device when it is delivered. Later on you need
8.3 For proper operation of internal mechanisms it is necessary to periodically lubricate the device
8.2 Do
not
wash
the
device
with
abrasives, detergents, or
under
running
water.
8.1 Clean
the
device
from
abrasive
residues
and
metal
dust
with
a
soft
cloth
after
each
use.
(Fig. 17)
with
the
same
frequency
Lubricate
the
clamp
screws
width of the sharpening edge. Tighten the thumbscrew (12) and remove any remaining paint with a cloth
(Fig.
appropriate position (see p. 6.5). In order to get to the angle the knife was sharpened
8.
CLEANING AND MAINTENANCE
cloth.
increases
the
sharpening
angle
by
one
division
(0,13о).
After
sharpening,
wipe
the
knife
with
a
soft
abrasive.
In
the
process
of
sharpening,
you
can
form
secondary bevel
-
the
adjusting
knob
(11)
7.4
forget
to
set
the
adjusting
knob
(11)
in
the
position
corresponding
to
the
thickness
of
the
7.4
Change
the
abrasives
to
smaller
ones
and
repeat
the
operation
in
paragraph
7.3.
Do
not
7.2
Fix the abrasive of the desired gritness in the holder (see p. 6.4) and install the adjusting knob (11) in the
the
kit.
If
the
knife
blade
is
thinner
than
1.5
mm,
replace
the
screws
in
the
clamps
with
the
M2,5x6
screws
from