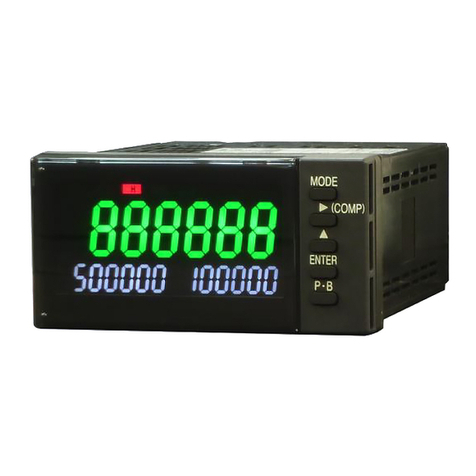
Tsuruga 471B Installation guide

Panel meter with totalized function
Pulse input
471B
Quick Manual

Contents
Introduction ·····················································1
About this booklet ·········································································1
Precautions ··················································································1
Installation Precautions ··································································2
Nomenclature···················································3
Operation Panel ············································································3
Rear Panel····················································································5
Installation·······················································6
Installation Conditions····································································6
Accessories···················································································6
Mounting Method ··········································································7
Dismounting·················································································8
Wiring Method ············································································9
Terminal layout and explanation ···················································· 11
Usage of Function Code···································16
Function code list ········································································ 16
Setting method of code No. ·························································· 17
Function setting method······························································· 18
Specification···················································22
Optional output ··············································24
PhotoMOS compare output ··························································· 24
Analog output············································································· 26
BCD output (Digital output) ·························································· 28

Introduction
1
Introduction
About this booklet
Thank you for purchasing our digital panel meter 471B. Before use of the product, read this
quick manual carefully and thoroughly, and keep it available for routine reference.
The following symbol marks are used in this quick manual for the safety use of the product.
!Warning
This is the warning to avoid danger. Severe injure or fatal accident
may occur to the user in case the product is mishandled.
!Caution
This is the caution to avoid danger. Minor injury to the user or
physical obstacle may occur in case the product is mishandled.
Precautions
For the safe use of this product, users must follow the following warning and caution.
!Warning
There is no power on-off switch on the model 471B. It immediately starts
to operate after turning the power ON.
Never touch the terminals when power is ON. There may be risk of
electric shock.
!Caution
The rated data for warm up is specified for more than 15 minutes.
When the front panel or the case becomes dirty, wipe it with soft cloth. If
the dirt is difficult to remove, wipe it lightly with the soft moist cloth with
mild detergent diluted with water and finish by wiping with a dry cloth.
Do not use organic solvent like benzene or paint thinner as they may
deform or discolor the surface of the case.

Introduction(contd.)
2
Installation Precautions
For the safe use of this product, users must follow the following caution.
!Caution
If the product is installed inside the cabinet, provision for the proper heat
dissipation should be done to prevent the temperature to exceed more
than 50 ℃inside the cabinet.
Do not mount the product in quite near distance. The rise of temperature
may decrease the life of the product.
Do not use the products in the following places. It may be the cause of
damage or malfunction.
∗Wet place (rain, water drops), direct sunlight
∗Place having high temperature, humidity, dust and corrosive gases
∗Place having excessive noise, waves, static electricity
∗Place having lots of vibration and shock
Store the product in the specified temperature range between -20℃to
65℃

Nomenclature
3
Nomenclature
Operation Panel
No.
Name
Function
①
Display 1
Instantaneous or totalized value display
Red or green can be select for display color
②
Display 1 Over
Light on when instantaneous value display 1 exceeds 999999.
Light on when totalized value display 1 exceeds 999999.
③
TOTAL
Light on with red color during display 1 is totalized value
④
Display 2
Instantaneous or totalized value display in while color
⑤
INST
Light on with red color during display 1 is instantaneous value
⑥
Display1 Unit
Pasting position of instantaneous and totalization unit seal
⑦
Display2 Unit
Pasting position of instantaneous and totalization unit seal
⑧
Comparative
display
The comparison status of the comparison output is displayed.
⑨
SET Display
Light on during setting mode
OVER SETAL1 AL2 AL3 AL4
RESET
ENTER
MODE
INST
TOTAL
kW h
kW
①Display 1
②Display 1 Over
③TOTAL
④Display 2
⑤INST
⑧Comparative display
(AL1~AL4)
⑨SET Display
⑩Setting key
⑪Reset key
⑥Display1 Unit
⑦Display2 Unit

Nomenclature(contd.)
4
No.
Name
Function
⑩
Setting key
MODE
During measurement mode:Change to Setting
mode、Adjustment mode
During setting mode:Change to each code No.
▼
During measurement mode:Invalid
During setting mode:Digit selection of setting value
▲
During measurement mode:Invalid(Except when
switching to diagnostic mode)
During setting mode:Change of setting value
ENTER
During measurement mode:Invalid
During setting mode:Set value changed to saved
measurement mode
⑪
Reset key
RESET
During measurement mode:
Display shows “0”.(If the Reset totalizing
function is set, set the totalized to initial
value)
During setting mode:
Setting mode changes to measurement
mode without saving the set value.
LED Display
0
1
2
3
4
5
6
7
8
9
DP
マイナス
0
1
2
3
4
5
6
7
8
9
.
-
A
B
C
D
E
F
G
H
I
J
K
L
M
N
O
P
Q
R
S
T
U
V
W
X
Y
Z
A
B
C
D
E
F
G
H
I
J
K
L
M
N
O
P
Q
R
S
T
U
V
W
X
Y
Z

5
Rear Panel
No.
Name
Function
⑫
Terminal A1~A6
Sensor power supply, Input、P.O output terminal
⑬
BCD OUTPUT
CONNECTOR
Open collector NPN transistor output
Terminal RS-232C
B1~5:RS-232C communication, B6: Vacant terminal
Terminal RS-485
B1:+, B2:-, B4~5: Terminating resistance,
B3, B6:Vacant terminal
⑭
Terminal C1~C6
C1~3:Control input terminal, C4:Vacant terminal、
C5~6:Analog output terminal
⑮
Terminal D1~D6
D1~6:Compare output terminals of AL1 to AL4
⑯
Terminal E1~E6
E1,E3:Power supply terminal, E5:Ground terminal
E2,E4,E6:Vacant terminal
※The specification of ⑬, C5 to C6 of ⑭and ⑮are option.
1
2
3
4
5
6
A B C D E
12 13 14 15 16

Installation
6
Installation
Installation Conditions
Power supply
AC100 to 240V 50/60Hz、DC24V、DC110V
Voltage tolerance of
power supply
AC90 to 250V、DC24V±10%、DC100 to 170V
Power consumption
During AC100V: Approx. 11VA、During AC200V: Approx. 15VA
During DC24V: Approx. 250mA、During DC110V: Approx. 50mA
Operating ambient
temperature
0 to 50℃, 40 to 85%RH(No condensation)
Storage temperature
-20 to 65℃(No condensation)
Weight
Approx. 300g
Mounting method
Tighten from behind the panel with exclusive mounting bracket.
Insulation resistance
Measuring input terminals
–
External Case DC 500 V, More than 100 M
Ω
Power supply terminal
–
External Case DC 500 V, More than 100 M
Ω
Power supply terminal
–
Measuring input DC 500 V, More than 100 M
Ω
Measuring input terminals
–
BCD output DC 500 V, More than 50 M
Ω
Measuring input terminals
–
Analog output DC 500 V, More than 50 M
Ω
Withstanding voltage
Measuring input terminals
–
External Case AC 2000 V for one minute
Power supply terminal
–
External Case AC 2000 V for one minute
Power supply terminal
–
Measuring input AC1500 V for one minute
Measuring input terminals
–
BCD output AC 500 V for one minute
Measuring input terminals
–
Analog output AC 500 V for one minute
Protective structure
Front operation unit IP65, Case part except front side IP20,
Terminal block IP00
Accessories
Make sure that the following things beside the main body part are included.
471B main unit
Bracket 2 pcs.
Waterproof packing
Quick Manual (This booklet)
(For the model with RS-232C or RS-485, exclusive quick manual is included.)
Unit Sticker
Connector (2m with flat cable) (In case of BCD Output model)

7
Mounting Method
Mounting pitch
Panel cutout dimensions: 92 0
+0.8×45 0
+0.6mm
Panel thickness: 0.6 to 3.5mm (Degree of protection IP65)
3.6 to 10mm (Degree of protection IP20)
If the material of the panel is aluminum, it may
be deformed due to its weak strength. So, it is recommended to use the
thickness of aluminum panel sheet at least 1.5mm.
Mounting Method to Panel
1Insert the main unit fitted with the waterproof packings into the hole, from the panel
front, and insert the attached bracket to the ditch on both sides of the main unit.
Push the bracket as shown by arrow ①until the main unit is stably stays and fix the
bracket. The packings functions as stopper too, so do not remove it. Refer to the
side view of the bracket mounting.
2To fix the main unit more firm, press the back part (center part) of the bracket
indicated by arrow ②by screwdriver, which enhances the stopper strength.
!Caution
When pushing by screwdriver, apply it to the arrow ②
The pushing of other part may cause the damage of bracket.
More than 30mm
More than 130mm
More than 75mm
ECBA D
①
②
①
Push ②
Top view of bracket mounting
Side view of bracket mounting
Bracket
Panel to mount
Waterproof packings

Installation(contd.)
8
Dismounting
1By extending with fingers the lever outward by about 1mm, as shown in the bracket
lock releasing figure, the lever lock can be released.
2Keep extending the lever outward, slide the bracket backward of the main unit, and
remove it from the ditch.
!Caution
The extension of the lever for long time or the stress to it by metallic
piece like screwdriver may damage the lever.
ECBA D
Lever
About 1mm extension
releases the lock
Enlarged view of
bracket inside
Bracket lock releasing

9
Wiring Method
Remove the terminal base cover of the rear side terminal and conduct the wiring. Make sure
that the terminal base cover is attached after wiring. If both options of comparison output and
analog output are used, first complete the wiring of the comparison output and then start the
wiring of analog output.
Notes for wiring
!Warning
To avoid an electrical shock, turn the power off when wiring.
Do not conduct wiring at moistened place or by wetted hands. There may
be risk of electric shock.
Do not touch the terminals when turning the power on. There may be risk
of electric shock.
!Caution
Power supply and load should be within the suitable range as prescribed
in specification. Negligence may cause the damage of products.
Power supply should reach the rated power within a second.
After the power is OFF, pause more than 10 seconds before the power ON
again.
Do not use the product with wrong wiring. It may be the cause of product
damage.
◆Others caution during wiring
Always use input line and power line independently. If input line and power line are wired in
parallel, it may cause an in stability of the display.
When the auxiliary relay is operated by the relay output to run the electro- magnetic switch
or big size relay, take the noise preventive measures.
In case that the noise is frequently occurred, it will be effective to store the product in the
shielded housing or to insert the power source line filter or insulated transformer.

Installation(contd.)
10
About the crimp terminal
Direction of crimp terminal
Recommended crimp terminal:V1.25-FS3
(Made of Fuji Terminal Industry Co.,Ltd)
Ext. diameter of covered cable:Max.φ3.3
Terminal screw:M3
Crimp terminal: Refer figure at the right
!Caution
For the C column and D column terminal blocks, apply one crimp terminal
per one terminal block.
Do not do the parallel connection, using two crimp terminals (overlaying)
at the same terminal block. It stresses the internal PCB and so on and
may cause the failure or trouble. As for the A column and E column
terminal blocks, up to two crimp terminals per terminal block are
acceptable.
1
2
3
4
5
6
AB C D E
6
18.25
9.5
5.85
5.8
Unit: mm

11
Terminal layout and explanation
Rear side terminal
1
2
3
4
5
6
▲
AB C D E
1
2
3
4
5
6
7
8
9
10
11
12
13
14
15
16
17
18
4
2
8
1
4
2
8
1
4
2
8
1
4
2
8
1
4
2
8
1
4
2
8
1
10
10
10
SEL
0
2
4
OUTPUT ENABLE
E1
E2
E3
E4
E5
E6
N C
N C
+
-
RESET
P/L
N C
C1
C2
C3
C4
C5
C6
A.OUT+
A.OUT-
BCD_LATCH
OVER
SYNC
DC24V、DC110V
19
20
21
22
23
24
25
26
27
28
29
30
31
32
33
34
35
36
GND
DP1
DP2
DP3
DP4
DP5
D.COM
DATA COM
DATA COM
A B C D E
D1
D2
D3
D4
D5
D6
AL3
AL4
AL1
AL2
ALCOM1
ALCOM3
BCD output
Analog output
Power supply
Comparison output
Control input
At optional comparison outputAt optional BCD output
At optional analog output
NC:Vacant terminal
Sensor power supply
P.O output Measuring input
RS-485RS-232C
Term
NC
-
+
B6
B5
B4
B3
B2
B1
NCNC
SG
CS
RD
RS
SD
Term
At optional RS-232C output At optional RS-485 output
NC:Vacant terminal
NC:Vacant terminal
Do not use as relay
terminal etc.
NC:Vacant terminal
(B column is a terminal block) (B column is a terminal block)
10
10
10
1
3
5
A1
A2
A3
A4
A5
A6
P.O
COM
P.O COM
SIG1
SIG2
SENSOR
AC100 to 240V
!Caution
Replacement of the units by customers
themselves may cause the damage of the
equipment and Tsuruga Electric Corporation
may not be able to respond in this case.

Installation(contd.)
12
Power supply connection
Connect the power supply at Terminal No.E1-E3.
Power supply voltage is written on the Terminal
nameplate at the time of product shipment.
○AC power supply
AC100 to 240V 50/60Hz
permissible range AC 90 to 250V
○DC power supply
For DC 24V, Permissible range DC24V±10%
For DC110V, Permissible range DC100 to 170V
!Caution
Do not use the voltage out of permissible range. It may be the cause of
equipment damage.
Power on / off, power supply should reach up to rated voltage or shut
down within 1 second.
After the power is OFF, pause more than 10 seconds before the power ON
again.
GND (ground) terminal
In case of fear that the noise is frequently generated on the power source
line, it is effective to earth the ground terminal directly to the ground. If
the instrument is not affected by environmental noise, the grounding can
be omitted. In this case, take care for the ground terminal not to touch
other input terminals, as it is charged with neutral electric potential of
power source voltage.
1
2
3
4
5
6
AB C D E
+
-
1
2
3
4
5
6
AB C D E
GND for
power supply
GND for
power supply
AC power supply
DC power supply

13
Connection of input signal
Power supply for the sensor is connected from terminal No.A1-A2. If the power supply of sensor
is applied from external sources, the connection of terminal No. A1 will not be required. When
sensor power source is not used, A1 will be vacant and do not used it for other purpose.
○Connection example of
non voltage contact or
NPN open collector
○Connection example of
voltage pulse output
Caution
If sensor power supply terminal A1 is accidentally short-circuited with
COM terminal A2, it may cause malfunction of the sensor. At that time,
guarantee of the counter value can’t be given because of error in internal
memory writing.
Connection of P.O output
Terminal No. A5 and A6 give the output
the total sync pulse of NPN open collector.
Please connect the load with the contact
capacity within the specification range.
(Refer page 23『General specification』)
1
2
3
4
5
6
A B C D E
A1
A2
A3
A4
A5
A6
P.O
P.O COM
1
2
3
4
5
6
A B C D E
A1
A2
A3
A4
A5
A6
P.O
COM
P.O COM
SIG1
SIG2
SENSOR
A1
A2
A3
A4
A5
A6
P.O
COM
P.O COM
SIG1
SIG2
0V
OUT
0~2V
4.5~30V
SENSOR

Installation(contd.)
14
Connection of Control signal
Please input the control signal. The configuration is as
follows.
Connection of Analog output
The analog output is can be obtained
from the Terminal No.C5-C6.
Allowable load resistance should be
connected within the specified range.
(Refer page 22『Specification』)
Connection of comparison outputs(AL1, AL2, AL3, AL4)
Comparison output scan be obtained in terminal No.
○
D2 -○
D1 、○
D2 -○
D3 、○
D5 -○
D4 and ○
D5 -○
D6
Instantaneously
Instantaneous value <lower limit set value
:
AL1
○
D2 -○
D1
Instantaneous value> upper limit set value
:AL2 ○
D2 -○
D3
Totalization
6 digits under accumulation totalized value> upper limit set value
:
AL3 ○
D5 -○
D4
Lower 6 digits totalized value> upper upper limit set value
:AL4 ○
D5 -○
D6
Contact capacity:AC/DC250V 200mA
1
2
3
4
5
6
A B C D E
RESET
P / L
N C
C1
C2
C3
C4
C5
C6
D.COM
+5V
D.COM
Less than 10mA
Swich
RESET or P/L
Photocouplers
parts
471B internal
1
2
3
4
5
6
A B C D E
C1
C2
C3
C4
C5
C6
A.OUT+
A.OUT-
1
2
3
4
5
6
A B C D E

15
Connection of BCD output
Data output 6 digits Open collector (NPN) configuration is
as shown in the connector arrangement table of BCD
output shown in page 11.
Control input pin 16 BCD_LATCH, 17 SEL, 15 OUTPUT
ENABLE are as shown in the connector arrangement table
of BCD output, shown in page 11.
Accessory: Cable (5808-05) 2m
Connector (8822E-036-171-F, Kel Corp.)
Electrical schematic diagram
1
2
3
4
5
6
A B C D E
▲Mark
0V
24V
(0V)
OUT
OUT
OUT
0V
DC24V
DC24V
IN
IN
IN
IN
IN
ENABLE
13 OVER
16 BCD_LATCH
17 SEL
15 OUTPUT
19 1×10
20 2×10
21 4×10
22 8×100
0
0
0
18,36 DATA COM
Transistor output unit
Transistor output unit
Transistor output unit
Darington
Controller side
DC power supply
471B
▲Mark
Lower cable No.19~36
Upper cable No.1~18
Upper cable
No.1(Brown)
Upper cable
No.18(Gray)
Lower cable
Lower cable
No.19(White)
No.36(Blue)

Usage of Function Code
16
Usage of Functio n Code
Function code list
●Display functions
Code No.
Function
Display 1
Setting range
Default value
00
Key protection
KEY.
OFF, ON
OFF
01
Totalized pulse coefficient
TPLS
9999E-0 to 0001E-9
0001E-0
02
Converted value of
instant pulse
IPLS
1000E-0 to 0001E-6
0001E-0
03
Unit of instant time
UNIT
2(hour), 1(minute), 0(second)
0(second)
04
Filter of input frequency
FLT
2(HF), 1(MF), 0(LF)
2(HF)
05
Cut off time
CUT
0.1 to 199.9
199.9
06
Instantaneous display cycle
DISP
0 (100ms), 1(1s), 2(5s)
0(100ms)
07
Totalized decimal point
T DP
0, 0.0, 0.00, 0.000, 0.0000, 0.00000
0
08
Instant decimal point
I DP
0, 0.0, 0.00, 0.000, 0.0000, 0.00000
0
09
Initial totalizing value
I NT.
0 to 999999
0
10
Display 1 switching
I.T.
0(Instantaneous), 1(Totalization)
0(Inst.)
11
Display color
COLO.
R(Red), G(Green)
G(Green)
12
Reset totalizing function
I.RST
OFF, ON
OFF
13
Synchronized totalization
pulse division
P.O R
0(1/1), 1(1/10), 2(1/100)
0(1/1)
14
Synchronized totalization
pulse width
P.O W
0(100ms), 1(50ms), 2(10ms)
0(100ms)
15
Display switch-off function
TURN.
0(Invalid)/1(All display)/2(Display2),
0 to 99 minute
2(Display2),01
16
Invalid of reset key
RST
0 (Invalid), 1(Valid)
1(Valid)
17
Pause / Latch
P.L.
0 (Pause), 1 (Latch)
0(Pause)
18
Over display of display 1
OVER
OFF, ON
OFF
●Comparison outputs function
Code No.
Function
Display 1
Setting range
Default value
41
AL1 Comparative value
AL. 1
0 to 999999
0
42
AL2 Comparative value
AL. 2
0 to 999999
999999
43
AL3 Comparative value
AL. 3
0 to 999999
999999
44
AL4 Comparative value
AL. 4
0 to 999999
999999
45
Batch switching
B.SEL.
0(ALARM),1(BATCH)
0(ALARM)
46
AL3 Output width
WID.3
0.1s,0.2s,0.5s,1.0s,-(Continuous)
0.1s
47
AL4 Output width
WID.4
0.1s,0.2s,0.5s,1.0s,-(Continuous)
0.1s
48
AL4 Auto reset
A.RST
OFF,ON
OFF
●Analog output function
Code No.
Function
Display 1
Setting range
Default value
75
Analog output switching
A.SEL.
0(Instantaneous), 1(Totalization)
0(Inst.)
79
Full scale (Totalization)
A.FUL.
200 to 999999(Totalization)
200

17
Measurement
Operation
Mode Setting
(Set Code No.)
●RS-232C, RS-485 output function
Code No.
Function
Display 1
Setting range
Default value
80
Baud rate
BAUD.
4800,9600,19200bps
9600bps
81
Parity
PARIT
non(none), odd(odd no.), even(even no.)
non(none)
82
BCC switching
BCC
ON, OFF
OFF
83
Device number
RS.NO.
0 to 99
00
Setting method of code No.
This is the basic input method of function code.
Following the setting of the Code No., perform the function setting on the following pages.
Identification of the key color during
set up is as follows.
Black key: Valid key
White key: Invalid key
[
Common matters during the Setting mode
]
During setting mode, if the key is not
operated for about 5 minutes, the
operation returns into measurement
mode automatically. At this time, the
setting contents are not saved.
Again, if the reset key is pressed more
than 1 second, setting value which
was under changing process before
becomes invalid and returns to
measurement operation undergoing
mode.
MODE
▲
SET
SET
SET
MODE
Press 1 sec.
Confirm
Select the Code №
,▲
To function setting

Usage of Function Code(contd.)
18
Mode
Setting
(Set number)
Mode
Setting
(Item setting)
Function setting method
The following is an example of the input function setting. Please refer this page when changing
to the setting other than factory setting value. Please continue the operation of the function
setting after referring Code No. setting method only.
Code No.00『Key protection』
Code No.01『Totalized pulse coefficient』
When the key protection mode is made ON,
function other than the Key protection can be
forbidden to use.
Setting range:ON[Key protection is on.]
OFF[Key protection is off]
Totalized pulse coefficient can be set.
The totalized pulse coefficient can be set by
multiplying 4 digits of the mantissa and one
digit of the exponent per pulse
Setting range:1×10⁻⁹ to 9999×100
The exponent part is not indicated by ‘minus’.
Change from “OFF”to “ON”
Change from 0001E0 to 1666E3
▲
SET
MODE
MODE
SET
SET
▲
MODE
SET
MODE
MODE
,▲
To measurment
operation
To code No.setting
ENTER
1sec.
ENTER
1sec.
ENTER
1sec.
ENTER
1sec.
Displays of
current setting
Memory
Change of setting
Code №01
MODE
MODE
MODE
▲
▲
SET
SET
SET
SET
▲
MODE
MODE
Code №00
To measurment
operation
Memory
To code No.setting
Select ON or OFF
Displays of
current setting
ENTER
1sec.
ENTER
1sec.
ENTER
ENTER
1sec.
1sec.
Table of contents
Other Tsuruga Measuring Instrument manuals
