8
iTA
Benvenuti a tutti gli utenti del sistema a pellet
P10 di Tulikivi
Il vostro forno Tulikivi è dotato del sistema di combustione a
pellet Tulikivi Green P10. Queste sono le istruzioni d’uso del si-
stema a pellet P10. Se riscaldate la stufa con legna, seguire le
istruzioni d’uso del forno Tulikivi.
Prima aCCensione Della stUFa
Le istruzioni relative all’asciugatura e al rodaggio della stufa sono
riportate nell’opuscolo delle istruzioni d’uso delle stufe Tulikivi.
Seguire le indicazioni ivi riportate. Durante la fase di rodaggio
della stufa, utilizzare unicamente legna di combustione.
La valvola di chiusura della canna fumaria e le valvole di for-
nitura dell’aria comburente non possono essere chiuse troppo
presto perché si potrebbe formare del pericoloso monossido
di carbonio!
La stufa in pietra ollare non è ideata per la combustione dei re-
sidui casalinghi o altri rifiuti. Non usare combustibili liquidi, nep-
pure per l’accensione.
montaGGio Del sistema a Pellet
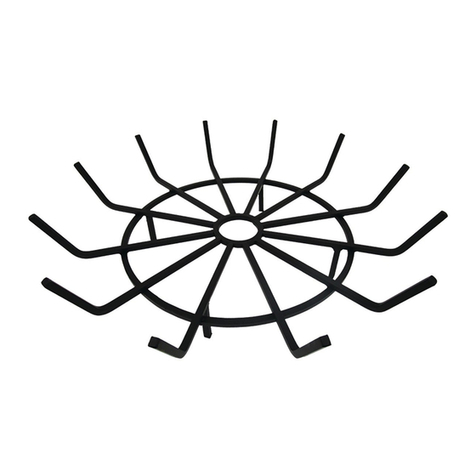
Rimuovere dalla stufa la griglia che si utilizza per bruciare la le-
gna (immagine 1). Nel caso in cui il forno appartenga alla cate-
goria di stufe 1, rimuovere anche il deflettore d’aria (immagine
2). Collocare la griglia per il pellet (immagine 3). Fare attenzione
al posizionamento della griglia: nei forni di stufe di categoria 1,
la griglia è inclinata all’indietro (immagine 4), nei forni di stufe di
categoria 2, invece, la griglia è inclinata in avanti (immagine 5).
Rimuovere dallo spoiler per pellet l’adesivo di sicurezza. Collo-
care lo spoiler per pellet sul bordo anteriore del focolare (imma-
gine 6). Nel modello Valkia 2D collocare lo spoiler per pellet su
entrambi i lati (immagine 7). Nel caso in cui il sistema di com-
bustione a pellet sia dotato di guarnizione di tenuta, collocarla
nella fenditura tra la cornice dello sportello e lo spoiler per pel-
let (immagine 8).
aCCensione e risCalDamento Della stUFa
in Pietra ollare
Prima dell’accensione, controllare che la griglia sia pulita e che la cas-
setta della cenere non sia piena. Durante il riscaldamento, tenere chiu-
si la cassetta della cenere e lo sportello di manutenzione. Per ragioni di
sicurezza, la cenere va mossa solo quando è fredda.
Nel caso in cui la cassetta della cenere sia dotata di valvola di potenzia-
mento combustione, assicurarsi che sia chiusa (immagine 9). Aprire al
massimo la valvola di chiusura nella canna fumaria e il regolatore dell’aria
comburente situato sopra lo sportello di manutenzione (immagine 10
e 11). Se dovessero essere in funzione cappe di aspirazione o sistemi
di condizionamento, questi vanno spenti.
Nel caso in cui la stufa sia stata a lungo inutilizzata, va controllato il ti-
raggio della canna fumaria. Accartocciare della carta. Collocarla sul-
la griglia, accenderla e chiudere lo sportello. Se la fiamma è chiara e
verticale, ciò indica che nella canna fumaria vi è tiraggio a sufficien-
za. In mancanza di tiraggio nella canna fumaria, si immette aria calda
nell’apertura di pulizia con un phon per capelli o un iniettore d’aria calda,
oppure, si può bruciare della carta di giornale accartocciata nell’apertura
di pulizia sulla parte inferiore del forno.
Riempire l’imbuto griglia e la parte inferiore del focolare con pellet a
temperatura ambiente (immagine 12). Controllare la quantità di pellet
da utilizzare nella tabella presente sulla pagina posteriore delle istruzio-
ni. La quantità di pellet non deve comunque mai superare l’apertura di
immissione dell’aria, situata tra i pannelli di rivestimento della camera di
combustione. In molte stufe il focolare a vortice riesce a contenere una
quantità di pellet utile a un intero ciclo di riscaldamento, producendo
una fiamma armoniosa che si estende sull’intera ampiezza del focolare.
Appianare il pellet. Collocarci sopra 3 o 4 dadi di accensione, distan-
ziandoli dalla parete posteriore del focolare di circa 5 cm (immagine
13). Immergere con leggera pressione i dadi nel letto di pellet, al fine
di ottenere una fiamma uniforme. Accendere i dadi.
Durante la combustione non è necessario regolare la quantità di aria
comburente. La struttura del focolare a vortice e della griglia per pel-
let assicurano la giusta quantità di aria per una combustione ottimale,
assicurando un alto livello di sicurezza ambientale. Durante la fase fi-
nale della combustione, quando il pellet si ritira sotto l’orlo della porta,
il processo di combustione può essere incrementato aprendo la valvola
situata sulla cassetta delle ceneri per far entrare più aria primaria (im-
magine 14). La combustione viene potenziata quando l’aria di combu-
stione viene diretta maggiormente attraverso la griglia. Nel caso in cui
rimanessero alcuni residui di pellet sui lati dell’imbuto, vanno fatti cade-
re, (scopare o spazzolare) con la tenaglia da forno, sulla brace al centro
del focolare sopra la griglia (immagine 15).
Non aggiungere altro pellet quando il focolare è caldo o sopra il pellet già
in combustione (immagine 16).
Bisogna porre molta attenzione alla fase finale di combustione del pel-
let. Far bruciare il pellet fino alla fine. Quando la brace è spenta, control-
lare che nella cassetta della cenere non siano presenti ancora residui di
pellet accesi. Il pellet tende a rimanere acceso nel mezzo della cenere,
quindi, è necessario mescolarlo bene in modo da essere certi che sia
davvero spento. Chiudere l’eventuale valvola della canna fumaria solo
quando si è certi che tutto sia spento.
Attenzione! L’ossido di carbonio è un gas inodore e incolore, per cui è
molto importante porre molta attenzione alle varie fasi sopra descritte.
Se esiste una valvola di chiusura nella canna canna fumaria, va chiusa
anche quella.
Durante l’uso della stufa, lo sportello del focolare e quello di ma-
nutenzione devono essere obbligatoriamente chiusi. Nelle pre-
senti istruzioni fanno eccezione le fasi di accensione, di aggiunta
di combustibile e di combustione dei residui di brace.
Durante il riscaldamento, e per il periodo successivo, le superfici
interne della stufa e i loro componenti rimangono bollenti. Le su-
perfici esterne invece raggiungeranno la temperatura massima
dopo 2 – 3 ore dalla fine della combustione. Per questo motivo,
è importante evitare il surriscaldamento attenendosi alle istru-
zioni d’uso che seguono.
Non aggiungere mai del pellet sopra la brace. Inoltre, la stu-
fa non è progettata per conservare al proprio interno il pellet.
Questo rischierebbe di assorbire i gas di combustione e di pren-
dere fuoco.
Se dopo aver utilizzato il pellet, si desidera riscaldare ulterior-
mente la stufa, impiegare ceppi di legna. Evitare il surriscalda-
mento della stufa. Seguire attentamente le indicazioni relative
alle quantità di legna e pellet consigliate per ogni turno di ri-
scaldamento.
PULIZIA DEL SISTEMA A PELLET
Pulire regolarmente la griglia per pellet per evitare l’otturazio-
ne delle fenditure d’aria della griglia. Si consiglia di utilizzare una
spazzola in metallo (immagine 18).
Le istruzioni di pulizia e manutenzione della stufa sono fornite
nelle istruzioni d’uso della stessa.
OK


