8
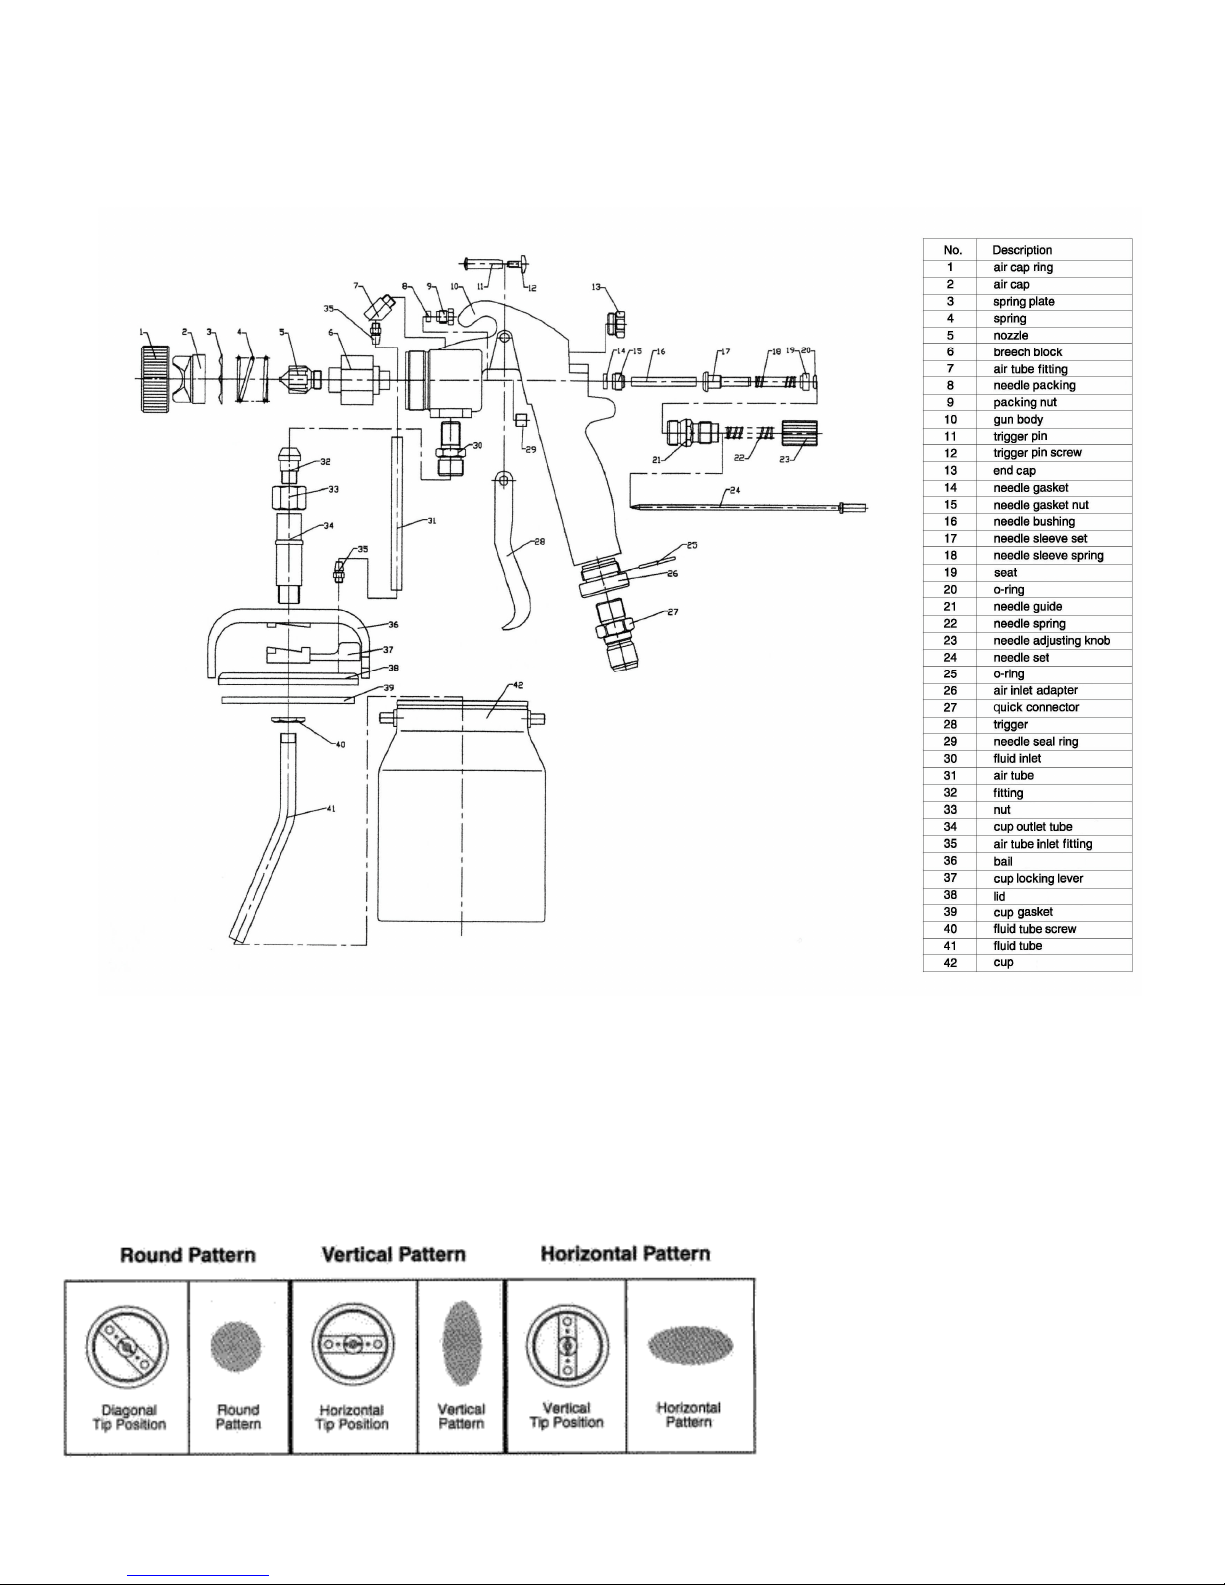
To adjust the size of the pattern, screw the air cap ring in or out accordingly. Turning the ring clockwise will make
the pattern bigger, and will decrease the atomization. Turning the ring counterclockwise will make the patterns
smaller and will increase the atomization. CAUTION: When adjusting the size of the spray pattern, moving the air
cap too close to the nozzle may cause an undesirable figure-8 pattern; moving the air cap too far from the nozzle will
eventually prevent spraying altogether.
To Begin Spraying
Switch the turbine power switch to the ON position.
To control the thickness of the coat being applied, slowly turn the material flow adjustment screw (at rear of gun)
counter-clockwise while squeezing the trigger of the gun. Continue turning the screw until the appropriate material
flow has been achieved to provide the desired coating thickness and finish. For best results, select the needle,
nozzle and air cap combination that allows you to have the trigger fully engaged.
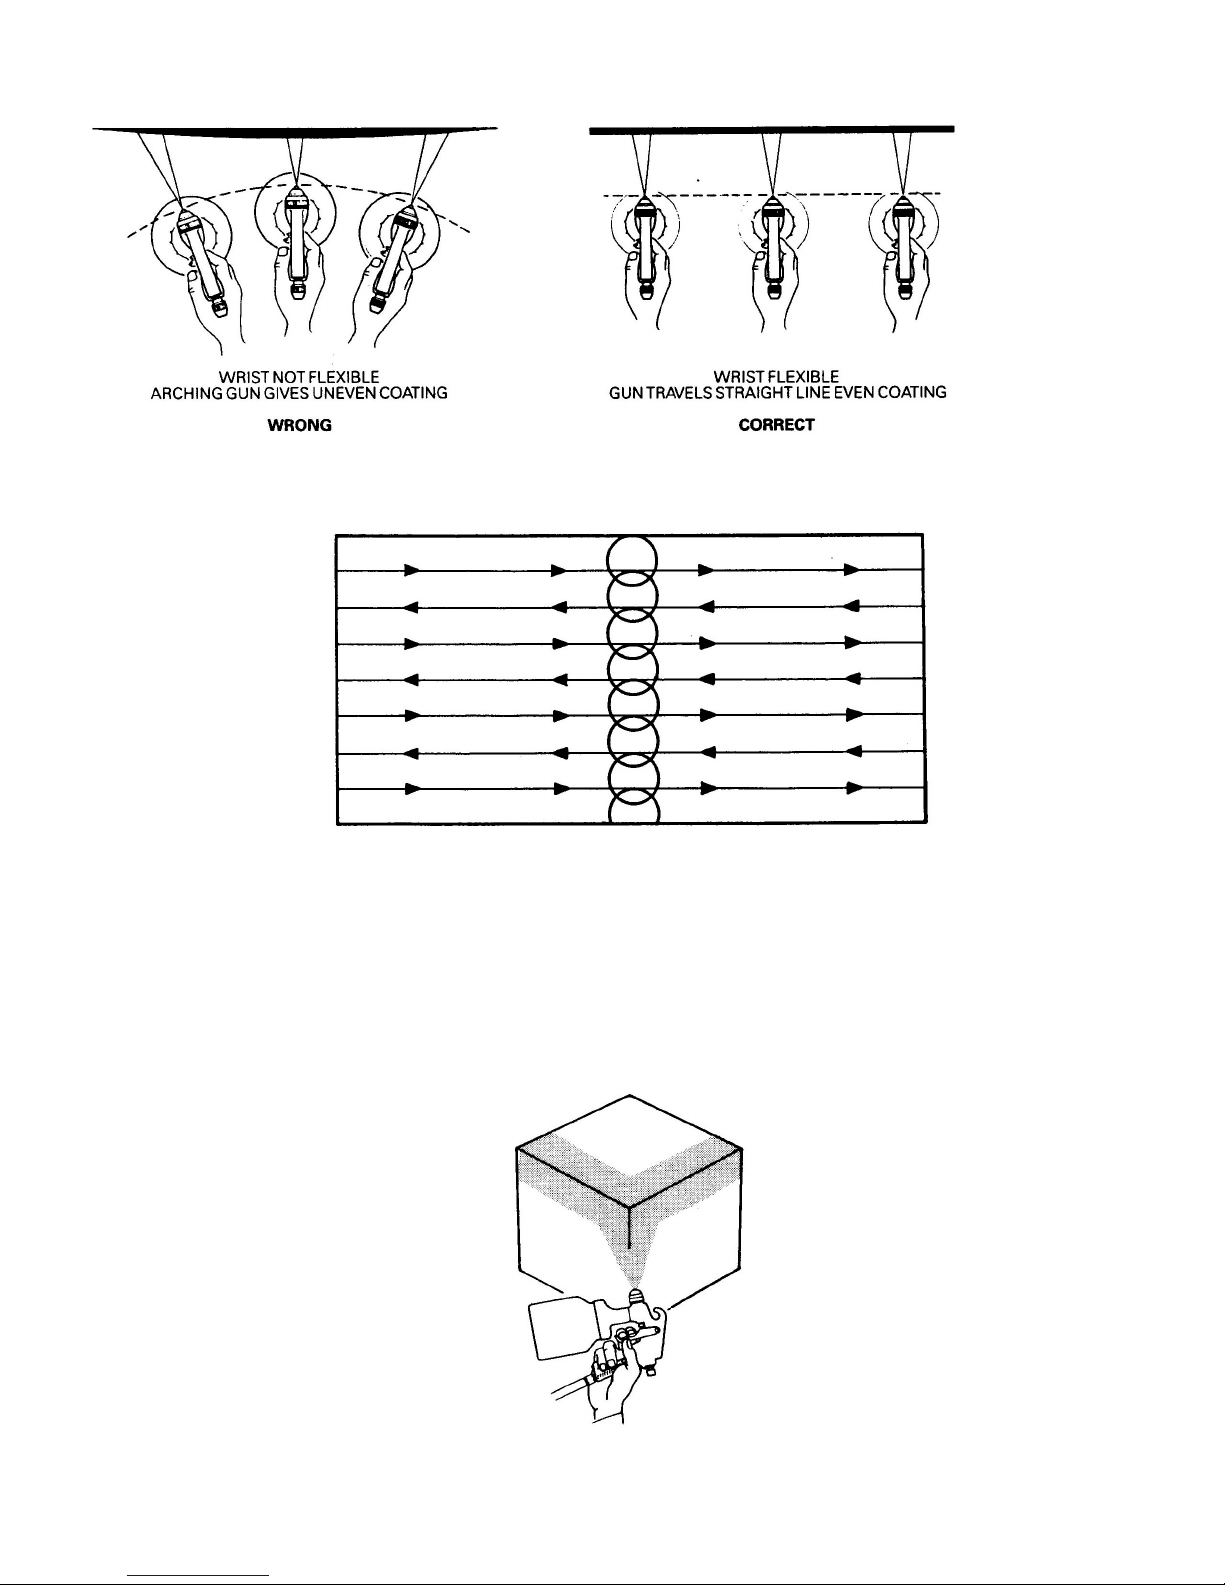
Maintain a consistent distance of 6-8 inches from the surface and spray in a smooth continuous motion.
The direction of the spraying motion should be based on the spray pattern chosen: when spraying a horizontal
pattern, the direction should be up and down; when spraying a vertical pattern, the direction should be left to right or
right to left; when spraying a round pattern, the direction can be either.
CAUTION: Once you have filled the spray gun, it is important to keep the gun upright. You may tilt the gun as
necessary to spray a ceiling or tabletop for example, but note that the tube that pressurizes the paint cup is internal.
Do not turn the gun on it side or upside down when there is paint in the cup as the paint may block the air holes
and prevent the pressurization of the paint cup. If you will be spraying with the gun in a non-upright orientation, use
the optional remote cup assembly.
TESTING PRIOR TO SPRAYING
•
For optimum results, always test coating viscosity, spraying distance, pattern size, film thickness,
needle/nozzle/air cap combination and finish, on a sample of the surface to be coated.
•
To test the proper application speed (speed of your hand), spray one pass on a sample of the surface to
be coated at a consistent speed. Examine the sprayed coating: if there appears to be space between the
droplets of paint, slow down your application speed; if individual droplets are not visible and the film seems
even, note the application speed and maintain it throughout use.
•
To test the Needle/Nozzle/Air Cap combination and to ensure even film thickness (coat of material
being applied), use the horizontal spray pattern test:
Horizontal Spay Pattern Test
1. Turn the air cap to the vertical position – this will spray a horizontal pattern.
2. Maintaining the distance of 6-8" from the surface, squeeze the trigger and spray a horizontal pattern on the
same spot until the material has built up enough to sag.
3. Release the trigger and point the gun away from the surface.
4. Repeat steps 1-3 about three to five times in different areas of the test piece.
Watch the material sag and see if it runs (drips) evenly across the spray pattern. If so, your needle, nozzle and air
cap combination are correct. If not, identify a common problem with all the test patterns sprayed and refer to the
following troubleshooting chart: