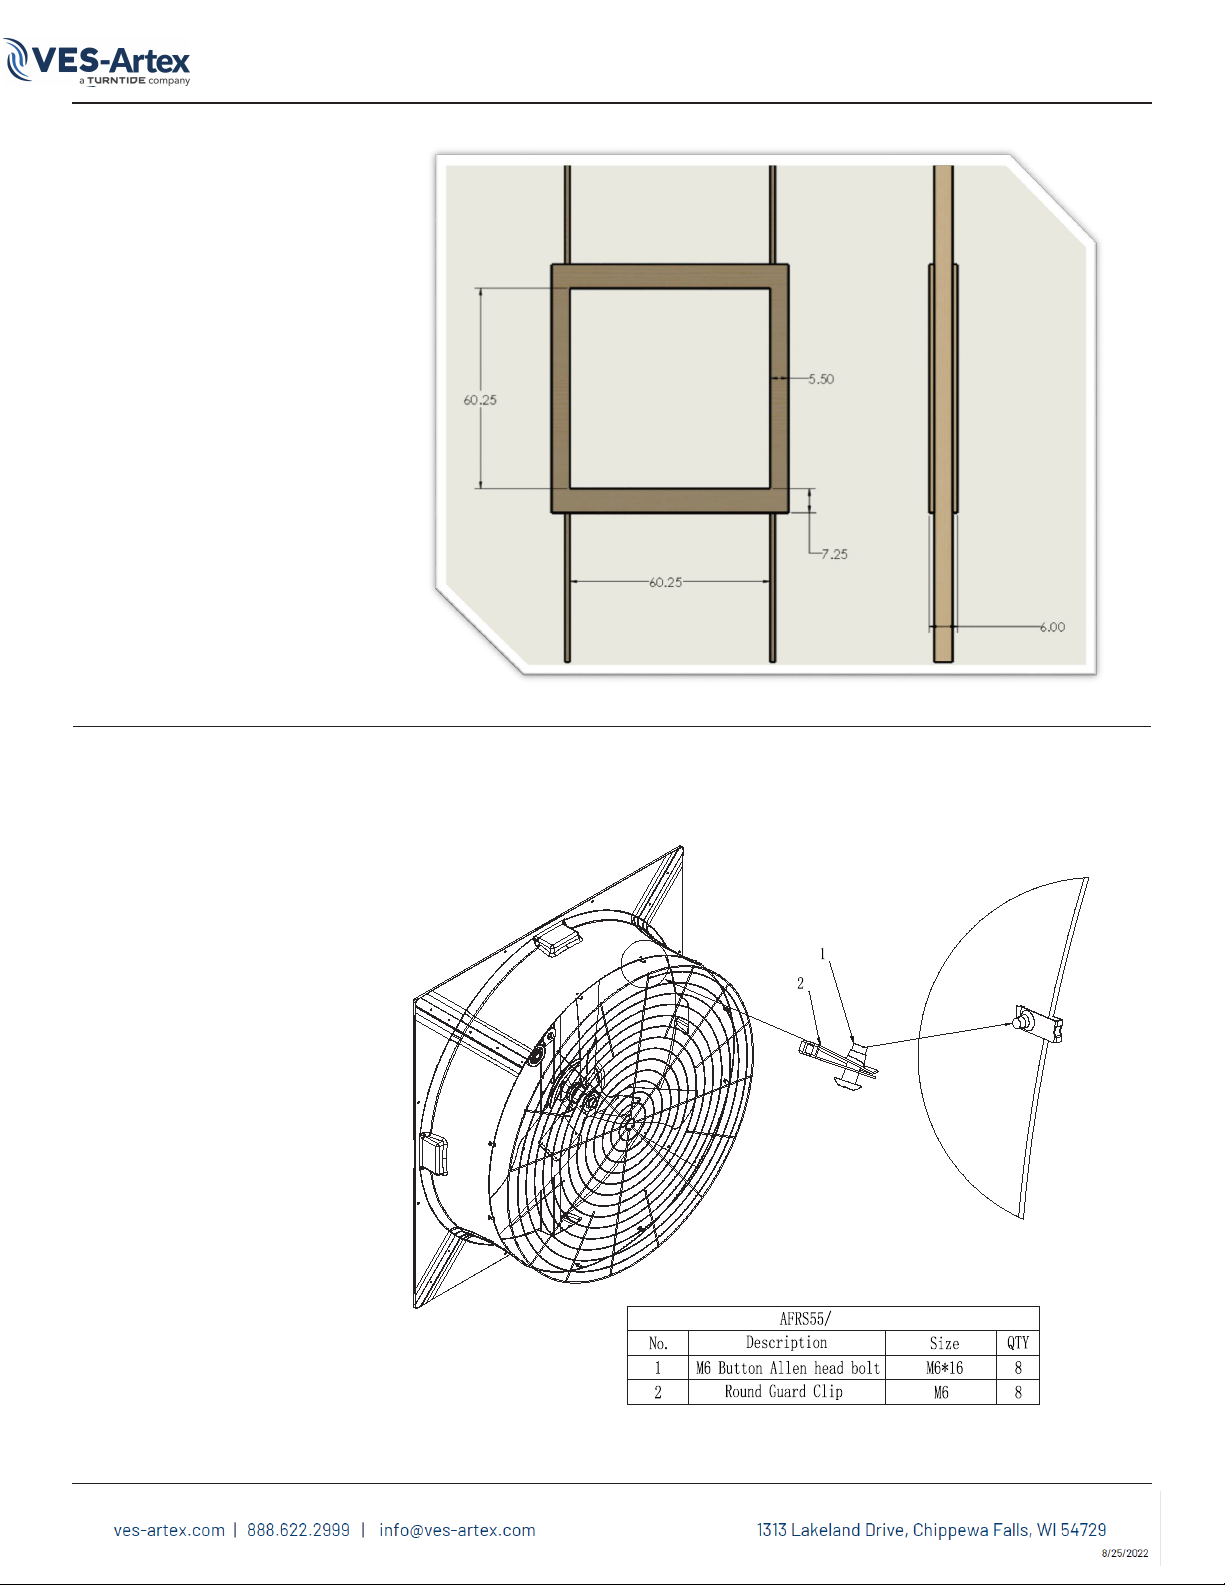
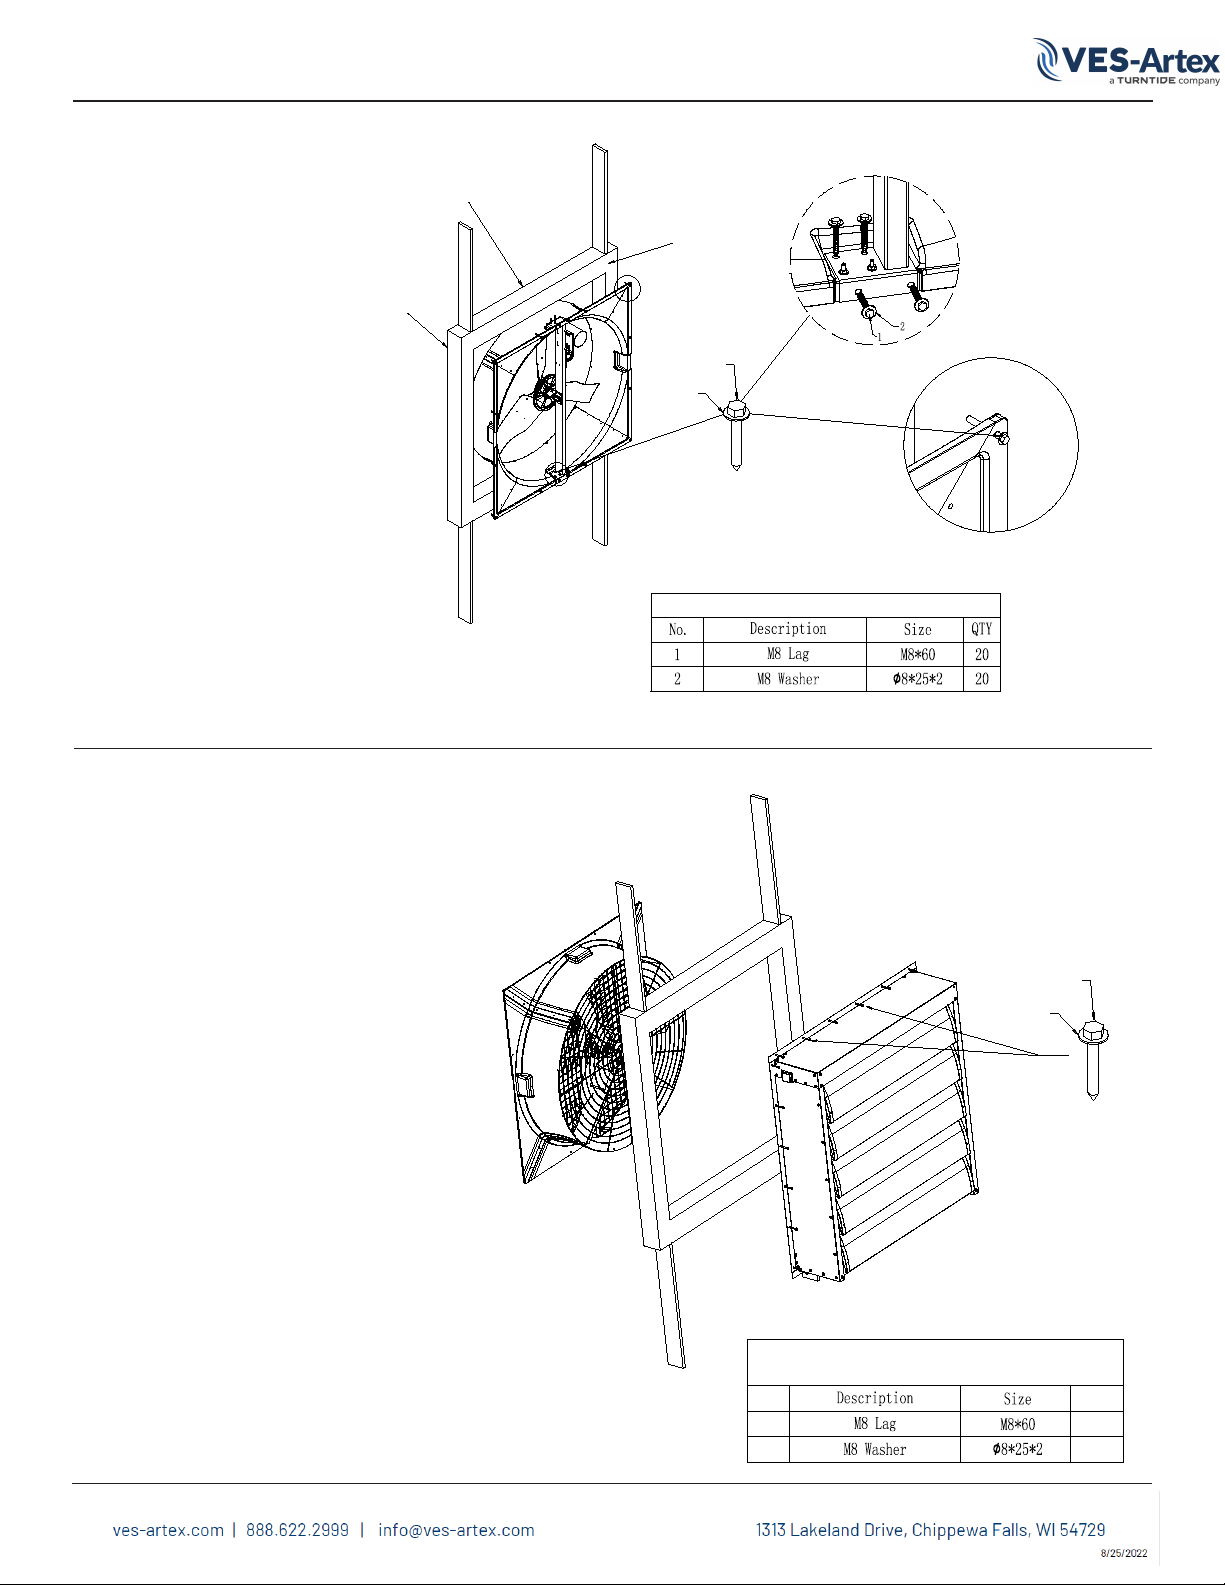
Installation Steps | PPFS 55 Instruction Manual |
TOOLS NEEDED
13mm Socket
Phillips-head screwdriver
Flat-head screw driver
4-3in wood screws (optional)
1-48in 2x4 lumber (optional)
Cordless drill
Drill-bit Set
Metric hex-key set
Drill socket adapter
Ratchet
14mm Socket
* For installation in metal
buildings, please contact
VES.
Always disconnect the power supply
before servicing or working with the
unit for any reason.
Parts replacement and
troubleshooting to be performed
only by qualied personnel.
Do not place ngers or objects in
the fan while motor is connected to
the power source.
Do not attach foreign objects to
the blades of the fan.
Do not use gasoline benzene,
thinner, harsh cleaners, etc., which
are dangerous and will damage fan.
Please follow all warning guidelines, failure to do so
could result in serious injury or death.
Assembly/Installation of the fan should be carried
out by qualied professionals.
During transportation, parts on the fan may become
loose and need to be checked during and after
installation.
• Ensure all hardware is tight and secure
• Ensure alignment of pulleys is correct
• Ensure proper belt tension is maintained
Disconnect electrical power before installing,
inspecting or servicing equipment. All electrical
wiring must be done by a qualied electrician in
accordance with all Local and National electrical and
safety codes, as well as the National Fire Protection
Agency (NFPA) where applicable.
Fans should be hung no lower than
7’ at the lowest point from the
ground/oor.
Always have the necessary number
of people before starting.
Always have the necessary number
of people available to properly
handle large fans.
SAFETY
Installation Safety
Prior to any installation product should be inspected
for any damage caused during shipping. Any damage
found should be documented and communicated to
liable parties.
Operation Safety
When fan is in operation no attempt should be made
to service or interact with parts from the fan. Any
attempt to interact with fan parts while the fan is
operating could result in injury. Inlet and exit guards
and or shutters are in place to help prevent foreign
objects from entering inside the outer perimeter of
the housing. If maintenance to the fan is required,
interrupt the source of power to the motor and allow
propeller to come to a complete stop before moving
forward with any efforts to service.
Maintenance Safety
Some safeguards must be
disassembled or removed for the
parts to be serviced or replaced. As
this fan does have moving parts and
is supplied with electrical power,
steps must be taken to ensure
safety around these presented
hazards.
Safety & Warnings
Read and save these instructions. Revised 9/1/18VESENVIRO.COM | 1.888.622.2999 3