●Take the 2 posts for the ladder side as well as the ladder spindles, one cross log, the 2 ladder legs, and
the ladder cross log. You will start with the ladder spindles and place them into the holes of the ladder
legs, then place the ends of the ladder legs into the holes of the ladder cross log and cross log. Keep in
mind that the ladder cross log should be on the bottom of the ladder with the flat side facing up. Once
that is complete and square you can place the cross logs into the holes on the posts.
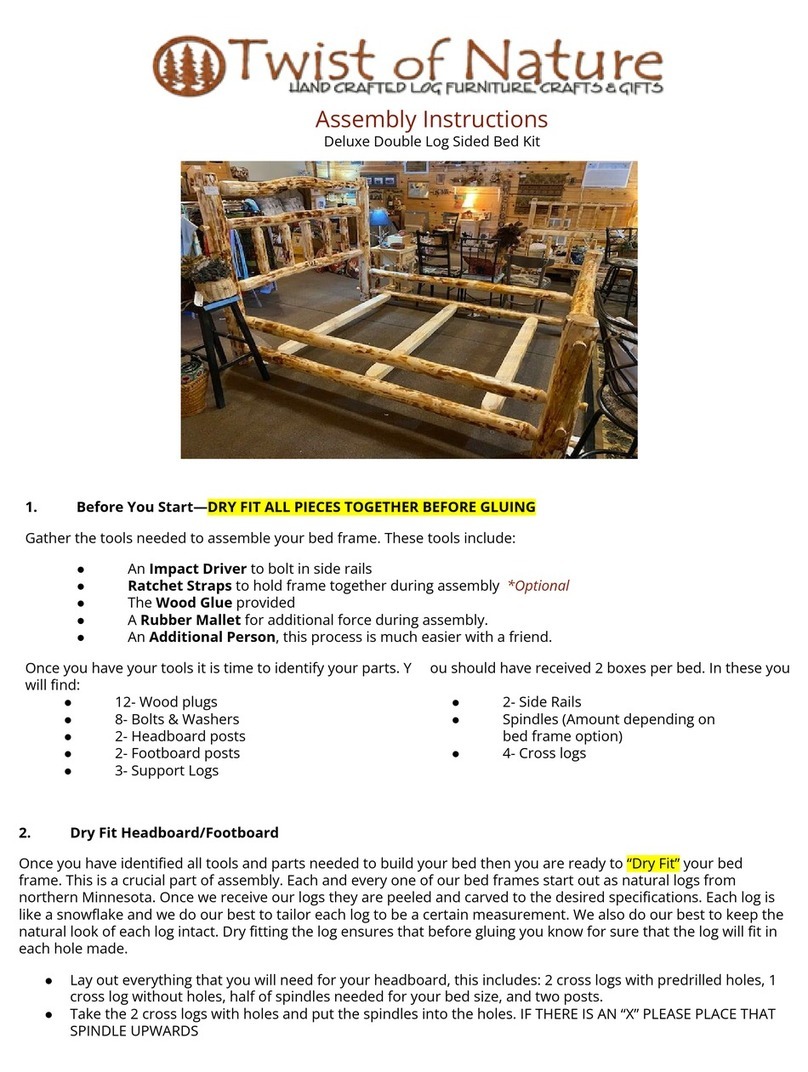
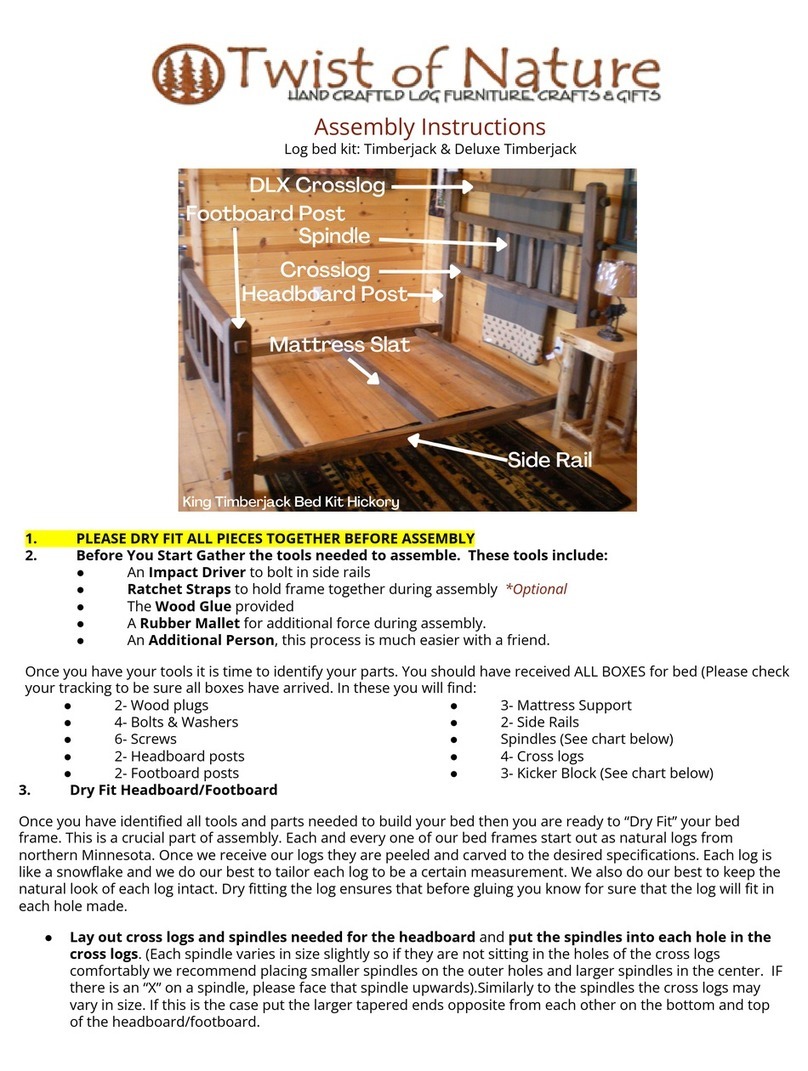
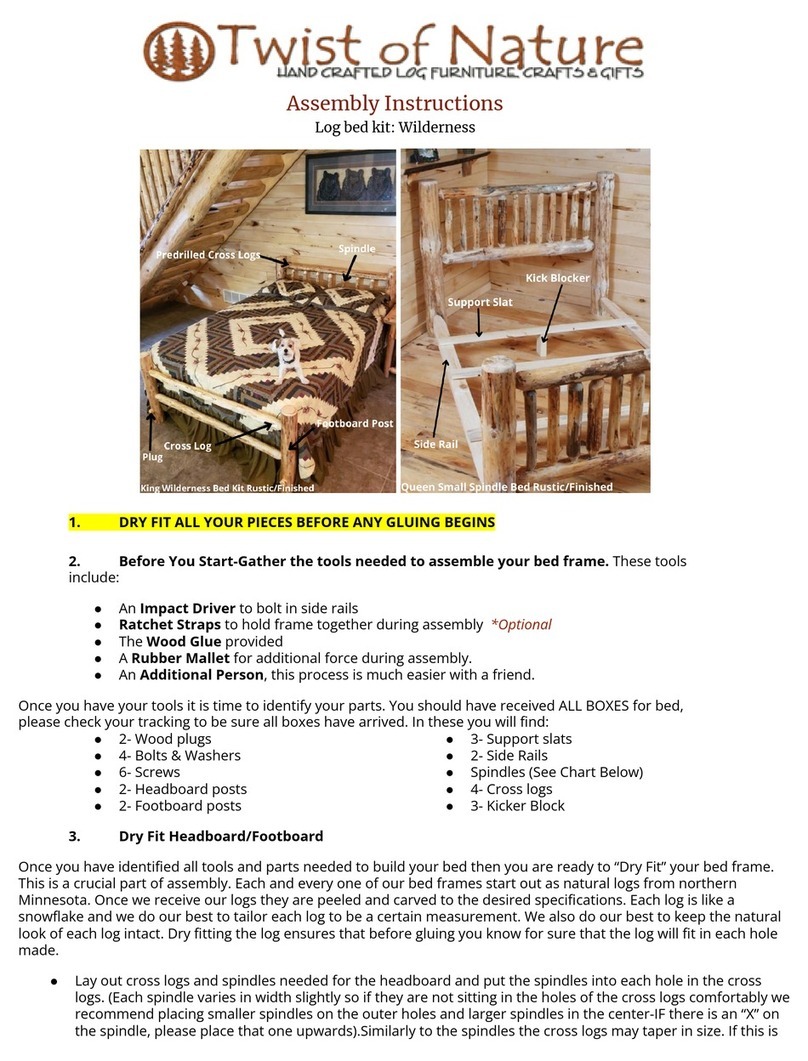
●The Headboard consists of the remaining 2 Posts and 2 cross logs. Just place the cross logs into the pre
drilled holes on the posts.
●Finally we will assemble the side rails. Please take a look at how many spindles are needed for your loft
size. 2 side rails have 3 extra holes pre drilled. These holes are for the mattress supports and should be
face inward and be on the bottom half of the rail itself. You can then place the spindle into the pre
drilled holes of the side rail. *Please keep in mind that these logs were cut and peeled by hand and may
vary in size slightly. If this is the case place the larger diameter spindles in the middle pre drilled hole
and work your way outwards with the smaller diameter spindles. Repete for 2nd rail.
3. Gluing Headboard/Footboard/Side Rails
Once the “Dry Fitting '' process is done and you are satisfied with how the headboard looks; the spindles, crosslogs,
and headboard post look sturdy it is time to glue them into place. When gluing keep in mind that it is important to
first glue the spindles into the cross logs/side rails then, immediately glue the cross logs/side rails into the
headboard/footboard posts before the glue on the spindles dry. This allows you to manipulate the structure and
square the loft up before the drying process begins.
4. Side Rails
●Now that your headboard and footboard are fully assembled and the glue has dried it is now time to
connect them with your side rails. This is where additional help is useful. Grab the 2 side rails, bolts,
washers, and your impact driver. This will require some help to do.
●To start, grab a side rail and place it into the pre drilled holes on the headboard. *Make sure there are 3
holes on the bottom of the side rail facing inward for the mattress support logs. While one person holds
the side rail up another person can place and glue the side rail.
●Glue the same side rail into the footboard. The second side rail can be glued into the headboard now.
Before you glue the side rail into the footboard squeeze the support logs into the remaining holes on
the side rails. Once the support logs are in place and glued you may glue the side rail to the footboard.
5. Finish
You have completed the bed assembly. If you have any questions or concerns please reach out and our team will be
happy to help. We have been in the log furniture business for over 25 years and have always been more than happy
to help our customers in any way we can, especially when it comes to assembling our beds! If you choose not to order
your bed with a clear lacquer finish we do recommend that you add a lacquer finish to your bed. You can do that by
first coating the wood in a sanding sealer then coating it in a water based lacquer. We use a semi-gloss top coat and
sand between coats to ensure that the wood is smooth. Adding a finish to your log bed will protect it from various
things like oils on your hands, gives the wood added durability and creates a clean finished look to your furniture.
Side Rails (2 w/3 holes for mattress
supports)
Spindles-HB
Spindles (top rail)
Headboard/Footboard Posts


