PAGE 10 OF 27 0321 IH-1020
800-295-5510
uline.mx
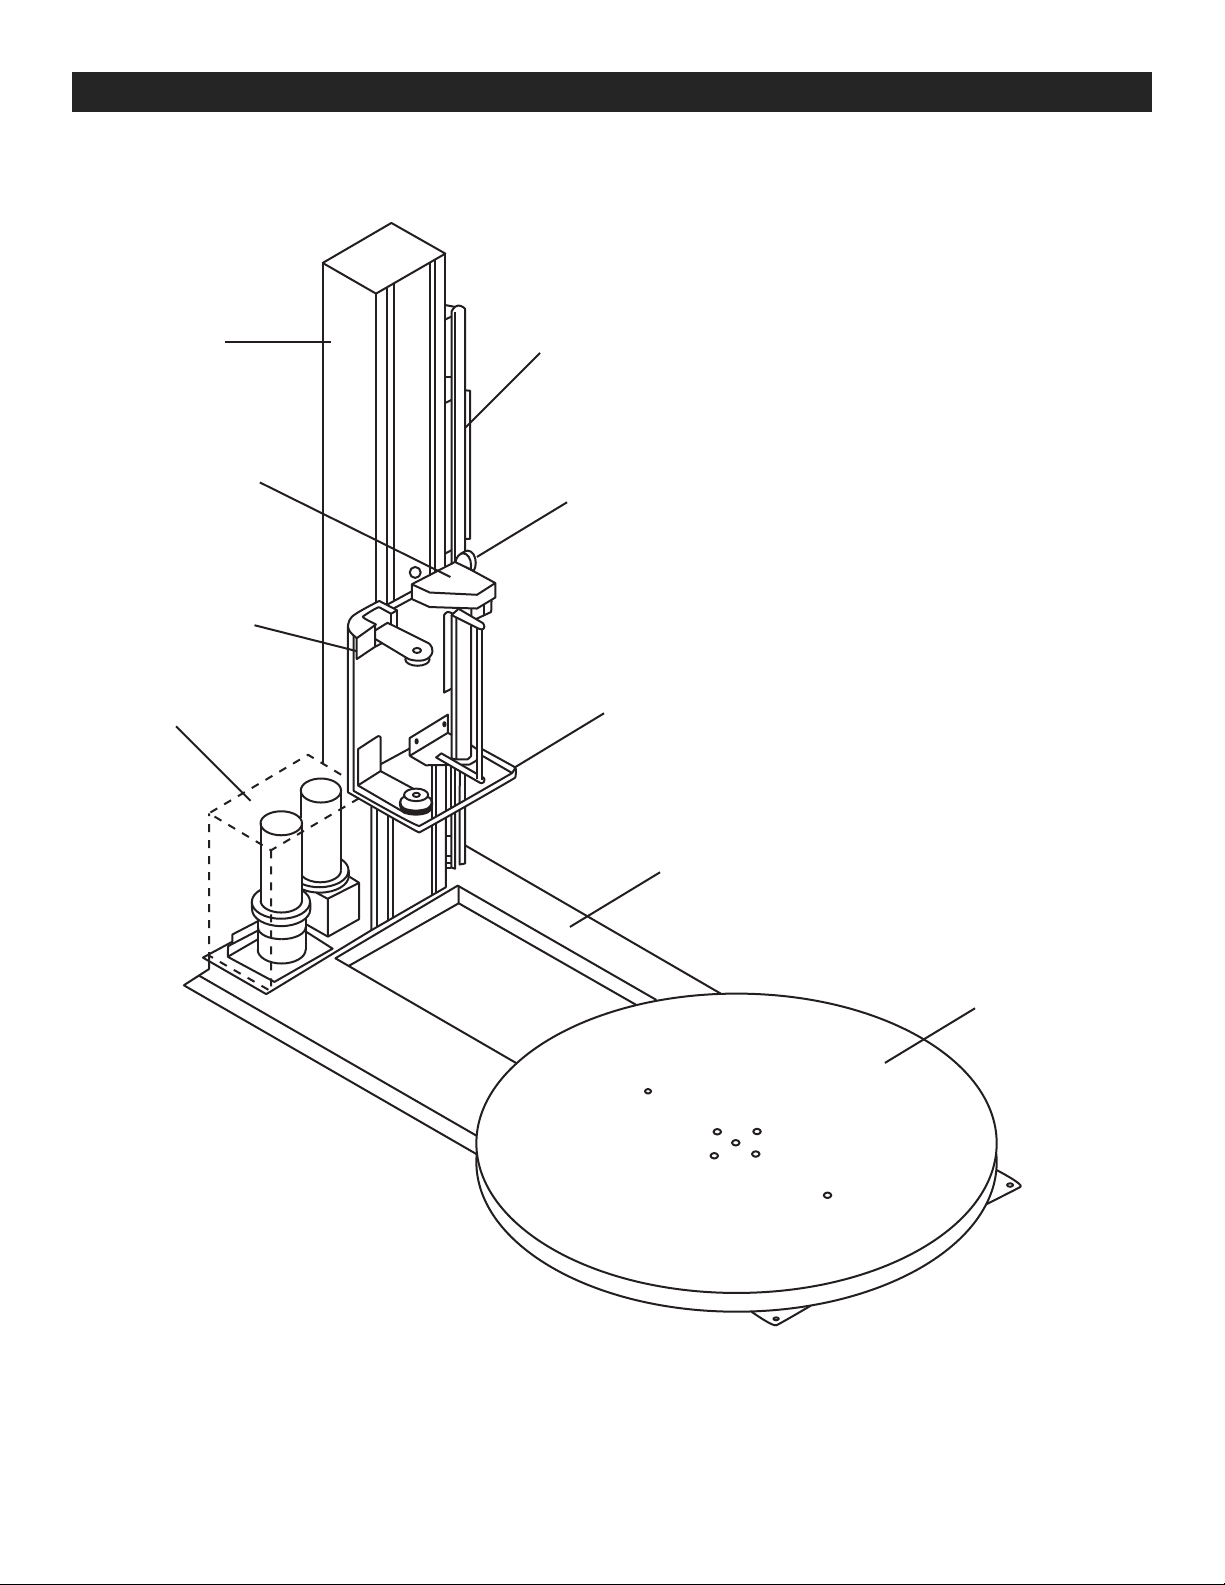
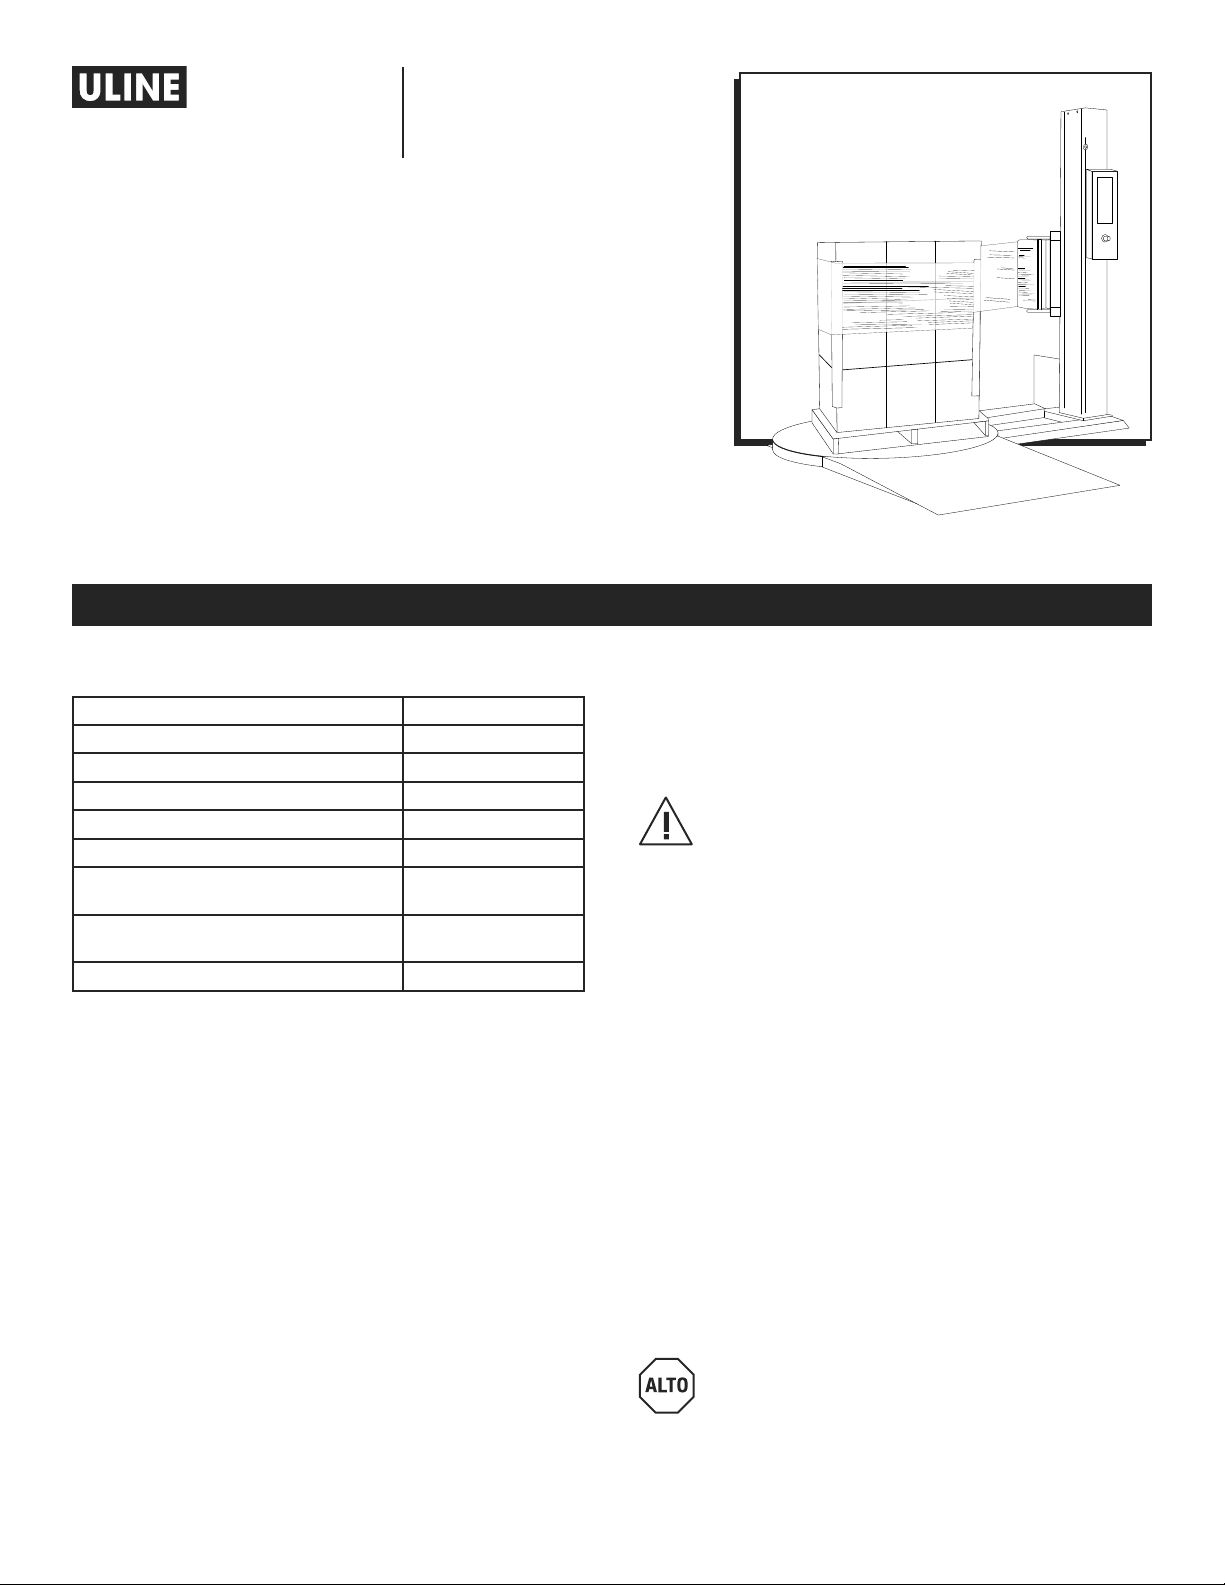
H-1020
DESPACHADORA DE
80” AUTOMÁTICA DE
PELÍCULA ELÁSTICA
DIMENSIONES DE LA MÁQUINA
Largo 249 cm (98")
Ancho 152 cm (60")
Altura 231 cm (91")
Diámetro de Plataforma Giratoria 152 cm (60")
Altura de Plataforma Giratoria desde el Piso 8 cm (3")
Altura para Envolver 203 cm (80")
Espacio de Funcionamiento 249 x 152 x 231 cm
(98 x 60 x 91")
Tamaño Máximo de Carga 132 x 132 x 183 cm
(52 x 52 x 72")
Peso Aproximado del Envío 533 kg (1,175 lbs.)
ESPECIFICACIONES ELÉCTRICAS
• 115 VAC, 60 Hz, Monofásica, 15 AMP
SISTEMA DE PLATAFORMA GIRATORIA
• 20 cargas por hora (espiral)
• 12 RPM de velocidad máxima de plataforma
giratoria
• Capacidad máxima de 4,000 lbs. de carga de la
plataforma giratoria
SISTEMA DEL PORTADOR DE PELÍCULA/ELEVADOR
• Velocidades ajustables para elevación y descenso
• Sensor fotoeléctrico automático para detección de
altura
SISTEMA PARA DESPACHAR LA PELÍCULA
• Ajuste de Película Infinito / Manual
• Capacidad del Rollo de 25 cm (10") de Diámetro
• Capacidad del Rollo de 50 cm (20") de Ancho
¡PRECAUCIÓN! El equipo de control del motor y
los reguladores están conectados a líneas de
voltaje peligrosas. Cuando dé mantenimiento a
la unidad y a los reguladores, los componentes
pueden estar expuestos con cubiertas o salientes
en o por encima de la línea de voltaje. Deberá
tomar precauciones extremas para protegerse
de choques eléctricos.
El usuario es responsable del cumplimiento de
todas las regulaciones relacionadas con la
conexión a tierra. NO use extensiones eléctricas
para operar el equipo.
Desconecte la alimentación de la corriente
directa antes de revisar los componentes, dar
mantenimiento, limpiar, y cuando la máquina
no esté en uso. NO conecte o desconecte
cables y conectores mientras se suministra
energía al circuito.
El cableado debe ser realizado sólo por personal
calificado. Existe el peligro de choque eléctrico
o incendio.
¡ADVERTENCIA! NO debe usar ropa holgada
mientras la máquina esté funcionando.
Manténgase alejado de las partes móviles
mientras la máquina esté operando.
ESPECIFICACIONES DEL SISTEMA