UFO UFO-R/UKL2 User manual

ENGLISH
UFO user manual 21
UFO user manual
WARNING!
Do not use the heater in vertical position
INFRARED TECHNOLOGY

ENGLISH
UFO user manual
22
Distinguished Customer,
You have purchased a high quality, efcient and original UFO Infrared Heater.
We would like to express our gratitude to you for your appropriate choice and
condence in UFO.
This manual has been designed for our UFO Star (UFO-E) and UFO UK (UFO-R)
models.
Please read this manual thoroughly in order to attain a sustainable satisfaction
with your heater.
Please stick to the items in "Safety Instructions” section with strict observance.
Appropriate installation, operation and maintenance are of great importance for
the security of you and of those who are to benet from the heater.
Please keep this Manual in a safe place for future reference and urgent needs.
We wish you to enjoy your new UFO Heater for better days and times…
Please read safety instructions carefully
for the security of you, your family and your belongings
before operating your appliance.
.
Center: SUNPazarlamaElk.Mak.Dan.vePaz.Ltd.Şti.
Akçaburgaz Mah. 72. Sok. No:17 K:2
Esenyurt / Istanbul
Factory: UFOIşiklaIsitmaSistemleriSan.veTic.Ltd.Şti.
Akçaburgaz Mah. 72. Sok. No:17
Esenyurt / Istanbul
www.ufoheat.com
IS
O
9001 : 2000
INFRARED TECHNOLOGY

ENGLISH
UFO user manual 1
1. TABLE OF CONTENTS
1. TABLE OF CONTENTS............................................................................................. 1
2. SAFETY INSTRUCTIONS......................................................................................... 2
2.1 Electrical Connection ...................................................................................... 2
2.2 Safety and re protection................................................................................ 2
2.3 Maintenance and Cleaning Instructions.......................................................... 2
2.4 Installation Distances and Safety clearances ................................................. 3
2.5 Repair and Service ......................................................................................... 3
2.6 UFO outdoor use ............................................................................................ 3
3. INSTALLATION INSTRUCTIONS ............................................................................. 4
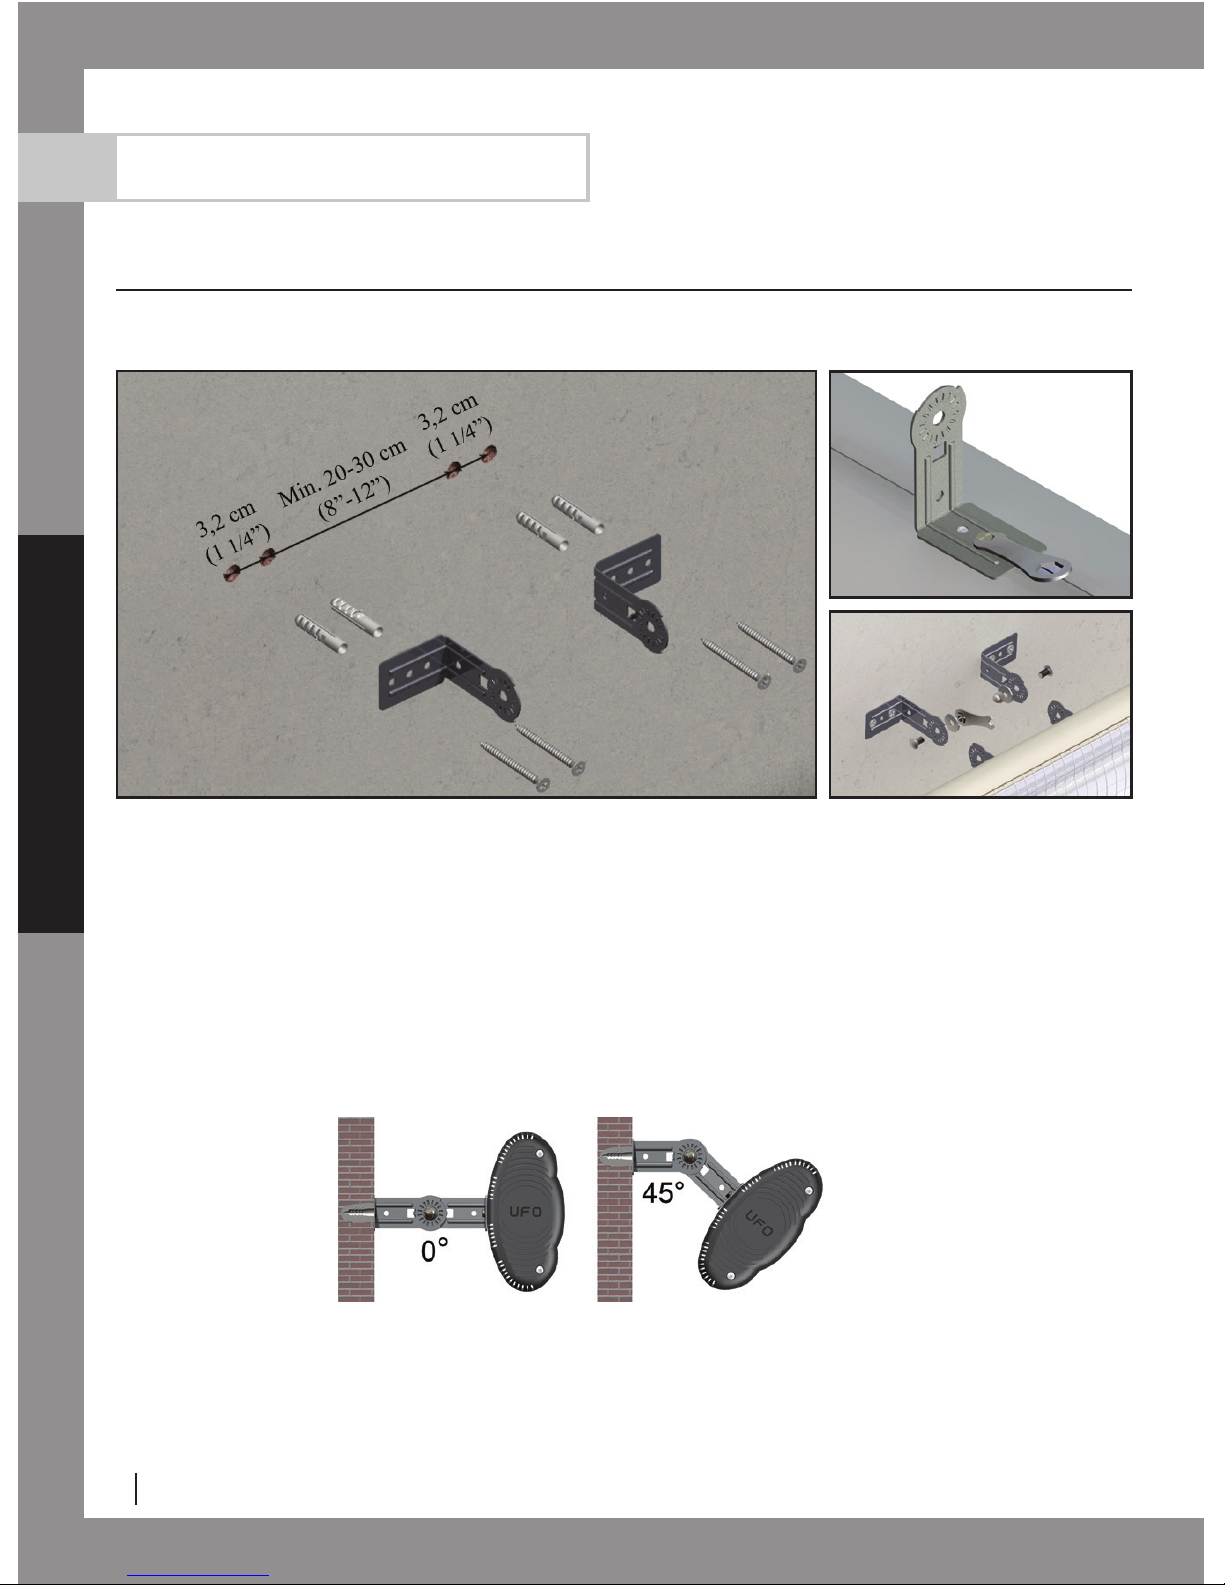
3.1 Installation Instructions ................................................................................... 4
3.2 Minimum Installation Distance ........................................................................ 5
3.3 Installation Position......................................................................................... 6
3.4 Right and Wrong Installation Positions ........................................................... 6
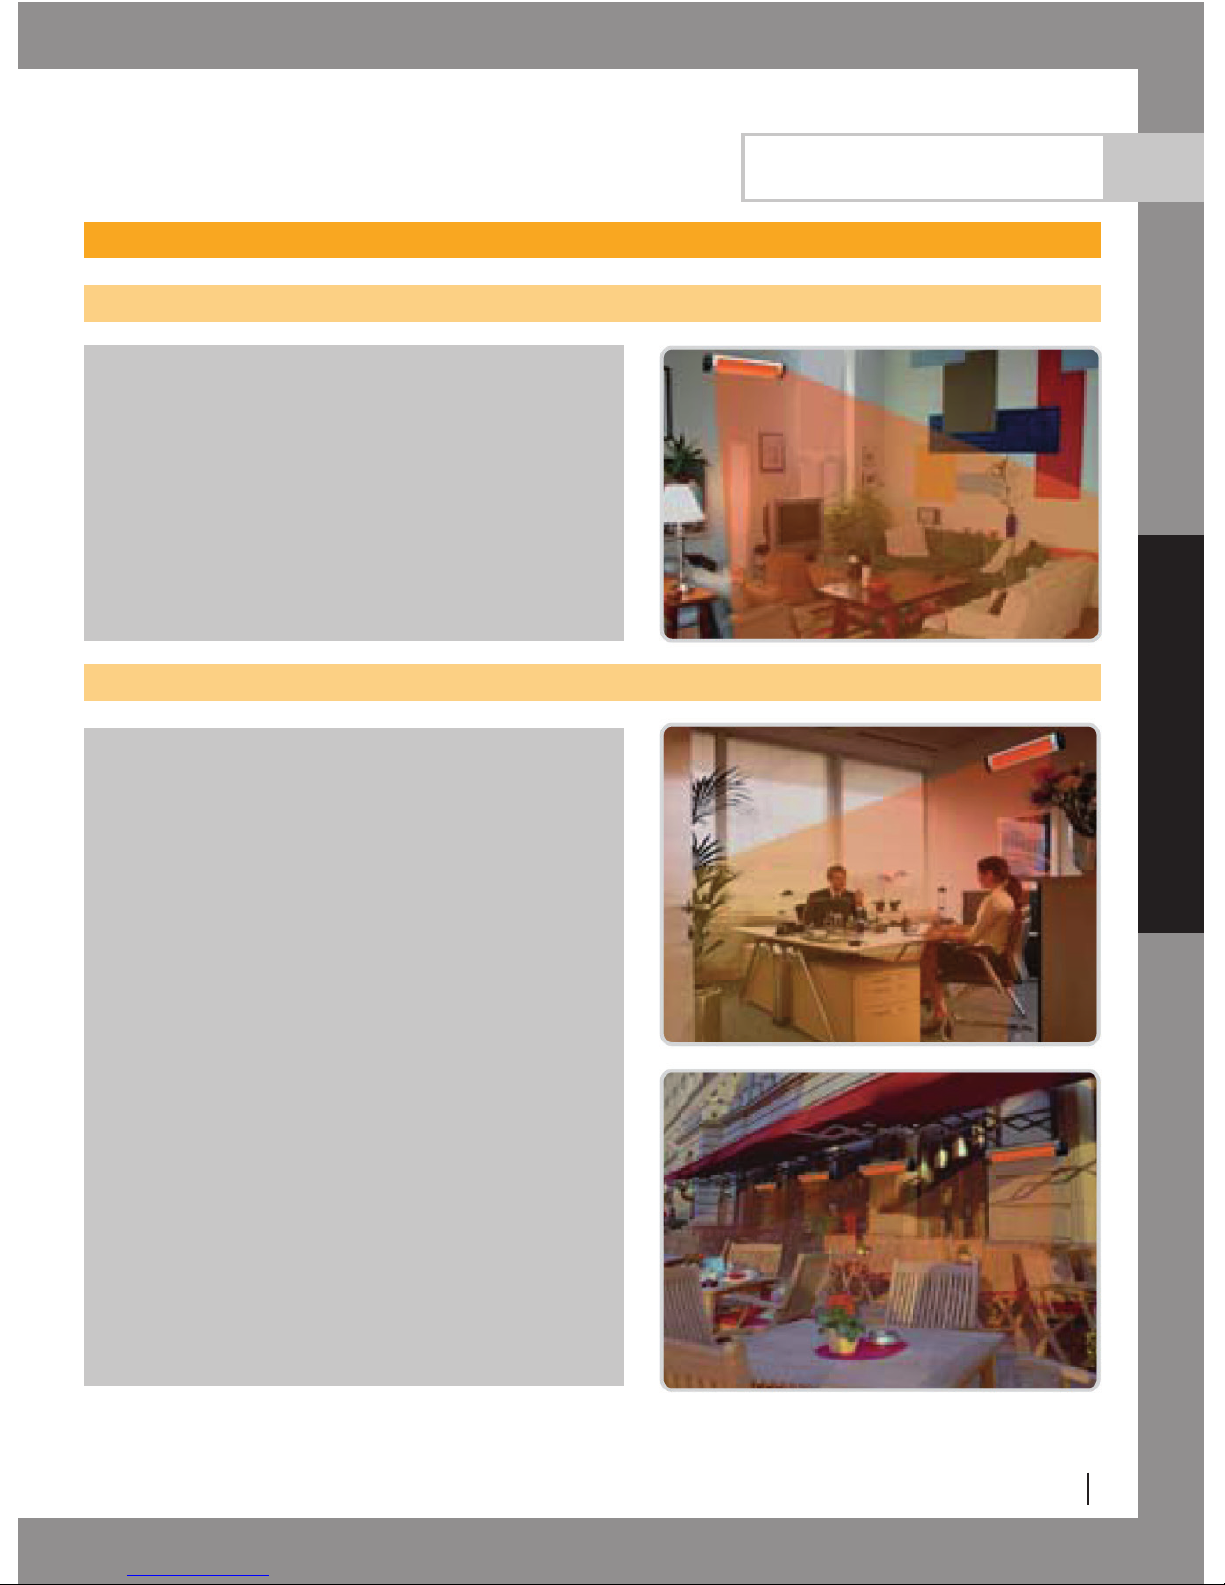
4. APPLICATION FIELDS.............................................................................................. 7
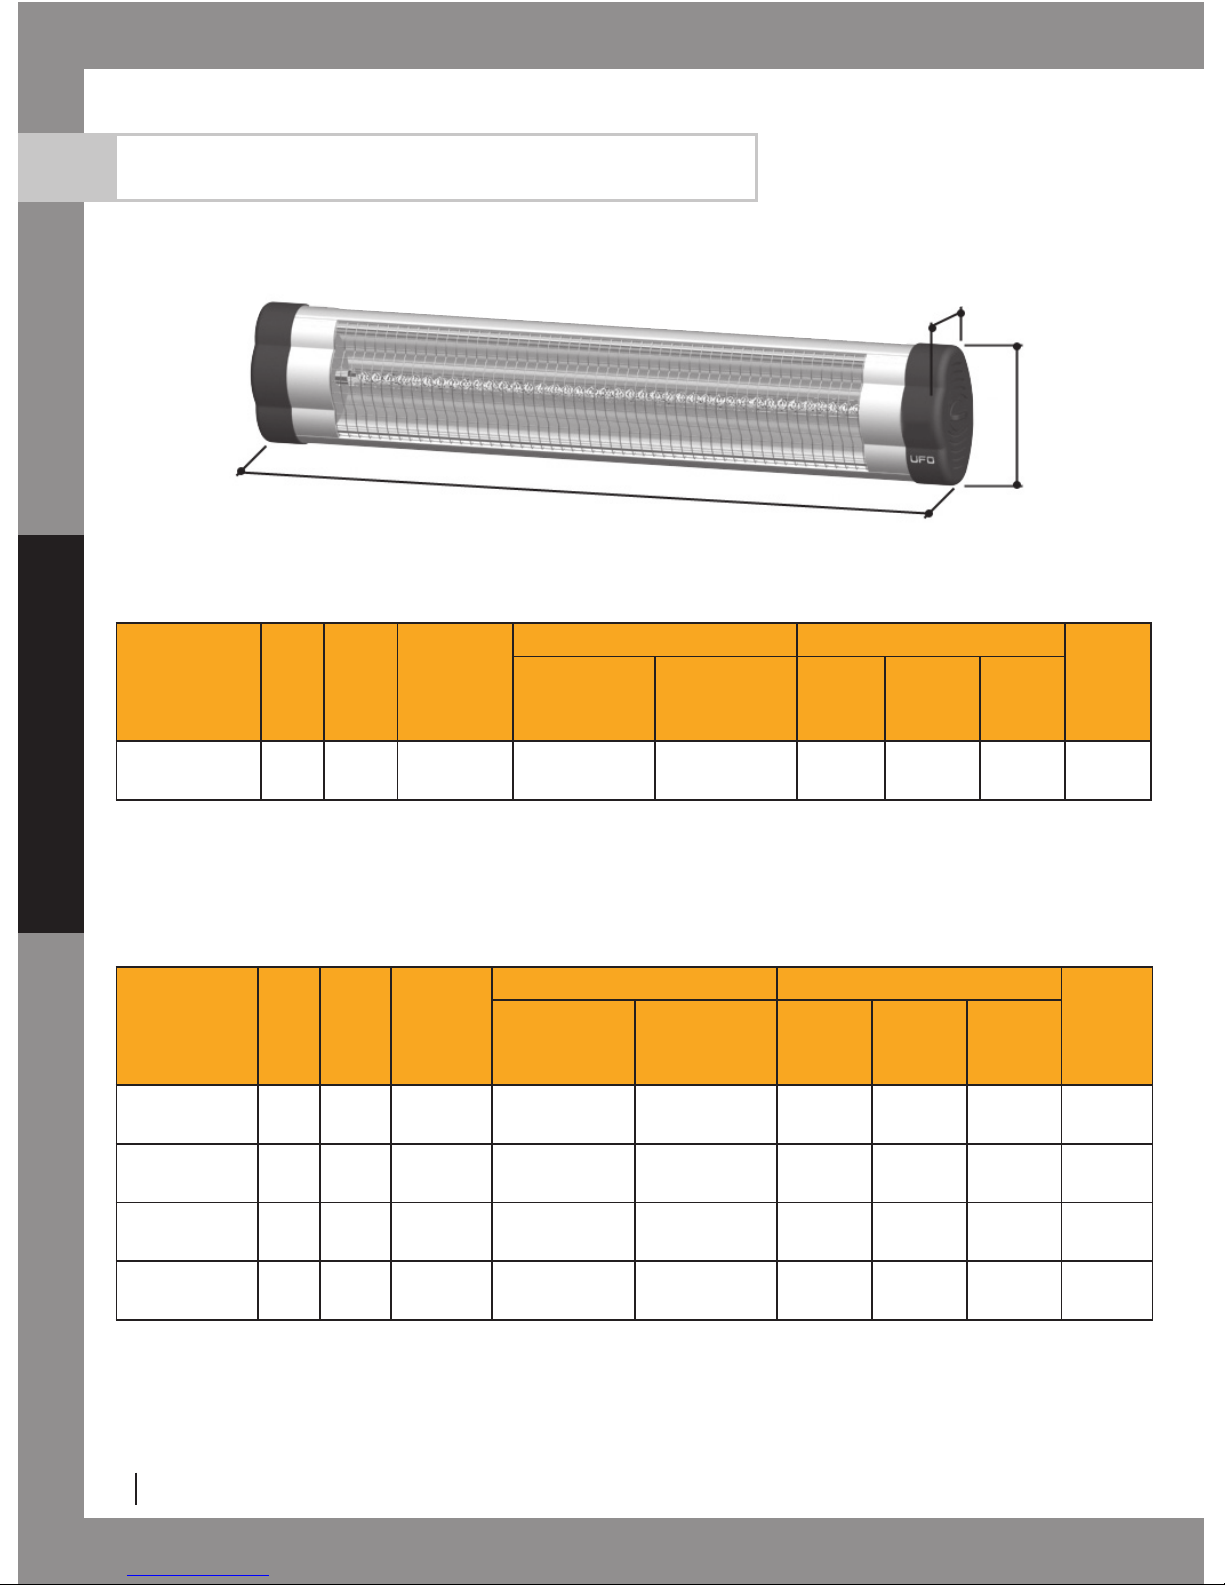
5. HEATERS DIMENSIONS AND HEATING AREA ...................................................... 8
6. OPERATING INSTRUCTIONS.................................................................................. 9
6.1 UFO Star (UFO-E) .......................................................................................... 9
6.2 UFO UK (UFO-R).......................................................................................... 10
6.2.1 Denitions of the Buttons on the Remote Control ..................................11
6.2.2 Denition and Functions of the Indicators on the Remote Control........ 12
6.2.3 Operation of the Remote Control .......................................................... 13
6.2.4 Control through the main module on the heater.................................... 15
7. DIFFERENCES AMONG UFO MODELS AND SPECIFICATIONS......................... 16
8. MAINTENANCE AND CLEANING INSTRUCTIONS............................................... 17
8.1 MAINTENANCE............................................................................................ 17
8.2 CLEANING.................................................................................................... 17
9. TECHNICAL SERVICE............................................................................................ 18
10. TERMS OF WARRANTY....................................................................................... 19

ENGLISH
UFO user manual
2
2. SAFETY INSTRUCTIONS
2.1 Electrical Connection
• Check whether your appliance and power cord are damaged before operating your appliance. If yes,
do not plug your heater and contact with authorized technical service.
• Check whether there is any crack, disjoint or scratch on the lament (heating tube). If any, do not plug
your heater and contact with authorized technical service.
• Make sure that the main electricity circuit is appropriate according to your UFO model:
- The 110~120V heaters are equipped with a NEMA 5-15 power cord and plug and must be
connected to a 20A circuit breaker with a NEMA 5-20T receptacle OR to a 15A circuit with
a 100% rated breaker.
- The 220~240V heaters are equipped with a NEMA 6-20 power cord and plug and must be
connected to a 20A breaker.
• Attention! Do not use your UFO heater together with another appliance plugged to the same multiple
sockets or connected to the same breaker.
• Use your appliance with a properly earthed plug.
• The earthed plug must fall outside heating eld and hot surface.
• The power cord must not be left on or around the frame of your UFO appliance.
• Unplug your appliance when you won’t operate it for a long term or will conduct cleaning
or maintenance.
2.2 Safety and Fire Protection
• Do not cover your appliance and do not hang any clothing over the heater or do not place any
clothing on or near the appliance.
• Do not stick anything into the protective grid.
• Do not make use of your heater to light up cigarette or similar materials.
• Supervision is needed when this product is used anywhere near children. The appliance is not
intended for use by children or other persons without assistance or supervision if their physical,
sensory or mental capabilities prevent them from using it safely.
2.3 Maintenance and Cleaning Instructions
• Before any maintenance or cleaning rst unplug your heater. Never pull the cord to unplug
your device.
• Take out the front grid and the lament to clean the reector (reecting mirror), apply the
instructions on page 17.

ENGLISH
UFO user manual 3
2.4 Installation Distances and Safety Clearances
Attention! The appliance must only be operated in a horizontal position with a slope of max ± 5º.
The heater must be installed at level on a at, stable surface, rigid enough to withstand safely the
weight of the device and not covered by any exible material, such as carpets, plastic or fabric.
• The distance between the back of the infrared heater and the installation surface must be
at least 12.5 cm (5'') (the supplied mounting brackets provide the adequate clearance).
• At all time, the distance of your appliance from the living beings is to be min 100 cm (39").
• The distance of the heating area of your appliance from combustible materials such as curtains,
drapes, etc., must be min 100 cm (39").
• The distance of your appliance from bath tub, washbasin or other sanitary installations is
to be min 100 cm (39").
• Wall installation
- The distance of your appliance from the ground is to be min 180 cm (71").
- The distance of your appliance from the ceiling is to be min 40 cm (16") (See table 1, page 5).
- The distance of your appliance from the corners to be installed is to be min 40 cm (16").
• Ceiling installation
- The distance of your appliance from the ground is to be min 180 cm (71").
- The distance of your appliance from the ceiling is to be min 12,5 cm (5").
- The distance of your appliance from the corners to be installed is to be min 70 cm (28").
2.5 Repair and Service
• Attention! Only technical services and persons authorized by SUN may serve, repair and replace
the parts of this heater (see page 18).
2.6 UFO outdoor use
UFO-E heaters feature IP34 certicate. This IP certicate (Ingress Protection) refers that they
provide protection against large objects with diameter over 2.5mm and against water spilling from
any direction. Electrical components of UFO-E heaters manufactured in accordance
with IP34 protection class are insulated and, due to such feature, they can safely be
used in exterior environment.
UFO products without IP logo are not designed for outdoor use. Thus they should be
installed away from rain or snow.

ENGLISH
UFO user manual
4
3. INSTALLATION INSTRUCTIONS
3.1 Installation Instructions
Attention! The appliance must be installed at level on solid surfaces. See pages 4-7 to come up with
the most appropriate installation method for your UFO.
1. Drill four 8 mm (5/16’’) diameter holes on the wall to the place where the unit will be placed with
the distances shown in (Figure-1)
2. Insert the wall anchors supplied with the unit into the holes.
3. With a star (Phillips) screwdriver, mount two of the L shaped legs on the wall using the #5x1.5’’
screws supplied with the unit.
4. Mount the other L legs on the unit using the six #M5x6 screws and the small wrench as shown in
(Figure-2) (corresponding nuts are already built in on the body of the unit).
5. Mount and x the L shape legs on the wall and on the unit respectively, using the #M8x15 bolts
and #M8 nuts and the washers as shown in (Figure-3) and tighten by using the wrench supplied.
6. Depending on the area to be heated the angle of the unit can be adjusted between 0-45 degrees
by the help of #M8 bakelite head bolt and nut xture (Figure-4).
7. Before operating the unit, check the installation solidity once again.
Figure 1 Figure 3
Figure 2
Figure 4

ENGLISH
UFO user manual 5
3.2 Minimum installation distances
Wall installation
Minimum distances from xtures and other equipments
Power
(Watts) <1800 1800-
2800 >2800
A40 cm
(16")
60 cm
(24")
70 cm
(28")
Ceiling installation
Table 1

ENGLISH
UFO user manual
6
WRONG WRONG RIGHT
RIGHTRIGHT RIGHT
WRONGWRONG WRONG
3.3 Installation Position
Attention! The heater must be installed in horizontal position only. Never install your device with an
angle greater than 5 °. In case of operations in angles larger than 5º the heating loop wire may fall into
disuse shortly.
3.4 Right and Wrong Installations Positions
Direct your heater towards the most appropriate angle. Do not point your heater to the windows or
vacant spaces since infrared heater is designed to directly heat people and objects in line with the
unit.

ENGLISH
UFO user manual 7
4. APPLICATION FIELDS
Application elds of UFO heaters
Residential applications
Living room
Family room
Entrance way
Ofce
Workshop
Garage
Solarium
Indoor pool and spa
Commercial applications
Ofce
Meeting room
Entrance way
Shopping centre
Showrooms
Swimming pool
Classroom
Conservatories
Factories and production plants
Warehouse and loading zones
Hotel
Airport
Train station

ENGLISH
UFO user manual
8
5. HEATERS DIMENSIONS AND HEATING AREA
UFO STAR (UFO-E)
Models Volts
(V
)
Hertz
(Hz)
Power
(Watts)
Heating Area Dimensions
Weight
(kg)
Outdoor
m2 (pi2)
Indoor
m2 (pi2)
H
cm
(in.)
D
cm
(in.)
L
cm
(in.)
UFO-E/S12 120 50-60 1400 8 (86) 12 (129) 19
(7 1/2)
10
(3 15/16)
74
(29) 2,5
UFO-E/S15 120 50-60 1700 10 (108) 15 (161) 19
(7 1/2)
10
(3 15/16)
74
(29) 2,5
UFO-E/S18 240 50-60 2000 12 (129) 18 (194) 19
(7 1/2)
10
(3 15/16)
86
(34) 3
UFO-E/S30 240 50-60 3200 20 (215) 30 (323) 19
(7 1/2)
10
(3 15/16)
108
(42 1/2) 3,6
Warranty Term: 3 Years
Filament Life: ± 8000 Hours
Power Control: On-Off Control with regulator
UFO UK (UFO-R)
Models Volts
(V
)
Hertz
(Hz)
Power
(Watts)
Heating Area Dimensions
Weight
(kg)
Outdoor
m2 (pi2)
Indoor
m2 (pi2)
H
cm
(in.)
D
cm
(in.)
L
cm
(in.)
UFO-R/UKL2 120 60 Min. 1020
Max. 1700
Min. 6 (65)
Max. 10 (108)
Min. 9 (97)
Max. 15 (161)
19
(7 1/2)
10
(3 15/16)
79
(31) 2,7
Warranty Term: 3 Years
Filament Life: ± 9000 Hours
Power Control: 5 Levels (H1 : 1020W, H2 : 1190W, H3 : 1360W, H4 : 1530W, H5 : 1700W)
L
D
H
H : Height D : Depth L : Length

ENGLISH
UFO user manual 9
6.1 UFO Star (UFO-E)
Heat control by the regulator
The regulator adjustment is conducted in accordance with required room temperature.
The heater operates constantly when the regulator is in the highest mode. Switch the regulator
on the highest mode to heat the cold rooms. When desired room temperature has been attained,
the heater may be operated with certain intervals adjusting the regulator. You may reduce the energy
costs to the minimum level in certain room temperatures through appropriate regulator adjustment.
Switching off during the maintenance or long term inactivity
When the heater is not operated for long term, cleaning or maintenance, put the regulator in “0” mode
and unplug the power cord.
6. OPERATING INSTRUCTIONS

ENGLISH
UFO user manual
10
6.2 UFO UK (UFO-R)
Inserting Batteries
Insert 2 AAA/ Alkaline type batteries into your Remote Control.
1. Flip the backside of your remote control
2. Pull out battery cover.
3. Insert the batteries in accordance with
the instructions and polarity of the batteries.
To change the batteries, do the same way depicted
above
Notice :
Replace the old batteries with the same type
batteries. Otherwise, your heater may not function well.
Pull out the batteries in case of long terms of disuse to
prevent leakage which may impair your remote control.
The screen of the remote control starts functioning after inserting the batteries. UFO logo and ashing
clock indicator starts appearing on the screen.
This remote is infrared type, it must be pointed toward the heater so that it sends signals and work
properly.

ENGLISH
UFO user manual 11
6.2.1 Denitions and fucntion of the indicators on the remote control
Symbol Description
Power mode indicator
Time settings indicator
On time indicator
Off time indicator
Indicates remaining time to switch off the heater
Indicates that “'everyday” function is on
Logo

ENGLISH
UFO user manual
12
6.2.2 Denitions of the Buttons on the Remote Control
The functions of your heater may be controlled via the buttons on your remote control and LCD
screen. You may also control some of the functions of your heater through the buttons on the front
side of the heater:
1. On / O
Switches on or off the heater or stands it by.
2.
5
/
6
Program Up / Down (+/-)
Adjusts heater intensity setting from 1 to 5.
3. Clock
Sets the remote time.
4. Timer On
Switches on the heater in stand by mode.
5. Timer O
Switches off the heater in preset time and
stand by mode.
6. Sleep
Switches off the heater in preset time.
7. Everyday
Make the heater operate in preset parameters
everyday.
8. Cancel
Cancels all settings.
9. LCD (Liquid Cristal Display)
Display the settings of the remote control and
related indications.
Attention!
Insert the batteries in the remote control before use.
1
4
7
2
5
8
3
6
9

ENGLISH
UFO user manual 13
6.2.3 Operation of the Remote Control
Power Mode Adjustment:
Press the button « On/O » to turn on the heater. The power mode indicator will display (H1).
Note: The heater starts operating at the power level mode at which it has been switched o.
Press «
56
» buttons to adjust the power level of the heater.
Time settings
Attention! Time settings are to be conducted for the rest of the functions to operate.
Ajusting the time (Clock) :
Press « Clock » button.
Press «
56
» buttons to set hour and minutes.
Press « Clock » button to save your settings.
Press « Cancel » button to cancel time settings.
Note : Repeated press on the buttons «
56
» will gear the speed of the buttons
and intervals with the presses will slow down the process.
Timer On/O:
Attention! The time is to be set precisely and the heater is to be operating before using
On / O timer function.
Timer On Settings:
Press « Timer On » button.
Press «
56
» buttons to set hour and minutes.
Press « Timer On » button to save your settings.
Timer O Settings:
Press « Timer O » button.
Press «
56
» button to set hour and minutes.
Press « Timer O » button to save your settings.

ENGLISH
UFO user manual
14
Sleep Timer Settings:
Attention! The time of the remote is to be set precisely and the heater is to be operating before using
Sleep Timer function.
Press « Sleep » button.
Press «
56
» button to set sleep time from 1 to 12 hours.
Press « Sleep » button to save your settings. Remaining time will appear on the screen.
Note :
• At any time, press « Cancel » button to cancel all time settings.
• The settings will recede unless you press « Clock », « Timer On », « Sleep », « Timer O »
necessary button to save your time settings in 20 seconds.
• Press « Cancel » button with the intervals of 3 seconds to cancel all settings of your remote
control.
• Repeated presses on the «
56
» buttons will gear the speed of buttons and intervals with the
presses will slow down the process.
• Set your Sleep timer again in case of turning off and on the heater.
• Once you set your On/Off time, such functions will operate in daily set times.
• The heater is to be in stand by mode to operate On timer.
• Clock and UFO logo keeps functioning in stand by mode.

ENGLISH
UFO user manual 15
6.2.4 Control through the main module on the heater
The button on the left functions as ON / OFF. « H0 » indicator appears on the screen when the heater
is switched ON and it is in stand by mode. (The 1
st
digit on the screen illustrates H symbol while 2
nd
digit illustrates power level mode from 1 to 5).
Press the right button on the heater to adjust power mode from 1 to 5 (H1, H2, H3, H4 and H5).
Note: The heater starts operating at the power level mode at which it has been switched o.
Press ON / OFF button on the remote control or the heater itself to switch off the heater.
If the radiator is tilted at an angle greater than 5°, it will refuse to operate and a buzzer will sound. The
message « Er » will be displayed. If the radiator is tilted at an angle of more than 5° when in function,
it will stop working and a beep will sound. The message « Er » will be displayed. In these two cases,
to operate the unit again, disconnect / reconnect the heater and put it back in a horizontal position.
The heater starts functioning in stand by mode after a power outage.
LED keeps ashing in case of a program set by remote control.
Buzzer signal is given following each command.
LED
Power level
On/OFF Power mode
H

ENGLISH
UFO user manual
16
7. DIFFERENCE AMONG UFO MODELS AND SPECIFICATIONS
Models
Star
(UFO-E)
UK
(UFO-R)
Body color Naturel 3
Champagne 3
Warranty 3 years 33
Element service life* ± 8000h 3
± 9000h 3
Plastic cover Holley 3 3
Outdoor use IP34 3
Power cord length 2.75 m 3 3
Remote control IR- control 3
Reector Aluminum 3 3
Reector side part Aluminum 3 3
Grid wire 16 x 16 x 1.2 mm 3 3
Voltage 240V (AC) 3
120V (AC) 3 3
Frequency 50 Hz 3
60 Hz 3 3
* In normal use.
INFRARED TECHNOLOGY

ENGLISH
UFO user manual 17
8. MAINTENANCE AND CLEANING INSTRUCTIONS
8.1 Maintenance
Attention! Careful and regular maintenance of UFO infrared heater considering these instructions
assume great importance so as to attain a long and efcient operation of your heater.
1- Check the lthiness of the reector and IR – lament at least once a month. If necessary, apply
cleaning and maintenance instructions.
2- The frequency and number of maintenance check must be adjusted by considering the operating
environment of the heater. Outdoor use or dusty environment requires more maintenance.
3- At each maintenance, check for visually deformation of the reector, grid and heater frame.
In case of any deformation, consult to your technical service.
4- Check the power cord and plug visually while cleaning the appliance. In case of any deformation,
consult to your technical service.
5- It is recommended to clean regularly the reector of your heater to ensure proper and efcient
operation.
8.2 Cleaning
Attention! Regular and careful cleaning helps your UFO Heater operate for longer years and more
efciently.
1- Before any maintenance or cleaning of your heater, be sure to unplug the power cord for your
safety.
2- To clean the reector or the element of your UFO infrared heaters remove the grid of the unit.
To do so, unscrew the plastic cover of the housing using a star screwdriver (Philips).
Subsequently, drag plastic covers, nishing trim and grid to the outside of the frame by
following the guidelines of the extrusion.
3- The reector and lament must be cleaned with a soft cloth, a smooth brush or dry air.
The cloth may be damp but never too wet and the cleaner should not include any chemical.
4- Never use abrasive or chemical cleaner so as not to damage your heater.
5- After the cleaning, be sure to reinstall properly the grid of the unit using a slotted screwdriver.

ENGLISH
UFO user manual
18
9. TECHNICAL SERVICE
Attention! Only technical services and persons authorized by SUN may serve, repair and replace the
spare parts of this heater.
Points to be considered before shipping the product to the technical service:
1. Make sure that the plug, to which the appliance is connected, has power, check the breaker
and power cord. If the plug lacks power, consult to an electrician.
2. Make sure that the appliance has been installed in accordance with the instructions in
the manual. If the installation is inaccurate, consult the technical service.
This manual suits for next models
4
Table of contents
Other UFO Heater manuals
Popular Heater manuals by other brands

Taurus
Taurus tropicano 3C ceramic manual

EOS
EOS Zeus HD Installation and operating instructions

HEATSTRIP
HEATSTRIP THX2400UK Operation, installation, and maintenance manual

SRP
SRP UAB SERIES Installation, operation and service instructions

Lasko
Lasko CT22422 operating manual

DeLonghi
DeLonghi HCM Series instructions