2
Instruction Manual Contents:
◎Composite Fencing Installation
Description: Ballistic NailScrew Driver: Model NO. NSDCN75 is a heavy duty, coil fed, pneumatic
nailer, using compressed air as power source. It is designed to drive 15° plastic sheet coil or 15° wire coil
with full round head Ballistic NailScrews® or nails 1-1/4” to 3” in length and 0.086˝ to 0.131˝ in diameter.
The NSDCN75 was specialty designed for UFO’s Ballistic NailScrew® program with the ease of
installation and durability in mind. The power to easily drive color matched Ballistic NailScrews® into
wood or composites into light gauge (12 to 20ga) steel frame and stop the drive when it is flush. This is
possible, but must be done a little differently that what you may be used to when you are attaching wood
to wood, so please follow these step by step rules when installing into steel.
•Consistent air pressure is the key to success. The closer to the compressor the better, but when
long runs of 3/8”air hose are necessary, the use of a surge tank will be necessary.
•Keep the pressure high--110 to120psi; the high velocity this creates is our friend. Please understand
this is where we are different than fastening to wood. Always be sure to test fire into the actual
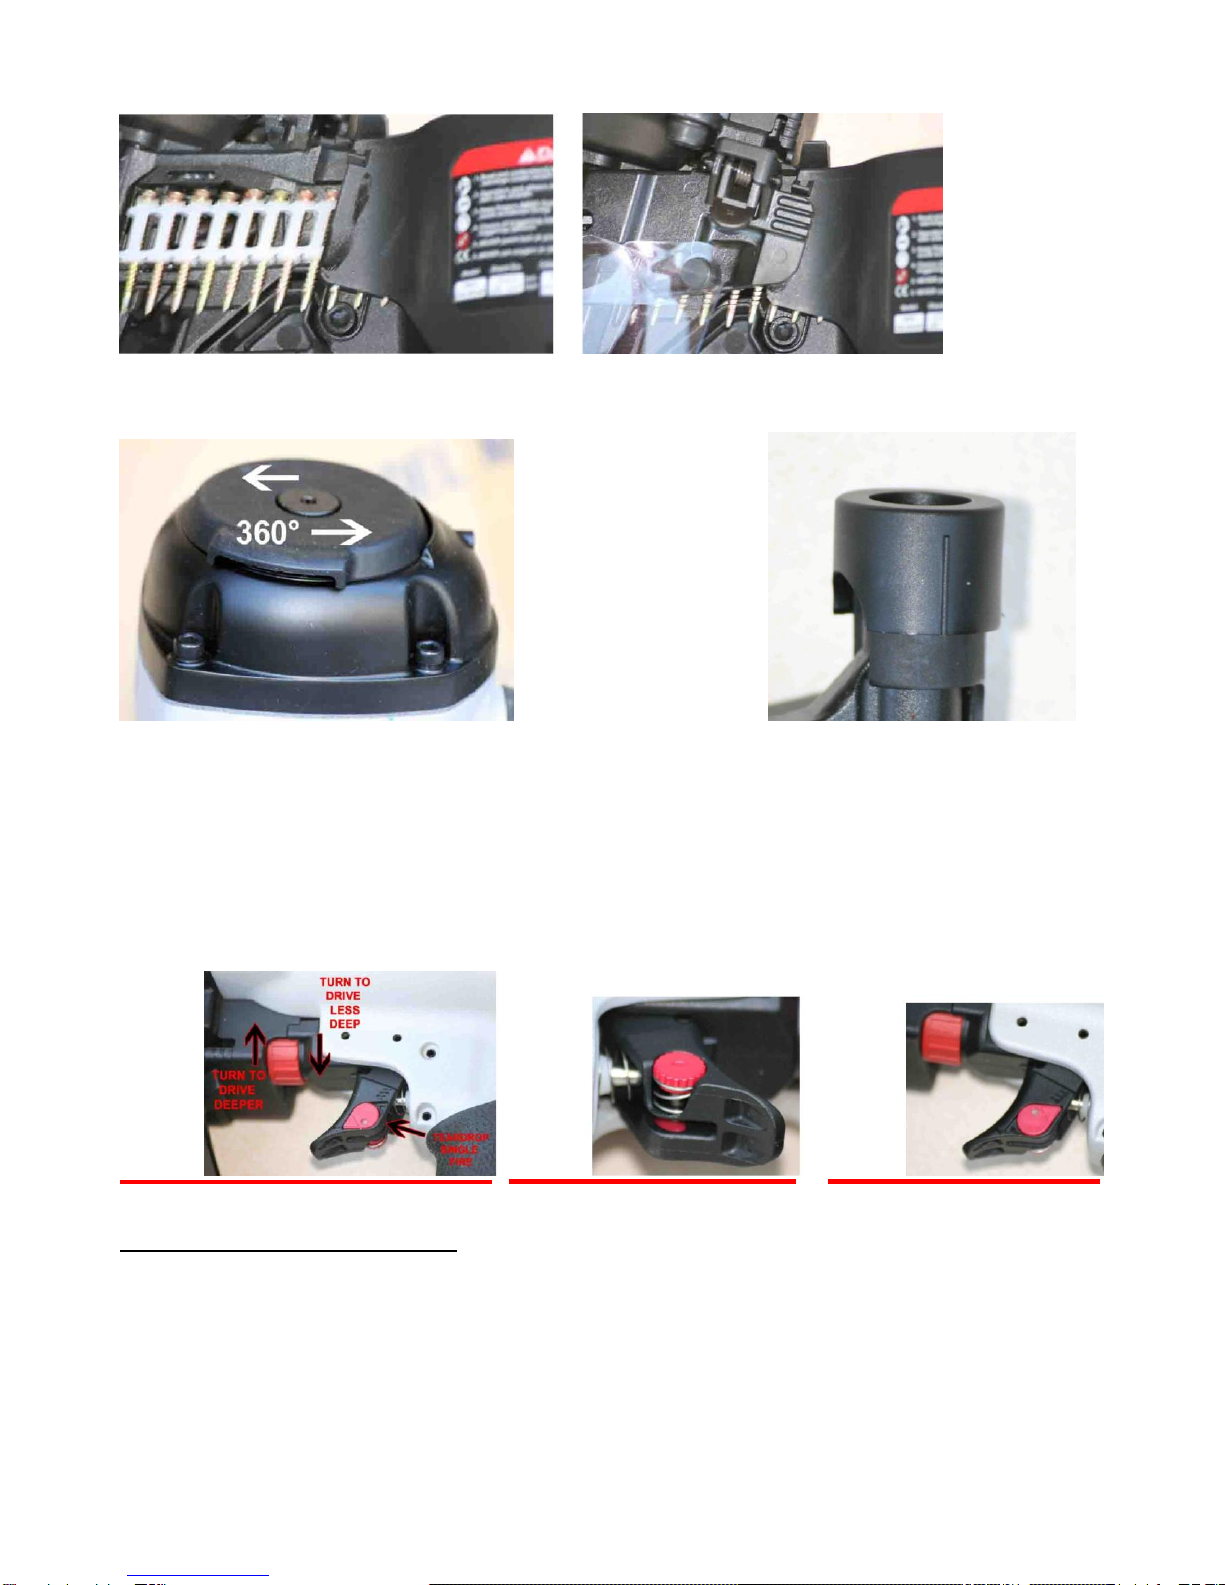
material scraps, adjusting the depth of drive on the tool (See C Fig. 19) to compensate for the excess
pressure. Lower the pressure as a last resort and as little as necessary to get the job done.
• The NSDCN75 should be sequentially fired into steel. First, place the nose of the tool where you
want the fastener to be; this will depress the safety. Second, use the trigger to fire the tool in
this sequence each and every time. The tool must be placed squarely and very firmly; try not to
let the tool bounce off the work surface. This will give a more consistent drive and finished look.
• When you have a Ballistic NailScrew® that is too high or low, use a T15 Torx bit in a screw
driver or impact driver to adjust the NailScrew. Go very slowly to the desired depth. High rpm will
strip out the NailScrew. Go slow and you will be amazed at the results.
• This is very important! Please make sure the frames are set very firm--not springy or bouncy. If
the frame moves much, it will cause the NailScrews to be set very inconsistently.
The NSDCN75 has very low noise level, making it ideal for installing Ballistic NailScrews® for
Composite fencing to wood or steel, construction of pallets and crate assembly, composite or wood
deck construction, roof decks, sub-floor, sidewall sheathing, anywhere screws are being used and you
want to save time installing and still do a quality job etc. (see www.911-nails.com)
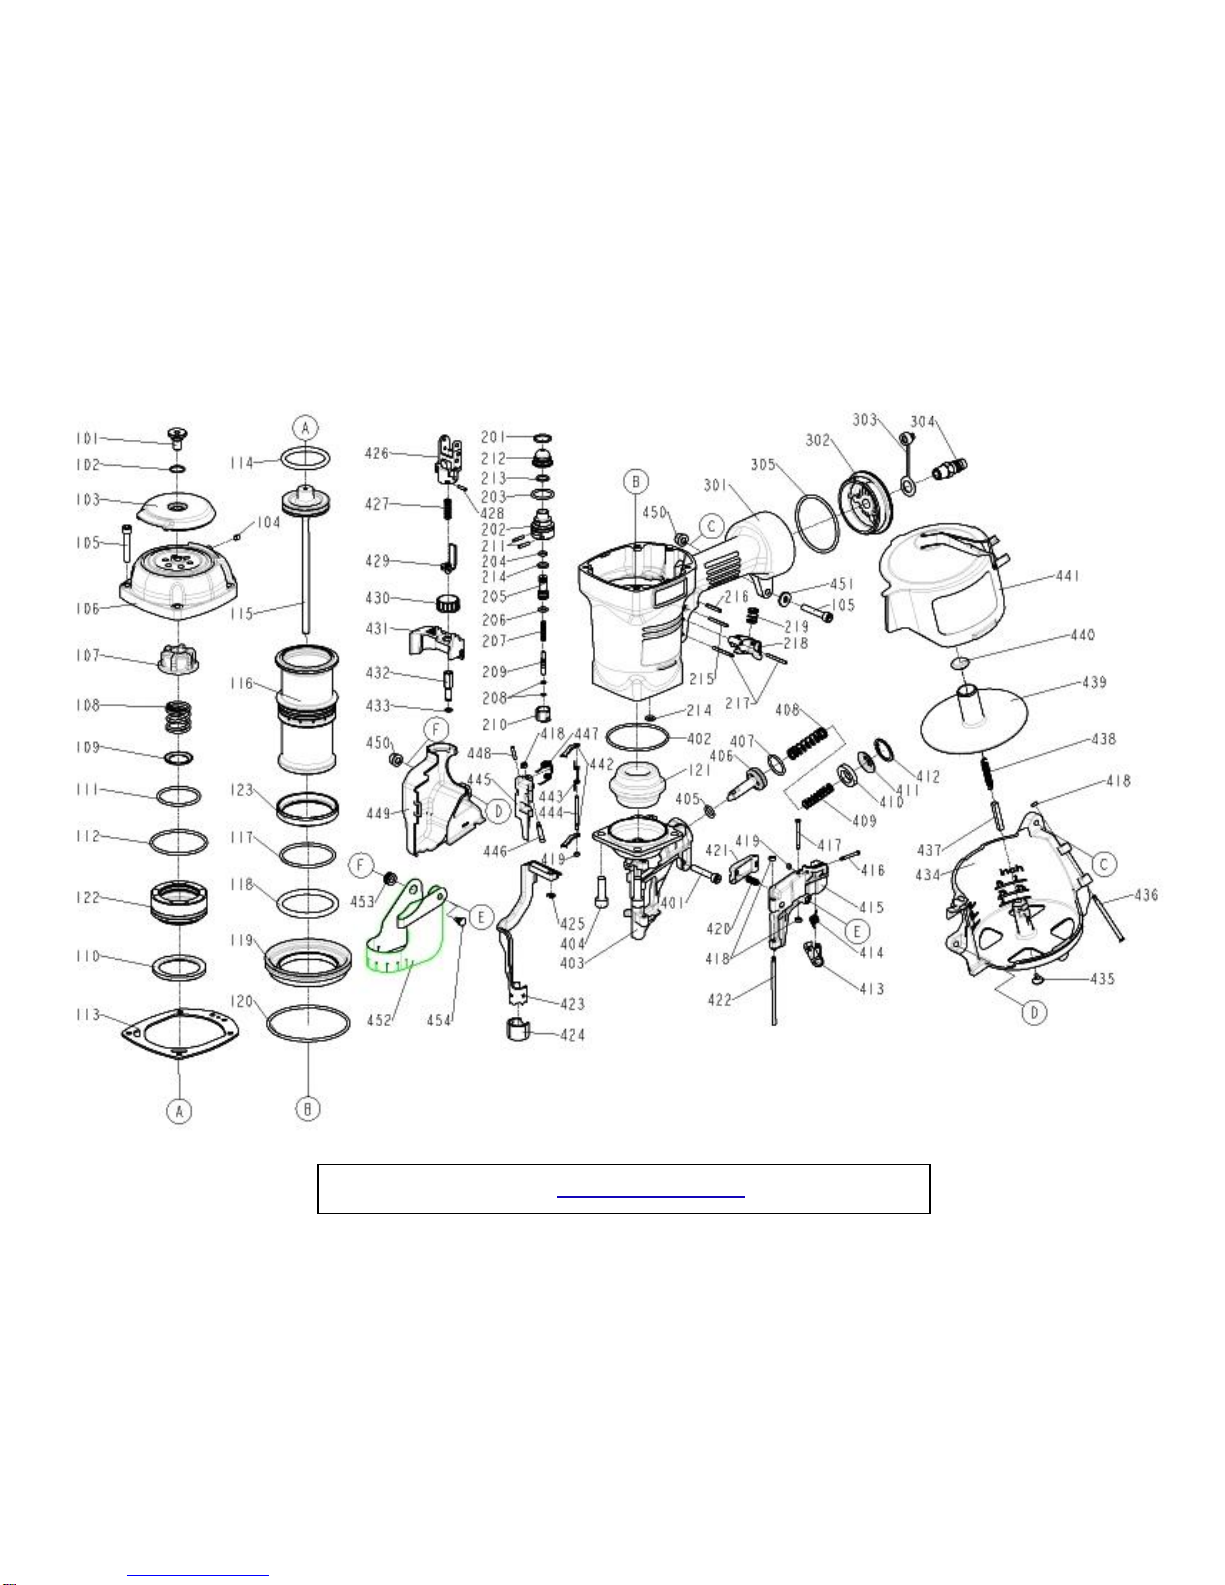
ONLY USE PARTS AND ACCESSORIES RECOMMENDED BY THE MANUFACTURER.
Parts & Service Contact: http://elder-hayesinc.com or call 1-800-769-0775