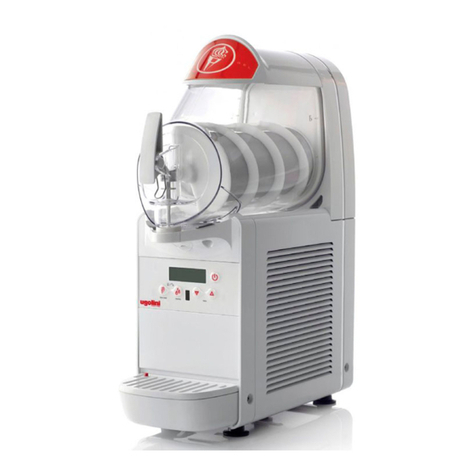
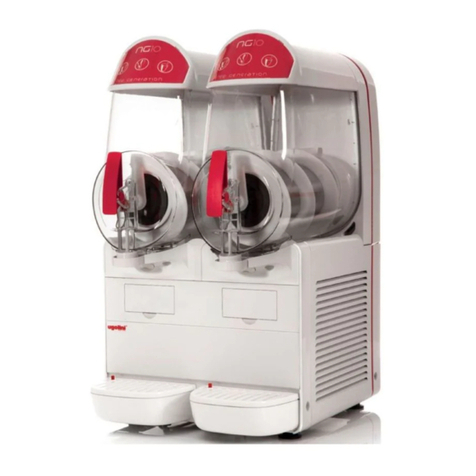
Ugolini minigel User manual

MANUALE D’ISTRUZIONI
OPERATOR’S MANUAL
MiniGEL

2
MINIGEL
DICHIARAZIONE DI CONFORMITÀ CE
Noi Ugolini spa, via dei Pioppi, 33 20090 Opera Milano ITALY dichiariamo, sotto la nostra responsabilità, che l’apparecchio DISTRIBUTORE DI
BEVANDE FREDDE - Marca: UGOLINI S.p.A. - Fabbricante: UGOLINI S.p.A. - Modelli: MiniGEL 1 - 230V 50Hz sono conformi alle seguenti
Normative:
In ottemperanza alle Direttive 2006/42/CE, 2006/95/CE, 2004/108/CE.
EC DECLARATION OF CONFORMITY
We Ugolini spa, via dei Pioppi, 33 20090 Opera Milano ITALY declare, under our responsibility, that the apparatus COLD DRINK DISPENSER -
Trademark: UGOLINI S.p.A. - Manufacturer: UGOLINI S.p.A. - Model: MiniGEL 1 - 230V 50Hz are in conformity with the following Standards:
Following the provisions of the Directives 2006/42/CE, 2006/95/CE, 2004/108/CE.
DECLARATION DE CONFORMITE CE
Nous Ugolini spa, via dei Pioppi, 33 20090 Opera Milano ITALY déclarons, sous notre responsabilité, que les appareil DISTRIBUTEUR REFROI-
DISSEUR DE BOISSONS - Marque: UGOLINI S.p.A. - Constructeur: UGOLINI S.p.A. - Modèle: MiniGEL 1 - 230V 50Hz sont conformes aux Normes
suivantes:
Conformément aux Directives 2006/42/CE, 2006/95/CE, 2004/108/CE.
EG-ÜBEREINSTIMMUNGSERKLÄRUNG
Wir Ugolini spa, via dei Pioppi, 33 20090 Opera Milano ITALY erklären auf eigene Verantwortung, daß die Gerät KALTGETRÄNKE DISPENSER -
Marke: UGOLINI S.p.A. - Hersteller: UGOLINI S.p.A. - Modell : MiniGEL 1 - 230V 50Hz mit den folgenden Normen übereinstimmen:
Gemäß den EWG-Richtlinien 2006/42/CE, 2006/95/CE, 2004/108/CE.
DECLARACIÓN DE CONFORMIDAD CE
Nosotros Ugolini spa, via dei Pioppi, 33 20090 Opera Milano ITALY declararamos, bajo nuestra responsabilidad, que los aparato DISTRIBUIDOR
DE BEBIDAS FRIAS - Marca: UGOLINI S.p.A. - Fabricante: UGOLINI S.p.A. - Modelo: MiniGEL 1 - 230V 50Hz responden con las siguientes
Normativas:
En cumplimiento de las Normas 2006/42/CE, 2006/95/CE, 2004/108/CE.
-
-
-
-
-
EN ISO 12100-1 (2003)
EN ISO 12100-2 (2003)
EN60335-1(2002) + A1/A11(2004) + A12 (2006) + A2 (2006)
EN60335-1/A13(2008) : 2007-11
EN60335-2-24 (2003) + A11 (2004) + A1 (2005) + A2 (2007)
-
-
-
-
EN60335-2-75 (2003) + A1 (2005) + A11 (2006)
EN62233:2008-11; EN62233:2009-04;
EN 55014 -1(2006); EN 55014-2(1997)+ A1(2001)
EN 61000-3-2(2006); EN 61000-3-3(1995) +A1(2001)+A2(2005)
-
-
-
-
-
EN ISO 12100-1 (2003)
EN ISO 12100-2 (2003)
EN60335-1(2002) + A1/A11(2004) + A12 (2006) + A2 (2006)
EN60335-1/A13(2008) : 2007-11
EN60335-2-24 (2003) + A11 (2004) + A1 (2005) + A2 (2007)
-
-
-
-
EN60335-2-75 (2003) + A1 (2005) + A11 (2006)
EN62233:2008-11; EN62233:2009-04;
EN 55014 -1(2006); EN 55014-2(1997)+ A1(2001)
EN 61000-3-2(2006); EN 61000-3-3(1995) +A1(2001)+A2(2005)
vedere targa dati sulla macchina
see data plate on the machine
voir la plaque sur l’appareil
siehe Dispenser Typenschild
ver la placa del distribuidor
Ugolini spa
L’Amministratore Delegato
(luogo ed anno di prod. - place and mfr. year - lieu et an de production
Produktionsort und Produktionsjahr - lugar y año de producción)

3
Questo apparecchio è coperto da uno o più dei seguenti brevetti e/o altre domande di brevetto depositate:
This dispenser is manufactured under one or more of the following U.S.patents and/or other pending patents:
Cet appareil est couvert par un ou plusieurs des brevets suivants et/ou autres demandes de brevet déposées:
Dieses Gerät ist durch eines oder mehrere der folgenden Patente und/oder andere eingetragene Patentanmeldungen geschützt:
Este aparato está cubierto por una o varias de las siguientes patentes y/o otras solicitudes de patente ya registradas:
U.S.A. 4,900,158 - U.S.A. 4,696,417 - U.S.A. 5,713,214 - U.S.A. 5,906,105
4
12
1. L'apparecchio è garantito per un periodo di dodici mesi dalla data di acquisto.
Tale data viene certificata dalla ricevuta e/o fattura fiscale e/o da un documento at-
testante l'avvenuta consegna dell'apparecchio all'acquirente.
2. Per garanzia si intende la sostituzione o riparazione gratuita delle parti compo-
nenti l'apparecchio riconosciute difettose all'origine, per vizi di fabbricazione a con-
dizione che: A- il difetto di funzionamento dell'apparecchio sia stato -a pena di
decadenza- denunziato per iscritto dall'acquirente al produttore entro otto giorni dal-
la scoperta del difetto stesso; B-ove l'acquirente abbia diritto alla garanzia, sarà do-
vere di Ugolini s.p.a. provvedere -a sua insindacabile discrezione- alla sostituzione
integrale dell'apparecchio, ovvero alla sostituzione o riparazione delle sole parti di
esso riconosciute difettose all'origine, per vizi di fabbricazione.
3. Sono escluse dalla garanzia le parti dell'apparecchio aventi funzione estetica e/o
ornamentale, nonché le parti che dovessero risultare difettose a causa -o per effet-
to- di circostanze non connesse a vizi di fabbricazione ovvero a negligenza, imperi-
zia o trascuratezza nell'uso, installazione errata o, comunque, difforme rispetto le
istruzioni fornite dal produttore, manutenzione errata o eseguita da personale non
autorizzato da Ugolini s.p.a., o, comunque, effettuata in modo difforme rispetto alle
istruzioni fornite dal produttore, (ivi) trasporto eseguito in modo inidoneo o, comun-
que, con modalità differenti rispetto quelle indicate dal produttore; sono altresì
esclusi dalle prestazioni in garanzia gli interventi tecnici inerenti l'installazione e l'al-
lacciamento agli impianti di alimentazione elettrica o idrica.
4. E' esclusa dalla garanzia la responsabilità del produttore per l'ipotesi in cui l'ap-
parecchio determini la distruzione o il deterioramento di una cosa diversa dall'appa-
recchio stesso; è, inoltre, esclusa la responsabilità del produttore per eventuali
danni che possano, direttamente o indirettamente, derivare a persone e/o cose per
effetto della -e/o in correlazione alla- mancata o inesatta osservanza di tutte le pre-
scrizioni indicate nel manuale di istruzioni allegato all'apparecchio; nelle ipotesi in
cui il produttore sia tenuto a rispondere dei danni subiti dall'acquirente, il risarcimen-
to non potrà in ogni caso comportare, a carico di Ugolini s.p.a., un esborso superiore
al prezzo versato dall'acquirente per l'acquisto del prodotto.
5. Sono escluse dalla garanzia anche tutte le spese di trasporto.
6. L'intervento di riparazione dell'apparecchio deve essere effettuato presso Ugolini
s.p.a., ovvero presso uno dei laboratori autorizzati dalla medesima; le spese di tra-
sporto, ed i rischi ad esso connessi, sono interamente a carico dell'acquirente; ove
l'intervento di riparazione sia effettuato a domicilio, l'acquirente sarà tenuto a corri-
spondere il diritto fisso di chiamata in vigore presso il produttore alla data dell'inter-
vento.
7. Trascorsi dodici mesi dall'acquisto, decade il diritto di garanzia e l'assistenza ver-
rà esplicata addebitando, oltre alle spese di manodopera, anche il costo delle parti
sostituite e quelle di trasporto.
8. Sono esclusi la sostituzione dell'apparecchio ed il prolungamento della garanzia
a seguito di intervenuto guasto.
9. E' escluso dalla garanzia l'apparecchio la cui targa di identificazione risulti mano-
messa, asportata o comunque in condizioni tali da non rendere possibile l'identifica-
zione certa dell'apparecchio stesso.
10. Tale garanzia è valida solo nel territorio in cui l'acquirente ha la propria sede le-
gale alla data dell'acquisto dell'apparecchio.
GARANZIA
Ai sensi dell’art.13 del Decreto Legislativo 25 Luglio 2005, n.151 “Attuazione del-
le Direttive 2002/95/CE, 2002/96/CE e 2003/108/CE, relative alla riduzione
dell’uso di sostanze pericolose nelle apparecchiature elettriche ed elettroniche,
nonchè allo smaltimento dei rifiuti”.
Il simbolo del cassonetto barrato riportato sull’apparecchiatura o sulla sua confe-
zione indica che il prodotto alla fine della propria vita utile deve essere raccolto
separatamente dagli altri rifiuti.
La raccolta differenziata della presente apparecchiatura giunta a fine vita è organizzata e
gestita dal produttore. L’utente che vorrà disfarsi della presente apparecchiatura dovrà
quindi contattare il produttore e seguire il sistema che questo ha adottato per consentire
la raccolta separata dell’apparecchiatura giunta a fine vita.
L’adeguata raccolta differenziata per l’avvio successivo dell’apparecchiatura dismessa al
riciclaggio, al trattamento e allo smaltimento ambientalmente compatibile contribuisce ad
evitare possibili effetti negativi sull’ambiente e sulla salute e favorisce il reimpiego e/o rici-
clo dei materiali di cui è composta l’apparecchiatura.
Lo smaltimento abusivo del prodotto da parte del detentore comporta l’applicazione delle
sanzioni amministrative previste dalla normativa vigente.
Pursuant to the European Directives 2002/95/EC, 2002/96/EC and 2003/108/EC,
on restricting the use of hazardous substances in electric and electronic equip-
ment and on the disposal of waste material.
The crossed out wheelie bin symbol applied to equipment or packaging means
that the product should be collected separately from other types of waste at the
end of its useful life.
The separate collection of equipment that has reached the end of its life cycle is organised
and managed by the manufacturer. A user that wishes to dispose of this product should
therefore contact the manufacturer and follow the instructions given with respect to the se-
parate collection of obsolete equipment.
Correct separate collection and the subsequent recycling, treatment and environmentally
compatible disposal of discarded equipment is of aid in avoiding possible negative effects
for the environment and people's health and facilitates the re-use or recycling of the mate-
rials of which the equipment is made.
Illegal disposal of this product on part of the owner will give way to the application of admi-
nistrative fines as provided by current laws.
Conformément aux Directives européennes 2002/95/CE, 2002/96/CE et 2003/
108/CE, relatives à la réduction de l'utilisation de substances dangereuses dans
les appareils électriques et électroniques, ainsi qu'à l'élimination conforme et au
recyclage des déchets.
Le symbole de la poubelle barrée indiqué sur l'appareil ou sur sa boîte indique
qu'à la fin de sa vie utile ce produit doit être éliminé séparément des autres dé-
chets et conformément aux lois en vigueur en la matière.
La collecte différenciée de cet appareil à la fin de sa vie utile, est organisée et gérée par
le producteur. Par conséquent, lorsque l'utilisateur souhaitera jeter cet appareil il devra
contacter le producteur et respecter le système que ce dernier aura mis en place pour réa-
liser la collecte différenciée des appareils arrivés à la fin de leur vie utile.
La collecte différenciée correctement effectuée, suivie de l'envoi des appareils éliminés au
recyclage, avec traitement et élimination des déchets dans le plus strict respect de l'envi-
ronnement, est une procédure fondamentale qui contribue à éviter les possibles effets né-
gatifs sur notre environnement et sur notre santé, et qui favorise la réutilisation et/ou le
recyclage des matériaux qui composent ces appareils.
L'élimination abusive de ce produit par son propriétaire comporte l'application de sanctions
administratives sévères, prévues par la réglementation en vigueur.
Laut EG-Richtlinien 2002/95/EG, 2002/96/EG und 2003/108/EG zur Beschrän-
kung der Verwendung gefährlicher Stoffe in elektronischen Geräten sowie zur
Abfallentsorgung.
Das Symbol des durchgestrichenen Abfallcontainers auf der Packung gibt an,
dass das Produkt zum Ende seiner Lebensdauer getrennt von den anderen
Abfällen entsorgt werden muss.
Die getrennte Abfallsammlung dieses Geräts am Ende seiner Lebensdauer wird vom Her-
steller organisiert und verwaltet. Der Nutzer, der das Gerät entsorgen möchte, muss sich
daher mit dem Hersteller in Verbindung setzen und das System befolgen, das dieser an-
gewendet hat, um das Altgerät der getrennten Abfallsammlung zuzuführen.
Eine angemessene Mülltrennung, die das Altgerät zur Wiederverwertung und umweltver-
träglichen Entsorgung führt, trägt dazu bei, mögliche negative Auswirkungen auf die Um-
welt und die Gesundheit zu vermeiden und fördert die Wiederverwendung bzw. das
Recycling der Materialien, aus denen das Gerät besteht.
Die unerlaubte Entsorgung des Produkts durch den Benutzer zieht die Anwendung der
von der geltenden Richtlinie vorgesehenen Ordnungsstrafen nach sich.
En virtud de las Directivas europeas 2002/95/CE, 2002/96/CE y 2003/108/ CE,
relativas a la reducción del uso de sustancias peligrosas en los aparatos eléctri-
cos y electrónicos, así como a la eliminación de residuos.
El símbolo del contenedor tachado que aparece impreso sobre el aparato o sobre
su embalaje indica que al finalizar la vida útil del producto éste nunca debe de-
positarse junto al resto de residuos.
La recogida selectiva de este equipo cuando llegue al final de su vida útil la gestionará y
organizará el fabricante. El usuario que desee deshacerse de este equipo deberá ponerse
en contacto con el fabricante y seguir el sistema que éste haya adoptado para permitir la
recogida selectiva del aparato que haya llegado al final de su vida útil.
La recogida selectiva adecuada para el posterior reciclaje, tratamiento y eliminación del
equipo inservible, compatible con el medio ambiente, contribuye a evitar posibles efectos
negativos para el medio ambiente y para la salud y favorece la reutilización y/o el reciclaje
de los materiales de los que está compuesto el equipo.
La eliminación inadecuada del producto por parte de su propietario comportará la aplica-
ción de las sanciones administrativas previstas por la normativa vigente.

4
MINIGEL
1 CARATTERISTICHE TECNICHE
E’ riservato il diritto di modifica del presente manuale senza pre-
avviso.
2 INTRODUZIONE
E’ necessario leggere attentamente questo libretto di istruzioni
allo scopo di conoscere tutte le caratteristiche del distributore.
Come tutti i prodotti meccanici, anche questo distributore richie-
de pulizia e cura. Il suo buon funzionamento inoltre può essere
compromesso da eventuali errori compiuti dall'operatore duran-
te le fasi di smontaggio e pulizia. Per questo motivo è importante
che le procedure di smontaggio, lavaggio, sanitizzazione e ri-
montaggio, essendo operazioni giornaliere, siano conosciute
senza possibilità di errore a chi utilizza il distributore.
3 INSTALLAZIONE
1Estrarre il distributore dall’imballo, che è consigliabile con-
servare per future necessità.
2Controllare che il distributore non abbia subito danni da tra-
sporto. In caso contrario, provvedere immediatamente ad effet-
tuare il reclamo presso il vettore.
3Appoggiare il distributore su un banco in grado di soste-
nerne il peso, anche a carico completo, tenendo presente
quanto detto all’avvertimento IMPORTANTE del prece-
dente punto 1.
4Lasciare uno spazio libero di almeno 15 cm attorno a tutto il
distributore per non ostacolare il flusso d’aria di raffredda-
mento.
5Controllare la stabilità dell’apparecchio regolando eventual-
mente i piedini in altezza. Nel caso in cui con il distributore
venga fornita una serie di piedini alti (100 mm circa), questa
deve essere sostituita a quella originale.
6Prima di collegare elettricamente il distributore controllare
che la tensione di rete sia quella corretta indicata in targa. Col-
legare il distributore a una rete monofase, servendosi di una
presa completa di messa a terra secondo quanto stabilito dalle
norme vigenti. Se il distributore è fornito senza spina, collegare
al cavo una spina conforme alle norme vigenti nel vostro
paese, provvista di spinotto o contatti di terra ed adatta a cor-
renti di almeno 10 A 250 V (per aree aventi tensioni di 220-
230 V 50-60 Hz) e 20 A 250 V (per aree aventi tensioni di 100-
115 V 50-60 Hz). Nel caso si volesse realizzare un collega-
mento fisso alla rete, collegare il cavo ad un interruttore a
parete di tipo bipolare con apertura dei contatti di almeno 3
mm. Non usare prolunghe per collegare elettricamente l'appa-
recchio.
7Il distributore non esce prelavato e sanitizzato dalla fab-
brica. Prima dell’uso esso deve essere smontato, lavato e sani-
tizzato seguendo quanto previsto nelle presenti istruzioni al
capitolo 5.3 PULIZIA.
4 PER UN FUNZIONAMENTO SICURO E
CORRETTO
1Non usare il distributore prima di aver letto il presente
libretto d’istruzioni.
2Non usare il distributore se non correttamente collegato a
terra.
3Non usare prolunghe per collegare elettricamente il distri-
butore.
4Non mettere in funzione il distributore se i pannelli non
sono al loro posto e bloccati con viti.
5Non ostacolare il flusso d’aria di raffreddamento; lasciare
uno spazio libero di almeno 15 cm attorno a tutto il distributore.
6Non introdurre dita o oggetti nelle fessure dei pannelli e
nell’apertura del rubinetto.
7Non smontare la vasca, non rimuovere mescolatori o pan-
nelli per pulizia o manutenzione senza assicurarsi che il distri-
Contenitori trasparenti smontabili n 1 2 3
Capacità singolo contenitore, circa l 6 6 6
Dimensioni:
larghezza cm 20 39 59
profondità cm 48 48 48
altezza cm 62 62 62
Peso netto, circa kg 25 45 61
Peso lordo, circa kg 27 48 64
Motocompressore ermetico
Condensatore a ventilazione forzata
Salvamotore
Livello di rumorosità inferiore a 70 dB (A)
IMPORTANTE
Caratteristiche elettriche: leggere i dati riportati sulla
targa di ogni singolo distributore; questa è situata nella
parte inferiore del pannello frontale, dietro il cassetto
raccogligocce di destra. I numeri di matricola degli appa-
recchi (preceduti dal simbolo #) sono riportati sul telaio
al di sotto del pannello posteriore. I dati riportati sulla
targa sono sempre quelli a cui fare riferimento.
IMPORTANTE
Nelle operazioni di trasporto o sollevamento, il distribu-
tore non deve mai essere afferrato per i contenitori tra-
sparenti o i cilindri evaporatori. Il fabbricante non
risponde dei danni provocati dalle suddette errate mano-
vre.
ATTENZIONE
Assicurarsi che l’apparecchio sia correttamente colle-
gato a terra; in caso contrario è possibile causare shock
elettrici alle persone o danneggiare il distributore.
IMPORTANTE
Posizionare l’apparecchio in maniera tale che la spina del
cavo di alimentazione sia facilmente accessibile.
IMPORTANTE
Questo apparecchio non è fatto per essere utilizzato da
bambini o persone con ridotte capacità mentali o senso-
riali, o con mancanza di esperienza o sufficiente cono-
scenza a meno che venga predisposta una supervisione
o istruzione sull'uso dell'apparecchio da una persone
responsabile della loro sicurezza.
I bambini devono essere controllati per evitare che gio-
chino con l'apparecchio.
MINIGEL 1
MINIGEL 2
MINIGEL 3

5
butore sia scollegato elettricamente.
5 ISTRUZIONI PER L’USO
Per rimuovere il coperchio del contenitore, premere il tasto su-
periore e far scorrere il coperchio stesso verso la parte anteriore
del contenitore.
Nel caso sia presente la serratura per la chiusura di sicurezza
del coperchio, ruotare la chiave in senso antiorario per sblocca-
re il tasto di apertura (vedere figura 2).
1Lavare e sanitizzare il distributore prima di utilizzarlo
seguendo quanto previsto nelle presenti istruzioni al capitolo
5.3 LAVAGGIO.
2Riempire i contenitori con il prodotto desiderato, tenendo
conto che questo, durante la lavorazione, aumenterà di
volume. Per questo motivo i contenitori non devono essere
riempiti fino alla massima capacità.
Per la preparazione di granite considerare un aumento di volu-
me pari a circa il 10%.
Per la preparazione di gelati considerare un aumento di volume
pari a circa il 30%.
3Nel caso si utilizzino basi liquide o in polvere, apposita-
mente preparate per gelati o granite, seguire attentamente le
istruzioni del produttore.
4Nel caso si utilizzino prodotti naturali per la preparazione di
granite (per esempio succo di limone, arancio o caffè), scio-
gliere 150-200 grammi di zucchero in ogni litro di prodotto.
5Nel caso si utilizzino basi liofilizzate da diluire con latte o
acqua, preparare il prodotto in un recipiente separato e ver-
sarlo nei contenitori della macchina solo dopo essersi assicu-
rati che questo sia omogeneo e che la polvere sia ben
stemperata.
6Agire sui comandi (vedere capitolo 5.1 DESCRIZIONE DEI
COMANDI).
7Il distributore deve funzionare ininterrottamente: il sistema
di raffreddamento di ogni contenitore si arresterà automatica-
mente quando il prodotto sarà pronto per la distribuzione man-
tenendo la densità impostata. I dispositivi di mescolazione
continueranno a funzionare.
5. 1 DESCRIZIONE DEI COMANDI
Il distributore è provvisto di un interruttore generale, di una ta-
stiera e di un display per la visualizzazione della temperatura del
prodotto. Tramite la tastiera è possibile selezionare la modalità
di funzionamento del distributore. Sono disponibili le seguenti
modalità di funzionamento:
PRODUZIONE GELATO O GRANITA: in questa modalità il di-
stributore prepara gelato o granita in base al prodotto presente
nel contenitore.
CONSERVAZIONE PRODOTTO: in questa modalità il distribu-
tore mantiene il prodotto liquido ad una temperatura idonea alla
sua conservazione. Questa funzione risulta utile nelle ore not-
turne per mantenere inalterata la qualità del prodotto e contene-
re il consumo di energia elettrica.
LAVAGGIO: in questa modalità il mescolatore ruota veloce-
mente ed il raffreddamento non è abilitato. Questa funzione ri-
sulta utile durante il lavaggio e la sanitizzazione della macchina
per evitare che la soluzione sanitizzante venga raffreddata.
INTERRUTTORE GENERALE
L’interruttore generale è collocato sotto il distributore stesso, sul
lato sinistro. La sua funzione è la seguente:
TASTIERA COMANDI
figura 1
Le funzioni dei tasti presenti sulla tastiera sono le seguenti:
PER IL FUNZIONAMENTO DEL DISTRIBUTORE
Mettere l’interruttore generale in posizione I. La spia rossa sarà
accesa.
ATTENZIONE
Se il cavo di alimentazione è danneggiato, esso deve
essere sostituito dal costruttore o dal suo servizio assi-
stenza tecnica o, comunque, da una persona con quali-
fica similare, in modo da prevenire ogni rischio.
IMPORTANTE
Quando il coperchio non è installato, tanto il mescolatore
quanto il raffreddamento non funzionano e sul display
viene visualizzato il messaggio “COV”.
IMPORTANTE
In ogni caso, ottenuta la miscela, il suo grado Brix (con-
tenuto percentuale di zucchero) deve essere superiore a
13.
Non utilizzare mai la macchina con sola acqua.
IMPORTANTE
Utilizzare il distributore solamente con prodotti alimen-
tari.
Posizione 0 :il distributore è spento.
Posizione I :il distributore è abilitato al funzionamento
ma si trova in modalità Stand-by. La sola
spia risulta accesa.
Tasto A Se premuto per 2 secondi permette di passare dalla
modalità Stand-by alla modalità di funzionamento e
viceversa. In modalità di funzionamento il mescola-
tore ruota ed il raffreddamento è abilitato.
Se premuto brevemente quando la macchina è in
funzione permette di accendere e spegnere le luci
del distributore, se presenti.
Tasto B se premuto attiva la funzione PRODUZIONE GE-
LATO O GRANITA. Tale modalità di funzionamento
è confermata dall’accensione della spia H, lampeg-
giante o continua.
Tasto C se premuto attiva la funzione CONSERVAZIONE.
Tale modalità di funzionamento è confermata
dall’accensione della spia G, lampeggiante o conti-
nua.
Tasto D se premuto in modalità PRODUZIONE GELATO O
GRANITA incrementa la densità del prodotto.
Tasto E se premuto in modalità PRODUZIONE GELATO O
GRANITA decrementa la densità del prodotto.

6
MINIGEL
Tenere premuto il tasto A fino a quando il distributore non si av-
via.
Selezionare tramite i tasti B o C la modalità di funzionamento
desiderata:
FUNZIONI AGGIUNTIVE
REGOLAZIONE DELLA DENSITÀ
Durante il funzionamento in modalità PREPARAZIONE GELA-
TO O GRANITA premendo i tasti D ed E è possibilie regolare la
densità del prodotto, (valore minimo 1, valore massimo 10). La
regolazione eseguita in fabbrica è al valore 6, idoneo alla prepa-
razione di gelato. Per la preparazione dei vari prodotti fare rife-
rimento ai seguenti valori:
Granita: regolare la densità tra 1 e 3.
Sorbetto: regolare la densità tra 2 e 5.
Gelato: regolare la dentità tra 5 e 7.
MODALITÀ LAVAGGIO
Quando il distributore si trova in modalità CONSERVAZIONE,
tenendo premuto per tre secondi il tasto C viene attivata la mo-
dalità LAVAGGIO, durante la quale il display visualizza “ --.-- “.
In questa modalità il mescolatore ruota ma il raffreddamento
non è abilitato.
Utilizzare questa funzione durante il lavaggio e la sanitizzazione
della macchina per evitare che la soluzione sanitizzante venga
raffreddata.
Premendo un tasto qualsiasi il distributore esce dalla modalità
LAVAGGIO e torna alla modalità di funzionamento CONSER-
VAZIONE.
ALLARME TEMPERATURA
La visualizzazione della temperatura sul display è normalmente
fissa. Qualora lampeggi, significa che il prodotto è rimasto per
un certo tempo al di sopra della temperatura massima di conser-
vazione ed è quindi opportuno verificare l’eventuale deteriora-
mento del prodotto stesso.
Per azzerare l’allarme e tornare alla visualizzazione fissa è ne-
cessario tenere premuto per tre secondi il tasto B.
AVVISO DI PRODOTTO PRONTO
Durante la fase di preparazione del prodotto la spia H lampeg-
gia. Quando il prodotto è pronto la spia H cessa di lampeggiare.
BLOCCO TASTIERA
E’ possibile bloccare la tastiera al fine di impedire l’accesso ai
comandi del distributore. Per fare questo è necessario tenere
premuti per due secondi contemporaneamente i tasti B e C.
L’avvenuto blocco viene segnalato da un lampeggio del display.
Tutti i comandi sono a questo punto bloccati.
Per sbloccare la tastiera è necessario tenere premuti nuova-
mente i tasti B e C per tre secondi. L’avvenuto sblocco viene se-
gnalato da un lampeggio del display.
PROTEZIONE CONTRO DENSITA’ ECCESSIVA
In caso di densità eccessiva del prodotto, al fine di evitare danni
al distributore, tanto il raffreddamento quanto il mescolatore
vengono arrestati per tre minuti e sul display viene visualizzato
uno dei seguenti messaggi: “AL03”, “AL06” oppure “AL08”.
Dopo tre minuti tanto la mescolazione quanto il raffreddamento
vengono riavviati e l’impostazione precedente della densità vie-
ne diminuita di un livello.
Per azzerare il messaggio di allarme e tornare alla visualizzazio-
ne fissa è necessario tenere premuto per tre secondi il tasto B.
5. 2 SUGGERIMENTI
1Il tempo necessario per ottenere la refrigerazione del pro-
dotto varia a seconda di diversi fattori quali ad esempio la tem-
peratura ambiente, la temperatura iniziale del prodotto, il suo
contenuto di zucchero (grado Brix) e di grassi e la regolazione
della densità.
2Rabboccando i contenitori con prodotto già preraffreddato
si aumenta ulteriormente l’efficienza del distributore.
3Per diminuire ulteriormente i tempi di ripristino ed aumen-
tare quindi l’autonomia del distributore, rabboccare le vasche
quando il livello del prodotto è sceso a metà evaporatore.
4Per la buona conservazione del prodotto, il distributore
deve funzionare anche durante la notte, quantomeno in posi-
zione CONSERVAZIONE PRODOTTO.
5Il funzionamento notturno in posizione CONSERVAZIONE
PRODOTTO elimina inoltre la possibile formazione di ghiaccio
(per condensazione dell’umidità atmosferica) all’esterno dei
contenitori.
6Non spegnere mai il distributore quando è presente pro-
dotto nei contenitori. Se non viene raffreddato il prodotto può
deteriorarsi. Inoltre, se non viene mescolato, esso può aggre-
garsi e formare dei blocchi di ghiaccio. Facendo ripartire il
mescolatore in queste condizioni (senza attendere che il ghiac-
cio sia sciolto), il distributore potrebbe danneggiarsi.
7Ogni distributore di questo genere deve emettere calore. Se
però tale emissione dovesse sembrare eccessiva, controllare
che nessuna fonte di calore venga a trovarsi nei pressi del
distributore stesso e, in particolare, in prossimità dei pannelli
grigliati. Assicurarsi inoltre che il flusso d’aria non venga osta-
colato dalla vicinanza di pareti, scatole o altro. Lasciare almeno
15 cm di spazio libero intorno al distributore. Verificare infine
che il filtro posto al di sotto del pannello posteriore risulti pulito.
5. 3 PULIZIA
1Pulizia e lavaggio sono fondamentali per garantire la per-
fetta conservazione del gusto del prodotto e la massima effi-
cienza del vostro distributore. Le procedure descritte nel
seguito devono essere considerate di carattere generale e pos-
sono variare per effetto della regolamentazione sanitaria
vigente.
2Prima dello smontaggio per il lavaggio, il distributore deve
essere svuotato del prodotto. Procedere come segue:
5. 3. 1 SMONTAGGIO
1Per rimuovere il coperchio del contenitore, premere il tasto
superiore e far scorrere il coperchio stesso verso la parte ante-
riore del contenitore.
Nel caso sia presente la serratura per la chiusura di sicurezza
Tasto B se si desidera preparare GELATO O GRANITA.
Tasto C se si desidera solamente conservare il prodotto.
IMPORTANTE
La temperatura di conservazione del prodotto è regolata
in fabbrica a 4°C.
-tramite le tastiere selezionare la modalità di funzionamento
PULIZIA
-se necessario attendere che il prodotto diventi liquido
-posizionare un recipiente sotto ogni rubinetto e svuotare i
contenitori
-riempire i contenitori con acqua e lasciar funzionare il distri-
butore in modalità PULIZIA per alcuni minuti. Svuotare
quindi i contenitori.
-tenere premuto il tasto A per spegnere il distributore
-spegnere l’interruttore generale
ATTENZIONE
Prima di procedere allo smontaggio di qualsiasi compo-
nente disconnettere sempre elettricamente l’apparecchio
togliendo la spina dalla presa.

7
del coperchio, ruotare la chiave in senso antiorario per sbloc-
care il tasto di apertura (vedere figura 2).
figura 2
2Per smontare il contenitore è necessario spingere verso
l’alto l’apposita leva (vedere figura 3) e quindi sfilare il conteni-
tore stesso (vedere figura 4).
figura 3
figura 4
3Rimuovere il mescolatore sfilandolo dal cilindro evapora-
tore. Quindi rimuovere il giunto esagonale (vedere figura 5).
figura 5
4Togliere la guarnizione dalla apposita sede (vedere figura

8
MINIGEL
6).
figura 6
5Smontare il rubinetto seguendo la sequenza indicata
(vedere figura 7).
figura 7
6Rimuovere il cassetto raccogligocce e svuotarlo.
7Rimuovere dal contenitore il restrittore di flusso (vedere
figura 8).
figura 8
5. 3. 2 LAVAGGIO
1Preparare in una bacinella circa quattro litri di acqua calda
(45-60°C) e detersivo specifico rispettando con attenzione le
prescrizioni del fabbricante; una soluzione troppo concentrata
può infatti causare danni alle parti da lavare, mentre una troppo
diluita può non detergere a sufficienza. Non usare detersivi
abrasivi.
2Usare una spazzola adatta e lavare accuratamente con la
soluzione detergente tutte le parti a contatto con la bevanda.
3Lavare i cilindri evaporatori usando una spazzola con setole
IMPORTANTE
Non lavare alcun componente della macchina in lavasto-
viglie.
ATTENZIONE
Prima di qualsiasi intervento di pulizia disconnettere
sempre elettricamente il distributore estraendo la spina
dalla presa o spegnendo l'interruttore esterno a parete.
IMPORTANTE
Al fine di prevenire danni al distributore utilizzare solo
detersivi compatibili con le parti in plastica.
ATTENZIONE
Durante il lavaggio del distributore non usare eccessiva
quantità di acqua in vicinanza dei componenti elettrici; in
caso contrario è possibile causare shock elettrici o dan-
neggiare il distributore.

9
morbide.
4Risciacquare tutte le parti lavate, con acqua corrente.
5. 3. 3 SANITIZZAZIONE DEL DISTRIBUTORE
SMONTATO
La sanitizzazione deve essere eseguita immediatamente
prima di mettere in funzione il distributore; evitare che que-
sto rimanga inattivo per lungo tempo dopo la sanitizzazio-
ne.
1Prima di iniziare le procedure descritte nel seguito lavarsi le
mani con un sapone antibatterico.
2Preparare in una bacinella circa otto litri di soluzione di
acqua calda (45-60°C) e prodotto sanitizzante approvato dalle
autorità del vostro paese rispettando le specifiche del produt-
tore. In mancanza di un prodotto sanitizzante specifico, prepa-
rare una soluzione di acqua e ipoclorito di sodio (varechina) in
proporzione di 1 cucchiaio ogni 2 litri di acqua.
3Immergere nella soluzione tutte le parti da sanitizzare per il
tempo indicato dal fabbricante del prodotto.
4Fare asciugare all'aria, su una superficie pulita, le parti
sanitizzate.
5Asciugare le parti esterne del distributore senza usare
panni abrasivi.
5. 3. 4 RIMONTAGGIO
1Inserire il cassetto raccogligocce nella sua sede.
2Lubrificare il pistone rubinetto, il giunto esagonale ed il
mescolatore nei punti indicati in figura 9 utilizzando esclusiva-
mente il grasso in dotazione con la macchina o altro grasso
per uso alimentare.
figura 9
3Rimontare il rubinetto sul contenitore con sequenza inversa
rispetto a quella di figura 8.
4Rimontare la guarnizione del contenitore nella apposita
sede.
NOTA: la tesa di maggior diametro deve essere appoggiata
alla parete posteriore (vedere figura 10).
figura 10
5Rimontare il giunto esagonale e quindi il mescolatore
(vedere figura 11).
figura 11
6Rimontare il contenitore spingendolo verso la parete poste-
riore, accertandosi che calzi correttamente sulla guarnizione.
La leva di bloccaggio si abbasserà fino ad appoggiarsi al piano

10
MINIGEL
gocciolatoio (vedere figura 12).
figura 12
7Risciacquare con bevanda fresca in modo da eliminare ogni
possibile residuo di soluzione sanitizzante dal fondo dei conte-
nitori. Asciugare l'interno dei contenitori con un tovagliolo di
carta del tipo “usa e getta”.
5. 4 SANITIZZAZIONE DEL DISTRIBUTORE
MONTATO
La sanitizzazione dell'apparecchio montato, precedente la
sua messa in funzione, può essere eseguita, se necessario,
solo come ulteriore precauzione in aggiunta alla sanitizza-
zione dell'apparecchio smontato descritta in precedenza
ma mai in sostituzione di essa.
1Preparare in una bacinella una soluzione di acqua e pro-
dotto sanitizzante approvato dalle autorità del vostro paese
rispettando le specifiche del produttore. In mancanza di un pro-
dotto sanitizzante specifico, preparare una soluzione di acqua
e ipoclorito di sodio (varechina) in proporzione di 1 cucchiaio
ogni 2 litri di acqua.
2Versare la soluzione nei contenitori.
3Usando una spazzola adeguata strofinare la soluzione su
tutte le parti al di sopra del livello della soluzione e sulla parte
inferiore del coperchio.
4Installare il coperchio e fare funzionare il distributore in
modo da permettere alla soluzione di agitarsi per circa 2 minuti.
5Svuotare i contenitori dalla soluzione sanitizzante attra-
verso i rubinetti e poi eliminarla.
6Risciacquare con bevanda fresca in modo da togliere ogni
possibile residuo di soluzione sanitizzante dal fondo dei conte-
nitori.
7Non procedere ad ulteriori operazioni di risciacquo.
6 MANUTENZIONE
1Ogni giorno: controllare il distributore e verificare che non
ci siano perdite di prodotto dalle guarnizioni. Se si notano per-
dite, controllare prima di tutto che i componenti del distributore
sia correttamente montati, quindi verificare che le guarnizioni
non necessitino di lubrificazione e infine che non siano difet-
tose o usurate, in tal caso sostituirle con ricambi originali del
fabbricante.
2Ogni mese: verificare che la guarnizione del giunto esago-
nale non sia usurata. Se lo fosse, sostituire il giunto stesso con
un ricambio originale del fabbbricante (vedere figura 13).
figura 13
3Ogni mese: eliminare la polvere accumulatasi sul filtro del
condensatore posto sul lato posteriore della macchina (vedere
figura 14).
figura 14
ATTENZIONE
Prima di qualsiasi intervento di pulizia disconnettere
sempre elettricamente il distributore estraendo la spina
dalla presa.
ATTENZIONE
Fare attenzione alle alette del condensatore in quanto
taglienti.

11
6. 1 MANUTENZIONE (SOLO A CURA DEL SER-
VIZIO DI ASSISTENZA)
OGNI ANNO
1Togliere tutti i pannelli e pulire l'interno della macchina com-
presa la base e l'interno dei pannelli.
Non rimuovere mai il materiale anticondensa posto attorno al
tubo di uscita dell’evaporatore (il tubo in rame collocato a
destra del motoriduttore). Se detto materiale risultasse man-
cante o andasse perduto, sostituire con ricambi originali del
fabbricante.
2Rimuovere eventuali tracce di prodotto trafilato all’interno
dell’evaporatore estraendo l’apposito cassetto come indicato
(vedere figura 15).
figura 15
IMPORTANTE
Lo schema elettrico del distributore è riportato sulla
parte interna del pannello lato rubinetto.
IMPORTANTE
Al fine di prevenire danni al distributore le parti in plastica
devono essere lubrificate solo con il grasso fornito dal
fabbricante o con altro grasso compatibile con parti in
plastica.

12
MINIGEL
1 TECHNICAL CHARACTERISTICS
We reserve the right to amend this manual without notice.
2 INTRODUCTION
Read this instruction booklet carefully in order to familiarise
yourself with all aspects of the dispenser.
Like all mechanical products, this machine will require cleaning
and maintenance. Good operation can also be affected by any
errors made by the operator during disassembly and cleaning.
For this reason, in the case of daily operations such as
disassembly, cleaning, sanitising and reassembly, it is important
that the person using the dispenser is aware of the procedures
and can perform them without making errors.
3 INSTALLATION
1Remove the dispenser from the packaging, which you
should keep in case it is needed in the future.
2Check that the dispenser has not been damaged during
transport. If it has, make a report to the carrier immediately.
3Position the dispenser on a bench capable of supporting the
weight, even at full load, bearing in mind the IMPORTANT
warning in point 1 above.
4Allow a minimum clearance of at least 15 cm all around the
dispenser so as not to impede the flow of cooling air.
5Check the stability of the device, adjusting the height of the
feet if necessary. In the event that the dispenser is provided
with a series of high feet (approximately 100 mm), these must
replace the original ones.
6Before plugging in the dispenser, check that the mains
voltage is the same as that indicated on the data plate. Connect
the dispenser to a single phase network, using an outlet
complete with earthing as defined by current standards. If the
dispenser has no plug, connect one to the cable that complies
with applicable regulations in the country of use, equipped with
earth contacts or a jack and suitable for currents of at least 10
A 250 V (for areas with voltages of 220-230 V 50-60 Hz) and 20
A 250 V (for areas with voltages of 100-115 V 50-60 Hz). If you
prefer to create a fixed connection to the mains, connect the
cable to a bipolar wall switch with contact opening of at least 3
mm. Do not use extension cables to connect the device to the
mains.
7The dispenser does not leave the factory pre-washed and
sanitised. Before use, it must be disassembled, washed and
sanitised, following the instructions in Chapter 5.3 CLEANING.
4 TO OPERATE SAFELY
1Do not use the dispenser without reading this instruction
booklet first.
2Do not use the dispenser if it is not properly earthed.
3Do not use extension cables to connect the dispenser to
the mains.
4Do not operate the dispenser if the panels are not in place
and secured with screws.
5Do not impede the flow of cooling air. Allow a minimum
clearance of at least 15 cm (6”) all around the dispenser.
6Do not put fingers or objects into the slots in the panels and
in the opening of the tap.
7Do not disassemble the tank or remove the mixers or
panels for cleaning or maintenance without ensuring that the
dispenser is unplugged.
Transparent removable bowls n 1 2 3
Capacity of each bowl, approx. l 6 6 6
Dimensions:
width cm 20 39 59
depth cm 48 48 48
height cm 62 62 62
Net weight, approx. kg 25 45 61
Gross weight, approx. kg 27 48 64
Hermetic compressor
Air-cooled condenser
Overload protector
Noise level lower than 70 dB (A)
IMPORTANT
Electrical characteristics: read the data on the plate of
each individual dispenser. This is located at the bottom
of the front panel, behind the drip tray on the right. The
serial numbers of the devices (preceded by the symbol #)
are shown on the frame below the rear panel. Always
refer to the data shown on the plate.
IMPORTANT
When transporting or lifting the dispenser, never pick it
up by the transparent containers or the evaporator cylin-
ders. The manufacturer is not liable for damage caused
by such mishandling.
ATTENTION
Make sure the device is properly earthed, otherwise you
may cause electric shocks to persons or damage to the
dispenser.
IMPORTANT
Place the device in such a way that the power cable is
easily accessible.
IMPORTANT
This device is not meant to be used by children or per-
sons with mental or sensory impairment, or with lack of
sufficient knowledge or experience unless supervision or
instruction is provided concerning the use of the device
by a person responsible for their safety.
Children should be supervised to ensure they do not play
with the device.
MINIGEL 1
MINIGEL 2
MINIGEL 3

13
5 OPERATING PROCEDURES
To remove the lid of the container, press the top key and slide
the lid towards the front of the container. If there is a safety lock
for the lid, turn the key in an anti-clockwise direction to release
the open key (see figure 2).
1Wash and sanitise the dispenser before using it, following
the instructions in Chapter 5.3 WASHING.
2Fill the container with the desired product, bearing in mind
that, during processing, the volume will increase. For this
reason, the containers must not be filled to maximum capacity.
To prepare granita, consider an increase in volume of around
10%. To prepare ice creams, consider an increase in volume of
around 30%.
3If using liquid or powder bases, specially prepared for ice
creams or granita, follow the manufacturer's instructions
carefully.
4If using natural products to prepare granita (for example
lemon juice, orange juice or coffee), dissolve 150-200 grams of
sugar in each litre of product.
5If using freeze-dried bases to be diluted with milk or water,
prepare the product in a separate container and only pour it into
the machine containers after making sure that it is
homogeneous and that the powder is well dissolved.
6Using the controls (see Chapter 5.1 DESCRIPTION OF
CONTROLS).
7The dispenser must operate without interruption: the
cooling system for each container will automatically stop when
the product is ready to be dispensed, maintaining the set
density. The mixing devices will still continue to operate.
5. 1 DESCRIPTION OF CONTROLS
The dispenser is equipped with an ON/OFF switch, a keypad
and a product temperature display. It is possible to select the
dispenser operating mode using the keypad. The following
operating modes are available:
ICE CREAM OR GRANITA PRODUCTION: in this mode, the
dispenser prepares ice cream or GRANITA depending on the
product in the container.
PRODUCT STORAGE: in this mode, the dispenser keeps the
liquid product at a temperature suitable for storage. This is
useful at night to maintain the quality of the product and limit the
consumption of electricity.
WASHING: in this mode, the mixer rotates at a high speed and
cooling is not enabled. This function is useful while washing and
sanitising the machine to prevent the sanitising solution from
being cooled.
ON/OFF SWITCH
The ON/OFF switch is located under the dispenser itself, on the
left-hand side. Its function is as follows:
CONTROL KEYPAD
figure 1
The functions of the keys on the keypad are as follows:
FOR DISPENSER OPERATION
Set the ON/OFF switch to I. The red LED F will be on.
Hold down key A until the dispenser starts up.
Use keys B or C to select the desired dispenser operating mode:
ADDITIONAL FUNCTIONS
ADJUSTING THE DENSITY
During operation in ICE CREAM OR GRANITA PREPARATION
mode, by pressing keys D and E, it is possible to adjust the
density of the product (minimum value 1, maximum value 10).
ATTENTION
If the power cable is damaged, it must be replaced by the
manufacturer, by the manufacturer’s technical support
service or by a similarly qualified person in order to pre-
vent any risk.
IMPORTANT
When the lid is not installed, neither the mixer nor the
cooling feature work, and the display shows the message
“COV”.
IMPORTANT
In any case, once the mixture is obtained, its degrees
Brix (sugar content percentage) must be greater than 13.
Never use the machine with water only.
IMPORTANT
Use the dispenser with food products only.
Position 0 :the dispenser is off.
Position I :the dispenser is enabled for operation but
is in standby mode. Only the F LED is on.
Key A If pressed for 2 seconds, this allows the user to
switch from standby mode to operating mode and
vice versa. In operating mode, the mixer rotates
and cooling is enabled.
If pressed briefly while the machine is running, it
allows users to turn the dispenser lights, if any, on
and off.
Key B If pressed, this activates the ICE CREAM OR
GRANITA PRODUCTION function. This operating
mode is confirmed when LED H lights up, either
flashing or continuously.
Key C If pressed, this activates the STORAGE function.
This operating mode is confirmed when LED G
lights up, either flashing or continuously.
Key D If pressed in ICE CREAM OR GRANITA PRO-
DUCTION mode, this increases the density of the
product.
Key E If pressed in ICE CREAM OR GRANITA PRO-
DUCTION mode, this decreases the density of the
product.
Key B If you want to prepare ICE CREAM OR GRANITA
Key C If if you just want to store the product.

14
MINIGEL
The adjustment set in the factory is at a value of 6, suitable for
the preparation of ice cream. For the preparation of various
products, refer to the following values:
Granita: adjust the density to between 1 and 3.
Sorbet: adjust the density to between 2 and 5.
Ice cream: adjust the density to between 5 and 7.
WASHING MODE
When the dispenser is in STORAGE mode, holding down key C
for three seconds activates WASHING mode, during which the
display shows “--.--”. In this mode, the mixer rotates but cooling
is not enabled.
Use this function while washing and sanitising the machine to
prevent the sanitising solution from being cooled.
When any key is pressed, the dispenser exits WASHING mode
and returns to STORAGE mode.
TEMPERATURE ALARM
The temperature shown on the display is usually fixed. If
flashing, this means that the product has remained above the
maximum storage temperature for a certain amount of time and
it is therefore appropriate to test for possible deterioration of the
product.
To reset the alarm and return to the fixed display, hold down key
B for three seconds.
PRODUCT READY ALERT
During the preparation of the product, LED H flashes. When the
product is ready, LED H stops flashing.
KEY LOCK
The keypad can be locked to prevent access to the dispenser
commands. To do this, hold down keys B and C at the same
time for two seconds. The lock is shown when the display
flashes.
All the controls are locked at this point.
To unlock the keypad, hold down again keys B and C for three
seconds. The unlock is shown when the display flashes.
PROTECTION AGAINST EXCESSIVE DENSITY
In the case of excessive density of the product, in order to
prevent damage to the dispenser, both cooling and the mixer
are stopped for three minutes and the display shows one of the
following messages: “AL03”, “AL06” or “AL08”. After three
minutes, both mixing and cooling are restarted and the previous
density setting is reduced by one level.
To reset the alarm message and return to the fixed display, hold
down key B for three seconds.
5. 2 OPERATION HELPFUL HINTS
1The time required to obtain the cooling of the product varies
depending on several factors such as the ambient temperature,
the initial temperature of the product, its sugar content (degrees
Brix) and fat content and the density adjustment.
2Topping up the containers with product that is already pre-
cooled further increases the efficiency of the dispenser.
3To further reduce recovery time and thus increase the
autonomy of the dispenser, fill up the tanks when the level of
product has fallen to the halfway point of the evaporator.
4To store the product correctly, the distributor must also
operate at night, at least in the PRODUCT STORAGE position.
5Night operation in the PRODUCT STORAGE position also
eliminates the possible formation of ice (due to condensation of
atmospheric moisture) on the outside of the containers.
6Never turn off the dispenser when there is product in the
containers. If not cooled, the product may deteriorate.
Furthermore, unless it is mixed, it may stick together and form
blocks of ice. If the mixer is restarted in these conditions
(without waiting for the ice to melt), the dispenser may be
damaged.
7All dispensers of this kind must emit heat. If, however, this
emission seems excessive, check that no source of heat is
located near the dispenser itself and, in particular, near the grid
panels. Also make sure that the airflow is not impeded by the
proximity of walls, boxes or similar. Leave at least 15 cm free
space around the dispenser. Finally, check that the filter
located below the rear panel is clean.
5. 3 CLEANING
1Cleaning and washing are essential to guarantee the
perfect preservation of the taste of the product and the
maximum efficiency of your dispenser. The procedures
described below should be considered general in nature and
may vary due to the health regulations in force.
2Before disassembly for washing, the dispenser must be
emptied out of the product. Proceed as follows:
- use the keypad to select the CLEANING operating mode
- if necessary, wait until the product becomes liquid
- place a container under each tap and empty the containers
- fill the containers with water and allow the dispenser to
operate in CLEANING mode for a few minutes. Then empty the
containers.
- hold down key A to switch off the dispenser
- turn the ON/OFF SWITCH to OFF
5. 3. 1 DISASSEMBLY
1To remove the lid of the container, press the top button and
slide the lid towards the front of the container.
If there is a safety lock for the lid, turn the key in an anti-
clockwise direction to release the open button (see figure 2).
figure 2
IMPORTANT
The product storage temperature is factory set at 4 °C.
ATTENTION
Before disassembling any component, always unplug
the device from the mains.

15
2To remove the container, push the lever upwards (see
figure 3) and then remove the container itself (see figure 4).
figure 3
figure 4
3Remove the mixer by sliding it out of the evaporator
cylinder. Then remove the hexagonal joint (see figure 5).
figure 5
4Remove the gasket from its housing (see figure 6).
figure 6
5Disassemble the tap by following the order given (see figure

16
MINIGEL
7).
figure 7
6Remove the drip tray and empty it.
7Remove the flow restrictor from the container (see figure 8).
figure 8
5. 3. 2 CLEANING
1Pour about four litres of hot water (45-60 °C) and specific
detergent into a basin, carefully respecting the manufacturer’s
instructions. A solution that is too strong can, in fact, damage
the parts to be washed, while a solution that is too diluted may
not clean enough. Do not use abrasive detergents.
2Use a suitable brush and wash all the parts in contact with
the beverage thoroughly with the detergent solution.
3Wash the evaporator cylinders using a soft brush.
4Rinse all parts washed using tap water.
5. 3. 3 SANITIZING
Sanitising must be done immediately before starting up the
dispenser. Do not allow it to remain idle for a long time after
sanitisation.
1Before starting the procedures described below, wash your
hands with antibacterial soap.
2Pour about eight litres of a solution made of hot water (45-
60 °C) and sanitising product approved by the authorities in
your country into a basin, according to the manufacturer's
specifications. In the absence of a specific sanitising product,
prepare a solution of water and sodium hypochlorite (bleach) at
a ratio of 1 tablespoon per 2 litres of water.
3Immerse all parts to be sanitised in the solution for the time
indicated by the product manufacturer.
4Allow the sanitised parts to air dry on a clean surface.
5Dry the external parts of the dispenser without using
abrasive cloths.
5. 3. 4 ASSEMBLY
1Slide the drip tray into place..
2Lubricate the tap piston, the hexagonal joint and the mixer
at the points indicated in figure 9, using only the grease that
came with the machine or other grease for use with food.
figure 9
3Reassemble the tap on the container in reverse order
compared to that shown in figure 8.
4Replace the container gasket.
N.B. the rim with the greater diameter must be rested on the
IMPORTANT
Do not wash any part of the machine in a dishwasher.
ATTENTION
Before any cleaning operation, always unplug the
dispenser from the mains or turn off the external wall
switch.
IMPORTANT
In order to prevent damage to the dispenser, use only
detergents that are compatible with the plastic parts.
ATTENTION
While washing the dispenser, do not use excessive
amounts of water around the electrical components. This
could cause electric shocks or damage to the dispenser.

17
rear wall (see figure 10).
figure 10
5Reassemble the hexagonal joint and then the mixer (see
figure 11).
figure 11
6Replace the container by pushing it towards the back wall,
making sure it fits properly onto the gasket. The locking lever
will be lowered until it rests on the drip tray surface (see figure
12).
figure 12
7Rinse using a cool beverage in order to eliminate any
remaining sanitising solution from the bottom of the containers.
Dry the inside of the containers with a disposable paper towel.
5. 4 IN-PLACE SANITIZATION
Sanitising the assembled device, prior to putting into
service, should only be performed, if necessary, as an
additional precaution to the sanitisation of the
disassembled devices described previously, never instead
of it.
1Prepare a solution of water and sanitising product approved
by the authorities in your country in a basin, according to the
manufacturer's specifications. In the absence of a specific
sanitising product, prepare a solution of water and sodium
hypochlorite (bleach) at a ratio of 1 tablespoon per 2 litres of
water.
2Pour the solution into the containers.
3Using a suitable brush, wipe the solution onto all parts
above the level of the solution and on the underside of the lid.
4Install the lid and operate the dispenser in order to allow the
solution to be stirred for about 2 minutes. Drain the sanitising
solution from the containers through the taps and then dispose
of it.
5Rinse using a cool beverage in order to eliminate any
remaining sanitising solution from the bottom of the containers.
Do not perform further rinsing.
6 ROUTINE MAINTENANCE
1Every day: inspect the dispenser and check for leaks of
product from the gaskets. If you notice leaks, first make sure
that the components of the dispenser are properly installed,
then check that the gaskets do not require lubrication and
finally that they are not worn or damaged. If they are, replace
them with original spare parts from the manufacturer.
2Every month: check that the hexagonal joint gasket is not
worn. If it is, replace the joint itself with an original spare part
ATTENTION
Before any cleaning operation, always unplug the
dispenser from the mains.

18
MINIGEL
from the manufacturer (see figure 13).
figure 13
3Every month: remove the dust from the condenser filter on
the back of the machine (see figure 14).
figure 14
6. 1 MAINTENANCE (TO BE CARRIED OUT BY
QUALIFIED SERVICE PERSONNEL ONLY)
1Annually: Remove all the panels and clean the inside of
the machine including the base and the inside of the panels.
Never remove the anti-condensation material wrapped around
the evaporator outlet tube (the copper tube located to the right
of the geared motor). If said material is missing or lost, replace
with original spare parts from the manufacturer.
2Remove any traces of product from the inside of the
evaporator by removing the tray as shown (see figure 15).
figure 15
ATTENTION
Beware of the condenser fins as they are sharp.
IMPORTANT
The dispenser wiring diagram is shown on the inside of
the tap side panel.
IMPORTANT
In order to prevent damage to the dispenser, the plastic
parts must only be lubricated with the grease supplied by
the manufacturer or with another type of grease compati-
ble with plastic parts.

19

20
MINIGEL
ELENCO RICAMBI
SPARE PARTS LIST
Table of contents
Languages:
Other Ugolini Ice Cream Maker manuals