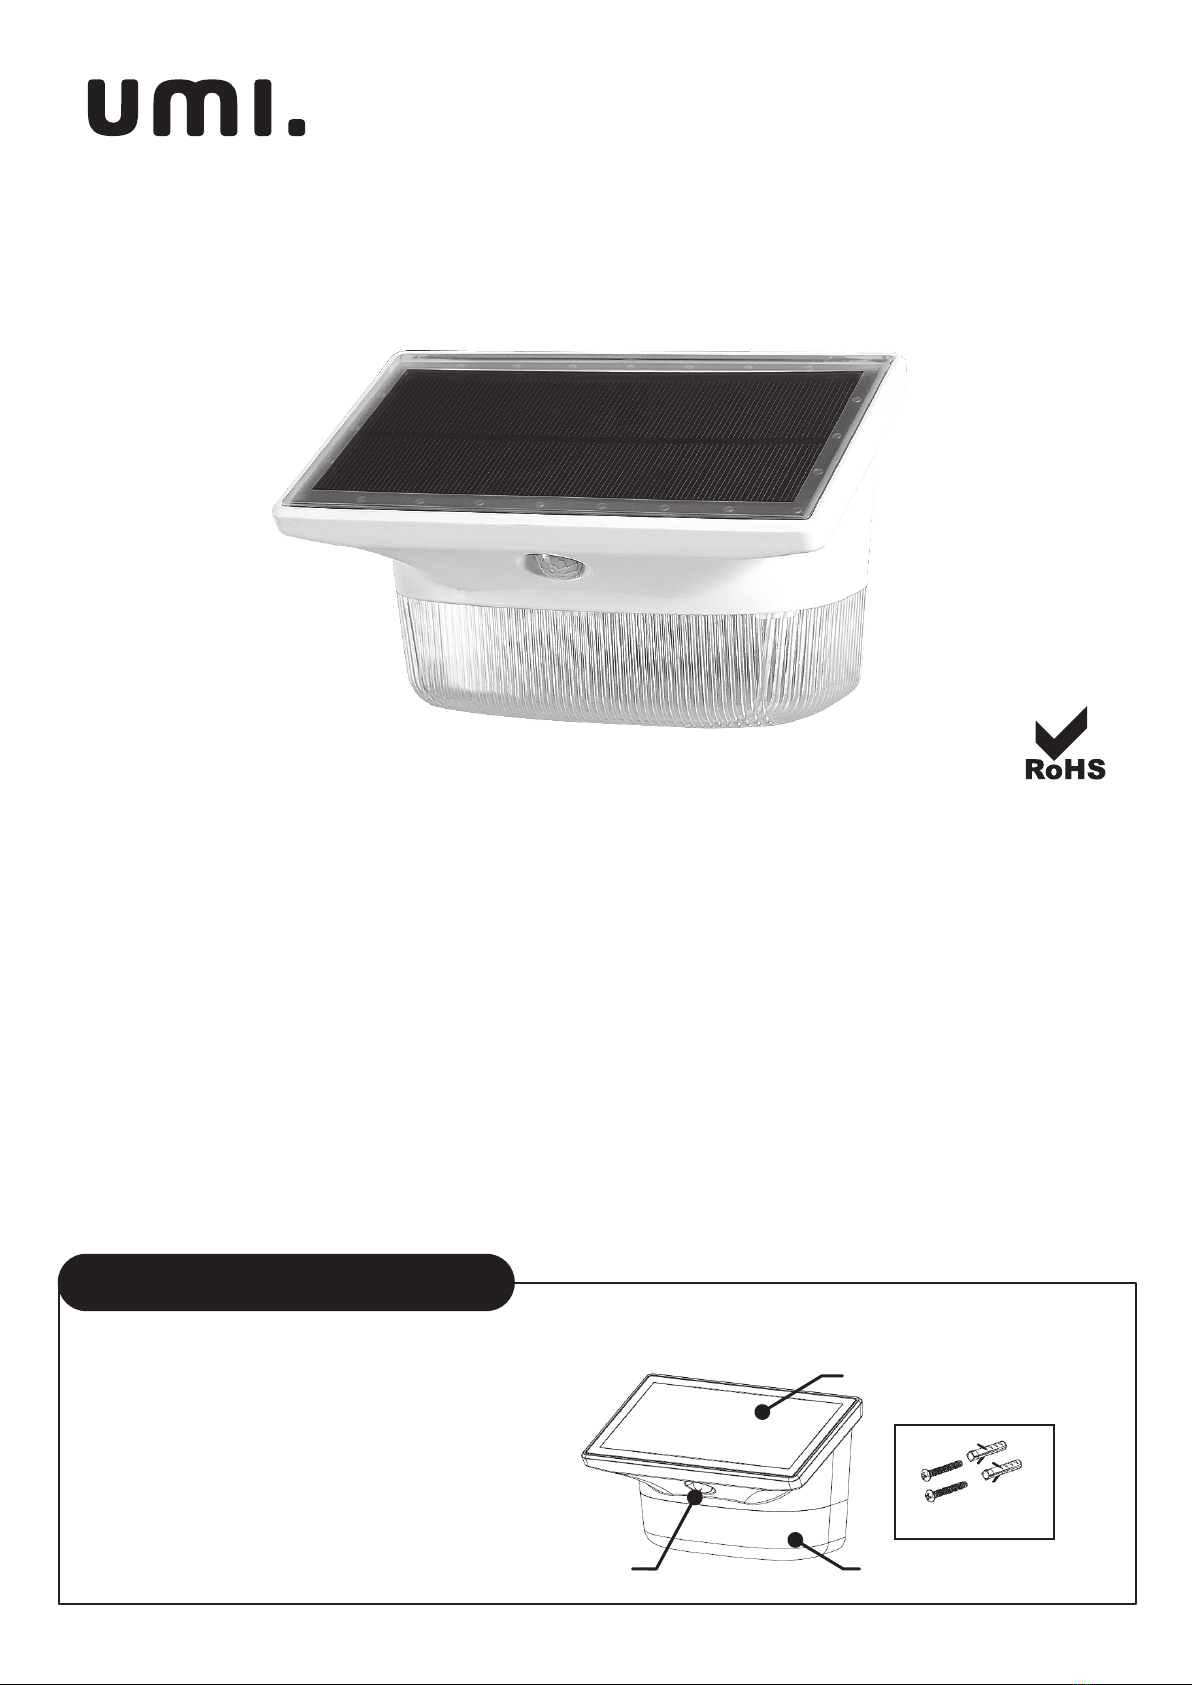
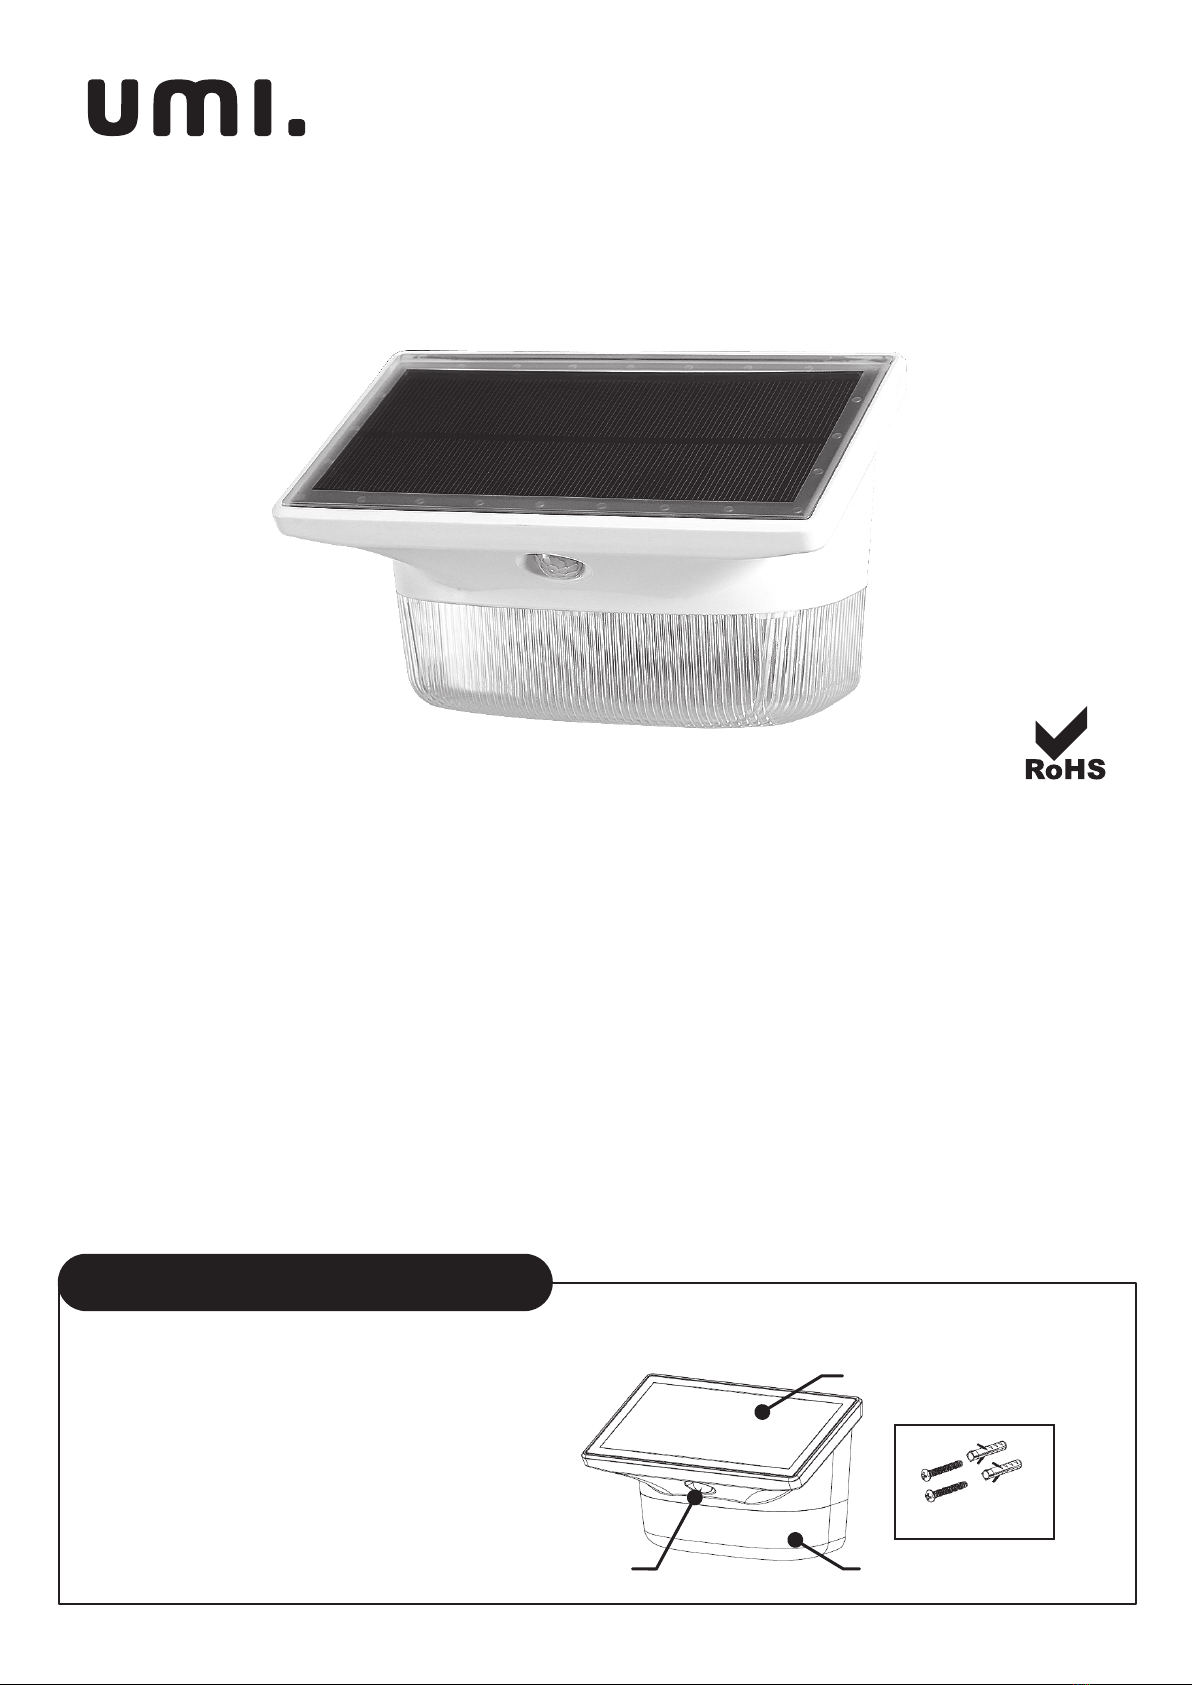
Installationsanweisung
Solarleuchte mit Bewegungssensor
Model no:SMW-200 / ASIN no. B07V1RFQMB
Die Solarleuchte hat ein einfaches Montagesystem.
Die Leuchte wird in drei einfachen Schritten montiert.
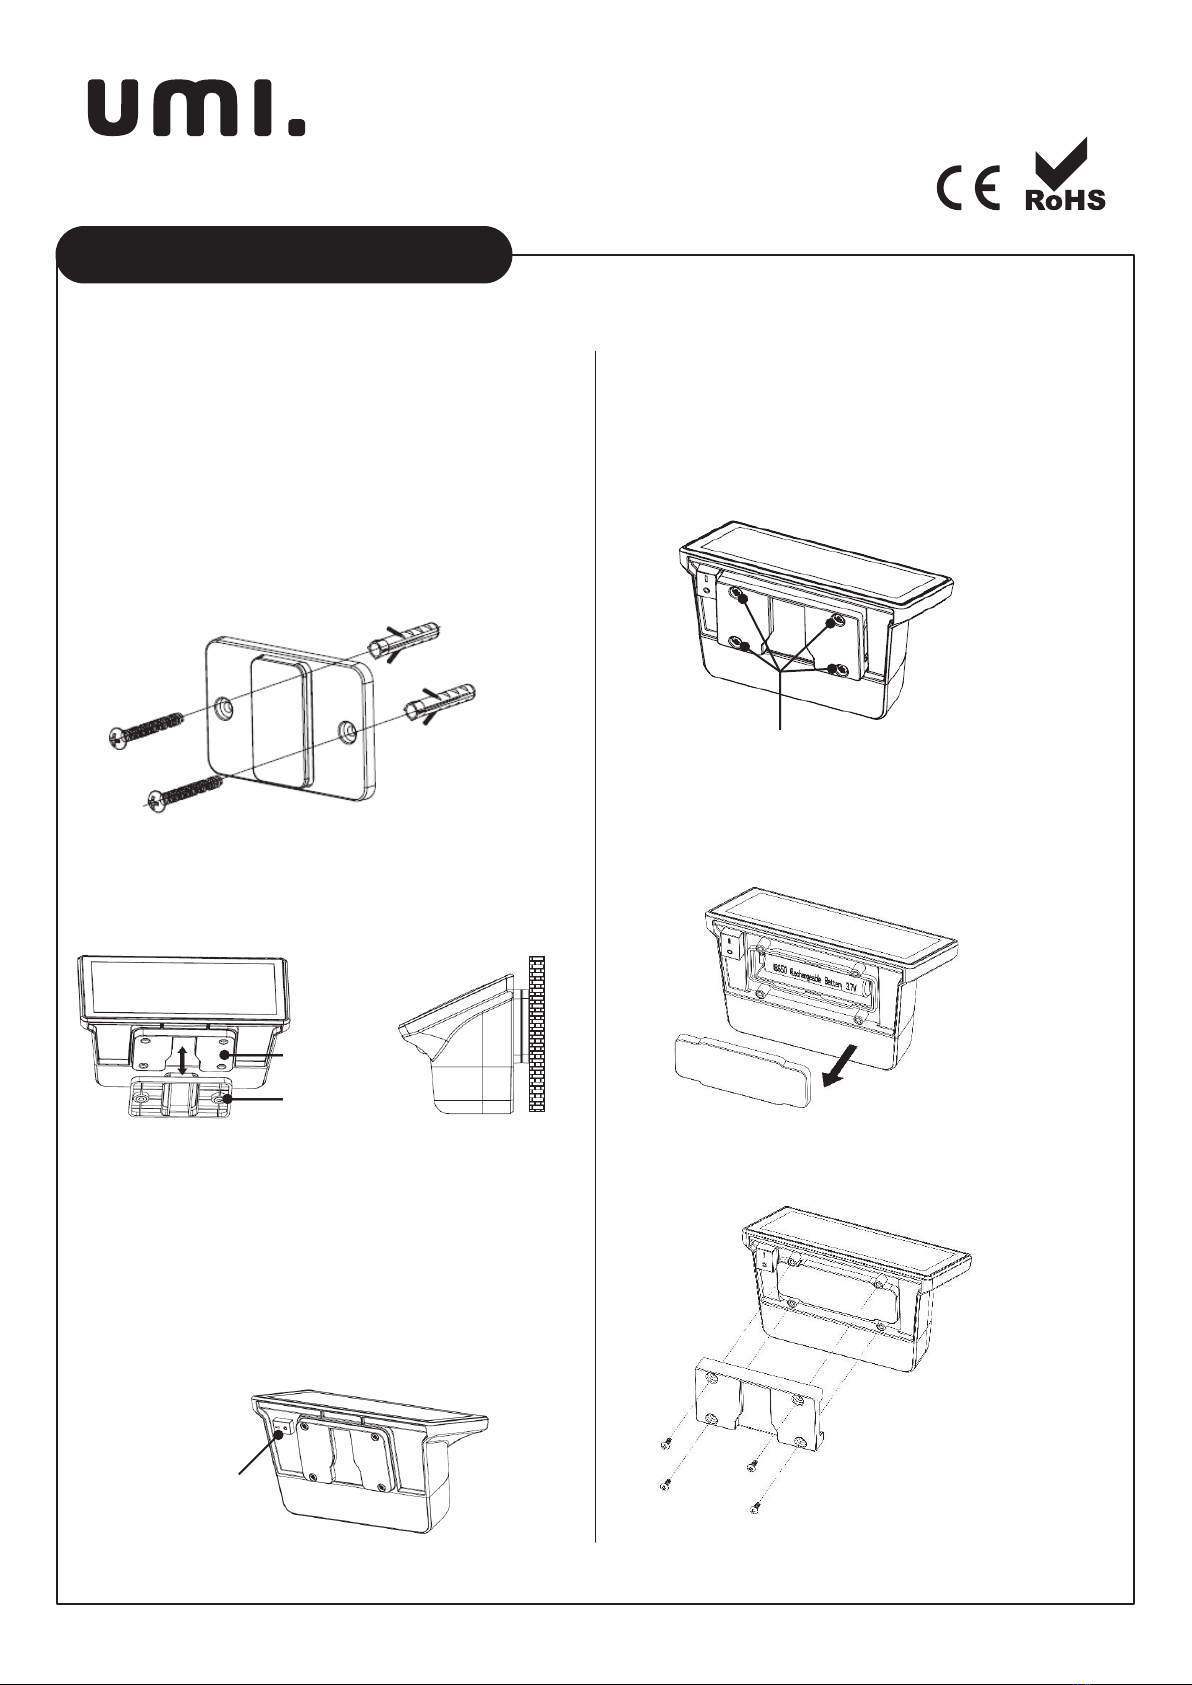
MONTAGE DER SOLARLEUCHTE BATTERIE ERSATZEN
Schritt 1: Bohren Sie Pilotlöcher für die Montagehalterung an der
gewünschten Wand. Verwenden Sie eine Wasserwaage,
um sicherzustellen, dass die Wandhalterung gerade ist.
Schritt 2: Installieren Sie die Halterung mit den beiden mitgelieferten
Schrauben. Sie können die mitgelieferten optionalen
Montageanker verwenden, um die Halterung an der Wand
zu befestigen (siehe Abbildung 1). (Montageanker sind
optional und werden beim Einschrauben in Holz nicht benötigt)
Abbildung 1
Schritt 3: Schieben Sie die Leuchte auf die Montagehalterung, wie
in Abbildung 2 dargestellt. Die Leuchte sollte auf die
Halterung gleiten, wie in Abbildung 3 dargestellt.
Abbildung 2
Lampenbefestigungsklammer
Wandhalterung
Abbildung 3
(Ansicht der Wandhalterung)
Ein / Aus Schalter
• Die Solarleuchte hat eine maximale Bewegungserfassungsreichweite
von 20 bis 26 Fuß (6-8M) und hat einen Bewegungserfassungswinkel von 140°
• Das Bewegungslicht bleibt ca. 45 Sekunden lang eingeschaltet,
nachdem eine Bewegung erkannt wurde.
• Die Solarleuchte hat einen Ein- / Aus Schalter auf der Rückseite.
Um die Leuchte manuell auszuschalten, verwenden Sie den
Korrekturschalter (siehe Abbildung 4).
Abbildung 4
die (4) Schrauben abschrauben
Um die Batterie in der Solarleuchte zu ersetzen,
entfernen Sie das Licht aus der Montagehalterung.
Schritt 1: Lösen Sie die vier Schrauben auf der Rückseite
des Lichts (siehe Abbildung 5) und entfernen
Sie die Abdeckung.
Abbildung 5
Schritt 2: Entfernen Sie die Batterie und ersetzen Sie sie durch eine
neue Batterie (siehe Abbildung 6). (Hinweis: Bitte verwenden
Sie einen aufladbaren Li-Ionen Batterie # 18650 3.7v als Ersatz)
Abbildung 6
Schri 3: Setzen Sie die Baerieabdeckung wieder ein und schrauben
Sie die vier Schrauben wieder ein (siehe Abbildung 7).
Hängen Sie das Licht wieder auf.
Abbildung 7