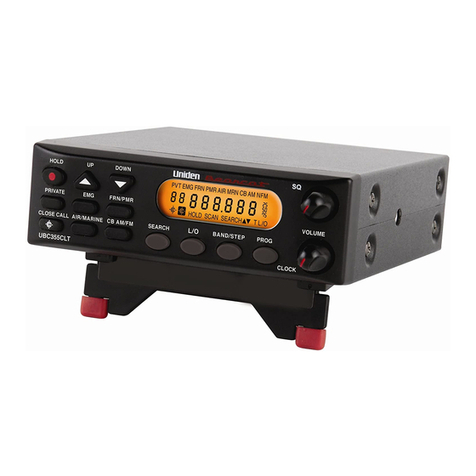
Uniden SVS8025TSE User manual

RELM WIRELESS CORP.
7100 Technology Drive
West Melbourne, FL 32904
www.RELM.com
OMSVS8025TSE ULZZ0109AZ
SVS8025TSE
RELM WIRELESS CORP.
7100 Technology Drive
West Melbourne, FL 32904
www.RELM.com
OMSVS8025TSE ULZZ0109AZ
Operating Guide
SVS8025TSE

SVS8025TSESVS8025TSE
SAFETY INFORMATION
WARNING
DO NOT operate the transceiver of any radio equipment with the antenna
touching, or close to the eyes, face, or exposed body parts.
DO NOT operate the transmitter of any radio equipment unless all the Radio
Frequency (RF) connectors are secure and any open connectors are properly
terminated.
DO NOT operate the transmitter of any radio equipment near electrical blasting
caps or in an explosive environment.
DO NOT let children operate any transmitter-equipped radio equipment.
Have your radio equipment installed and serviced by a qualified technician.

SVS8025TSESVS8025TSE - 1 -
Table of Contents
Introduction .................................................................................................. 2
Licensing ................................................................................................. 2
Technical Support and Service ................................................................ 2
Features ........................................................................................................ 3
General Features..................................................................................... 3
ESAS®Features ...................................................................................... 3
LTR®Features........................................................................................ . 4
Operating Controls ..................................................................................... 5
Basic Operation ........................................................................................... 7
Turn the Power On/Off............................................................................. 7
Adjust the Volume .................................................................................... 7
Select a Call Group ................................................................................. 8
Transmit/Receive ..................................................................................... 8
Dispatch Call ........................................................................................... 8
Telephone Call ......................................................................................... 9
Talk-Around ............................................................................................. 9
Quick Keys .............................................................................................. 9
Scan ...................................................................................................... 10
Menu Functions.......................................................................................... 11
SET SCAN ............................................................................................. 12
SET TIMER............................................................................................ 12
SET HORN ............................................................................................ 13
SET LOCK ............................................................................................. 13
SET DIMMER ........................................................................................ 14
Advanced Operation .................................................................................. 15
Editing the Scan List .............................................................................. 15
Manually Dialing a Call
(DTMF Microphone Required) ............................................................... 15
Talk Back Scan (Automatic Reply on Called Group) ............................. 16
Virtual Group (ESAS Operation Only) ................................................... 16
Busy System Queuing ........................................................................... 16
Alert Tones .................................................................................................. 17
Radio Installation ....................................................................................... 19
Considerations ....................................................................................... 19
Power Requirements ............................................................................. 19
Antenna ................................................................................................. 19
Mounting ................................................................................................ 19
Operational Check ................................................................................. 19
Accessories ................................................................................................ 20
SVS8025TSESVS8025TSE - 2 -
Introduction
Congratulations! You now own the best value in heavy-duty trunking radio
systems...a Uniden two-way FM mobile transceiver. The SVS8025TSE is an
800 MHz, 15 Watt, alphanumeric display subscriber unit that operates in a
trunked wireless communications environment. In a trunking system, several
radio channels are combined with high powered repeater stations to extend
the communications range and provide more efficient channel access. The
SVS8025TSE is also compatible with ESAS®(Extended Sub-Audible
Signaling). This is Uniden’s networking system for switched trunked call
processing and sophisticated data and text communications. Uniden dealers
can program the SVS8025TSE radio to include many features to meet your
needs.
Read this Operating Guide completely to be sure you are getting the most
from your radio.
Licensing
Before using your radio, you may need a license issued by the Federal
Communications Commission (FCC). Your Uniden dealer can help you with
this requirement and with all your future communication needs.
Technical Support and Service
Your Uniden dealer can provide you with technical assistance and
information. If your radio does not perform properly, take it to a Uniden dealer
for servicing. The radio contains no user-serviceable parts. Unauthorized
adjustment will void the warranty and may cause illegal radio operation.
Make sure that a qualified technician services your radio equipment. When
servicing the radio, use only factory-authorized replacement parts.
Features, specifications, and availability of optional accessories are all
subject to change without notice.
Uniden®is a registered trademark of Uniden America Corporation.
ESAS®is a registered trademark of Uniden America Corporation.
LTR®is a registered trademark of E.F. Johnson Company.

SVS8025TSESVS8025TSE - 3-
Features
General Features
• 128 Call Groups—Programmed by your service provider.
• Alphanumeric Display—10 characters and 6 icons show all functions and status.
• Backlit Front Panel Keys—Visible under low light conditions.
• Busy System Queue—If all the phone lines are busy, the radio will automatically
connect to a phone line as soon as one is available.
• Transmit Time-Out Timer—Limits radio transmit time.
• Horn-Honk Alert Control—Provides control of external horn device.
• Auto Power-Off Timer—Limits radio on time when car ignition is off.
• Simple Lock—Helps prevent accidental changes to your settings.
• Adaptive Scan—A powerful scan technique that automatically arranges the scan
list based on radio programming, radio usage and call history to give more
priority to often-used calls.
ESAS®Features
• Unique ID Number—Each radio is uniquely identified. Over 1 million IDs per
network.
• Automatic Roaming—A radio continues to roam until an ESAS System is found.
With Automatic roaming, the radio finds a site to check-in. The network tracks
radios as they roam, forwarding data and voice calls to them.
• Selective Calling—Directly calls another radio's Unique ID. Calls may be pre-
stored or manually dialed.
• Telephone Calling—Phone numbers can be pre-stored or manually dialed using
an optional DTMF microphone.
• Network Calling—The network automatically connects two radios that may be
using different sites.
• Automatic Site Selection—Ensures that the radio determines which cell is to be
used.
• Virtual Group—Automatically makes a half-duplex Selective Call in order to
remain part of the original group, when the radio is in a different cell.
• Radio Disable—Allows a service provider to remotely lock a radio when a radio is
stolen or when service is disconnected.

SVS8025TSESVS8025TSE - 4 -
LTR®Features
• Dispatch—Provides Push-To-Talk dispatch or fleet operation.
• Interconnect—Using a designated group ID, lets you draw a dial tone and place
phone calls using optional DTMF microphone.
• Talk Around—For direct radio-to-radio communications without a repeater.
• Transmit Inhibit—Prevents transmissions on the selected Call Group.
• Talk Back Scan—Also "Automatic Reply on called group." Allows the use of a
received group ID, when different than selected ID.
Note: Some of the features described above may not be available in
your area. Please check with your local Service Provider for more
information.

SVS8025TSESVS8025TSE - 5-
Operating Controls
[POWER]—Press this key to turn radio ON / OFF.
[VOLUME]—Press this key to increase (press top) or decrease (press
bottom) the volume. A tone sounds each time the key is pressed to indicate
the current volume level.
[SELECT]—Press this key to select a Call Group, or to choose option
settings in a Menu.
[MENU]—Press this key to display Menu items. (See page 11).
[L/O] [EXIT]—Press this key to lock-out or exclude a Call Group from the
scan sequence, or to change any Menu setting and quickly return to a Call
Group.
[A], [B], & [C] (QUICK KEYS)—Use these keys to store a Call Group in
memory and to recall that Group quickly. (See page 9 for programming).
Auto-Repeat Keys
Press and hold [VOLUME], [SELECT], or [MENU] for more than one second
for automatic-repeat of any of these functions.
Menu Time-out
If no action is taken at any Menu item for 5 seconds or more, the setting is
stored and the radio returns to the last selected Call Group.

SVS8025TSESVS8025TSE - 6 -
ALPHANUMERIC DISPLAY — The Liquid Crystal Display (LCD) contains 6
icons. It can display up to 10 alphanumeric characters.
Icon When Showing Indicates:
1TX—Radio is transmitting.
2SVC—ESAS check-in.
3SCAN—Radio is scanning Call Groups.
4DEL—Selected Call Group is not in the scan list.
5ROAM—The radio is checked-in to a cell other than your Home Cell.
6TAC—A Talk-Around-Call is in progress. (Talk-Around Call Group
must be selected.)

SVS8025TSESVS8025TSE - 7-
Basic Operation
Turn the Power On/Off
Press the [POWER] key to turn
the radio on. The radio will
perform a Self-Test and display
the result. Then the radio will
begin searching for the Call Group
last selected.
ESAS Operation: After the radio locks into the ESAS Cell for that Call
Group, it "checks in" and begins monitoring the messages from that Cell.
LTR Operation: The radio will automatically display the last Call Group
selected.
Press the [POWER] key to turn the radio off.
Adjust the Volume
1. Press the top of [VOLUME] to increase the volume.
2. Press the bottom of [VOLUME] to decrease the volume.
Each time you press the key, the radio sounds a tone to indicate the
volume.

SVS8025TSESVS8025TSE - 8 -
Select a Call Group
Note: If you are already at the Call Group you want, proceed to the
next section.
Press [SELECT] (▲or ▼) to move
up or down in the Call Group List
until you find the Call Group you
want.
If you are using an ESAS system, the radio may need to "check-in" to this
new Call Group before you can send or receive calls.
Transmit/Receive
1. Remove microphone from hook (hanger bracket).
2. Press the Push-To-Talk [PTT] button on the side of the microphone. Hold
this button in while you transmit your message. The Transmit icon (TX)
flashes while the radio "handshakes" with the Repeater System. Begin
talking when you hear the optional connect tone, or when the Transmit
icon stops flashing and remains lighted continuously during your
transmission .
3. Release the [PTT] button when you are ready to listen.
Note: If communication is difficult, try to find a higher location with
fewer obstructions between you and the repeater site.
4. For better voice quality while transmitting, hold the microphone vertically
about one inch in front of your mouth, with the top of the microphone level
with your lips. Replace the microphone in the hanger bracket when
finished.
Dispatch Call
To respond to a Dispatch Call,
remove the microphone from the
hook (hanger bracket) and press
the [PTT] button and speak into
the microphone. Release the
[PTT] button to listen.

SVS8025TSESVS8025TSE - 9-
Telephone Call
When a telephone call is received,
you'll hear a ring tone.
To answer the call, remove the microphone from the hook (hanger bracket)
and press the [PTT] button and speak into the microphone. Release the
[PTT] button to listen.
Talk-Around
In Talk-Around Mode, the transmit and receive frequencies are the same.
Instead of communicating through a repeater, you can communicate directly
with another radio, provided that radio is set to the same Mode and
frequency.
Talk-Around must be programmed as a Call Group. If your radio is
programmed with this feature, select that Call Group using [SELECT] (as
described on page 8).
When you are in a Talk-Around
Call, the Talk-Around Icon (TAC) is
displayed.
Quick Keys
A Call Group can be assigned to any of the Quick Keys ([A], [B], or [C]) for
quick access. For example, you could assign the Talk-Around Call Group to
Quick Key [A]:
1. Use [SELECT] to select the Talk-Around Call Group.
2. Press and hold key [A] for three seconds. An Alert tone will verify the
assignment.
Use the same procedure to assign other Call Groups to [B] and [C].

SVS8025TSESVS8025TSE - 10 -
Scan
When Scan is activated (see Menu
Functions on page 11), the radio
will scan a predetermined list of
Call Groups. Call Groups can be
added to or subtracted from this
list. (See page 15.)
When a call is received, the radio
stops at that Call Group.

SVS8025TSESVS8025TSE
Menu Functions
Note: Your radio may have only some of the features programmed.
Check with your Service Provider or Uniden Dealer for more
information.
You can set a number of features in the SVS8025TSE through the radio's
optional Menus. Press [MENU] to see the next Menu Item.
When you are at the desired Menu selection, you'll see the current setting.
Use [SELECT] to set a new value, or to activate or deactivate the feature.
Press [MENU] to store the new setting and move to the next Menu item, or
press [EXIT] to store the new setting and return to the last selected Call
Group.
If you do not press any key for 5 seconds, the Menu Function will time out.
You will hear a distinctive tone, the displayed setting will be stored, and the
radio will return to the last selected Call Group.
- 11-

SVS8025TSESVS8025TSE - 12 -
SET SCAN
Activate or deactivate the Scan function.
1. Select this item to see the
current setting (On or Off).
2. Press [SELECT] to change the
setting.
3. Press [EXIT] to store the new setting and return to the last selected Call
Group.
- Or -
Press [MENU] to store the new setting and move to the next Menu item.
- Or -
Let the Menu time out (5 seconds). The new setting will be stored, and the
radio returns to the last selected Call Group.
SET TIMER
Sets the Automatic Power Off Timer.
1. Select this item to see the
current setting.
2. Press [SELECT] to change the
setting. Choose from zero, 4
hours, 10 hours, or 16 hours.
3. Press [EXIT] to store the new setting and return to the last selected Call
Group.
- Or -
Press [MENU] to store the new setting and move to the next Menu item.
- Or -
Allow the Menu to time out (5 seconds). The new setting will be stored,
and the radio returns to the last selected Call Group.

SVS8025TSESVS8025TSE - 13-
SET HORN
If you have the auxiliary equipment installed in your vehicle, your horn will
honk when a call is received.
Note: You must set TIMER to 4, 10, or 16 Hours before setting the
HORN option.
1. Select this item to see the
current setting (Off, 3 Beeps, or
7 Beeps).
2. Press [SELECT] to change the
setting.
3. Press [EXIT] to store the new setting and return to the last selected Call
Group.
- Or -
Press [MENU] to store the new setting and move to the next Menu item.
- Or -
Allow the Menu to time out (5 seconds). The new setting will be stored,
and the radio returns to the last selected Call Group.
SET LOCK
Locks all keys on the radio except [VOLUME]. The [PTT] and DTMF keys on
the microphone are also still active.
1. Select this item to access the
Lock setting.
2. Press [SELECT] to set the
Lock.

SVS8025TSESVS8025TSE - 14 -
3. Press [EXIT] to Lock the radio
and return to last selected Call
Group.
- Or -
Allow the Menu to time out (5
seconds). The radio will be
locked.
4. Press [EXIT] to unlock the radio.
SET DIMMER
Adjusts display intensity to ambient light conditions.
1. Select this item to see the
current setting.
2. Press [SELECT] to change the
setting. As you change the
setting, the display lighting
changes accordingly.
3. Press [EXIT] to store the new setting and return to the last selected Call
Group.
- Or -
Press [MENU] to store the new setting and move to the next Menu item.
- Or -
Allow the Menu to time out (5 seconds). The new setting will be stored,
and the radio returns to the last selected Call Group.

SVS8025TSESVS8025TSE - 15-
Advanced Operation
Note: Your radio may have only some of the features programmed.
Check with your Service Provider or Uniden Dealer for more
information.
Editing the Scan List
The default scan list contains all Call Groups programmed into your radio.
To delete a Call Group from the scan list:
1. Use the [SELECT] key to choose the Call Group to be excluded.
2. Press the [L/O] key. The DEL icon will appear to indicate that the selected
Call Group will be bypassed during scan.
To add a Call Group to the scan list.
1. Press the [SELECT] key to choose the Call Group to be included in the
scan sequence. The DEL icon appears.
2. Press the [L/O] key. The DEL icon will disappear indicating that the
selected Call Group has been returned to the scan list.
Manually Dialing a Call
(DTMF Microphone Required)
1. Select a Call Group programmed with no pre-stored numbers.
2. Press and release the microphone push-to-talk [PTT] switch. A dial tone
should be heard.
3. Press the numbered keys on your optional AMX 101A DTMF microphone
to dial the desired number.
Important: Hold the first number key down about a second before
dialing the rest of the number.
4. When the called party answers, press the [PTT] switch to talk; release the
[PTT] switch to listen.
A short tone is transmitted each time the [PTT] switch is released to let the
other party know you are listening.
5. When your conversation is finished, "hang up" by pressing the pound "#"
key on the microphone keypad or by returning the microphone to the
hanger bracket to ground it.

SVS8025TSESVS8025TSE - 16 -
Talk Back Scan (Automatic Reply on Called Group)
The radio continually scans through all programmed and non Locked-Out
Call Groups. It transmits on the selected Call Group unless the Auto-Reply
option is programmed and a call has just been received. To automatically
transmit on this new Call Group, lift the microphone from the hanging bracket
within the programmed time (1 to 8 seconds).
Virtual Group (ESAS Operation Only)
When you are in a different Cell, the radio will make a half-duplex Selective
Call to the system to remain part of the original Group. When this happens,
and you transmit, you may see a change in the Call Group shown on your
radio display. However, you will still be connected to the original Call Group.
Busy System Queuing
When you select a telephone Call Group, and all lines are busy, the radio will
automatically enter a queue until a line is available. You will hear three quick
beeps indicating you are in Busy System Queuing. When a line becomes
available, you will hear a steady string of beeps. You must press the [PTT]
key within 10 seconds to make the connection or lose the line.
Busy System Queuing lasts for a maximum of 60 seconds. If a line is not
available during that time, the queue will be canceled, and you must try to
access a line again, and restart the Queuing.

SVS8025TSESVS8025TSE - 17-
Alert Tones
You will hear a unique Alert Tone or set of Tones under two conditions:
1. Whenever you perform certain functions, such as pressing an appropriate
key or pressing the wrong key for that operation.
2. Whenever a service feature is activated, such as establishing a
connection, trying to reach a busy repeater, or failing to reach a repeater.
Following are the different Alert Tones, with explanations.
Normal Tone
A single "beep" tone is heard each time you press an appropriate key, such
as [MENU], [A], or [SELECT].
Error Tone
A single "bonk" tone is heard whenever you attempt to perform a function
that is not programmed or if you press the wrong key in a sequence.
Queuing Tones
If the radio enters the Queuing Mode at the beginning of an ESAS call, you
will see the Queuing Icon. Once queued, the radio generates three beeps
every time you press [PTT] to inform you that it is still in queue mode. If
access is not achieved, a single long beep sounds. Queuing is automatically
reset and turned off.
Connect Tones
These short tones sound when the radio gains access to the trunking
system. You can begin speaking when you hear this tone.
Busy Tone
If the system you want to contact is within range, but is in use, you will hear a
busy tone similar to a telephone busy signal. When this signal is present, the
radio will not transmit. Wait a few seconds and try again.
Intercept Tone
A single short beep produced during extended attempts at "handshake,"
indicating retry attempts. This means that the radio is having difficulty
contacting the repeater system.

SVS8025TSESVS8025TSE
Out-Of-Range Tone
If you are in a no-repeater coverage area, or if the repeater is not functioning,
then a single steady Out-Of-Range Tone will be produced after a number of
"handshake" attempts.
Timeout Tone
If you are at a Menu Function and do not press a key for more than 5
seconds, you'll hear a two-note tone when the radio times out and returns to
the last selected Call Group.
- 18 -
Table of contents
Other Uniden Radio manuals

Uniden
Uniden MC6700 User manual

Uniden
Uniden Bearcat BCD396T User manual

Uniden
Uniden UH720SX-NB User manual

Uniden
Uniden BEARCAT 680 User manual

Uniden
Uniden MADISON User manual

Uniden
Uniden PRO 520XL User manual

Uniden
Uniden PC122 User manual

Uniden
Uniden GMR1048-2CK Manual

Uniden
Uniden BCD996T User manual

Uniden
Uniden FRS420 series User manual

Uniden
Uniden AX 144 User manual

Uniden
Uniden MYSTIC - Marine GPS Receiver User manual

Uniden
Uniden PRO340XL User manual

Uniden
Uniden UH720SX-NB User manual

Uniden
Uniden HOMEPATROL-1 User manual

Uniden
Uniden PRO 520XL User manual

Uniden
Uniden PRO340XL User manual

Uniden
Uniden PC122XL User manual

Uniden
Uniden Madison CB User manual

Uniden
Uniden CMX760 User manual