Urrea DLL21 Dimensions and installation guide

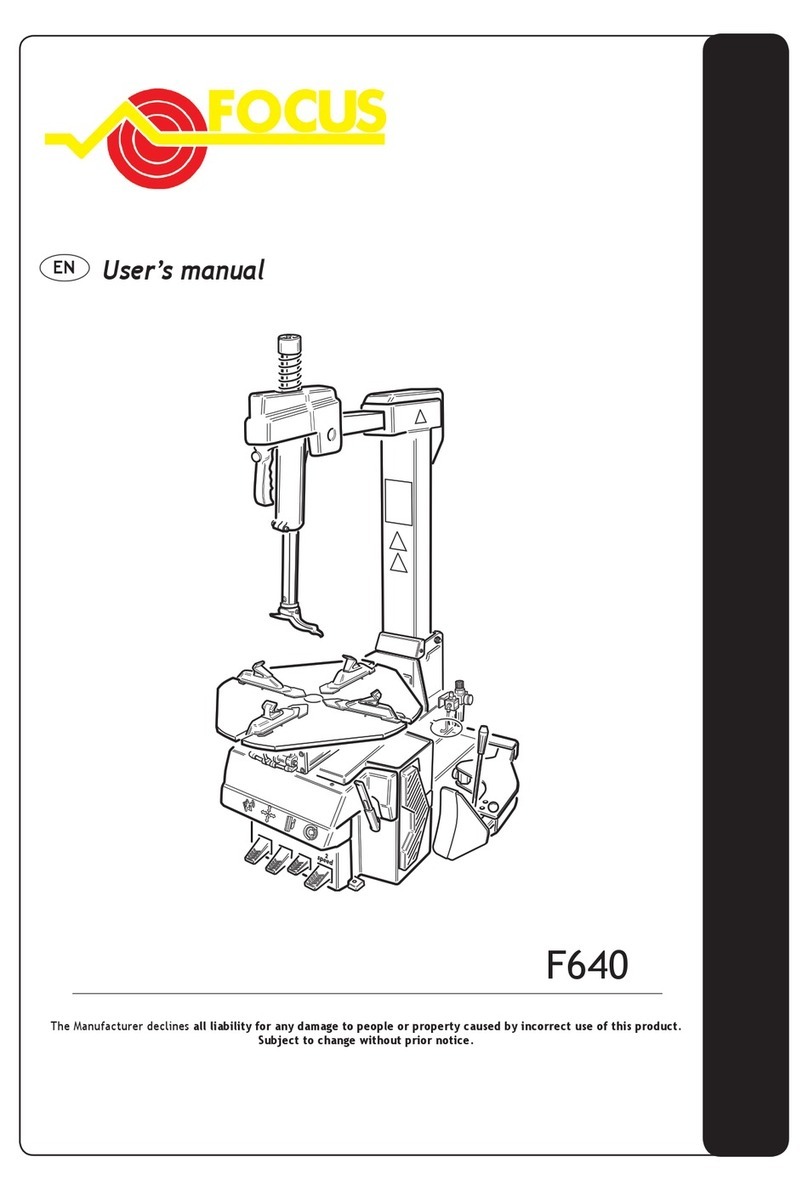
Desmontadora de Llantas
Tire Changer
DLL21 •DLL24
Manual de Usuario y Garantía.
User’s Manual and Warranty.
ATENCIÓN: Lea, entienda y siga las instrucciones de seguridad contenidas en este
manual, antes de operar esta herramienta.
WARNING: Read, understand and follow the safety rules in this manual, before operating this tool.
DLL21-DLL24 manual.indd 1 10/07/15 15:14

2
ENGLISHESPAÑOL
CONTENIDO CONTENT
SIMBOLOS SYMBOLS
PELIGRO, ADVERTENCIA, PRECAUCIÓN:
Indica un riesgo personal o la posibilidad
de un daño.
DANGER, CAUTION, WARNING: Indicates risk of
personal injury and/or the possibility of damage.
General safety rules
Electric safety
Personal safety
Tool use and care
Specific safety rules for wheel
balancers
Features
Installation & assembly
Operation instructions
Maintenance
Troubleshooting
Technical data
Electric wiring diagram
Warranty policy
13
13
13
13
14
15
15
17
19
21
21
22
24
3
3
3
4
4
5
6
8
9
11
12
22
24
Normas generales de seguridad
Seguridad eléctrica
Seguridad personal
Utilización y cuidados de las
herramientas eléctricas
Advertencias de seguridad para
desmontadoras
Características
Instalación y ensamble
Instrucciones de operación
Mantenimiento
Solucionador de problemas
Especificaciones técnicas
Diagramas eléctricos
Garantía
DLL21-DLL24 manual.indd 2 10/07/15 15:14

NORMAS GENERALES DE SEGURIDAD
El propósito de este manual es otorgar al due-
ño y al operador de esta máquina un conjun-
to de instrucciones prácticas y seguras para el
uso y mantenimiento de la desmontadoras de
llantas. Si usted sigue las instrucciones correc-
tamente, la máquina le ofrecerá los niveles de
eficiencia y duración adecuados.
ADVERTENCIA: Lea todas las advertencias
de seguridad y todas las instrucciones. La omi-
sión de alguna de las advertencias e instruccio-
nes que se enlistan a continuación puede dar
como resultado un choque eléctrico, fuego y/o
un serio daño.
CONSERVE TODAS LAS ADVERTENCIAS Y
TODAS LAS INSTRUCCIONES.
SEGURIDAD EN EL ÁREA DE TRABAJO
Mantenga el área de trabajo limpia y bien ilu-
minada. Las áreas desordenadas y oscuras pro-
vocan accidentes.
No maneje herramientas eléctricas en atmós-
feras explosivas, tales como en presencia de
líquidos inflamables, gases o polvo. Las herra-
mientas eléctricas crean chispas que pueden
encender el polvo o los humos.
Mantenga alejados a los niños y curiosos
mientras maneja una herramienta eléctrica.
Las distracciones pueden causarle la pérdida
del control.
SEGURIDAD ELÉCTRICA
• Evite el contacto del cuerpo con las super-
ficies descargadas a tierra tales como tubos,
radiadores, rangos y refrigeradores. Existe un
mayor riesgo de descarga eléctrica si su cuerpo
“hace tierra”.
• No exponga el producto a la lluvia o a condi-
ciones de humedad. La entrada de agua en la
máquina aumentará el riesgo de una descarga
eléctrica.
EXTENSIONES DE CABLE
NOTA: El uso de cables dañados incrementa el
riesgo de descargas eléctricas o quemaduras.
Si es necesario un cable de extensión, debe ser
usado un cable con el tamaño adecuado de los
conductores. Siempre use cables de extensión
listados en UL, CSA ó NOM.
Cuando esté usando el producto afuera, use
una extensión para exteriores marcadas con lo
siguiente: “WA” o “W”. Estas extensiones están
pensadas para trabajar en exteriores y reducen
el riesgo de descarga eléctrica.
SEGURIDAD PERSONAL
Esté alerta, vigile lo que está haciendo y use el
sentido común cuando maneje una herramien-
ta eléctrica. No use una herramienta eléctrica
cuando esté cansado o bajo la influencia de
drogas, alcohol o medicamentos. Un momento
de distracción mientras maneja herramientas
eléctricas puede causar un daño personal serio.
Use equipo de seguridad. Lleve siempre pro-
tección para los ojos. La utilización para las
condiciones apropiadas de un equipo de segu-
ridad tal como mascarilla antipolvo, zapatos no
resbaladizos, gorro duro, o protección para los
oídos reducirá los daños personales.
Evite un arranque accidental. Asegúrese de
que el interruptor está en posición apagado
antes de conectar a la red y/o a la batería, co-
ger o transportar la herramienta. Transportar
herramientas eléctricas con el dedo sobre el
interruptor o enchufar herramientas eléctricas
que tienen en interruptor en posición encendi-
do invita a accidentes.
Retire llaves o herramienta antes de arrancar
la herramienta eléctrica. Una llave o herra-
mienta dejada unida a una pieza rotativa de
una herramienta eléctrica puede causar un
daño personal.
No se sobrepase. Mantenga los pies bien asen-
tados sobre el suelo y conserve el equilibrio en
todo momento. Esto permite un mejor control
de la herramienta eléctrica en situaciones in-
esperadas.
Vista adecuadamente. No vista ropa suelta o
joyas. Mantenga su pelo, su ropa y guantes
alejados de las piezas en movimiento. La ropa
suelta, las joyas o el pelo largo pueden ser co-
gidos en las piezas en movimiento.
Si hay dispositivos para la conexión de medios
de extracción y recolección de polvo, asegúre-
se de que éstos estén conectados y se usen co-
rrectamente. El uso de estos dispositivos puede
reducir los peligros relacionados con el polvo.
3
ESPAÑOL•Manual de Usuario
DLL21-DLL24 manual.indd 3 10/07/15 15:14

IMPORTANTE: Este aparato no se destina
para utilizarse por personas (incluyendo niños)
cuyas capacidades físicas, sensoriales o menta-
les sean diferentes o estén reducidas, o carez-
can de experiencia o conocimiento, a menos
que dichas personas reciban una supervisión o
capacitación para el funcionamiento del apa-
rato por una persona responsable de su segu-
ridad. Los niños deben supervisarse para ase-
gurar que ellos no empleen los aparatos como
juguete.
UTILIZACIÓN Y CUIDADOS DE LAS
HERRAMIENTAS ELÉCTRICAS
No fuerce la herramienta eléctrica. Use la he-
rramienta eléctrica correcta para su aplicación.
La herramienta eléctrica correcta hará el tra-
bajo mejor y más seguro al ritmo para la que
fue concebida.
No use la herramienta eléctrica si el interrup-
tor no gira “encendido” y “apagado”. Cual-
quier herramienta eléctrica que no pueda con-
trolarse con el interruptor es peligrosa y debe
repararse.
Desenchufe la clavija de la fuente de alimen-
tación y/o de la batería antes de efectuar
cualquier ajuste, cambio de accesorios, o de
almacenar las herramientas eléctricas. Tales
medidas preventivas de seguridad reducen el
riesgo de arrancar la herramienta accidental-
mente.
Almacene las herramientas eléctricas inactivas
fuera del alcance de los niños y no permita el
manejo de la herramienta eléctrica a personas
no familiarizadas con las herramientas o con
estas instrucciones. Las herramientas eléctricas
son peligrosas en manos de usuarios no entre-
nados.
Mantenga las herramientas eléctricas. Com-
pruebe que las partes móviles no estén des-
alineadas o trabadas, que no haya piezas ro-
tas u otras condiciones que puedan afectar la
operación de las herramientas eléctricas. Las
herramientas eléctricas se reparan antes de su
uso, cuando están dañadas. Muchos acciden-
tes son causados por herramientas eléctricas
pobremente mantenidas.
Mantenga las herramientas de corte afiladas y
limpias. Las herramientas de corte mantenidas
correctamente con los bordes de corte afilados
son menos probables de trabarse y más fáciles
de controlar.
Use la herramienta eléctrica, accesorios y pun-
tas de herramienta, etc. de acuerdo con estas
instrucciones y de la manera prevista para el
tipo particular de herramienta eléctrica, te-
niendo en cuenta las condiciones de trabajo
y el trabajo a desarrollar. El uso de la herra-
mienta eléctrica para aplicaciones diferentes
de las previstas podría causar una situación de
peligro.
SERVICIO
Haga revisar su herramienta eléctrica por un
servicio de reparación calificado usando sola-
mente piezas de reemplazo idénticas. Esto ga-
rantizará que la seguridad de la herramienta
eléctrica se mantiene.
ADVERTENCIAS DE SEGURIDAD
PARA DESMONTADORAS
ADVERTENCIA: Este manual de operación
es una parte muy importante del producto,
por favor léalo detenidamente y manténgalo
en un lugar apropiado.
USO
La máquina está diseñada solamente para
montar, desmontar e inflar una llanta dentro
de los límites especificados y no para otros
propósitos. El fabricante no es responsable por
daños y/o lesiones causados por la operación
inadecuada y fuera de rango.
NOTA: Esta máquina deberá ser operada so-
lamente por personal calificado y entrenado
adecuadamente. Cuando la máquina esté en
funcionamiento, todo personal no autorizado
deberá estar alejado de la desmontadora.
Ponga atención a la etiqueta de seguridad pe-
gada en la máquina.
Los operadores deben utilizar equipo de segu-
ridad todo el tiempo tales como ropa de tra-
bajo, lentes de seguridad, tapones auditivos y
zapatos de seguridad. Mantenga manos y cuer-
po alejados de las partes móviles tanto como
sea posible. La ropa aguada, collares, pulseras
y ornamentos ostentosos pueden ser de mucho
peligro para los operadores.
4
DLL21-DLL24 manual.indd 4 10/07/15 15:14

La desmontadora deberá ser instalada sobre un
piso plano y sólido. Un espacio mayor a 0.5m
de distancia de la pared a la parte posterior y
lateral de la máquina garantiza el flujo de aire
perfecto y un espacio de operación suficiente.
No coloque la máquina en un sitio muy calien-
te, con mucha humedad, con mucho polvo, con
gas flamable y/o corrosivo.
Cualquier cambio y/o alteración a las partes
de la unidad in previo permiso del fabricante,
pueden causar daños y/o lesiones a la máquina
/ operador.
La unidad deberá ser operada solamente bajo
el voltaje y presión de aire especificados.
Si tiene la necesidad de cambiar de lugar la
unidad, hágalo bajo la supervisión de personal
capacitado.
ADVERTENCIA: No coloque ninguna parte
del cuerpo debajo de la herramienta de des-
montaje.
• Al separar la llanta del rin, la destalonadora
se moverá rápidamente hacia la izquierda.
NOTA: cuando se presiona la llanta, el cilin-
dro de la abrazadera abierta puede lastimar
la mano del operador. Recuerde no tocar la pa-
red lateral de la llanta.
• Al sujetar el rin, no meta la mano u otras par-
tes del cuerpo entre la abrazadera & el rin.
• No se pare detrás de la columna, al girar pue-
de lesionar a las personas.
IMPORTANTE: No se pare detrás de la co-
lumna, al girar puede lesionar a las personas.
ADVERTENCIAS:
Para inflado rápido asegúrese de sujetar la
llanta. Al operar la unidad no utilice cabello
largo ropa aguada y joyería.
Al operar la unidad no coloque la mano debajo
de objetos que caen.
CARACTERÍSTICAS
CONOZCA SU HERRAMIENTA
Esta desmontadora con columna fija y brazo
oscilante, es perfecta para montar, desmontar
e inflar todo tipo de llantas ya sean con o sin
cámara. La operación es sencilla y segura. Es el
equipo necesario para un taller automovilístico
y tienda de neumáticos.
1. RESORTE DE FLECHA VERTICAL.
2. VÁLVULA OSCILANTE.
3. FLECHA HEXAGONAL.
4. CABEZA DESMONTADORA.
5. UÑA.
6. TORNAMESA.
7. MESA DE OPERACIÓN.
8. PEDAL DE TORNAMESA.
9. PEDAL DE ABRAZADERA.
10. PEDAL PARA SUJETAR LA LLANTA.
11. TOPE.
12. PALANCA DE SEGURO.
13. COLUMNA.
8
910
22
22
11
1
2
3
4
5
6
7
8
910 21 20 19
18
17
16
15
14
13
12
11
5
ESPAÑOL•Manual de Usuario
DLL21-DLL24 manual.indd 5 10/07/15 15:14

14. PISTOLA PARA INFLAR.
15. CILINDRO DE ABRAZADERA.
16. PALANCA DE CUCHILLA.
17. ADITAMENTO DE SUMINISTRO DE AIRE.
18. CILINDRO DE CUCHILLA.
19. BRAZO DE PRESIÓN DE LLANTA.
20. CUCHILLA.
21. BARRETA.
22. TANQUE DE AIRE.
23. INDICADOR DE PRESIÓN.
INSTALACIÓN Y ENSAMBLE
Antes de instalar y/o montar la unidad, lea este
manual detenidamente. Los cambios de partes
y/o refacciones no autorizados llevados a cabo
en la máquina pueden dañarla severamente.
El personal encargado de llevar a cabo la ins-
talación de la unidad deberá tener el conoci-
miento eléctrico específico.
Los operadores deberán ser capacitados y au-
torizados.
Antes de instalar la unidad, lea detenidamente
la lista del equipo. Si usted tiene alguna duda,
favor de ponerse en contacto con los provee-
dores o directamente con nuestra compañía
Para asegurar el éxito de la instalación y mon-
taje, tenga a la mano las siguientes herramien-
tas:
Dos llaves (10”), llaves de dados, una llave
hexagonal, pinzas, desarmador, martillo, flexó-
metro.
DESEMBALAJE
De acuerdo con las instrucciones de desempa-
quetado, quite la caja y retire el material de
empaque, cheque si la máquina no está daña-
da, y verifique que las refacciones estén com-
pletas.
Mantenga el material de empaquetado lejos
del sitio de trabajo y disponga de él apropia-
damente.
INSTALACIÓN DE LA COLUMNA
Después de retirar todo el cartón, saque las
cajas con los accesorios (Fig.1-1), brazo destalo-
nador (Fig.1-5) y la columna (Fig.1-2), y coloque
el cuerpo según la imagen mostrada en la pa-
gina anterior, retire el tornillo (Fig.4), rondana
elástica y rondana metálica del cuerpo.
Coloque la columna sobre el cuerpo. La etique-
ta de advertencia debe ir al frente. Haga los
orificios en la base de la columna alineados con
los orificios con rosca sobre el cuerpo.
Coloque nuevamente
el tornillo, la ronda-
na elástica y rondana
metálica que había re-
tirado en el paso an-
terior. El torque debe
ser 70 NM (Fig.2).
Utilice un torquímetro para apretar.
Utilice una llave para retirar (Fig.3-3) la flecha
hexagonal (Fig.3-1) y retirar la tapa de la flecha
vertical. (Fig.3-2). Para retirar el tornillo de la
tapa de la flecha vertical necesitará utilizar la
palanca de seguro y asegurar la flecha hexago-
nal para evitar que se resbale y no dañar a la
máquina y/o al personal.
Instale el resorte (Fig.4-1) sobre la flecha verti-
cal. Monte la tapa de la flecha vertical y monte
el tornillo que se había retirado, ensamble la
rueda manual dentro de la tuerca buje del
brazo oscilante (Fig.4-2).
Retire la tuerca de seguridad que se localiza en
la parte de enfrente del vástago del pistón del
cilindro destalonador (Fig.5-1) y utilice la llave
adecuada para retirar la tuerca del tornillo del
6
1
2
3
4
5
Fig.1
Fig.2
Fig.3 Fig.4
1
2
31
2
DLL21-DLL24 manual.indd 6 10/07/15 15:14

brazo destalonador (Fig.5-4). Retire el tornillo
(Fig.5-3) y cuelgue el resorte (Fig.5-2).
Coloque el buje de la flecha del brazo desta-
lonador dentro de la placa de soporte sobre el
cuerpo (Fig.6-1) para alinear el orificio e insta-
lar el tornillo destalonador (Fig.6-2) y colocar la
tuerca para asegurarlo.
Introduzca el vástago del pistón (Fig.7-2) a
través del orificio del buje corredizo (Fig.7-1).
La superficie del buje corredizo deberá estar
hacia afuera (Fig.7). Coloque la tuerca retirada
(Fig.5-1) en el extremo delantero del vástago
del pistón. La tuerca será ensamblada. La dis-
tancia entre la orilla de la cuchilla a la goma
debe ser de 30~40mm (Fig.8). Cuelgue el resor-
te (Fig.6-3).
NOTA: Si la máquina tiene la característica de
inflado rápido, abra el panel lateral e introduz-
ca 2 tramos de manguera de Ø12 al tanque de
almacenamiento a la entrada de la válvula de
desinflado rápido y vuelva a instalar el panel
lateral.
Si la unidad viene equipada con caja de he-
rramientas, sujétela firmemente a la columna
completamente instalada.
INSTALACIÓN DE SUMINISTRO DE AIRE
Cuando la máquina sale de la planta de fabri-
cación, el dispositivo de suministro de aire ha
sido separado y colocado en la caja de acceso-
rios. El dispositivo de aire será colocado nueva-
mente cuando se encuentre en el lugar indica-
do por el cliente.
Saque el dispositivo de aire
de la caja de accesorios,
limpie cualquier suciedad
del cuerpo de la unidad,
utilice un desarmador para
fijarlo en el lado derecho
del cuerpo (Fig.9).
Conecte la manguera de aire. Separe el adap-
tador de la manguera ø8 PU en la pared lateral
del cuerpo e introdúzcalo en el codo (Fig.10-
11). El adaptador evita que la manguera se res-
bale dentro del cuerpo.
Conecte la pistola de inflado o el indicador de
presión. Introduzca el adaptador de la pistola
o del indicador de presión en la ranura (Fig.12)
de la tuerca abierta del aditamento de suminis-
tro de aire. Apriete la tuerca abierta y después
conecte el suministro de aire.
El suministro de aire ha sido ajustado de fábri-
ca, en caso de necesitar algún cambio ajústelo
de la siguiente manera:
PRESIÓN: Levante el botón ajustable de pre-
sión (Fig.13-1) y gírelo en el sentido de las ma-
necillas del reloj, esto aumentará la presión de
aire, si gira el botón en dirección contraria de
las manecillas del reloj, la presión de aire dis-
minuirá.
SUMINISTRO DE ACEITE: Utilice un desarmador
para girar el tornillo (Fig.13-2), si gira el torni-
llo en el sentido de las manecillas del reloj, esto
reducirá la velocidad de caída del aceite, si gira
el tornillo en dirección contraria de las mane-
cillas del reloj, la velocidad de caída del aceite
aumentará.
7
ESPAÑOL•Manual de Usuario
Fig.12
Fig.10 Fig.11
Fig.9
Fig.7 Fig.8
1
2
Fig.13
1
2
Fig.5
15
3
4
2
Fig.6
3 1
2
DLL21-DLL24 manual.indd 7 10/07/15 15:14

INSTRUCCIONES DE OPERACIÓN
DESMONTAR Y MONTAR UNA LLANTA
DESMONTAR UNA LLANTA
Saque todo el aire de la llanta y saque la cáma-
ra. Utilice la herramienta adecuada para retirar
el plomo de balanceo del rin. (Fig.14)
Coloque la llanta entre la cuchilla destalonado-
ra y el obstructor (Fig.15).
Después presione hacia abajo el pedal para
presionar la llanta para separar el rin de la llan-
ta. Repita la misma operación en las otras par-
tes de la llanta para separarla completamente
del rin. Coloque la rueda con el rin separado
sobre la tornamesa y presione el pedal de la
abrazadera para sujetar el rin. Se puede selec-
cionar la abrazadera exterior y la abrazadera
interior para sujetar la rueda según el tipo de
rin. Para separar el labio de la llanta con sua-
vidad, puede utilizar la brocha para aplicar el
lubricante o jabón espeso líquido entre el labio
y la llanta.
Coloque la flecha hexagonal a la posición de
operación para acercar la herramienta des-
montadora al rin de la llanta. Utilice la rueda
manual (Fig.4-2) para presionar contra el
brazo oscilante y después utilice la palanca
para poner el seguro.
La herramienta de desmon-
taje se moverá y dejará un
espacio automáticamente
(Fig.16).
El ángulo de la herramienta de desmontaje ha
sido calibrado al rin estándar (13”). En caso de
manejar rines extra grandes y/o rines extra pe-
queños, usted puede recalibrar el ángulo.
Utilice la barreta para sepa-
rar el labio hasta la válvula
de aire de la llanta (Fig.17).
Presione el pedal de la tornamesa para girarla
en el sentido de las manecillas del reloj hasta
que todo el labio de la llanta haya sido separa-
do del rin. En caso de manejar una llanta con
cámara, mantenga la boquilla a 10cm del lado
derecho de la herramienta de desmontaje al
desmontar para no lastimar la cámara.
Si al estar desmontando la llanta, la máquina
se atasca, deténgala inmediatamente y levante
el pedal para permitir que la tornamesa gire
en sentido contrario de las manecillas del reloj
para eliminar la resistencia.
Al manejar llantas con cámara, saque la cámara
y después mueva el labio inferior hacia arriba a
la orilla del rin y después repita los pasos men-
cionados para separar el otro labio de la llanta.
Durante el proceso de desmontaje de la llan-
ta, mantenga las manos y todas las partes del
cuerpo alejadas de las partes móviles. Los colla-
res, pulseras y ropa floja pueden ser muy peli-
grosos o lesionar seriamente a los operadores.
MONTAR UNA LLANTA
Antes de montar la llanta, verifique si la llanta
y el rin son del mismo tamaño
Limpie la suciedad y el óxido del rin y después
sujételo. Asegure el rin a la tornamesa.
Aplique líquido lubricante o jabón líquido al-
rededor del labio de la llanta, incline la llanta
contra el rin y mantenga el extremo delante-
ro hacia arriba. Presione hacia abajo la flecha
hexagonal para mover el brazo de desmontaje
y hacer contacto con el rin y el seguro.
Ambos labios, izquierdo y
derecho arriba de la cola de
la herramienta de desmon-
taje serán colocados bajo
el extremo delantero de la
herramienta de desmontaje
(Fig.18), gire la tornamesa
en dirección de las manecillas del reloj para
guiar el labio inferior a la ranura de separación
de la llanta.
En caso que la llanta tenga
cámara, colóquela dentro
de la llanta e introduzca la
válvula de aire en su lugar,
ensamble el labio de acuer-
do con el paso menciona-
do anteriormente (Fig.19).
8
Fig.16
Fig.18
Fig.19
Fig.17
Fig.14 Fig.15
DLL21-DLL24 manual.indd 8 10/07/15 15:14

9
ESPAÑOL•Manual de Usuario
Para evitar lesiones a los operadores, nunca
meta las manos entre el rin y la uña al momen-
to de sujetar el rin.
COMO INFLAR UNA LLANTA
Al inflar una llanta, tenga mucho cuidado y
siga el proceso de operación al pie de la letra.
Verifique que él suministro de aire y las co-
nexiones se encuentren en buen estado, esta
unidad está equipada con un indicador de pre-
sión de aire para monitorear el inflado de la
llanta y la presión de aire.
1. Libere la llanta de la tornamesa.
2. Conecte la manguera de inflado a la válvula
de aire de la llanta.
3. Mientras infla la llanta, verifique la presión
de aire y no exceda el límite indicado por el
fabricante del neumático. La válvula de dismi-
nución de presión equipada en la máquina, no
permite exceder los 3,5 bar, el cliente puede
cambiar la presión de aire, ajustando la válvula
de disminución de presión según se requiera.
4. Si la presión de aire es muy alta, utilice el
botón de desinflado para lograr la presión de
aire requerida.
INFLAR UNA LLANTA RÁPIDAMENTE
(solo para las máquinas equipadas con GT)
Si la llanta sin cámara no ajusta bien, aplique el
inflado rápido primero y después prosiga con
el proceso de inflado normal:
1. Sujete la rueda y conecte la manguera de in-
flado.
2. Presione hasta abajo el pedal para inflar (se-
gundo cambio) y suéltelo rápidamente una vez
que la llanta se encuentre completamente en
la posición del primer cambio.
3. Presione hasta abajo el pedal para inflar va-
rias veces hasta alcanzar la presión de aire co-
rrecta, verifíquela en el indicador de presión.
NOTA: Durante este proceso verifique que la
llanta haya sido sujetada firmemente, de lo
contrario se corre el riesgo de lesionar y/o per-
der la vida.
Al inflar, siga las siguientes instrucciones:
ADVERTENCIA: Verifique que la llanta y el
rin tengan la misma dimensión, también che-
que que la llanta no esté muy dañada para no
maltratarla más al inflarla.
ADVERTENCIA: Cuando se necesite una
presión de aire relativamente alta, retire la
llanta e ínflela bajo la cubierta de protección.
ADVERTENCIA: Al inflar la llanta, tenga cui-
dado; mantenga las manos y el cuerpo alejados
de la llanta.
MANTENIMIENTO
NOTA: Solamente personal profesional califica-
do puede llevar a cabo el mantenimiento de la
máquina. Antes de realizar cualquier manteni-
miento, desconecte la fuente de alimentación
y asegúrese que el personal de mantenimiento
se haga cargo del cable de corriente, mientras
tanto desconecte el suministro de aire, apá-
guelo y saque todo el aire de la unidad. Para
que la desmontadora funcione adecuadamen-
te y tenga una vida productiva prolongada, es
necesario llevar a cabo un mantenimiento y/o
reparación periódica según el instructivo, de lo
contrario el desempeño y confiabilidad de la
máquina se verán afectados y los operadores
se podrán lesionar seriamente.
Mantenimiento mensual:
Mantenga la máquina y el
área de trabajo limpias.
Utilice aceite diesel para
limpiar la flecha hexagonal
(Fig.20). Utilice el aceite de
la máquina para lubricar.
Utilice aceite diesel para
limpiar la uña de la torna-
mesa y su guía (Fig.21).
Cheque periódicamente el
nivel de aceite lubricante,
si está por debajo del lími-
te, agregue aceite SAE30
(Fig.22).
Purgue periódicamente el agua y las impurezas
del separador de agua y aceite.
Cheque y ajuste periódi-
camente la tensión de la
banda, ajuste la tuerca en A
y B para llevar a cabo la ten-
sión adecuada. (Fig.23)
Cheque todas las conexiones y apriete el tor-
nillo flojo.
Fig.20
Fig.21
Fig.23
Fig.22
DLL21-DLL24 manual.indd 9 10/07/15 15:14

10
FLECHA HEXAGONAL & AJUSTE DE ABER-
TURA DE LA PLACA DE SEGURO
Al presionar hacia abajo la palanca de segu-
ro hexagonal, la flecha hexagonal se deslizará
verticalmente bajo el efecto de su propio peso
y el del resorte de retorno. Cuando la palanca
de seguro gira unos 100 grados en dirección de
las manecillas del reloj, la leva conectada a la
palanca empujará hacia arriba la placa de se-
guro para trabar la flecha hexagonal.
Si no se puede llevar a cabo
esta operación, trabe la fle-
cha hexagonal ajustando la
posición de los tornillos y las
tuercas. (Fig.24).
INSTALACIÓN & OPERACIÓN DEL BRAZO
ASISTENTE
INSTALACIÓN DEL BRAZO ASISTENTE IZQUIERDO
El brazo asistente izquierdo se puede ajustar
a la desmontadora para poder manipular llan-
tas de 20” de diámetro y ayudar a completar
el desmontaje de llantas duras y de cama baja,
podemos utilizarlo para hacer el trabajo que es
difícil y/o imposible para los operadores.
Antes de instalar el brazo asistente izquierdo,
el suministro de aire y corriente deberán ser
desconectados.
El lado izquierdo y derecho de la base de la
placa del cuerpo de todas las desmontadoras
que pueden manipular llantas con un diámetro
de más de 20” cuentan con el orificio de insta-
lación para el brazo asistente izquierdo. Antes
de instalar el brazo asistente izquierdo, retire
el panel lateral y quite el tapón de goma, en
caso de tener la caja de herramientas sujeta-
da en el mismo lugar, retire la caja de herra-
mientas.
Retire el empaquetado del brazo asistente iz-
quierdo. Verifique los accesorios con la lista de
piezas, después saque el conjunto de la base
(Fig.25) e instale el tornillo y la rondana en la
base.
Empuje la plataforma de la base dentro del
cuerpo a través de la base en la parte poste-
rior izquierda del cuerpo. Alinee el orificio con
rosca con el orificio reforzado y utilice el torni-
llo y la rondana para sujetar. (Fig.26)
Instale el soporte del cuerpo (Fig.27-1) sobre el
asiento del ensamble y alinéelo, utilice el tor-
nillo anteriormente retirado para sujetar pero
no lo apriete.
Utilice el soporte (Fig.28) para conectar el so-
porte del cuerpo y el cuerpo e introduzca el
tornillo para sujetar.
Conecte la manguera de suministro de aire
(Fig.29-2) y utilice la T en forma de Y para co-
nectar la salida de la manguera, conecte el otro
extremo con la entrada de la válvula de ajuste
de presión.
Conecte el suministro de aire, introduzca el
vástago conector del rodillo cónico de pre-
sión (Fig.30-1) dentro del orificio de la flecha
giratoria (Fig.30-2) del brazo giratorio. Mani-
pule la válvula de cambio de dirección manual
para lograr que la punta del rodillo cónico de
presión coincida con el centro de la tornamesa
(Fig.31), de lo contrario utilice un desarmador
para ajustar la posición de la base y hacer que
coincida, después del ajuste, sujete el tornillo
Tal como lo muestra la Fig.32 fije el soporte en
el cuerpo y fije la caja de herramientas en el so-
porte y después utilice la tuerca de seguridad
para apretar.
Fig.25 Fig.26
Fig.27 Fig.28
1
Fig.31 Fig.32
1
2
Fig.29 Fig.30
1
2
1
2
Fig.24
DLL21-DLL24 manual.indd 10 10/07/15 15:14

11
ESPAÑOL•Manual de Usuario
Tal como lo muestra la Fig.33 fije el soporte del
cono en el soporte del cuerpo e instale el cono
de presión sobre el soporte.
Afloje la tuerca que se localiza debajo de la
base y gire el desarmador en dirección de las
manecillas del reloj hasta que quede contra
el suelo, entonces apriete (Fig.34) e instale el
panel lateral y la caja de herramientas retirada
anteriormente.
INSTALACIÓN DEL BRAZO ASISTENTE DERECHO
Después de separar la llanta del rin siguiendo
las instrucciones de la sección “Montar y des-
montar una llanta“, podemos ejecutar las si-
guientes operaciones:
Primero coloque la uña según la dimensión de
la llanta y después sujete el rin con la uña y co-
loque el rodillo cónico de presión en el centro
del rin (Fig.35). Presione la válvula manual para
presionar el rin hacia abajo hasta que la parte
externa del rin esté más abajo que la superficie
de la uña, justo en este momento puede inme-
diatamente bloquear el rin, eleve el brazo de
soporte y colóquelo en la posición de opera-
ción, retire el rodillo cónico de presión y coló-
quelo sobre el soporte.
Utilice la prensa para presionar hacia abajo la
llanta sección por sección con el rin separado
(Fig.36-1) y utilice una brocha para untar lubri-
cante en la orilla del labio. Coloque la herra-
mienta de desmontaje (Fig.36-2) en posición.
Coloque la prensa al lado de la herramienta
de desmontaje para presionar hacia abajo el
labio e introducir la barreta por debajo de la
herramienta de desmontaje entre el rin y el
labio (Fig.37), levante la prensa y colóquela al
lado opuesto de la herramienta de desmonta-
je y presione el labio dentro de la ranura de
desprendimiento de la llanta y después gire la
barreta para levantar el labio sobre la herra-
mienta de desmontaje (Fig.38). Gire la torna-
mesa para separar el labio superior.
SEPARAR EL LABIO INFERIOR
Utilice el disco para
elevar la parte inferior
de la llanta y separe el
labio inferior (Fig.39)
siguiendo el paso ade-
cuado.
MONTAR UNA LLANTA
Primero, limpie la suciedad utilizando jabon
líquido (previamente visto en las instruccio-
nes de montado) instale el labio inferior y con
la prensa presiónelo como se muestra en la
Fig.40, gire la tornamesa unos 90º y después
sujete la prensa en la
herramienta de des-
montaje (Fig.41) y gire
la tornamesa conti-
nuamente hasta que
se haya completado la
operación.
SOLUCIONADOR DE PROBLEMAS
LA TORNAMESA GIRA EN UNA SOLA DIREC-
CIÓN
El switch universal de contacto está quemado.
Cambiar switch universal.
LA TORNAMESA NO GIRA
Banda dañada. Cambiar banda.
Banda floja. Ajustar tensión de banda.
El motor o la fuente de corriente tienen pro-
blemas. Checar motor, fuente de corriente y
cable de corriente.
Fig.35
Fig.36
1
2
3
Fig.37 Fig.38
Fig.39 Fig.40
Fig.39
Fig.41
Fig.33
Fig.34
1
DLL21-DLL24 manual.indd 11 10/07/15 15:14

12
El switch universal de contacto está quemado.
Cambiar switch universal.
LA TORNAMESA NO PUEDE SUJETAR EL RIN
NORMALMENTE
Uña desgastada. Cambiar uñas.
Fuga de aire en el cilindro de la abrazadera.
Cambiar sellos.
NO SE PUEDE PONER SEGURO A LA FLECHA
HEXAGONAL Y CUADRADA
La placa de seguro no está en su posición. Vaya
a la sección de mantenimiento y reparación.
EL PEDAL DEL CHASIS NO REGRESA
Resorte de retorno de pedal dañado. Cambiar
resorte.
EL MOTOR NO GIRA O TIENE POCA POTENCIA
Sistema de conducción atascado. Checar que
se atascó.
Condensador descompuesto. Cambiar conden-
sador.
Voltaje insuficiente. Esperar que el voltaje se
normalice.
Corto circuito. Reparar.
EL CILINDRO NO TIENE FUERZA SUFICIENTE
Fuga de aire. Cambiar sellos.
Falla mecánica. Reparar falla.
Presión de aire insuficiente. Ajustar presión de
aire.
FUGA DE AIRE
Manguera de aire rota. Aditamento roto. Sello
de cabeza roto. Cambiar partes rotas.
Pérdida de sellador. Rellenar con pegamento.
ESPECIFICACIONES TÉCNICAS
DLL21
DLL24
VOLTAJE-FRECUENCIA
FASE
POTENCIA DE MOTOR
DIÁ. MÁXIMO DE RUEDA
ANCHO DE RUEDA
DIÁ. INTERNO DE RIN
DIÁ. EXTERNO DE RIN
FUERZA DEL SEPARADOR
DE LLANTAS
PRESIÓN DE TRABAJO
ENTRADA DE AIRE
120 V ~ 60 Hz
1~
1 HP
37,8” (96 cm)
3” - 11”
12” - 21”
10” - 18”
2 500 kg
8 - 10 Bar
1/4”
VOLTAJE-FRECUENCIA
FASE
POTENCIA DE MOTOR
DIÁ. MÁXIMO DE RUEDA
ANCHO DE RUEDA
DIÁ. INTERNO DE RIN
DIÁ. EXTERNO DE RIN
FUERZA DEL SEPARADOR
DE LLANTAS
PRESIÓN DE TRABAJO
ENTRADA DE AIRE
120 V ~ 60 Hz
1~
1,5 HP
47” (119 cm)
3” - 15”
12” - 21”
13” - 24”
2 500 kg
8 - 10 Bar
1/4”
DLL21-DLL24 manual.indd 12 10/07/15 15:14

13
ENGLISH•User’s manual
GENERAL SAFETY RULES
The purpose of this manual is to provide the
owner and operator of this machine with a set
of safe and practical instructions for the use
and maintenance of the tire changer.
If such instructions are carefully followed, the
machine will offer you the levels of efficiency
and duration.
WARNING: Read and understand all in-
structions. Failure to follow all indications list-
ed below, may result in electric shock, fire and/
or serious personal injury.
SAVE THESE INSTRUCTIONS.
SAFETY IN WORKING AREA
Keep your work area clean and well lit. Clut-
tered benches and dark areas may cause acci-
dents.
Do not operate power tools in explosive atmo-
spheres, such as in the presence of flammable
liquids, gases or dust. Some power tools create
sparks which may provoke fire.
Keep away observers, children and visitors
while operating a power tool. Distractions can
cause you to lose control.
ELECTRIC SAFETY
• Avoid the body contact with grounded sur-
faces such as pipes, radiators and refrigerators.
There is an increased risk of electric shock if
your body is grounded.
• Don’t expose power tools to rain or wet con-
ditions. The precense of water into power tools
will increase the risk of electric shock.
• When operating a power tool outside, use
an outdoor extension cord marked “W-A” or
“W”. These cords are rated for outdoor use
and reduce the risk of electric shock.
EXTENSION CORDS
Replace damaged cords immediately. The use
of damaged cords can shock, burn or electric
shock.
If an extension cord is necessary, a cord with
adequate size conductors should be used to
prevent excessive voltage drop, loss of power
or overheating.
PERSONAL SAFETY
Stay alert, watch what you are doing and use
common sense when operating a power tool.
Don’t use the tool if you are tired or under the
influence of drugs, alcohol or medication. A
moment of unattention while operating pow-
er tools may cause a serious personal injury.
Dress properly. Do not wear loose clothing or
jewellery. Contain long hair. Keep your hair,
clothing and gloves away of moving parts.
Loose clothes, jewellery or long hair can be
caught in moving parts.
Avoid an accidental starting. Be sure that the
switch is OFF before plugging in. Carrying
tools with the finger on the switch or plug in
the tool switch in ON may cause accidents.
Remove the adjusting keys or wrenches be-
fore turning the tool on. A wrench or a key
that is left close to a rotating part of the tool
may provoke a personal injury.
Do not overreach. Keep proper footing and
balance at all times. Proper footing and bal-
ance enables better control of the tools on un-
expected situations.
Use safety equipment. Always wear eye pro-
tection. Dust mask, nonskid safety shoes, hard
hat, or hearing protection must be used for ap-
propriate conditions.
Before connecting the tool to a power source
(receptacle, outlet, etc.) be sure that the volt-
age supplied is the same as that one specified
on the nameplate of the tool. To use a not
specified voltage may cause a serious injury to
the user as well as damage the tool.
IMPORTANT: This appliance is not intended
for use by persons (including children) with re-
duced physical, sensory or mental capabilities
may be different or reduced, or lack of experi-
ence or knowledge, unless such persons are su-
pervised or trained to operate the product by
a person responsible for their safety. Children
should be supervised to ensure they do not use
the devices as toys.
TOOL USE AND CARE
Do not force the power tool. Use the correct
tool for the application. The correct tool will
do the job better and more safely at the rate
that it was designed to work at.
DLL21-DLL24 manual.indd 13 10/07/15 15:14

14
Do not use tools if switch does not turn it on or
off. Any tool that cannot be controlled whith
the switch is dangerous and must be repaired.
Disconnect the plug from the power source
before making any adjustments, changing ac-
cessories or storing the tool. This preventive
safety measures reduce the risk of accidental
starting of the tool.
When the power tool is not in use, store it out
of the reach of children, and do not allow in-
dividuals who are not familiar with the power
tool or these instructions to operate it. Power
tools are dangerous in the hands on untrained
users.
Maintain the power tool. Check for misalign-
ment or binding of moving parts, broken parts,
and any other condition that may affect the
operation of the power tool. If it is damaged,
have it repaired before using. Many accidents
are caused by poorly maintained power tools.
Check for misalignment or bonding of moving
parts, breakage parts, and any other condition
that may affect the tools operation. If you find
a damaged tool, take it to service before use it.
Use only accessories that are recommended by
the manufacturer of your model. Suitable ac-
cessories for one tool, may become hazardous
when are used on another tool.
Keep cutting tools, sharpened and clean. Cut-
ting tools in good condition with sharpened
edges, are less likely to stuck in workpieces or
easier to control.
Is recommendable to use a safety device suit-
able, such a thermal and diferential switch
when you are using an electric equipment.
SERVICE
Tool service must be perfomed only by quali-
fied repair personnel. Service or maintenance
performed by unqualified personnel could re-
sult in a risk of injury.
SPECIFIC SAFETY RULES FOR
TIRE CHANGERS
WARNING: This instruction manual is the
important part of the product. Please read it
carefully and keep It properly.
USE
This machine is only applied to mount, de-
mount and inflate the tire in the specified
scope and not for any other purpose.
The manufacturer will not be responsible for
the damage or injury caused for the operation
not properly and out of the range.
NOTE: This machine should be operated by
the special trained qualified personnel. When
operating, the unauthorized personnel will be
kept far away from the machine.
Please note the safety label stuck on the ma-
chine.
Operators should wear safety protective fa-
cilities such as working suit, protective glasses,
eye plug and safety shoes. Keep your hands
and body from the movable parts as possible as
you can. Necklace, bracelet and loosen cloth-
ing may cause dangerous to the operators.
Tire changer should be installed and fixed on
the flat and solid floor. The more than 0.5m of
distance from the rear and lateral side of the
machine to the wall can guarantee the perfect
air flow and enough operation space.
Do not place the machine in the site of high
temperature, high humidity, dust and with
flammable and corrosion gas.
Without the permission from the manufac-
turer, any change on the machine parts will
cause injury/damage to the machine/operator.
Pay attention that the tire changer should be
operated under the specified voltage and air
pressure.
If you want to move the tire changer, you
should under the guidance of the professional
service personnel.
WARNING: Do not reach any part of your
body under the demount tool.
• When breaking bead, the bead breaking
blade will quickly move leftwards.
NOTE: When press the tire, the opened clamp
cylinder may injury the hand of the operator.
Remember, do not touch the side wall of the
tire.
• When clamping the rim, do not reach your
hand or other parts of the body in between the
clamp & the rim.
IMPORTANT: Do not stand behind the col-
umn to avoid the column from injuring the
persons when swing.
WARNINGS:
When rapid inflation, ensure the wheel
clamped.
DLL21-DLL24 manual.indd 14 10/07/15 15:14

15
ENGLISH•User’s manual
When operation, do not wear long hair, loosen
clothing and jewelries.
When operation, do not reach your hand un-
der the falling objects.
FEATURES
KNOW YOUR TOOL
This tire changer it’s suitable to mount, de-
mount and inflate all types of tires with tube
& tubeless. The operation is easy, convenient,
safe and reliable. It is the necessary equipment
for the auto service shop and tire shop.
1. VERTICAL SHAFT SPRING.
2. ROCKER VALVE.
3. HEXAGON SHAFT.
4. DEMOUNT HEAD.
5. CLAW.
6. TURNTABLE.
7. OPERATION LABEL.
8. TUMTABLE PEDAL.
9. CLAMP PEDAL.
10. TIRE PRESS PEDAL.
11. LIMIT HANDLE.
12. LOCK HANDLE.
13. COLUMN.
14. INFLATION GUN.
15. CLAMP CYLINDER.
16. BLADE HANDLE.
17. AIR SOURCE FITTING.
18. BEAD BREAKING CYLINDER.
19. TIRE PRESS ARM.
20. BEAD BREAKING BLADE.
21. CROWBAR.
22. AIR TANK.
23. INFLATION GAUGE BOX.
INSTALLATION & ASSEMBLY
Before installation and debug, carefully read
this manual. The unauthorized change on the
parts and spare parts of the machine will cause
the damage on the machine.
Installation and debug personnel should have
the specific electrical knowledge.
Operators must be trained and authorized.
Before installation, carefully read the equip-
ment list. If any question, please contact with
the dealers or our company.
To ensure the success of the installation and
debug, please prepare the following common
tools:
Two wrenches(10”), one socket wrenches, one
hexangular wrench, one tung and one screw
driver.
8
910
22
22
11
1
2
3
4
5
6
7
8
910 21 20 19
18
17
16
15
14
13
12
11
DLL21-DLL24 manual.indd 15 10/07/15 15:14

16
UNPACKING
According to the de-package instruction on
the package box, to detach the box and re-
move the package material to check if the
machine damage or not and if the spare parts
completed.
Keep the package material far away from the
working site and deal with it properly.
INSTALLATION OF THE COLUMN
After un-package the package carton, take out
accessory boxes (Fig.1-1), bead breaking arm
(Fig.1-5) and column assembly (Fig.1-2).
And position the body according to the illus-
tration on the previous page, remove the bolt
(Fig.1-4), elastic washer and plate washer on
the body.
Place the column on the body. The direction of
the warning label is forwards. Make the holes
on the column base plate align to thread holes
on the body.
Once again assemble the
removed the bolt, elastic
washer and plate washer
and plate washer removed
in the torque is 70N·M (Fig.2).
Use torsion wrench to tight. Use the wrench
to remove the screw (Fig.3-3) hexangular shaft
(Fig.3-1) and take off the vertical shaft cap
(Fig.3-2). When remove the screw on the verti-
cal shaft cap, you need use the lock handle to
lock the hexangular shaft to avoid sliding off
to damage the machine or injury personnel.
Install the vertical shaft spring (Fig.4-1) on the
vertical shaft. Mount the vertical shaft cap and
mount the removed screw and assemble the
hand wheel into the nut bushing of the rocker
arm (Fig.4-2).
Remove the lock nut at the front end of the
bead breaking cylinder piston rod (Fig.5-1) and
use the wrench to remove the nut on the bead
breaking arm bolt (Fig.5-4) Remove the bolt
(Fig.5-3) and hang the spring (Fig.5-2).
Position the bead breaking arm shaft bushing
into the bead breaking support plate on the
body (Fig.6-1) to align the hole and install the
bead breaking bolt (Fig.6-2)and assemble the
nut to lock.
Insert the piston rod (Fig.7-2) through the
hole of the bead breaking slide bushing (Fig.7-
1). The surface of the slide bushing should
be outwards (Fig.7). Assemble the removed
nut (Fig.5-1) into the front end of the piston
rod. The nut will be assembled. The distance
from the edge of the bead breaking blade to
the bead breaking rubber is 30~40mm (Fig.8).
Hang the spring (Fig.6-3).
NOTE: If the machine is the one with the quick
inflation, please open the side panel and insert
2 pieces of Ø12pu hose at the inlet of the quick
deflation valve into the 2 Ø12nozzle and then
install the side panel.
If being equipped with the tool box, you must
fix firmly and the column completely installed.
1
2
3
4
5
Fig.1
Fig.2
Fig.3 Fig.4
1
2
31
2
Fig.5
15
3
4
2
Fig.6
3 1
2
Fig.7 Fig.8
1
2
DLL21-DLL24 manual.indd 16 10/07/15 15:14

17
ENGLISH•User’s manual
AIR SOURCE FITTING INSTALLATION
When the machine out of the factory, the air
source fitting has been detached and placed
in the accessory box and the fitting will be in-
stalled when it is in the site of the customers
again.
Take out the air source
fitting out from the acces-
sory box and the screw and
remove the oil and dust.
Use the screw to fix it on
the right side of the body
(Fig.9).
Connect the air hose. Detach the adapter on
the ø8 PU hose on the side wall of the body
and insert it into the elbow (Fig.10-11). And
the adapter is to keep the hose from sliding
into the body.
Connect the inflation gun or inflation gauge
box: Inlay the adapter of the inflation gun or
inflation gauge box into the groove (Fig.12) on
the open nut on the air source fitting. Tight
the open nut and then connect the air source.
Air source has been ad-
justed before ex-factory.
If it needs change, adjust again:
PRESSURE: Lift up the pressure adjustable but-
ton (Fig.13-1) and twist clockwise and the air
pressure will increase. Meanwhile, if counter-
clockwise, the air pressure will decrease.
OIL FEED: Use screw driver to twist the screw
(Fig.13-2). If clockwise, the oil dropping speed
will slow. If counterclockwise, it will become
fast.
OPERATION INSTRUCTIONS
DEMOUNT AND MOUNT TIRE
DEMOUNT TIRE
Deflate the air in the tire completely and pull
out the core. Use the special tool to detach the
weight on the rim (Fig.14).
Place the tire between then bead breaking
blade and tire pressing runner clog (Fig.15).
Then step down the tire press pedal to detach
the rim from the tire. Repeat the same opera-
tion on the other parts of the tire to make the
tire completely detached from the rim. Place
the wheel with the tire detached from the rim
on the turntable and step the clamp pedal to
clamp the rim. You can select the outer clamp
and inner clamp to clamp the wheel according
to the different rim. To detach the lip smoothly,
you can use the brush to spread the lubricant
or thick soap liquid between the lip and rim.
Position the hexangular shaft to the working
position to make the demount tool close to
the rim of the wheel. And use the hand wheel
(Fig.4-2) to push against the rocker arm and
then use the lock handle to lock.
The demount tool will au-
tomatically move a little of
gap (Fig.16).
The angle of the demount tool has been cali-
brated according to the standard rim (13”). If
handling the extra-big or extra-small rim, you
can reposition.
Use the crowbar to detach
until the lip to the hump of
the demount tool (Fig.17).
Step the turntable rotation pedal to rotate the
turntable clockwise until the entire lip com-
pletely detached. If handling the tube tire,
Fig.12
Fig.14 Fig.15
Fig.10 Fig.11
Fig.9
Fig.13
1
2
Fig.16
Fig.17
DLL21-DLL24 manual.indd 17 10/07/15 15:14

18
to avoid the damage on the tube, you should
keep the nozzle of the tire 10cm from the right
side of the demount tool when demounting.
If the demount of the tire is jammed, please
stop the machine immediately and then lift up
the pedal to let the turntable rotate counter-
clockwise to remove the resistance
When handling the tube tire, Take out the
tube and then move the lower lip upwards to
the upper edge of the rim and then repeat the
above steps to detach the other lip .
In the process of demounting tire, you should
keep your hands and the other parts of your
body from the movable parts. Necklace, brace-
let and the loose clothing can injury personnel.
MOUNT TIRE
Before mount tire, check if the tire and rim are
of the same dimension.
Clean the dirt and rust on the rim and lock it on
the chuck. Lock the rim on the turntable.
Spread the lubrication liquid or soap liquid
around the lip. Tilt the tire against the rim and
keep the front end upwards.
Press down the hexangular
shaft to move the demount
arm to contact with the rim
and lock. The left lip above
the tail of the demount tool
and the right lip will be
positioned under the front
end of the demount tool (Fig.18).
Clockwise rotate the turntable to guide the
bottom lip into the tire detaching slot.
If there is tube, place it
in the tire and plug the
core. And assemble the
lip according to the above
mentioned step (Fig.19).
In the process of clamping the rim, do not
reach your hands in between the rim and the
claw to avoid the damage to the personnel.
INFLATION
When inflating the tire, please be carefully and
series obey the operation process. Check the
air route to see if the air connection is OK. This
machine is equipped with an inflation gauge
for monitoring the inflation of the tire and the
inflation pressure.
1. Loose the tire from the turntable.
2. Connect the inflation hose with the tire air
core.
3. In the process of inflation, you should re-
peat switching the inflation gun to confirm
the pressure indicated on the pressure gauge
not exceed the scope specified by the manu-
facturer. The pressure decrease valve equipped
in the machine make the pressure not to ex-
ceed 3,5bar. And the customer can get differ-
ent inflation pressure by adjust the pressure
decrease valve according to the requirement.
4. If the inflation pressures too high, you can
press down the deflation press button on the
inflation device to reach the required air pres-
sure.
RAPID INFLATION
(only for the machines with GT)
If the tubeless tire fit to the tire not tight, you
can apply the rapid inflation first and then
common inflation:
1. Clamp the wheel and connect the inflation
hose.
2. Step down the inflation pedal to the bottom
position (second gear) and quickly release the
pedal when the tire is full to the position of
the first gear.
3. Repeat stepping the pedal for many times to
confirm the pressure indicated on the pressure
gauge not exceeds the pressure specified
by the manufacturer.
NOTE: In this process, you should ensure the
wheel has been tightly clamped. Or you will be
in the dangerous of lose your life.
When inflating, please obey the following in-
structions:
WARNING: Carefully check if the tire and
the rim are of the same dimension and check
the wear condition of the tire to confirm the
tire not damaged before inflation.
WARNING: When the air pressure needed
for inflation relatively high, you can take off
the tire and to inflate under the protective
cover.
WARNING: When inflating the tire, please
be carefully. Keep your hands and body away
from the tire.
Fig.18
Fig.19
DLL21-DLL24 manual.indd 18 10/07/15 15:14

19
ENGLISH•User’s manual
MAINTENANCE
NOTE: Only the qualified professional person-
nel can execute the maintenance. Beforeany
maintenance, Cut off the power .And ensure
the maintenance personnel can take charge
of the power plug. Meanwhile, cut off the air
supply and push the air supply switch to the
off position and completely deflate the resid-
ual air in the machine. To correctly use the tire
changer and prolong its working life, it is nec-
essary to periodically maintenance and repair
according to the instruction manual. Or the
running and reliability of the machine will be
affected and the personnel near the machine
or the operator will be injured.
Monthly maintenance:
Keep the machine and working area clean.
Use the diesel oil to clean
the hexangular shaft
(Fig.20),Use the machine
oil to lubricate.
Use the diesel oil to clean
the turntable claw and its
guide and use the lith-
ium base oil to lubricate
(Fig.21),
Periodically check the lu-
brication oil level in the oil
fog device. If the oil level
lower than the oil scale,
please feed in the SAE30
lubrication oil in time (Fig.
22). Periodically drain out
the water and impurity in
the oil water separator.
Periodically check and
adjust the tension of
the driven belt. Properly
adjust the adjust nut in
A and B to realize the
proper tension. (Fig.23).
Check all the connect parts and tight the
loosen bolt.
HEXANGULAR SHAFT & LOCK PLATE LOCK
GAP ADJUSTMENT
When press downward the hexangular lock
handle, the hexangular shaft will vertically
slide under the effect of the weight of the
hexangular shaft and return spring. When the
lock handle rotate clockwise for about 100
degree, the cam connected to the handle will
push up the lock plate to lock the hexangular
shaft.
If you can not realize this situ-
ation, you can reach the target
to lock the hexangular shaft
through adjusting the position
of the screws and nuts (Fig. 24).
INSTALLATION & OPERATION OF THE ASSIS-
TANT ARM
INSTALL THE LEFT ASSISTANT
The left assistant can be equipped on the tire
changer which can handle the tire with the di-
ameter of 20˚ to help complete the demount
on the stiff and low profile tire. We can use it
to handle the work which if difficult and im-
possible to do only by the operators.
Before installation, the power and air source
must be cut off.
The left and right side of the base plate of
body of the tire changer which can handle
the tire with the diameter of more than 20˚ all
have the installation hole for the left assistant
prepared. Before installation, you can remove
the side panel and take off the installation
rubber plug. If there being the tool box, you
should detach the tool box.
Detach the package of the PL330assistant.
Check the accessory according to the pack list.
After confirmation, takeout the base assembly
(fig.25) and install the screw and washer on it.
Push the platform of the base plate of the base
assembly into the body through base plate on
the left-back side of the body. Align the thread
hole to the reinforce hole and use the bolt and
washer to fix (Fig.26).
Fig.20
Fig.21
Fig.23
Fig.24
Fig.22
Fig.25 Fig.26
DLL21-DLL24 manual.indd 19 10/07/15 15:14

20
Install the body bracket (Fig.27-1) on the seat
assembly. Align. Use the screw removed before
to fix and not tighten.
Use the fix supporting bracket (Fig.28) to con-
nect the body bracket and the body and insert
the screw to fix.
Connect the air source hose (Fig29-2) and use
Y Tee to connect the outlet hose and the other
end connect with the inlet of the assistant
pressure adjusting valve.
Connect the air source, insert the press cone
roller connect rod (Fig.30-1) into the rota-
tion shaft hole (Fig.30-2) of the rotation arm.
Handle manual direction change valve to make
the tip of the press cone roller coincide to the
center of the turntable (Fig.31). If not coincide,
use the screw to adjust the position of the base
to realize the coincide. After adjustment, fix
the bolt.
According to the Fig.32, fix the fix bracket
on the body and fixes the tool box on the fix
bracket and then use the lock nut to tight.
As Fig.33, fix the cone support on the body
bracket and install the press cone on the
bracket.
Loose the nut below the base and turn the
screw clockwise until it against the ground and
tight (Fig.34) and install the side panel and tool
box removed.
At this moment, the installation of the left as-
sistant completed.
INSTALL THE RIGHT ASSISTANT
After detach the tire from the rim according
to the instruction of the chapter IV, we can ex-
ecute the following operations.
First, position the claw according to the dimen-
sion of the tire and then clamp the rim by the
claw and position the tire press cone roller
at the center of the rim(Fig.35). Push down
the manual valve to press down the rim until
the external rim of the rim is lower than the
surface of the claw. At this moment, you can
immediately lock the rim. Lift up the support
arm and place it at the working position and
take off the press cone roller and place it on
the support.
Use the press (Fig.36-1) to press down the
tire section by section rim detached from the
mouth and use the brush to spread the lubri-
cant on edge of the lip. Position the demount
tool (Fig.36-2) in the demount position. Place
the press beside of the demount tool to press
down the lip and insert the crowbar below
the demount tool in between the rim and lip
(Fig.37).
Lift up the press and move it to the position
opposite to the demount tool and press the lip
into the tire detach groove and then rotate the
crowbar to lift the lip onto the demount tool
(Fig.38). Rotate the turntable to detach the up-
per lip.
Fig.35
Fig.36
1
2
3
Fig.37 Fig.38
Fig.32
Fig.33
Fig.34
1
Fig.31
1
2
Fig.29 Fig.30
1
2
1
2
Fig.27 Fig.28
1
DLL21-DLL24 manual.indd 20 10/07/15 15:14
This manual suits for next models
1
Table of contents
Languages:
Popular Tyre Changer manuals by other brands

twin busch
twin busch TW X-11 Installation, operation, and parts manual

Butler
Butler AIKIDO.4 instruction manual

Rene Herse Cycles
Rene Herse Cycles ANTELOPE HILL Mounting instructions

Snap-On
Snap-On EEWH326A Operation instructions

Hunter
Hunter TCX50 Operation manual

John Bean
John Bean EHP System Series Operation instructions