UT MyMovie MV3800 User manual

MV3800 MyMovee HD Media Recorder
User’s Guide

Chapter: 1
Introduction
Thank you very much for purchasing the MV3800 HD Media Recorder product. We hope you will enjoy
using it as a great home entertainment partner.
The MV3800 HD Media Players & Recorders are designed to enhance the consumer experience with
breathtaking movie quality of High-Definition (HD) video and crystal sound clarity of DTS and Digital
Dolby digital audio. Featuring full support of major media formats, MV3800, offers users a simple way to
play their HD 1080p digital content on any TV.
Instead of keeping shelves full of music CDs, DVDs and Blue Ray Discs movies, more and more people
prefer to build large personal collections of digital content on their desktop or laptop computers. The
drawback is they must use the computer to play these files. Their movie watching or music listening
experience is confined to small screen and small speakers of their computer system. With MV3800, users
can simply play the digital content directly from the pre-assembled internal HDD up to 2TB or from USB
external storage device in the comfort of their living room or bedroom. They are free from struggling with
burning media files onto DVDs or connecting the computer to the TV.
MV3800 also has recording feature of TV shows from the Cable or Satellite, or family videos from a
Camcorder. It provides an ideal setup archiving old VCR tapes and DVDs to digital media files. MV3800
even supports time-shift and scheduled recording functionalities - making Live TV playback a snap
Features Highlight
High definition 1080p movie
Crystal clear high definition audio
More video format supported
Build-in HDD
Media Streaming with UPNP
Record, store and playback
USB 2.0 Host ports
Internet Radio
Download Station
NAS
Multi language support
Product Specifications
Chipset
Realtek 1283 C+
A
C
Adapter
Input: 100-240V Output: 12V/3A
A/V Video: HDMI 1.3,CVBS, YpbprAudio: Digital 5.1(optical+coaxial)Audio,Stereo L/R

Output
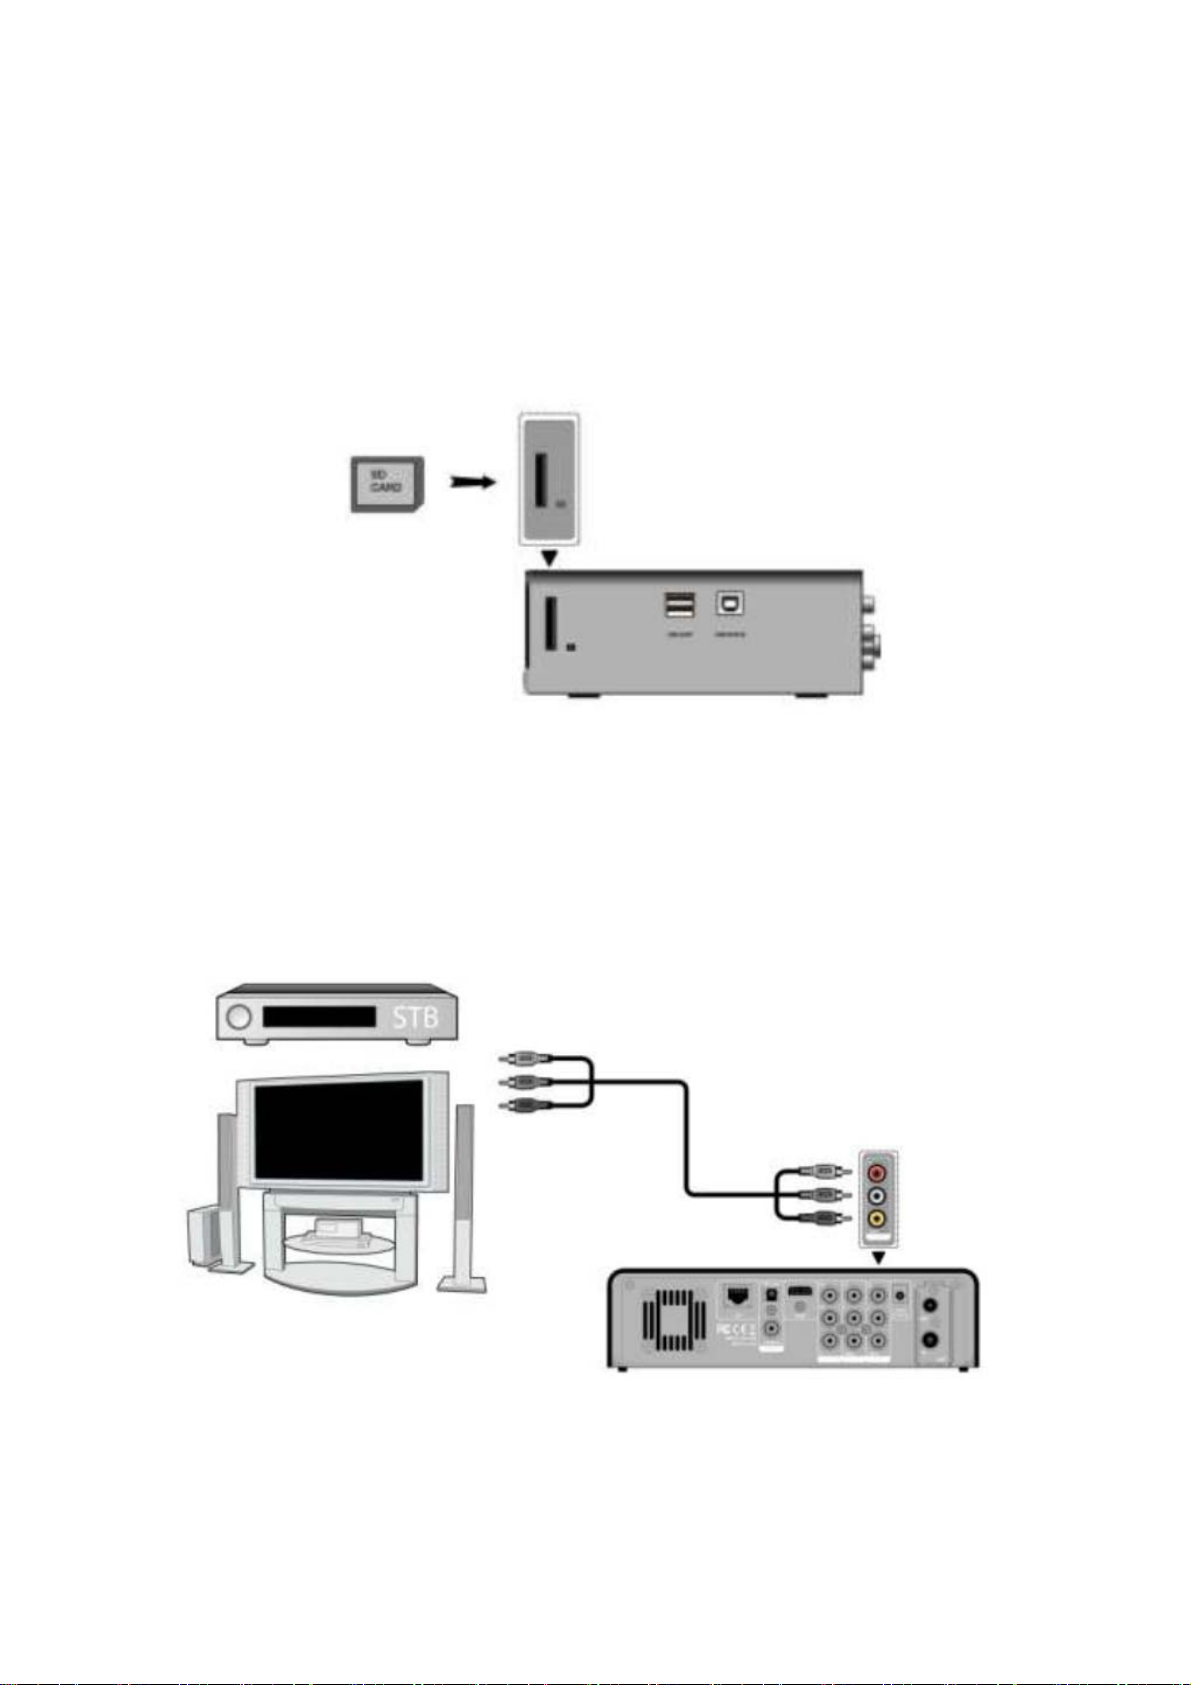
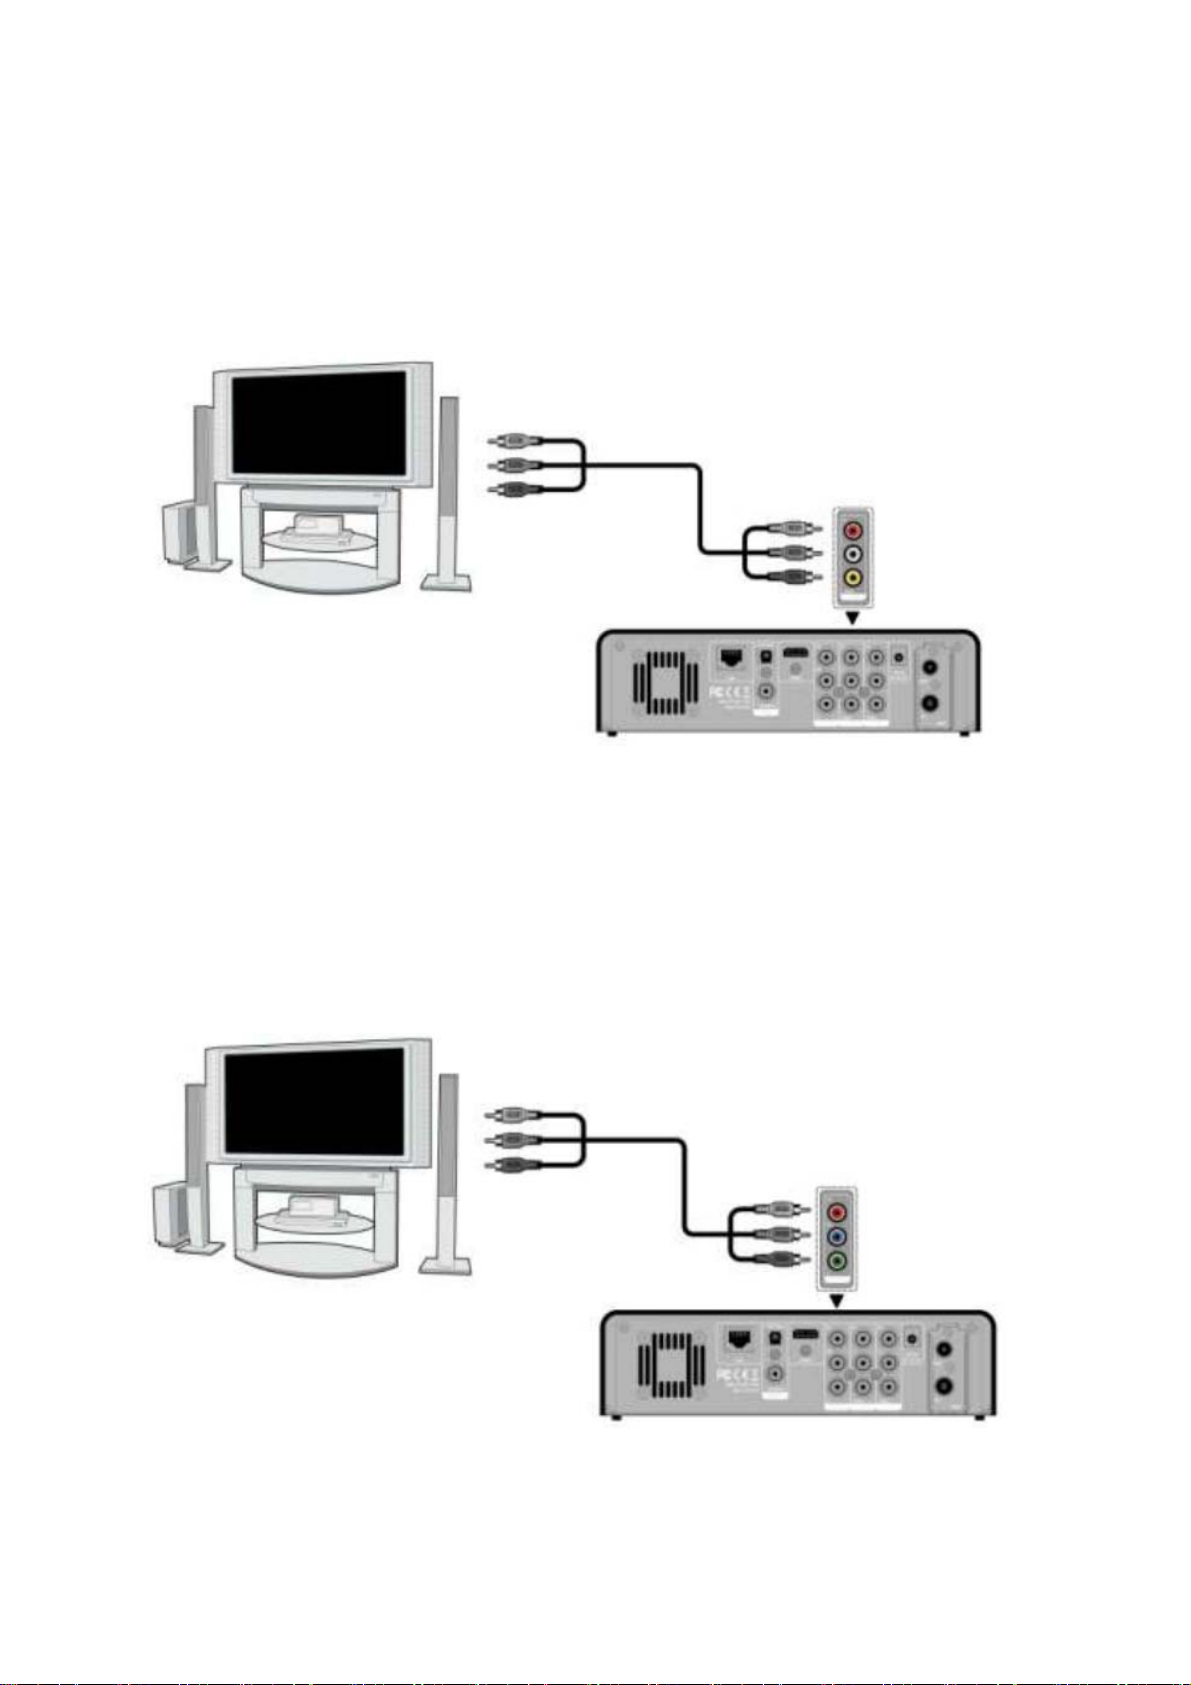
AV Input Video:CVBS. Audio:Stereo(L/R)
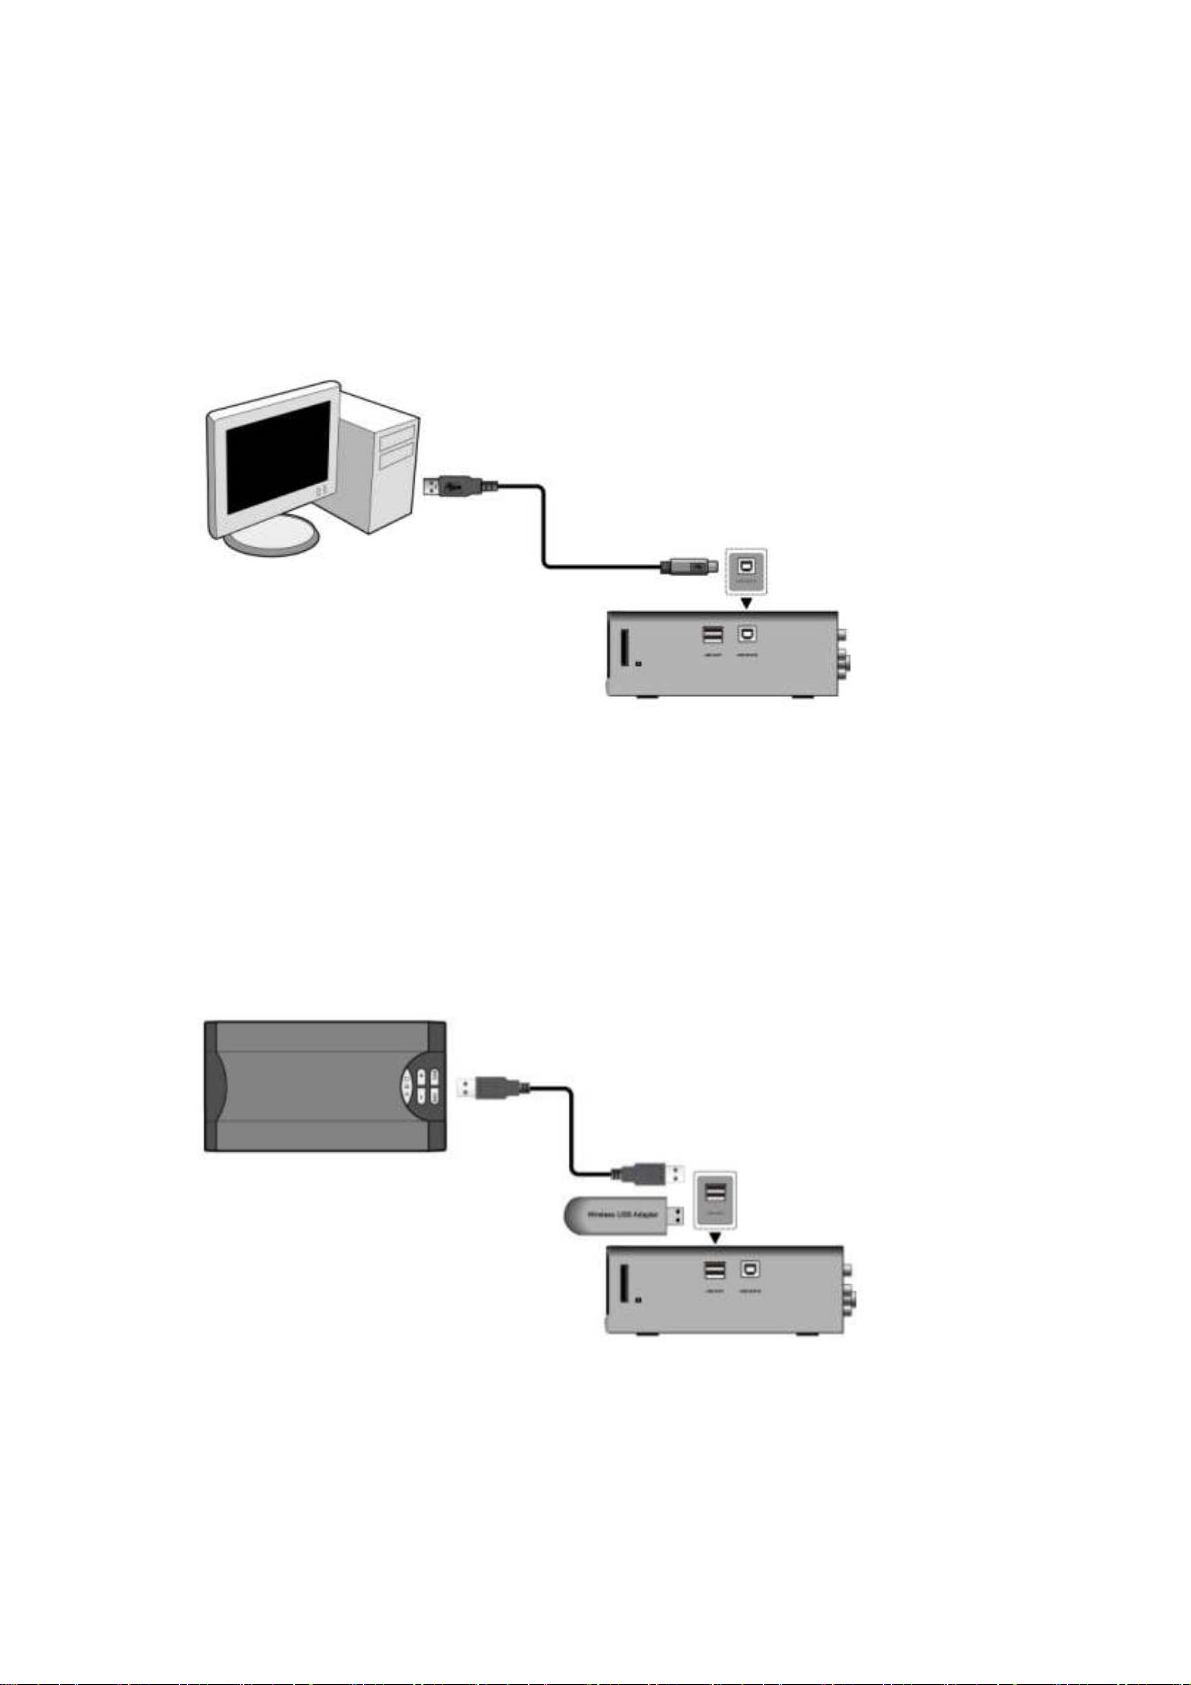
USB
Interface 3* USB 2.0 HOST,1* mini USB 2.0 device
HDD
Capacity 3.5 (SATA)HDD built-in , up to 2TB
Language English,Spanish,French,Germany,Italian,Dutch,Russian,Polish,Portuguese,Swedish,
Turkish
File
System
FAT32/NTFS
TV System NTSC/PAL
Video
Format MKV, TS, M2TS, MTS, TP, WMV, IFO, ISO, VOB, DAT, AVI, MPG, MP4, MOV, RM,
RMVB, DIVX, XVID, FLV
Subtitle SUB, SRT, SSA, SMI, IDX+SUB
Codec
MPEG1,HD MPEG2(up to MP@HL 1080i)
HD MPEG4 SP/ASP(720p/1080i/1080p)
Xvid,WMV9(up to 1080p)
RM/RMVB8/9/10(up to 1280x720@30P)
Audio
Format
MP3, WMA, WAV, OGG, AAC, LPCM, FLAC, AC3
A
udio Out
Stereo
Dolby Digital AC3 5.1 (passthrough & downmix to stereo)
Dolby Digital Plus (passthrough)
DTS (passthrough & downmix to stereo)
DTS-HD Master Audio (passthrough core stream & downmix to stereo)
DTS-HD High Resolution Audio (passthrough core stream & downmix to stereo)
FLAC 7.1 (passthrough & downmix to stereo)
Photo JPG/JPEG/BMP/GIF/TIFF,Music Slideshow, Zoom and Transition
Web
Service Youtube ,Youku,Picasa, Flickr ,Rss news,Weather, iRadio, Internet TV
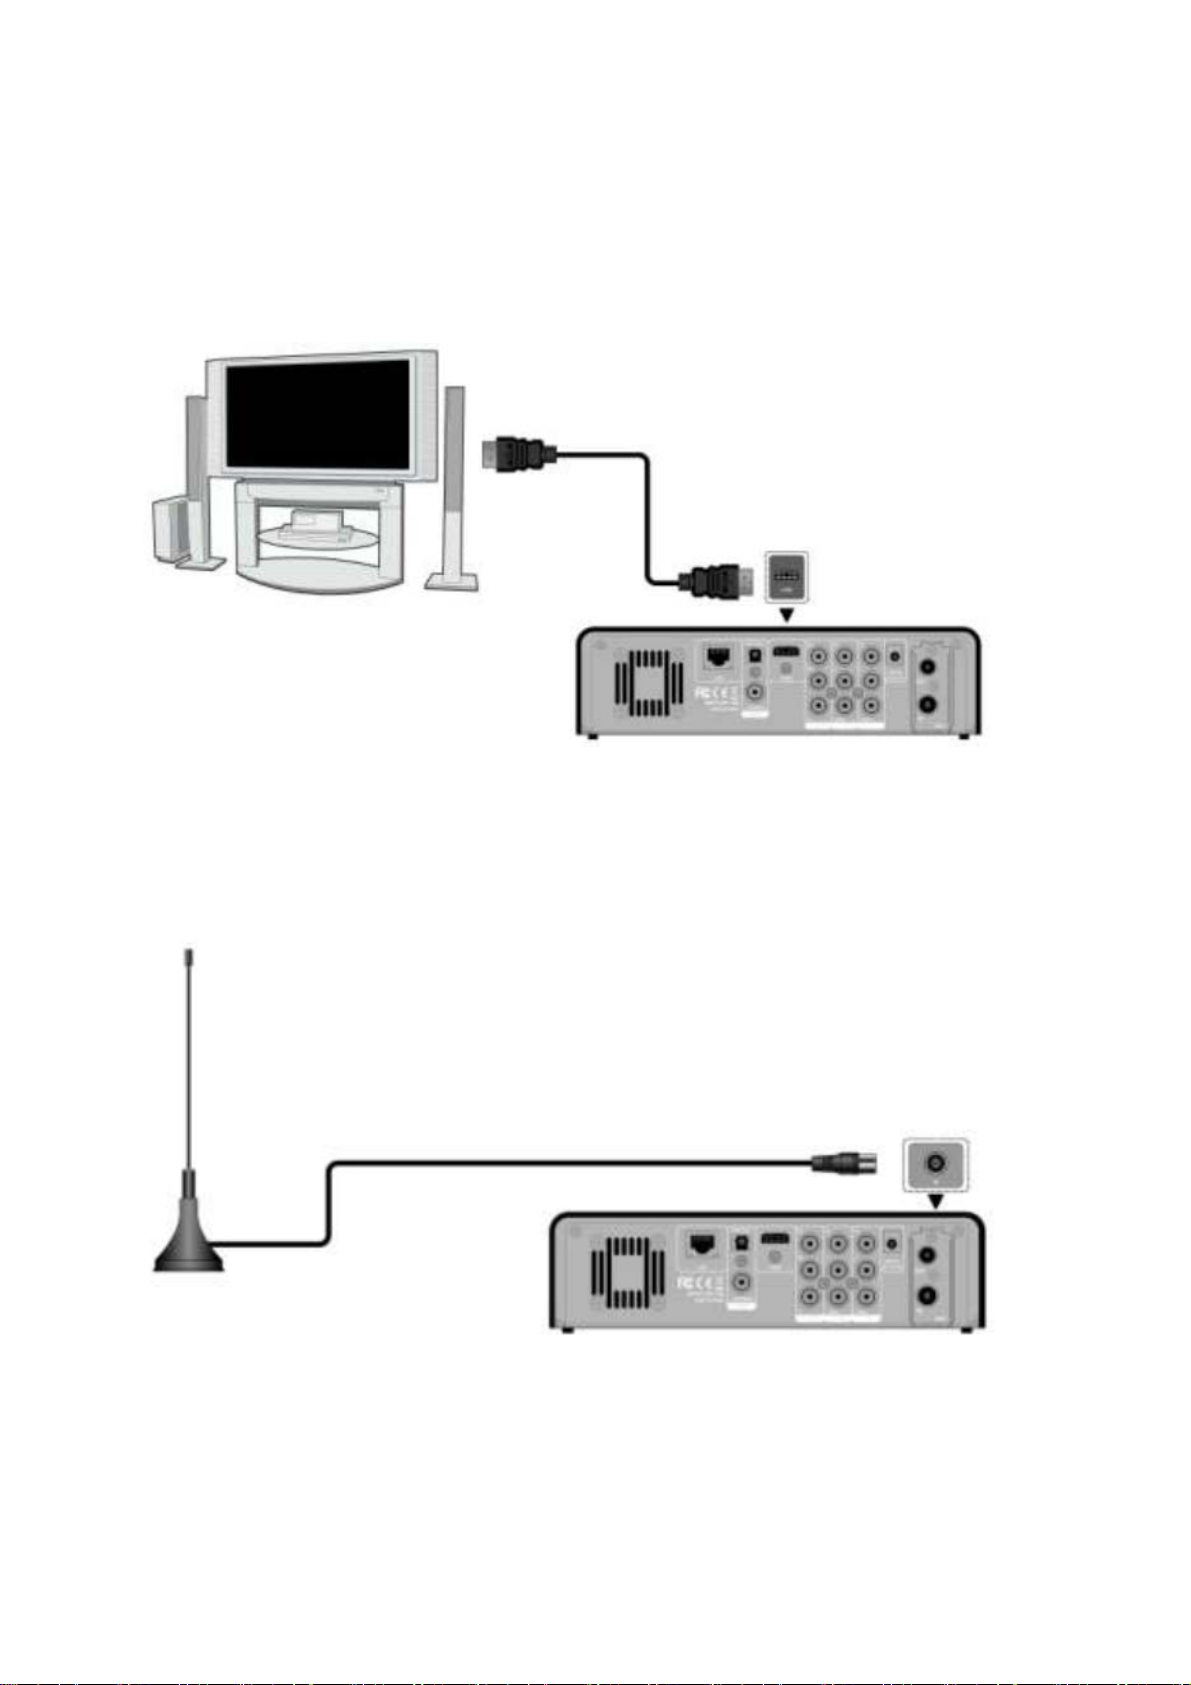
Tuner
Dual Tuner
Support MPEG2,MPEG4 & H.264 Standard Signal
Recorder format : TS
Support Timeshift recording/Schedule recording/EPG
Resolution: Same as signal
A/V
Recording
Audio Stereo and composite Video Recorded Format: MPEG2
Resolution: Up to 720x576@25fps(PAL), 720x480@30fps(NTSC)
Adjustable Video quality: HQ/SP/LP/EP/SLP
Others
function NAS,UPNP,SAMBA,BT,FTP,WIFI

Contents of box
MV3800 HD Media Recorder
Remote Control with
Batteriese
Quick Installation Guide
Component AV Cables
Composite AV Cables
Power Adapter
HDMI Cable (optional)
Wireless N dongle (optional)
Note:
The actual contents in the package might be different from the packing list in this manual.
Functionality
This MV3800 HD Media Recorder has the following functionality.
A/V Output
HDMI V1.3 for high-definition video and digital audio
Composite & component video and stereo audio for analog audio-visual connection
S/PDIF coaxial & optical interface for high-fidelity digital audio
Adjustable video output resolution (NTSC, PAL, 480p, 576p, 720p, 1080i, 1080p)
Multimedia Playback
Supports major audio, video and image file formats (1080p HD video decoding)
Movie format: AVI/MKV/TS/TP/TRP/M2TS/MPG/MP4/M4V/MOV/VOB/ISO/IFO/DAT/
WMV/ASF/RM/RMVB/FLV
Music format: MP3/OGG/WMA/WAV/AAC/FLAC
Photo format: HD JPEG/BMP/GIF/TIF/PNG
Photo slide show with background music
DVB-T TV
supports Digital Video Broadcasting Terrestrial (DVB-T) TV reception
supports Electronic Program Guide (EPG), Teletext and subtitle.
Video Recording
supports one button recording and scheduled recording, can easily record programs from
DVB-T TV, DVD player, DV, etc., and save as MPEG-2 (.mpg, or .ts) format;
supports time shifting function
Network Feature
A/V streaming/transmission via Ethernet (10M/100M) & Wi-Fi (802.11b/g/n, optional)
File sharing via Samba server
A/V streaming via UPnP Media Server
BitTorrent download (controlled and managed via web server)
Digital Radio (SHOUTcast) 3 / 63
File Copy
Supports copying & moving files among Card, USB, HDD, and Network・・
USB 2.0 Support
USB DEVICE port (for computer connection)
USB HOST port x 2 (for USB storage devices)
Note: All the information contained in this manual was correct at the time of publication. However, as
our engineers are always updating and improving the product, your device‟s software may have a slightly
different appearance or modified functionality than presented in this manual.

Cautions
This player‟s design and manufacture has your safety in mind. In order to safely and effectively use this
player, please read the following before usage.
Usage Cautions
User should not modify this player. If commercial hard disk is being used, the environmental temperature
should be within +5℃~ +35℃.
Power
The player‟s power voltage: DC 12V. When using this player, please connect the supplied AC adapter or
AC adapter cable to the player‟s power jack. When placing the adapter cable, make sure it can not get
damaged or be subject to pressure. To reduce the risk of electric shock, unplug the adapter first before
cleaning it. Never connect the adapter to the player in a humid or dusty area. Do not replace the adapter
or cable‟s wire or connector.
Radio Interference
If not properly shielded, almost all electronic devices will get radio interference. Under some conditions,
your player might get interference. The design of this player has followed the FCC/CE standard, and has
followed the following rules:
(1) This player may not cause harmful interference;
(2) This player could accept some interference received including interference that may cause
undesired operation.
Repair
If the player has a problem, you should take it to an appointed repair center and let the specialists do the
repair, never repair the player yourself, you might damage the player or endanger yourself or your data.
Disposing of the Player
When you dispose of the player, be sure to dispose it appropriately. Some countries may regulate
disposal of electrical device, please consult with your local authority.
Hard Disk Cautions
The player uses an internal hard disk for data storage, in normal case, format or repair is not required.
You should carefully read the < Frequently Asked Questions > chapter, and check our website for latest
information before formatting the hard disk.
Physical impact may create bad sector in the hard disk, you can use CHKDSK to fix theproblem.
All data stored in the player may be lost due to physical impact, electrical shock, power lost, HDD
format etc. Please backup your data.
It is suggested to do defragment after a long period of usage.
Regularly backup the data in the hard disk so that it can be recovered in the event of data
corruption or loss. Our company takes no responsibility for loss of data stored on the hard disk.

Others
When using this player, please do not let the player come into contact with water or other liquid, if water
is accidentally spilled on the player, please use a dry cloth to absorb the spillage.
Electronic products are vulnerable, when using please avoid shaking or hitting the player, and do not
press the buttons too hard.
Do not let the player come into contact with water or other liquid.
Do not disassemble the player, repair the player or change the design of the player, any damage
done will not be included in the repair policy.
Do not press the buttons of the player too hard.
Avoid hitting the player with hard object, avoid shaking the player, and stay away from magnetic
fields.
During electrostatic discharge and the strong electromagnetic field, the product will malfunction,
then unplug the power cable and the product will return to normal performance next time it is
powered on.
Connection
Connecting the Power Supply
Follow the picture and connect the AC adaptor to the player‟s DC IN jack;
Follow the picture and plug in the AC adaptor to the power outlet.

Connecting to a PC
Make sure the player is powered on;
Plug in the squarish connector of the USB cable to this player‟s USB DEVICE port;
Plug in the rectangular connector of the USB cable to computer.
In this way, you can manage content on the built-in HDD of the player on your local PC.
Connecting a USB Device
Make sure the player is powered on;
Plug in the USB stick or USB HDD etc. to the USB HOST port of this player.
In this way, you can browse contents on the USB device.

Connecting a Memory Card
Memory card can be used by inserting to the card slot
Follow the picture to insert the memory card to the card slot properly;
Insert the card by following the arrow pointer in the picture.
In this way, you can browse contents on the memory card.
Connecting to a TV
A/V IN
Follow the picture and plug in the 3 color connector to the player‟s A/V IN jack;
Follow the picture and plug in the 3 color connector to the A/V OUT jack of the TV/IPTV Set-Top
Box (STB).
In this way, you can record TV programs from the TV/IPTV Set-Top Box.

A/V OUT
Follow the picture and plug in the 3 color connector to the player‟s A/V OUT jack;
Follow the picture and plug in the 3 color connector to the TV‟s A/V IN jack.
In this way, you can enjoy the content in the player on TV or other display devices.
Y/Pb/Pr Component OUT
Follow the picture and plug in the 3 color connector to the player‟s Y/Pb/Pr jack;
Follow the picture and plug in the 3 color connector to the TV‟s Y/Pb/Pr jack.
Audio Connection while using Y/Pb/Pr Video out:
First method: use the audio output from the A/V OUT jack;
Second method: use the audio output from the S/PDIF Coaxial or Optical jack.
In this way, you can also enjoy videos, music, and photos in the player on TV.

HDMI OUT
Follow the picture and plug one connector on your HDMI cable to the player‟s HDMI jack;
Follow the picture and plug the other connector on your HDMI cable to the TV‟s HDMI jack.
Note: The HDMI cable is an optional accessory sold separately.
In this way, you can have the highest quality video and audio via a single cable.
ANT. / RF IN
Follow the picture and plug a TV Aerial to the ANT. / RF IN socket;

ANT. / RF OUT
Make sure the player is connecting to power supply;
Make sure a TV Aerial is connecting to the ANT. / RF IN socket;
Follow the picture and plug a TV cable to the ANT. / RF OUT socket then plug the cable to a TV
or other TV receiver.
The player can loop out the DVB-T signal to other TV receiver device. In this way, you can watch the TV
programs with another TV receiver while recording.
Connecting to an Digital Amplifier
Follow the picture and plug in the RCA connector on your coaxial cable to the player‟s S/PDIF
Coaxial jack. Or if you use optical fiber, please plug in the Toslink connector on your optical fiber
to the player‟s S/PDIF Optical jack;
Follow the picture and plug in the other connector on your coaxial cable or optical fiber to the
digital audio device (digital amplifier or decoder).
Note: Optical fiber and coaxial cable are not supplied.

In this way, you can enjoy powerful Dolby Digital, DTS, or MPEG sound. (Please refer “
Changing Audio
Settings‟
for configuration)
Connecting to a LAN
To connect to a LAN (Local Area Network) you require a cat5, cat5e or cat6 network cable (not supplied).
Connect one of the crystal plugs on the cable to the player‟s RJ45 LAN socket;
Connect the other crystal plug on the cable to a RJ45 LAN port on your router, switch, or hub
devices.
Connecting to a WLAN
Make sure the player is powered on;
Plug the Wireless LAN USB Adapter (i.e. Wi-Fi USB Dongle) to the USB HOST port of the player.
Note: The Wi-Fi Dongle is an optional accessory sold separately. (Please refer to “
Changing Network
Settings‟
for more details about wireless setup)

Power On / Off
Power On
After connecting the DC IN jack and press the power button on the front panel, the player will soon enter
the home screen, and the power indicator will turn blue.
Power Off
Press the power button on the front panel, the player will soon enter standby mode, and the power
indicator will turn red. Then unplug the power cord to cut off the power supply.
Menu Language
The system language of this player can be set to English or other languages. Change the language you
wish in the setup menu, the selected language will take effect immediately.
HDD Format
For users who wish to install a new SATA HDD into the player, please refer to the following procedures to
format the hard disk on the player before usage.
Step 1: Select OK on the Warning page, press ENTER to confirm.

Note: This page can be also accessed via Setup->System->HDD Format menu.
Step 2: Press the up / down button to adjust the capacity of time shift buffer.
Press the left / right button to select Next, and the enter button to confirm.
Step 3: Select Format, press ENTER, and then hard disk format will start.
The formatting procedure will be finished within a few minutes. And then you can use the hard disk
properly on the player.
Note: HDD format will remove all data stored on the hard disk drive. Please take care and backup your
data in advance!

About the Player
Remote Control
All procedures in this manual can be carried out using the remote control buttons.
See the following for details on each button and its function:
No. Button Function
1 STANDBY Press to enter standby mode or wake up
2 TV SYSTEM SYSTEM Press to switch between NTSC, PAL, 480P, 576P, 720P, 1080I,
and 1080P
3 BROWSE
R
Press to enter the browser menu
4 Numeric buttons Press to enter numeric input when changing settings
5 REPEAT Press to set repeat option: One, All, (and Shuffle)
6 F
R
Press to fast rewind the current playback. Press repeatedly to select
speeds
7 FF Press to fast forward the current playback. Press repeatedly to select
speeds
8 PLAY/PAUSE Press to begin/pause the playbac
k
9 HOME Press to enter the home screen
10 Navigational buttons
Press the arrow buttons to select menu options, and the ENTER button to
confirm
11 MENU Press to activate tools menus:
--Press to rename and delete files in the browser menu.
--Press to add shortcuts for network access in My_Shortcuts in NET of the
browser menu.
12 TIME SHIFT Press to activate the time shift function. Time shift function

allows you to pause live TV and resume the program from the
point you left it. While paused, the program is recorded to the
internal HDD as long as the space is available.
Time shift mode remains active until you press the stop button
13 SLOW Press to play back in slow motion. Press the PLAY button to
resume regular playback
14 ZOOM Press to zoom the image (photo or video)
15 AUDIO Press to select an audio track
16 Red Press to select the files in browser menu
17 EPG(Green) Press to enter the Electronic Program Guide which displays an on-screen
list of programs for the coming week when watching Digital Terrestrial TV.
Press to add the selected files to the playlist under browser menu.
18 MUTE Press to mute audio output, and press again to resume
19 REC Press to begin recording.
Press repeatedly to set one touch recording (OTR) length (30MIN. /60MIN.
/ 90 MIN. / 120 MIN. / 180 MIN. / 240 MIN. / Off)
20 COPY Press to enter the file copy menu
21 MUSIC Press to start playing music in the music playlist
22 INFO Press to hide or display the information bar during playback
23 VOL-/VOL+ Press to decrease/increase the volume
24 PREV Press to view the previous file / page up
25 STOP Press to stop playback
26 NEXT Press to view the next file / page down
27 RETURN Press to return to the previous screen while navigating menus
28 ENTER Press to select options in menus
29 SETUP Press to enter the setup menu
30
A
-B Press to set the beginning and end points of a section to repeat
31 GOTO Press to jump to a specific point on a title. Specify the point using Title,
Chapter and Time
32 SUBTITLE Press to set subtitle options
33
A
NGLE Press to change the view angle during DVD (with multi-angle) playbac
k
34 Blue Press to activate sort function in channel set in TV setup menu
35 TTX(Yellow) Press to open Teletext OSD if it is available in the broadcasted stream of
Digital Terrestrial TV
Front Panel
1. Recording indicator 2. Power button & indicator 3. Infrared receiver window

Rear Panel
1. Air Flow hole RJ45 LAN socket
2. S/PDIF COAXIAL jack
3. S/PDIF OPTICAL jack
4. HDMI jack
5. Y/Pb/Pr OUT jack
6. A/V OUT jack
7. A/V DC IN jack
8. DC IN jack
9. ANT. / RF OUT socket
10. ANT. / RF IN socket
Side Panel
1. Memory Card slot
2. USB HOST port (A-Type) x 2
3. USB DEVICE port (B-Type)

Setup Menu
The Setup menu allows you to personalize and configure the preferences for your player.
To select a Setup option:
- Select the Setup icon on the home screen, or press the SETUP button on the remote control.
- Use the LEFT/RIGHT navigational buttons to select an option, and then press ENTER.
There are seven Setup options, including DTV, Audio, Video, REC, Network, System, and MISC. Use
the UP/DOWN navigational buttons to select a menu. Press ENTER to confirm. Press RETURN to
cancel and display the previous menu screen.
Changing TV Settings
Press the left / right button on the remote control to select the DTV tab from the menu bar.
TV Region
- Select to set the region for Digital Terrestrial TV
Channel Scan
- Select to scan for available Digital Terrestrial TV channels

AUTO SCAN
In AUTO SCAN mode, the system will automatically scan for available DVB-T TV channels.
MANUAL SCAN
In MANUAL SCAN mode, you can select the CH name, Bandwidth, and Input Frequency. Use
the navigational and numerical buttons on the remote control to select or input. Press the enter
button to confirm.

Channel Set
- Select to edit channel information.
In this menu, you can edit the Name, and sequence for the DVB-T TV channels. Use the navigational
buttons to select and modify the settings,and press the enter button to confirm.
You can also press the blue button to select Sort.
Changing Audio Settings
Use this menu to configure audio settings.
Night Mode
- Choose between Off / On / Comfort. If the option is turned on, the audio output volume will be
decreased to make you more comfortable.
Digital Output
- Choose between HDMI LPCM / HDMI RAW / SPDIF LPCM / SPDIF RAW. In raw mode,
Dolby Digital, DTS, or MPEG sound can be bypassed to the HDMI TV or Digital amplifier.
Other manuals for MyMovie MV3800
1
This manual suits for next models
1
Table of contents
Other UT Media Player manuals