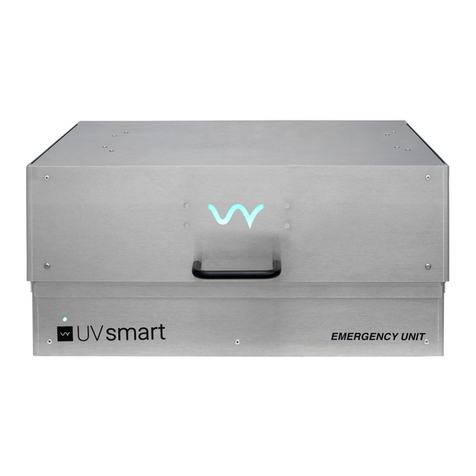
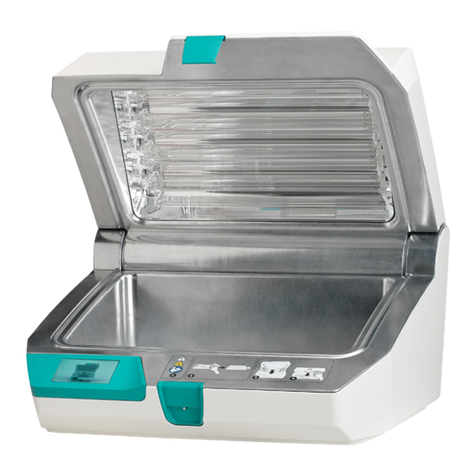
UV Smart D60 User manual

1UV Smart D60 |Instructions for Use |Revision 1 US
Instructions for Use
US United states of America
To avoid the risk of accidents or damage to the D60, it is essential to
read these instructions before it is installed and used.
UV Smart D60

2UV Smart D60 |Instructions for Use |Revision 1 US
Table of contents
1. Introduction .............................................................................................................................................................
2. Intended Use ...........................................................................................................................................................
2.1. Intended Use
2.2. Intended Medical Indication
2.3. Indications for Use
2.4. Contra-indications for Use
2.5. Intended users
2.6. Intended use environment
2.7. Claimed performance
3. Clinical benets .......................................................................................................................................................
4. Residual risks ..........................................................................................................................................................
5. Warnings and precautions ......................................................................................................................................
5.1. Warnings
5.2. Precautions
6. Product overview .....................................................................................................................................................
6.1. Packaging content
6.2. Features and dimensions
7. Interface ....................................................................................................................................................................
8. Sounds and lights ....................................................................................................................................................
9. Use .............................................................................................................................................................................
9.1. Connected and standalone D60
9.2. First time (setup)
9.3. Before every D60 use
9.4. After every D60 use
9.5. Placement of medical equipment guide
9.6. D60 use
9.7. Navigating the D60 menu
9.8. Adding//editing equipment
9.9. Adding/editing users
9.10. Exporting data via USB
10. UV Soft.....................................................................................................................................................................
10.1. First time use
10.2. D60 settings
10.3. Equipment settings
10.4. User settings
10.5. Export
10.6. License
10.7. Server
10.8. Language
10.9. Info
10.10. Exit
11. Maintenance ............................................................................................................................................................
11.1. Maintenance
11.2. Cleaning
11.3. Calibration
11.4. Yearly validation
11.5. Disposal
12. Problem solving ....................................................................................................................................................
12.1. Problem solving
12.2. Out-of-use
12.3. Broken glass
12.4. Overheating
13. Technical specications ........................................................................................................................................
14. Symbols ..................................................................................................................................................................
15. Warranty ..................................................................................................................................................................
16. Contact details .......................................................................................................................................................
17. Index ........................................................................................................................................................................
3
5
7
7
8
10
12
13
14
31
39
40
41
42
43
43
44

3UV Smart D60 |Instructions for Use |Revision 1 US
1. Introduction
The UV Smart D60 is intended to reduce micro-organism count by at least log-4 on outer surfaces of channel- less
invasive medical devices1within 60 seconds by using UV-C light.
The D60 has a disinfection area with 8 lamps, in which medical equipment can be placed. The lamps switch on for 60
seconds during each cycle, in which the micro-organism count on inserted equipment reduces with at least log-4. When
applicable, data about the user, equipment and disinfection cycles is stored on the D60 memory.
The emitted light used is UV-C, ranging from 100-280nm (peak at 253.7nm). The lamps each have an intensity of 75W.
The light is diusely distributed.
The D60 disinfection area is completely sealed o, preventing UV-C light from reaching the user, guaranteeing safe use.
UV-C light cannot penetrate the window in the door; only visible light gets through, enabling the user to see inserted
equipment and to verify if all the lamps are on during a cycle. When opening the D60 during a disinfection cycle, the UV-C
lights switch o automatically.
The germicidal eect of UV-C light will not penetrate dirt, debris and grime. To allow the D60 to perform optimally it is
required that all medical equipment is cleaned before use, according to the corresponding instructions for use provided by
the equipment manufacturer.
The UV Smart D60 should be used by trained personnel only. In addition, the Instructions for Use should be read prior to
operation.
In case they might occur, serious incidents should be reported to UV Smart or your local distributor and competent
authority of the member state.
The UV Smart D60 is a Risk Group 2 device. This device complies with part 15 of the FCC Rules. Operation is subject to
the condition that this device does not cause harmful interference.
FCC Regulatory Notices:
This device complies with Part 15 of FCC Rules, Operation is Subject to following two conditions:
(1) This device may not cause harmful interference, and
(2) This device must accept any interference received including interference that cause undesired operation.
Caution: Any changes or modications to the equipment not expressly approved by the party responsible for compliance
could void user s authority to operate the equipment. This equipment has been tested and found to comply within the
limits for a Class B digital device, pursuant to part 15 of the FCC Rules. These limits are designed to provide reasonable
protection against harmful interference in a residential installation.
1Channel-less invasive devices
A device without working channel(s) which, in whole or in part, penetrates inside the body through a body orice.

4UV Smart D60 |Instructions for Use |Revision 1 US
This equipment generates, uses, and can radiate radio frequency energy and, if not installed and used in accordance with
the instructions, may cause harmful interference to radio communications. However, there is no guarantee that interference
will not occur in a particular installation. If this equipment does cause harmful interference to radio or television reception,
which can be determined by turning the equipment o and on, the user is encouraged to try to correct the interference by
one or more of the following measures:
• Re-orient or relocate the receiving antenna • Increase the separation between the equipment and receiver
• Connect the equipment into an outlet on a dierent circuit from that to which the receiver is connected
• Consult the dealer or an experienced radio/TV technician for help.
ISED Canada Regulatory Notices:
This device is compliant with ISED Canada license-exempt RSS standards. Operation is authorised under the following
two conditions:
1 - the device may not cause harmful interference;
2 - the device must accept any interference received, even if it compromises operation.
Cet appareil est conforme aux normes CNR exemptes de licence d’ISDE Canada. Le fonctionnement est autorisé sous
les deux conditions suivantes :
1 - l’appareil ne doit pas causer d’interférences nuisibles ;
2 - l’appareil doit accepter toute interférence reçue, même si elle compromet son fonctionnement.
RF Exposure information
FCC:
This device complies with FCC RF radiation exposure limits set forth for an uncontrolled environment. This device complies
with the safety requirements for RF exposure for mobile (>20 cm) use conditions in accordance with FCC rule part 2.1091.
ISED Canada:
This equipment complies with ISED Canada RSS-102 radiation exposure limits set forth for the general population. This
equipment complies with the safety requirements for RF exposure in accordance with RSS-102 Issue 5 section 2.5.2 for
mobile (>20 cm) use conditions.
Cet équipement est conforme aux limites d’exposition aux radiations CNR-102 de l’ISDE Canada établies pour la population
générale. Cet équipement est conforme aux exigences de sécurité pour l’exposition aux radiofréquences conformément
à la section 2.5.2 de la norme CNR-102 Issue 5 pour les conditions d’utilisation mobile (>20 cm).

5UV Smart D60 |Instructions for Use |Revision 1 US
2. Intended Use
2.1. Intended use
The UV Smart D60 is intended to reduce micro-organism count by at least log-4 on outer surfaces of channel-less invasive
medical devices within 60 seconds. This is achieved after the equipment is pre-cleaned and checked according to the
manufacturer’s protocol.
The medical devices that can be disinfected with the D60:
▪Flexible and rigid Channel-less endoscopes;
▪Invasive transducers;
▪TEE-probes.
The device does not support or sustain life. Moreover, the D60 has no patient interaction. It is used on medical devices
which do come in contact with the patient. No substances/tissues (derived) of human and/or animal origin are present in
the D60. After a disinfection cycle the D60 can be reused directly after performing the steps indicated in chapter 9.3.
2.2. Intended medical indication
The UV Smart D60 is intended for disinfection of channel-less invasive medical devices physically able to t inside the
designated disinfection area.
2.3. Indications for Use
The UV Smart D60 can be used in case of the following needs:
▪Disinfection within 60 seconds;
▪Automated disinfection;
▪Consistent disinfection;
▪Disinfection on location.
Previously administered or manual disinfection methods can be applied in case of device failure.
2.4. Contra-indications for use
The UV Smart D60 cannot be used in case:
▪The Indications for Use are not met;
▪The D60 is damaged;
▪The user comes in direct contact with UV-C light, produced by the device;
▪The invasive medical device has working channels;
▪The invasive medical device has visible debris on it;
▪There is any doubt about how to use the D60.
2.5. Intended users
The UV Smart D60 is suitable for use by trained reprocessing personnel or a trained medical professional. These individuals
are qualied by education, training, licensure or client privileging who perform a professional service within their scope

6UV Smart D60 |Instructions for Use |Revision 1 US
of practice. Medical professionals include doctors, nurses, hospice workers, (emergency) medical technicians and other
trained caregivers. Reprocessing personnel is personnel specically trained or educated for the reprocessing of medical
equipment within reprocessing facilities.
2.6. Intended use environment
The intended use environment of the UV Smart D60 is medical related meaning; hospitals, medical clinics, nursing home,
doctor’s oce, reprocessing facilities, etc.
The UV Smart D60 shall be used in the following environmental conditions:
Temperature: 0oC – +40oC
Relative Humidity: 5% – 90% (without condensation)
Atmospheric pressure: 700hPa - 1060hPa
2.7. Claimed performance
The required reduction of micro-organisms is based on the EN-14885:2018 to compare it to the state of the art of disinfection
methods. The following reductions are determined and claimed:
Table 1: Specic micro-organism reduction by the UV Smart D60
Claim Micro-organism Sort and type Log reduction
Bactericidal
Staphylococcus aureus Gram-positive bacteria, vegetative ≥ 5,0
Pseudomonas aeruginosa Gram-positive bacteria, vegetative ≥ 5,0
Enterococcus hirae Gram-positive bacteria ≥ 5,0
Escherichia coli Gram-negative bacteria, Enterobacteriaceae ≥ 4,0
Fungicidal
Candida albicans Fungus, vegetative yeast ≥ 4,0
Aspergillus brasiliensis Fungus, spore ≥ 4,0
Yeasticidal
Candida albicans Fungus, vegetative yeast ≥ 4,0
Candida auris Fungus, yeast ≥ 4,0
Sporicidal Bacillus subtilis Gram-positive bacteria, endospore ≥ 4,0
Mycobactericidal
Mycobacterium avium Gram-positive mycobacteria, vegetative ≥ 4,0
Mycobacterium terrae Gram-positive mycobacteria, vegetative ≥ 4,0
Tuberculocidal Mycobacterium terrae Gram-positive mycobacteria, vegetative ≥ 4,0
Viricidal
Poliovirus type 1, LSc-2ab (Picornavirus) Enterovirus ≥ 4,0
Adenovirus type 5, strain Adenoid 75 Adenoviridae ≥ 4,0
Murine Norovirus, strain S99 Berlin Caliciviridae ≥ 4,0
Polyomavirus SV40, strain 777 Incertae sedis ≥ 4,0

7UV Smart D60 |Instructions for Use |Revision 1 US
3. Clinical Benets
Due to the fast D60 disinfection cycles the positive impact of the D60 on the health of an individual is expressed in a
positive impact on patient management. By using the D60, equipment can be disinfected faster resulting in a higher
turn-over speed. This means a higher number of patients can be treated in the same time frame and a smaller medical
equipment inventory is required. Moreover, reprocessing personnel are less burdened because of the simple and quick
use of the D60.
Any residual risks related to the use of the D60 are mentioned in the Warnings and Precautions-chapter. When the D60
is used according to its intended use and this Instructions for Use those risks mentioned and any undesirable side-eects
are reduced as far as possible.
4. Residual risks

8UV Smart D60 |Instructions for Use |Revision 1 US
5.1. Warnings
Upon delivery, check that all items are present, without visible debris and undamaged. Do not use a damaged D60. If you
think the D60 is damaged, dirty or items are missing, please contact your local distributor.
Do not use the D60 in an oxygen enriched environment or in the vicinity of combustible gases (e.g. anesthetics).
Do not use the device outside the pre-scribed conditions as stated in the Intended Use Environment paragraph (2.6).
The D60 must only be connected to a mains power supply with protective earth, to avoid the risk of electric shock.
When connecting the D60 to a mains power supply (wall socket), make sure the power supply is reachable to users so the
D60 can be shut o in case of emergency. Shutting o can be done by unplugging the power cable from the wall socket.
Visible debris should be removed from the medical equipment surface according to the corresponding instructions for use
provided by the equipment manufacturer before placing it inside the D60 for disinfection.
Protect the D60 and the power supply against liquids and moisture.
Follow the instructions as indicated on the device display.
Do not insert medical equipment with working channels.
Do not insert medical equipment made of organic materials.
Only insert medical equipment consisting of non-porous outer surfaces.
Do not insert medical equipment made of (elastic) textile materials.
Do not insert sharp objects.
Do not insert humans or animals.
Do not insert ammable substances in the D60 to prevent damage and risk of re/explosion.
Do not insert medical equipment larger than the dimensions as dened in the Product Overview chapter (6). This could
damage the medical equipment/D60 and/or jeopardize the disinfection performance.
Inserted medical equipment should not touch the side walls nor the bottom or ceiling of the disinfection area.
Do not close the D60 door with excessive force.
Do not open the D60 door during a disinfection cycle, unless it is instructed by the display or when strictly necessary
because of external factors.
Do not take out medical equipment before the disinfection cycle has nished, unless it is instructed by the display or when
strictly necessary because of external factors.
Do not shut o the D60 during a disinfection cycle.
Do not attempt to repair the device during its intended lifetime. Refer to the Warranty chapter (15).
Do not open the D60 control unit using the designated control unit key. Only qualied personnel is classied to open the
D60 control unit.
Do not connect any accessories to the D60; The D60 should not be used together with other devices.
The D60 should not be used for in vivo use.
The device should be calibrated at intervals dened in this Instructions for Use.
5. Warnings and precautions

9UV Smart D60 |Instructions for Use |Revision 1 US
To be disinfected surfaces should not be shadowed or covered during the disinfection process.
Use of the D60 could inuence the color of the outer surface of the disinfected equipment.
Do not remove the USB ash drive during the data importing and exporting processes.
Do not stick anything to the inside or outside of the D60.
Do not place any medical equipment on the D60 disinfection area oor.
The UV-C lamps in the D60 disinfection area contain mercury. Handle the D60 with care to prevent any damage. In case
of damage, refer to chapter 12.3. (P.39).
Do not modify the D60 without authorization of the manufacturer.
With initial placement of the D60, it is recommended to mount the D60 to a wall using the wall mount. Be aware that if the
D60 is not mounted to the wall, the device may tip over when a force is applied to the sides of the D60.
During a disinfection cycle, light is visible around the edges of the door. Despite the fact that this is harmless, do not place
your ngers or come close with your eyes around the edges of the door during a disinfection cycle.
The UV Smart D60 is a Risk Group 2 device. Caution: Possibly hazardous optical radiation emitted from this product. Do
not stare directly at operating lamp. May be harmful to the eye.
Caution. UV ray exposure.
5.2. Precautions
With initial use, the user is required to read this Instructions for Use.
According to the D60 Intended Use, the user is required to be trained.
Do not transport the D60 when its door is open.
Do not transport the D60 when medical equipment is present in the disinfection area.
Make sure the D60 is properly positioned on a level and steady surface.
Avoid applying external force in the ‘opening’ direction of the D60 door when the door is fully opened.
Gently place/remove medical equipment in/from the disinfection area of the D60 to prevent damage to the D60 and
medical equipment.
Always visually verify if the UV-C lamps switch on when a disinfection cycle is ongoing.
Only clean the D60 following the cleaning instructions in the Maintenance chapter (11).
After a disinfection cycle a smell can be identied: this caused by the germicidal eect of the UV-C light on microorganisms.
The smell is not harmful.
The D60 connection with a client’s intranet is realised through an ethernet cable. Therefore, the client is responsible for
any intranet security protocols that apply.
Do not touch the UV-C lamps unless they are being cleaned.
During cleaning make sure to use gloves.
When closing the door, keep your hands free from the door opening.
In case of high repetitive use (5 times in 10 minutes), let the device cool down for at least 30 minutes before next use.

10UV Smart D60 |Instructions for Use |Revision 1 US
Features
1. D60 unit
2. Disinfection area
3. Equipment holder
4. Wire holder
5. UV-C lamps (8x)
6. UV-C lamp protection covers (4x)
7. Door
8. Handle
9. Window
10. Control unit panel
11. Touch screen
12. Barcode scanner
13. RFID reader
14. Door magnets (2x)
15. Feet (6x)
16. Wall attachment
17. Control unit lock
18. Micro-switch
19. Main power supply inlet
20. Ethernet connector
21. Internal On/O-switch*
22. Foot pedal
Dimensions
a. Device height 2033mm
b. Device area (WxD) 861mm x 473mm
c. Disinfection area height 1750mm
d. Disinfection area (WxD) 384mm x 259mm
e. Maximum medical equipment insertion tube length 1200mm**
f. Maximum medical equipment wire length 2000mm**
* The D60 internal On/O-switch (21) is located behind the Control Unit panel (10). The Control Unit behind the panel shall only be accessed by UV Smart
qualied servicing personnel. Upon D60 installation at the client, the On/O-switch shall be switched On by the servicing personnel. Users can switch the
device On/O by plugging/unplugging the power cable into/from the wall socket.
**Geometry varies per equipment. Consult UV Smart or your local distributor in case of any questions.
6. Product overview
6.1. Packaging content
6.2. Features and dimensions
Items
- D60 medical device
- D60 Instructions for Use
- Power cable

11UV Smart D60 |Instructions for Use |Revision 1 US
1
13
a
c
9
4
3
5
2
7
6
10
21
11
8
Fig 1. D60 product overview
16
14
18
14
15
22
12
17
d
b
19
20

12UV Smart D60 |Instructions for Use |Revision 1 US
7. Interface
The D60 interface consists of a touch screen, RFID reader, barcode scanner, speaker and (color)LEDs.
Touch screen
The touch screen is located approximately at eye-level on the front of the D60 control unit. With touch input the user can
navigate through the interface of the screen and hereby control the D60. Throughout the D60 use the D60 displays a
variety of screens and animations. Specic screens are explained throughout this Instructions for Use.
RFID reader
The RFID reader is located below the touch screen on the front of the D60 control unit. During a disinfection process,
the RFID reader facilitates traceability of equipment and ID cards equipped with RFID.
Barcode scanner
The barcode scanner is located below the RFID reader on the front of the D60 control unit. During a disinfection process,
the barcode scanner facilitates traceability of equipment and ID cards equipped with barcodes.
Speaker
The speaker is integrated into the D60 control panel and gives feedback of the D60 status during the D60 use. The
meaning behind the sounds is explained in chapter 8.
LEDs
The LEDs are integrated into the D60 disinfection area and give feedback of the D60 status during the D60 use. The
meaning behind the LEDs is explained in chapter 8.

13UV Smart D60 |Instructions for Use |Revision 1 US
8. Sounds and lights
Sound/light
Negative /
(Blinking) red
Positive / green
Attention /
Blinking white
No Sound / White
Possible meanings
The medical equipment has not been successfully
disinfected
The lamps are not functioning properly
The door has been opened too soon
The medical equipment has been successfully disinfected
Setup is successful
Equipment has not been taken out of the disinfection
area
The door is not (properly) closed
The D60 needs cleaning
D60 is ready to be used
D60 is in setup mode
D60 is in menu mode
D60 is in the middle of a process
Action options
▪Check display for instructions
▪Close the door manually
▪Contact your local distributor
▪Check display for instructions
▪Contact your local distributor
▪Check display for instructions
▪Close the door manually
▪Check display for instructions
▪Take out equipment
▪Check display for instructions
▪Take out equipment
▪Close the door
▪Check display for instructions
▪Close the door
▪Contact your local distributor
▪Clean the D60 manually
▪Check display for instructions
▪Initiate a disinfection cycle
▪Check display for instructions
▪Navigate through the menu
▪Check display for instructions
!
Use the following table to identify the meaning behind the D60 sounds and lights.
/
/
/
/

14UV Smart D60 |Instructions for Use |Revision 1 US
9. Use
With initial placement of the D60, it is recommended to mount the D60 to a wall using the wall mount. Be aware that if the
D60 is not mounted to the wall, the device may tip over when a force is applied to the front or back of the D60.
UV Smart qualied personnel will connect the D60 power cable to the mains power supply (wall socket) and make sure
the wall socket where the D60 power cable is plugged into is always in reach of users in case of emergency. In case of
emergency, users can unplug the power cable from the wall socket to shut o the D60. After connecting the D60 to the
mains power supply, the personnel will then switch on the D60 and perform the rst time setup, together with a client
responsible. In the case of a connected D60, UV Smart qualied personnel will install UV Soft on the client’s PC and
connect both UV Soft and the D60 to the intranet.
During setup the following settings are congured:
- Language
- Time zone
- Time and date
- D60 description
These settings can be adjusted at any moment by a master user in the D60 menu. Refer to chapter 9.7 of this Instructions
for Use. After the setup 4 users are pre-installed (1 master and 3 normal users) and 3 equipments (see 9.7.4 and 9.7.5).
9.2. First time use (setup)
9.1. Connected and standalone D60
Two congurations of the D60 are available: A connected D60 and a standalone D60. During the rst time use (setup), the
conguration selection is made by the user, depending on the user’s needs. The dierence between the congurations is
described below:
Connected D60
A connected D60 is connected to the client’s intranet, via ethernet cable. This D60 works together with UV Soft, UV
Smart’s data logging software. The software is installed on a client’s PC, connected to the same intranet. Within UV Soft,
users and equipment for disinfection can be added and edited and use data can be viewed and exported. Refer to chapter
10 for UV Soft details.
Standalone D60
A standalone D60 is not connected to any network. Users and equipment for disinfection are imported into the D60 via
USB ash drive. Use data can be viewed and exported from the D60 interface.
9.3. Before every D60 use
Perform the following steps before every D60 use.
1. Make sure there are no signs of D60 damage or D60 material degradation.
2. In case the display indicates an error or maintenance state, contact your local distributor.
3. Make sure no equipment from the previous disinfection cycle is present in the disinfection area.
4. Make sure all visible debris is removed from the disinfection area.
5. Make sure the door is closed.
6. Make sure the D60 setup has been performed.
When all steps have been performed and the D60 display enables to start the disinfection process, the D60 is
suitable for use.
- ID necessity: Does the client want to make use of user identication?
- Equipment ID necessity: Does the client want to make use of equipment identication?
- Network settings

15UV Smart D60 |Instructions for Use |Revision 1 US
9.4. After every D60 use
Perform the following steps after every D60 use.
1. Remove equipment from the disinfection area.
2. Make sure all visible debris is removed from the disinfection area.
3. In case you use the D60 for only one disinfection cycle, close the door. In case of running multiple disinfection cycles,
repeat the process starting at the Before every D60 use-paragraph (9.3).
9.5. Placement of medical equipment guide
Equipment with the following dimensions is suitable to be placed inside the D60 disinfection area:
Maximum medical equipment insertion tube length 1200mm*
Maximum medical equipment wire length 2000mm*
When placing medical equipment inside the D60 disinfection area, be aware of the following:
1. First, the wire-end of the medical equipment should be carefully placed in its designated clamp.
2. With care, place the medical equipment main body part in the D60 clamp. Make sure it hangs steadily.
3. Medical equipment should not overlap/cast shadow on itself.
4. Medical equipment should hang freely; meaning not touching the sides, nor the bottom or top of the disinfection area.
These steps can be remembered by mnemonic WENO:
Wire rst, Equipment second, No shadow, Open and free
1 2 3 4
Wire rst Equipment second No shadow Open and free
*Geometry varies per equipment. Consult UV Smart or your local distributor in case of any questions.

16UV Smart D60 |Instructions for Use |Revision 1 US
9.5.1. Correct equipment placement
Scope Correct Incorrect
VNL9
TEE-probe
VNL11
FNL10

17UV Smart D60 |Instructions for Use |Revision 1 US
9.6. D60 use
Follow the steps below to correctly use the D60 for disinfection of channel- less invasive medical devices. Make sure to read
the Before every D60 use-paragraph (9.3) rst.
1. If applicable to the medical equipment, perform leak testing on the medical equipment according to hospital protocol.
2. Pre-clean your medical equipment according to the instructions for use provided by the manufacturer of the equipment.
3. Make sure to rinse (with sterile water) and dry any equipment after pre-cleaning.
Follow the instructions on the D60 display:
4. On the D60 display, touch the green button to start the D60 disinfection process.
5. Scan your ID using the D60 scanner or RFID reader. Use the keyboard in the corner to enter your user pin code if scanning
is not possible. This step is not prompted if ID scanning is not applicable according to how the D60 is setup.
6. Scan the medical equipment using the D60 scanner or RFID reader. Use the keyboard in the corner to enter the equipment
number if scanning is not possible. This step is not prompted if medical equipment scanning is not applicable according to how
the D60 is setup.
7. Conrm performed leak testing. This step is not prompted if leak testing is not applicable according to the equipment settings
in the equipment database.
8. Conrm pre-cleaning according to protocol.
9. Conrm rinsing and drying of the equipment after pre-cleaning. This step is not prompted if rinsing and drying is not applicable
according to the equipment settings in the equipment database.
10. Conrm the preparation summary.
11. Carefully insert medical equipment into the D60 disinfection area according to WENO (9.5).
12. Close the door. The D60 disinfection cycle will start automatically. Wait for the disinfection cycle to nish.
13. After the disinfection cycle has nished, scan your ID using the D60 scanner or RFID reader. Use the keyboard in the corner
to enter your user pin code in case scanning is not possible. This step is not prompted if ID scanning is not applicable according
to how the D60 is setup.
14. Disinfect your hands according to protocol.
15. Carefully take-out the disinfected medical equipment from the D60.
16. In case you use the D60 for only one disinfection cycle, close the door. In case of running multiple disinfection cycles, repeat
the process starting at the Before every D60 use-paragraph (9.3). In case of high repetitive use (5 times in 10 minutes), let the
device cool down for at least 30 minutes before next use.

18UV Smart D60 |Instructions for Use |Revision 1 US
5
9
13
6
10
14
7
11
15
4
8
12

19UV Smart D60 |Instructions for Use |Revision 1 US
9.7. Navigating the D60 menu
The D60 menu is accessed by pressing the three-striped icon in the top-right of the home screen. The D60 menu has
a structure as displayed below. The next pages describe the path to each end point in more detail.
Menu
Disinfection log
Disinfection log
System
Settings
Language
Select language
Time zone
Set time zone
Time & date
Set time and date
D60 name
Set D60 name
User ID scan necessary
Equipment ID necessary
User database
User database
Equipment database
Equipment database
Network
Setup network
USB import/export
Insert USB flash drive
USB flash drive detected
Import data
Confirm/decline
Data imported
Export data
Confirm/decline
Data exported
Interface
Interface
Factory reset
Reset confirmation
Reset successful
Maintenance
Only accessible to qualified personnel
System Log
System Log
Info
Fig 2. D60 Menu tree

20UV Smart D60 |Instructions for Use |Revision 1 US
9.7.1. Disinfection log
Navigate to the disinfection log by pressing Disinfection log. The Disinfection log displays the following information:
9.7.2. Info
Navigate to the info panel by pressing Info. The info panel displays the following information:
Disinfection start
Disinfection nish
Disinfection result
User IN
User OUT
Equipment
Time stamp, date
Time stamp, date
Succesful/Reason
of failure
User responsible
User responsible
Equipment inserted
Pre-clean performed
Leak test successful
Rinse & dry performed
Measured UV-C dose
Amperage
Yes
Yes
Yes
UV-C dose
Amperage
Legal manufacturer
Software version
Database version
Upcoming maintenance
Description
Cycle information
MAC Adress
Legal manufacturer
Software version
Database version
Date
Description of the D60
Total cycles, cycles since
last maintenance
MAC Adress
Table of contents
Other UV Smart Medical Equipment manuals
Popular Medical Equipment manuals by other brands

FORESIGHT
FORESIGHT TIMS MVP Setup and configuration guide

Nasco
Nasco Life/form LF00890U instruction manual

Drive DeVilbiss Healthcare
Drive DeVilbiss Healthcare Apollo II Cushion Instructions for use

Kowa
Kowa KW-2000 Operation manual

dynarex
dynarex Resp-O2 36400 quick start guide

NeuroTek
NeuroTek EyeScan Deluxe instructions