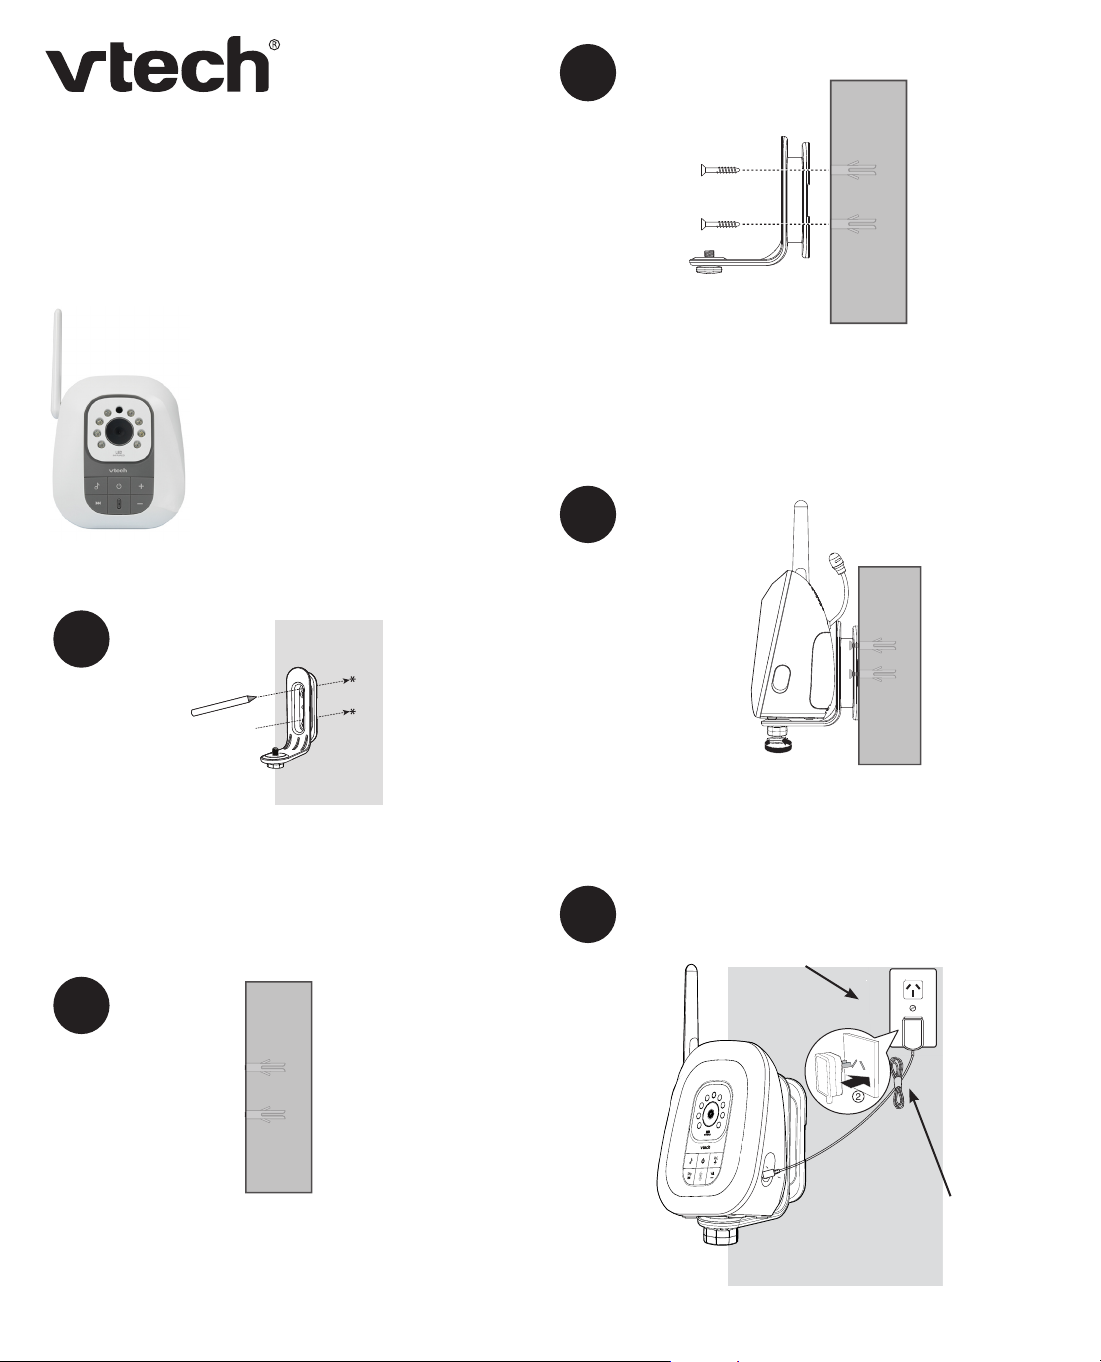
Pairing and Unpairing the Baby Unit
Pair the baby unit
The new BM3210 baby unit must be paired
to the BM3200 parent unit before use. Please
refer to BM3200 user’s manual for complete
instructions, including baby unit installation.
To pair a baby unit:
Make sure you power on the baby unit
and the parent unit before pairing.
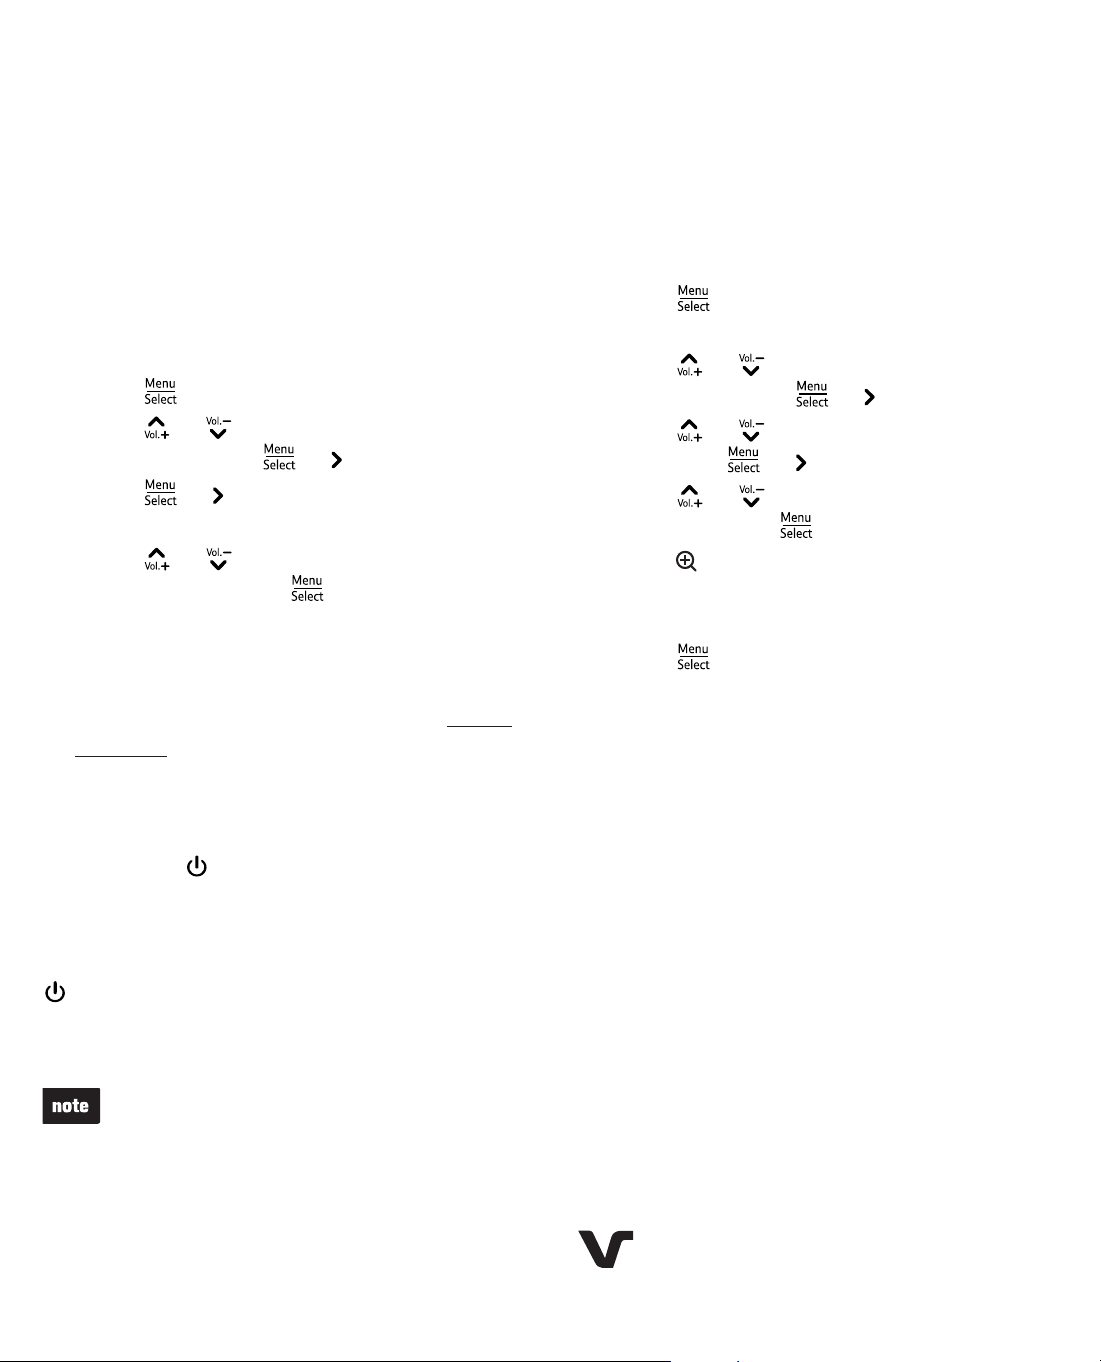
Press when the parent unit is not in use.
Press or to choose PAIR/UNPAIR
CAM, then press or .
Press or again to choose Pair new
CAM.
Press or to choose a desired baby
unit slot, then press . If you choose an
occupied baby unit slot, the new baby unit
will replace the existing baby unit.
Make sure the new baby unit is turned on.
On the new baby unit, immediately press
and hold +and -for 5 seconds when the
parent unit screen displays Please press
both [+] and [
-
] keys on CAM side until
POWER indicator flashes Red and Green
light. The light on the new baby unit
flashes red and green alternately.
When pairing is successful, the screen displays
the image from the newly paired baby unit. The
light on the new baby unit turns red when it
is powered by AA batteries or turns green when
it is powered by AC power.
If pairing fails, the screen displays Pairing
failed. Try the pairing process again.
Only one baby unit can be paired at a time.
1.
2.
3.
4.
5.
•
•
Unpair the baby unit
Make sure you powered on the baby unit
and the parent unit before unpairing the
baby unit.
To unpair a baby unit:
Press when the parent unit is not in
use.
Press or to choose PAIR/UNPAIR
CAM, then press or .
Press or to choose Unpair CAM,
then press or .
Press or to choose a desired baby
unit, then press .
Press when the screen displays To
unpair CAM # from the system, press
[zoom] key.
Press when the screen displays
Press [MENU/SELECT] key to confirm.
When unpairing is successful, the screen
displays the image of the next paired baby
unit. If there is no paired baby unit, the
screen displays No CAM paired.
1.
2.
3.
4.
5.
6.
VTech is the registered trademark of VTech Holdings Limited.
Copyright © 2016 for VTECH TELECOMMUNICATIONS LTD.
All rights reserved. Printed in China.
Version A