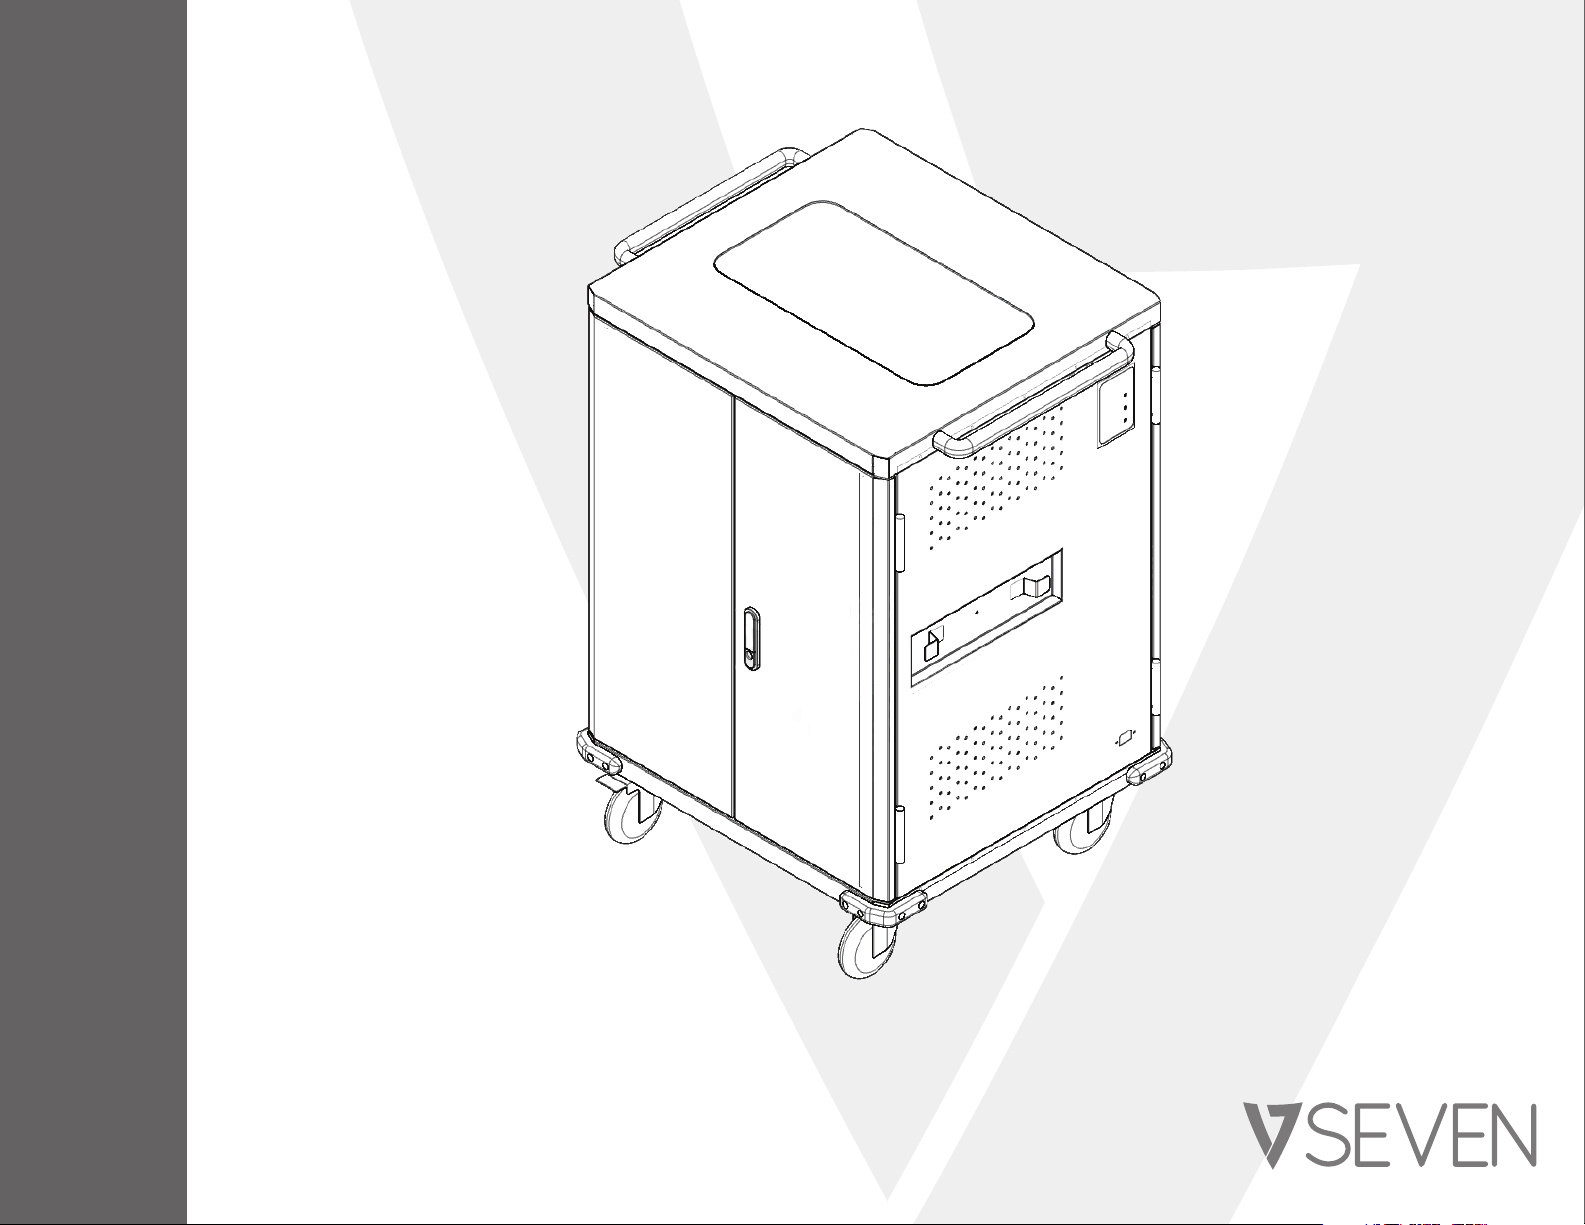
V7 CHGCT36-1E User manual

USER MANUAL
CHGCT361E
CHGCT361K
Charge Cart

1 Getting Started
Package Includes
Cart Diagram
Unboxing
Locking the Cart
2 Setup
Plugging in Devices
Advanced Features
3 Technical Specs
4Safety and Warnings
TABLE OF CONTENTS

1
GETTING STARTED
Package includes
• AC Power Cord
• Keys
AC Power Cord Keys
CHGCT36

Cart Diagram
Front Work Platform
Handle
LED Indicators
Power Cable
Wrap Brackets
5"Locking Caster 5"Caster
Pad Lock
Loop
Power Inlet
Cable Access Panel
Rubber Bumpers
(4 Corners)
Fans (Optional)
Charging Timer
Adapter Slots
Built-in PDUs
Locking Point
*Security Lock Not
included
Device Slots
Power Cord
Pass Through

Remove from pallet
Open Doors
2. Lift Handle
Open Doors
1. Push Down
Open Doors
3. Turn Handle
REMOVE • LÖSCHEN • RETIRER
RETIRAR • RIMUOVERE
!
1
2

Pad Lock Loop
*Pad lock not included
Front/Back
Door Locks

2. Plug in AC Adapters
2
SETUP
1. Plug cart into outlet

3. Place adapters into slots
4. Insert the adapters through the pass through holes

5. Place the adapter wires on the cable holder dividers
6. Place the devices in the dividers

Charging System
Charging all of your devices at one time can overload a typical circuit. V7 Charge Carts are equipped with a built-in timing device that automatically switches the AC power supply from one half
of the device outlets to the other, at specied intervals to help protect against overload.
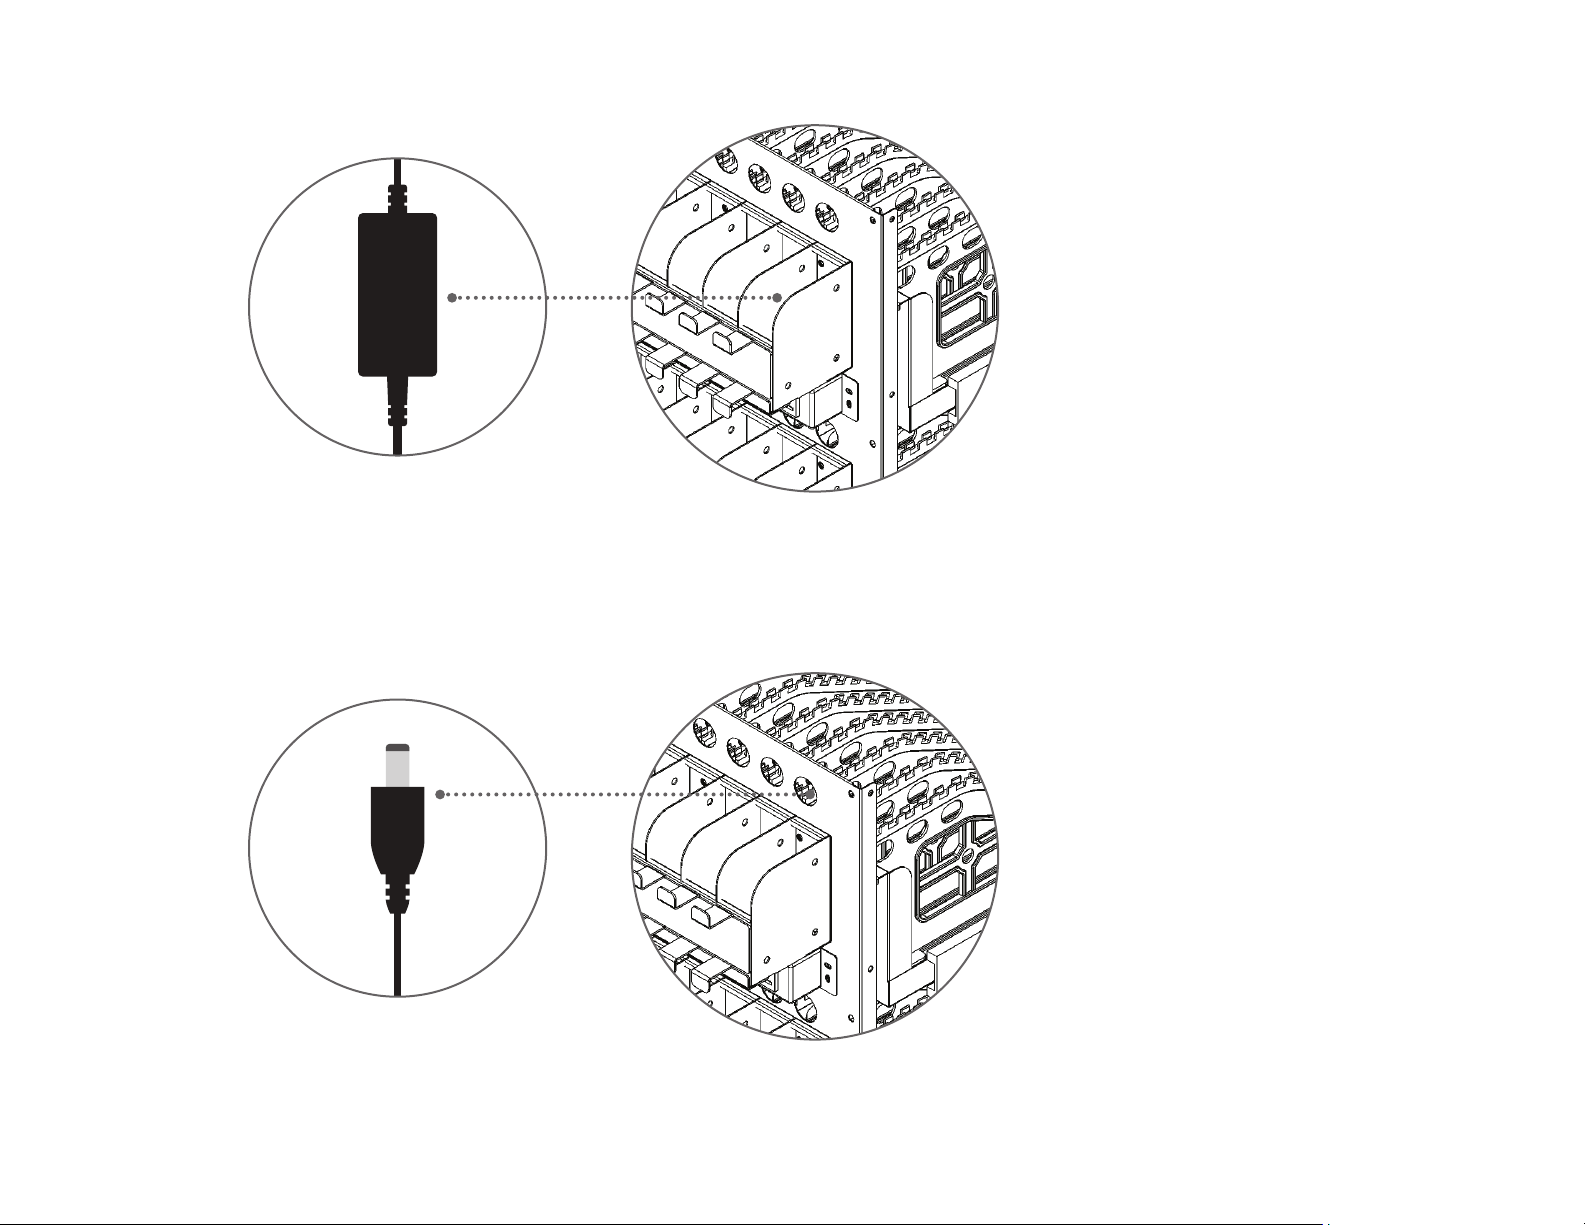
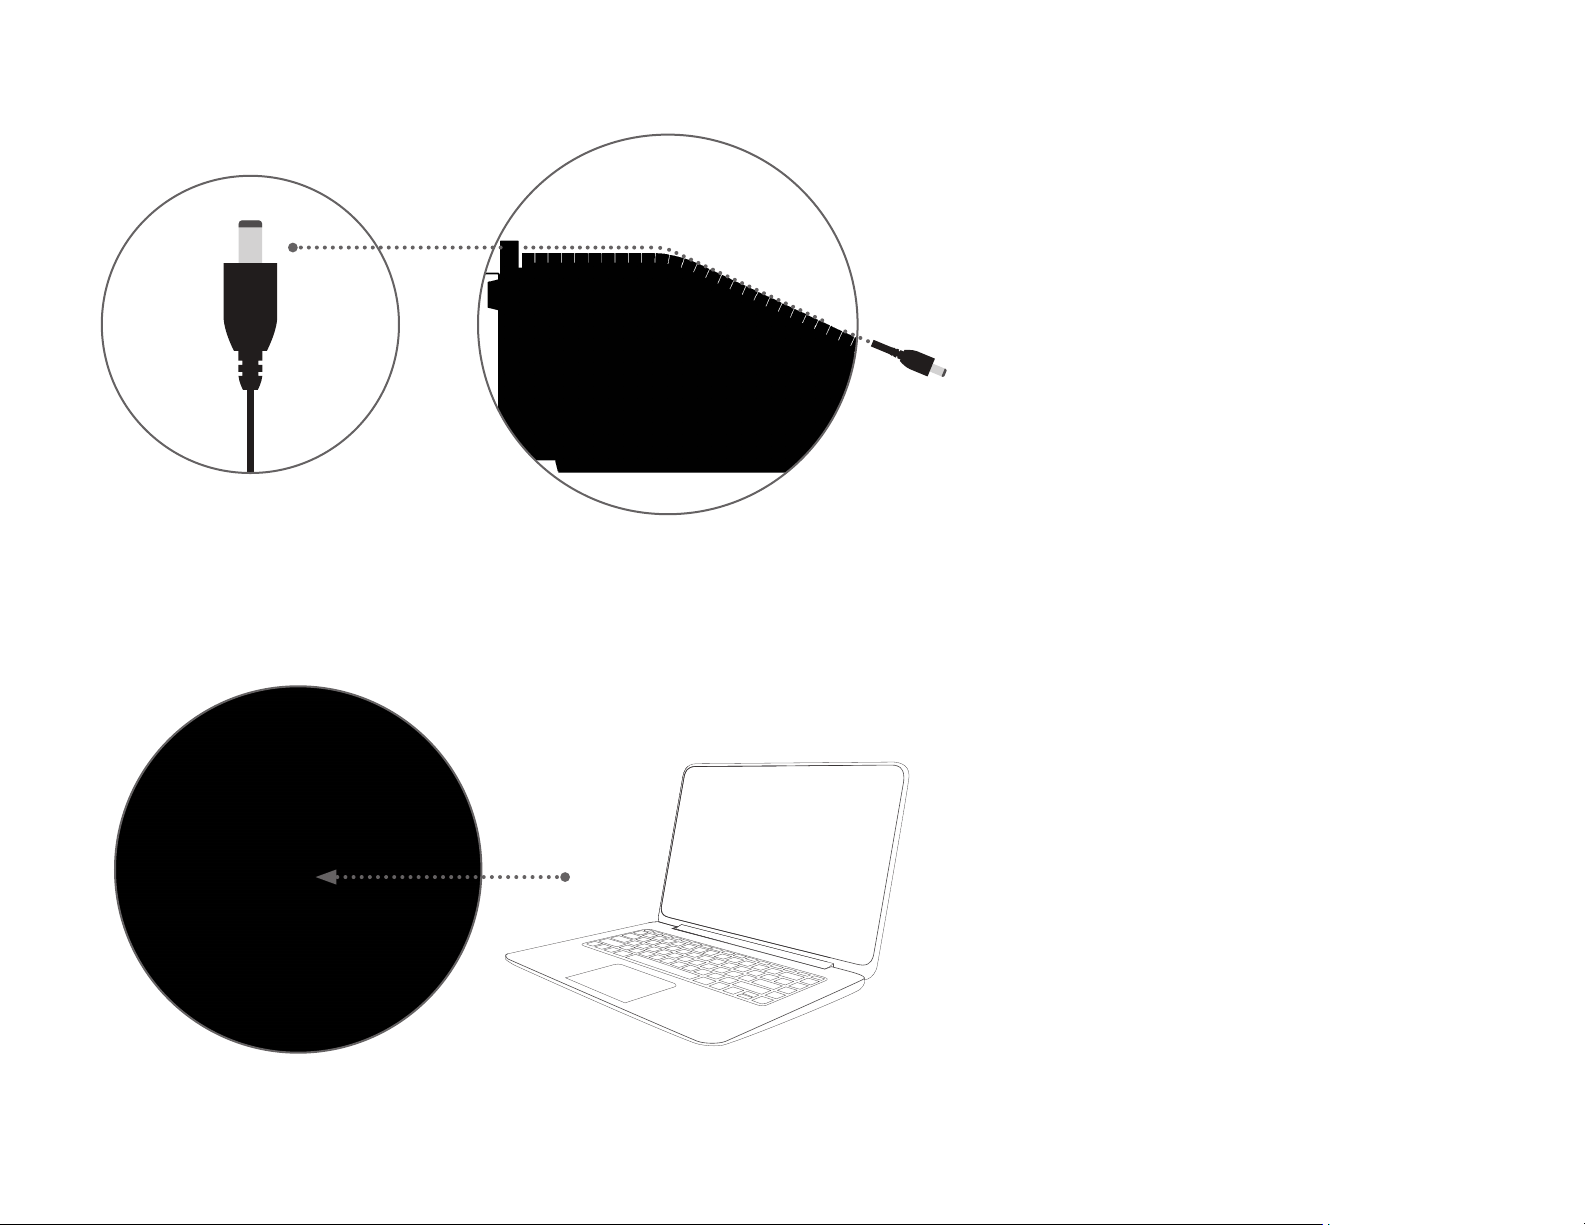
The timer module will provide power to each set of 18 outlets for the amount of time indicated on the timer (default is set to 15 minutes). When that time expires, the cart will change
power to the other set, and continue to alternate sides. Every time power is turned o and then restored to the cart, power starts with the rst set.
The LED indicator on the outside of the cart will show you which set is currently charging.
The timer is factory-set on a 15-minute cycle. Devices with fully depleted batteries will require more than one cycle to fully charge.
Circuit Breaker:
There is a circuit breaker on the cart. If there is no power to internal and external outlets, check to see if the circuit breaker is tripped.
The LED indicator
will illuminate red
when charging
ADVANCED FEATURES

3
TECHNICAL SPECS
CHGCT36
810 mm 652 mm
1080 mm
Cart Dimensions

CHGCT36-1E CHGCT36-1K
V7 Model Number CHGCT36-1E CHGCT36-1K
IM SKU J154274 J154275
EAN / UPC 0662919101157 0662919101164
Color Black and Gray Black and Gray
Material High-grade 18 gauge cold rolled steel High-grade 18 gauge cold rolled steel
Numbered Device Spaces 36 36
Organization and convenience Flexible device dividers with cable channels and num-
bered device slots on sliding shelves, numbered power
adapter slots with cable management, two push handles
Flexible device dividers with cable channels and num-
bered device slots on sliding shelves, numbered power
adapter slots with cable management, two push handles
Cooling system Ventilation slots (60% rate), optional fan system Ventilation slots (60% rate), optional fan system
Warranty 5 Year 5 Year
Package Contents Charging Cart, 6 ft (1.83 m) Shuko Power Cord, Manual Charging Cart, 6 ft (1.83 m) UK Power Cord, Manual
Input Voltage 230VAC, 15A, 60HZ 230VAC, 15A, 60HZ
Output Voltage 230VAC, 15A, 60HZ 230VAC, 15A, 60HZ
Charging System Adjustable zone based timer system Adjustable zone based timer system
Rolling Casters size 5 in (12.7 cm) 5 in (12.7 cm)
Product Dimensions 31.89 x 25.67 x 42.52 in (810 x 652 x 1080 mm) 31.89 x 25.67 x 42.52 in (810 x 652 x 1080 mm)
Product Weight 200.62 lbs (91 kg) 200.62 lbs (91 kg)
Package Size 33.27 x 29.61 x 50.08 in (845 x 752 x 1272 mm) 33.27 x 29.61 x 50.08 in (845 x 752 x 1272 mm)
Package Weight 240.3 lbs (109 kg) 240.3 lbs (109 kg)
Device slot dimensions 15 x 1.42 x 20.24 in (381 × 36 × 260 mm) 15 x 1.42 x 20.24 in (381 × 36 × 260 mm)
Power adapter slot dimensions 3.5 x 1.5 x 7.9 in (89 x 40 x 200 mm) 3.5 x 1.5 x 7.9 in (89 x 40 x 200 mm)
Weight capacity (top of cart) 132.28 lbs (60 kg) 132.28 lbs (60 kg)
Safety & Compliance ROHS, CE approved power distribution units ROHS, CE approved power distribution units
Environment* "Operating: -10°C to 40°C Humidity: 20% to 80% RH
Storage: -40°C to +60°C Humidity: 20% to 90% RH"
"Operating: -10°C to 40°C Humidity: 20% to 80% RH
Storage: -40°C to +60°C Humidity: 20% to 90% RH"
*Note: For this charge cart only. Check the environment specications of the devices you are storing.

4
SAFETY + WARNINGS
CAUTION
• To reduce risk of electric shock only use this product indoors.
• This product is heavy. Use caution handling and keep upright. Do not attempt to unpack or move it unassisted.
• Use caution when unpacking and save the packing material for later use. Scratches and other damage caused by
mishandling is not covered by the warranty.
• Do not allow anyone to sit, stand, or climb on this product.
• Do not block the ventilation holes used for air circulation.
• Do not overload heavy objects on or inside this product.
• Before moving this product, disconnect the power from the wall outlet.
• While moving this product, make sure the power cord is secured.
• This product should always be used by adults or with adult supervision.
• Never unplug this product from the outlet when hands are wet or by pulling the power cord.
• Do not use an extension cord in conjunction with this product.
• Connection to any other type of receptacle other than a two-pole, three-wire grounded receptacle may result in
shock hazard as well as violate local electrical codes.
• In the event of an emergency, disconnect the power cord from the AC power outlet.
• Do not plug the input of this product into its own output.
• Do not attach an additional extension cord, power strip, or surge protector to this product.
• Do not attach non-computer-related items, such as medical equipment, life-support equipment, microwave
ovens, or vacuum cleaners to this product.
• Place cables in such a way that they won’t be pulled or snagged, and no one can step on or trip over them.
• Do not attempt to disassemble this product. This product contains no user replaceable parts. Only factory service
personnel may perform repairs.
• If this product is misused, incorrectly operated or repaired, the warranty will be void.
• Do not remove plugs from outlets in use labeled“Do not remove”with a red sticker. These are required for the
charging system and auxiliary outlets of the cart to function.

BENUTZERHANDBUCH
CHGCT361E
CHGCT361K
Ladewagen

1 Erste Schritte
Paketinhalt
Übersicht
Auspacken
Abschließen des Wagens
2 Einrichtung
Anschließen von Geräten
Erweiterte Funktionen
3 Technische Daten
4Sicherheits- und Warnhinweise
INHALTSVERZEICHNIS

1
ERSTE SCHRITTE
Paketinhalt
• AC-Netzkabel
• Schlüssel
AC-Netzkabel Schlüssel
CHGCT36

Übersicht
Vorderseite Arbeitsplattform
Gri
LED-Anzeige
Klammern zur
Netzkabelaufwicklung
Arretierung für Lenkrollen
(5 Zoll, 12,7 cm) Lenkrollen
(5 Zoll, 12,7 cm)
Verriegelungslasche
Netzanschluss
Kabelabdeckung
Gummipuer
(4 Ecken)
Lüfter (optional)
Lade-Timer
Adapterfächer
Eingebaute
PDUs
Abschließmöglichkeit
* Sicherheitsschloss
nicht enthalten
Gerätefächer
Durchlass für
Netzkabel

Von Palette entfernen
Türen önen
2. Gri anheben
Türen önen
1. Nach unten drücken
Türen önen
3. Gri drehen

Verriegelungslasche
* Vorhängeschloss nicht enthalten
Vorne/Hinten
Türschlösser

2. Netzadapter anschließen
2
EINRICHTUNG
1. Wagen mit Stromanschluss verbinden
This manual suits for next models
1
Table of contents
Languages:
Other V7 Batteries Charger manuals
Popular Batteries Charger manuals by other brands

DazeTechnology
DazeTechnology DazeBox Installation, use and maintenance manual

Stanley
Stanley BC1509 instruction manual

Monarch
Monarch 9465 operating instructions

SJS
SJS Cycle2Charge V3 Plus User Manual, Mounting Instructions

iCharger
iCharger 3010B user manual

LG Innotek
LG Innotek PWMA-W637A/B/C user manual