manuals.online logo
Brands
  1. Home
  2. •
  3. Brands
  4. •
  5. Vacmaster
  6. •
  7. Kitchen Appliance
  8. •
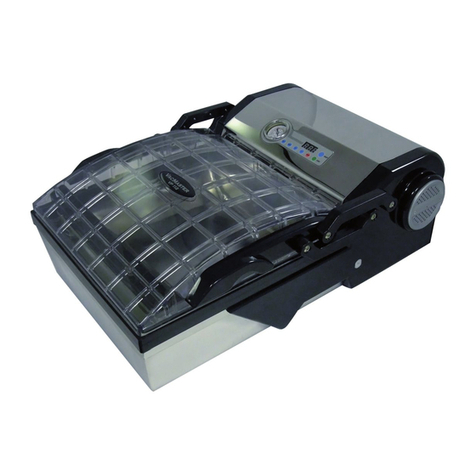
  9. Vacmaster VP112 User manual

Vacmaster VP112 User manual

Foods Vacuum Freezer
Storage
Vacuum Fridge
Storage Typical Storage
Fresh Beef & Veal 1-3 years 1 month 1-2 weeks
Ground Meat 1 year 1 month 1-2 weeks
Fresh Pork 2-3 years 2-4 weeks 1 week
Fresh Fish 2 years 2 weeks 3-4 days
Fresh Poultry 2-3 years 2-4 weeks 1 week
Smoked Meats 3 years 6-12 weeks 2-4 weeks
Fresh Produce, Blanched 2-3 years 2-4 weeks 1-2 weeks
Fresh Fruits 2-3 years 2 weeks 3-4 days
Hard Cheeses 6 months 6-12 weeks 2-4 days
Sliced Deli Meats Not recommended 6-12 weeks 1-2 weeks
Fresh Pasta 6 months 2-3 weeks 1 week
*Typical storage life will vary depending on product quality and freshness at the time of packaging. All shelf lives noted are approximate.
Vacuum packaging is not a substitute for canning, but it does greatly extend the shelf life of food. Vacuum
packaging keeps food fresher up to ve times longer than under normal conditions! For best results, package the
freshest foods possible. Stored under the correct conditions, food will taste as fresh as the day it was packaged.
P.O. Box 412888
Kansas City, MO 64141
www.aryinc.com 800.821.7849
VP112
QuickStart Guide
VP112
QuickStart Guide
For your safety, follow these precautions when
using your VP112:
▪ Read Owner’s Manual & QuickStart Guide carefully before using
the machine for the rst time.
▪ Do not use the VP112 on wet or hot surfaces, or near a heat source.
▪ Do not immerse machine or power cord in water or any other liquid.
▪ Plug VP112 into grounded power sources only, do not use extention
cords.
▪ To disconnect, unplug directly from power source. Do not disconnect
by pulling on cord.
▪ Do not operate appliance with damaged power cord.
▪ Only use the VP112 for its intended use.
▪ Only use VacMaster® pouches, accessories and attachments.
QuickStart Guide
1. Select Barrier Vacuum Pouch
Select the proper size VacMaster® vacuum pouch. Allow a minimum of 1” to 2” of extra headspace at the
top of the pouch to ensure quality, air-tight seal.
2. Plug machine into grounded electrical outlet.
The LCD on the control panel will read “OFF”.
3. Press “ON/OFF” turning machine to “ON” mode.
4. Adjust / Set Timing Controls
NOTE: All time adjustments must be made with machine power “ON”.
  ▪VacuumTime:Press the “VAC” button once to adjust the vacuum time up or down by using the
“+” or “-“ buttons. For the initial test, set the vacuum time to 35 seconds. Adjust vacuum time
accordingly to achieve the vacuum required. Depending on the pouch size and the amount of
product in the package, the vacuum time can vary from 25-60 seconds.
  ▪SealingTime: Press the “SEAL” button once to adjust the seal time up or down by using the “+”
or “-“ buttons. For the initial test, set seal time to 5 seconds. Adjust the time accordingly to achieve
perfect seal.
5. Fill pouch and place in chamber
▪Remove or replace ller plates to accommodate the product to be vacuumed.
▪Always use as many ller plates as possible. Using the plates will result in a faster, more efcient
vacuum.
▪Keep pouches that contain liquids or wet product below the height of the seal bar.
   ▪Lay the pouch at in the chamber with the opening of the pouch across the seal bar.
▪Pouch opening should extend across the seal bar by ½” to 1”. Make sure the opening is at and
wrinkle-free.
NOTE: The entire pouch, including the opening must remain inside the chamber.
6. Close lid
Using the handles marked by “LIFT HERE”, lower the lid allowing it to t tightly against the chamber
gasket.
7. The Process (Vacuum and Seal)
a. Press the “START” (GREEN) button. This will start the vacuum pump.
b. Make sure that the lid is engaged. You will notice the vacuum level increasing by looking at
the vacuum gauge. If the vacuum level does not increase, press rmly on the lid making sure that it
seals completely against the chamber seal.
c. Vacuum Cycle (counts down to zero)
d. Sealing Time (counts down to zero)
e. Vacuum Devac
Air is let back into chamber. You will notice the bag tighten around the product in the vacuum pouch.
f. When the machine BEEPS the cycle is complete.
g. OPEN lid by using the handles and remove pouch.
8. Pouch Inspection
Vacuum – check the quality of the vacuum by looking at the tightness of the pouch
and the product. If you notice air pockets increase the vacuum time by 5 seconds, test
again. The vacuum time could take up to 60 seconds depending on the pouch size and
the volume of the product being packaged.
Seal – Inspect the pouch seal.
Note: A positive seal will look “clear” upon inspection. If the seal is “spotty or incomplete” increase the
sealing time by 1 second. If the seal is “white or milky” decrease the seal time by 1 second.

Other manuals for VP112

1

Other Vacmaster Kitchen Appliance manuals

Vacmaster VP220 User manual

Vacmaster

Vacmaster VP220 User manual

Vacmaster PRO110 User manual

Vacmaster

Vacmaster PRO110 User manual

Vacmaster SVP-20 User manual

Vacmaster

Vacmaster SVP-20 User manual

Vacmaster VP330 Manual

Vacmaster

Vacmaster VP330 Manual

Vacmaster PRO110 User manual

Vacmaster

Vacmaster PRO110 User manual

Vacmaster VP800 User manual

Vacmaster

Vacmaster VP800 User manual

Vacmaster Vacmaster Pro90 User manual

Vacmaster

Vacmaster Vacmaster Pro90 User manual

Vacmaster VP112 User manual

Vacmaster

Vacmaster VP112 User manual

Vacmaster VP545 Manual

Vacmaster

Vacmaster VP545 Manual

Vacmaster PRO350 User manual

Vacmaster

Vacmaster PRO350 User manual

Vacmaster VP600 User manual

Vacmaster

Vacmaster VP600 User manual

Vacmaster SV10 User manual

Vacmaster

Vacmaster SV10 User manual

Vacmaster PRO305 User manual

Vacmaster

Vacmaster PRO305 User manual

Vacmaster vp320 User manual

Vacmaster

Vacmaster vp320 User manual

Vacmaster VP680 User manual

Vacmaster

Vacmaster VP680 User manual

Vacmaster SV1 User manual

Vacmaster

Vacmaster SV1 User manual

Vacmaster Pro160 User manual

Vacmaster

Vacmaster Pro160 User manual

Vacmaster PRO200 User manual

Vacmaster

Vacmaster PRO200 User manual

Vacmaster VP215 User manual

Vacmaster

Vacmaster VP215 User manual

Vacmaster PRO360 User manual

Vacmaster

Vacmaster PRO360 User manual

Vacmaster VP325 Manual

Vacmaster

Vacmaster VP325 Manual

Popular Kitchen Appliance manuals by other brands

Saturn ST-EK8037 manual

Saturn

Saturn ST-EK8037 manual

BOSKA Pro 853560 instruction manual

BOSKA

BOSKA Pro 853560 instruction manual

Enders 7909 instruction manual

Enders

Enders 7909 instruction manual

Kalorik USK PPG 37241 operating instructions

Kalorik

Kalorik USK PPG 37241 operating instructions

Scarlett SC-FD421001 instruction manual

Scarlett

Scarlett SC-FD421001 instruction manual

FoodSaver V4925 owner's manual

FoodSaver

FoodSaver V4925 owner's manual

Course	Housewares B416144 quick start guide

Course Housewares

Course Housewares B416144 quick start guide

AEG SANTO Series operating instructions

AEG

AEG SANTO Series operating instructions

Melissa 643-036 instruction manual

Melissa

Melissa 643-036 instruction manual

cecotec ROCK'NTOAST 3IN1 instruction manual

cecotec

cecotec ROCK'NTOAST 3IN1 instruction manual

Gourmia GMF225 instructions

Gourmia

Gourmia GMF225 instructions

Electrolux EKM7 Series Instruction book

Electrolux

Electrolux EKM7 Series Instruction book

Magio MG-965 instruction manual

Magio

Magio MG-965 instruction manual

Keimling Naturkost Excalibur 56301WH Operation manual

Keimling Naturkost

Keimling Naturkost Excalibur 56301WH Operation manual

Beper 90.071 use instructions

Beper

Beper 90.071 use instructions

Geryon E2900-M user manual

Geryon

Geryon E2900-M user manual

Morphy Richards 46718 owner's manual

Morphy Richards

Morphy Richards 46718 owner's manual

Kenwood A995 manual

Kenwood

Kenwood A995 manual

manuals.online logo
manuals.online logoBrands
  • About & Mission
  • Contact us
  • Privacy Policy
  • Terms and Conditions

Copyright 2025 Manuals.Online. All Rights Reserved.