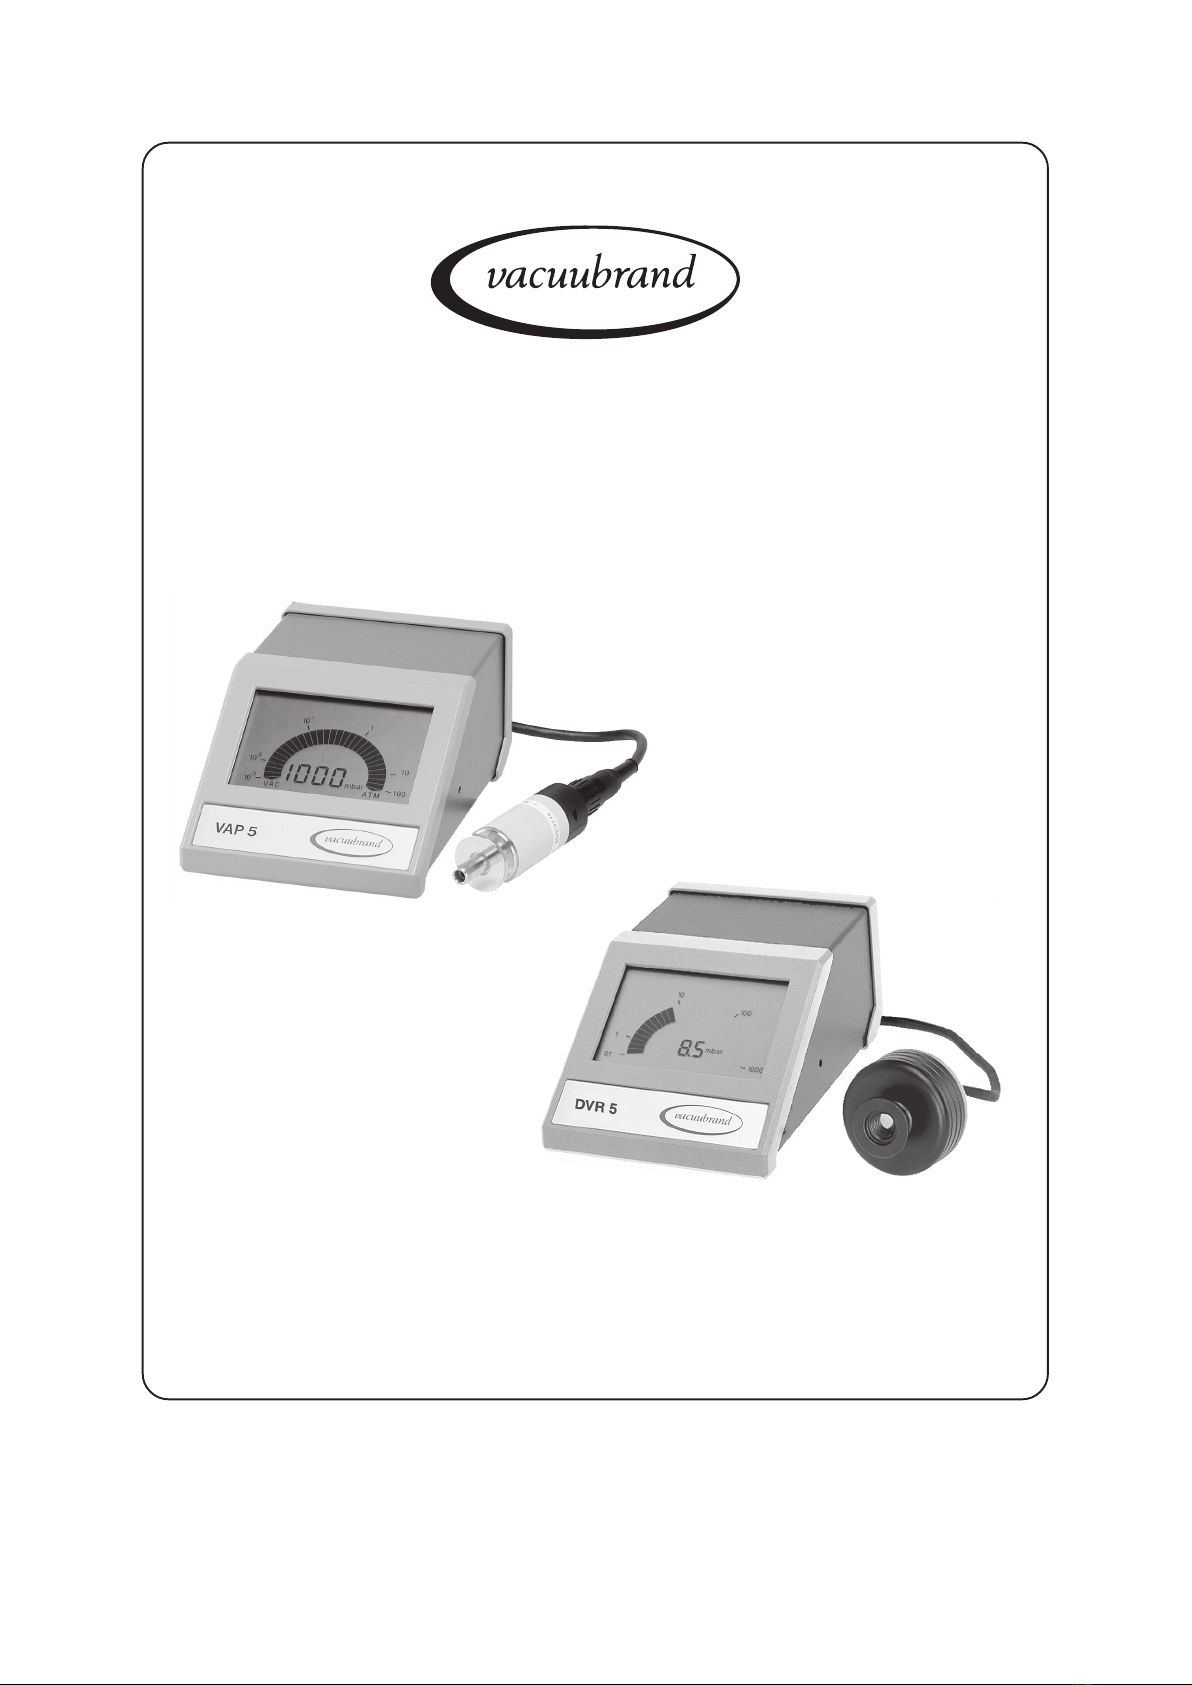
vacuubrand VAP 5 User manual

page 1 of 17
Documents are only to be used and distributed completely and unchanged. It is strictly the users´ responsibility to check
carefully the validity of this document with respect to his product. manual-no.: 999039 / 16/12/2009
Vacuum gauges
VAP 5
DVR 5
Technology for Vacuum Systems
Instructions for use

page 2 of 17
Documents are only to be used and distributed completely and unchanged. It is strictly the users´ responsibility to check
carefully the validity of this document with respect to his product. manual-no.: 999039 / 16/12/2009
After sales service: Contact your local dealer or call +49 9342 808-193.
Dear customer,
Your VACUUBRAND vacuum gauge shall support you at your work for a long time without any trouble and
with full load output.Thanks to our large practical experience we attained much information how you could
add to an efficient application and to personal safety. Please read these instructions for use prior to the
initial start-up of your controller.
VACUUBRAND vacuum gauges are the result of many years of experience in construction and practical
operation of these vacuum gauges combined with the latest results in material and manufacturing technology.
Our quality maxim is the ”zero fault principle”:
Every delivered vacuum gauge is tested extensively including an endurance run. Due to this endurance
run, also faults, which occur rarely, are reported an can be corrected. Every single vacuum gauge is tested
on achievement of the specification after the endurance run.
Every VACUUBRAND controller leaving our factory achieves the specification. We feel obliged to
this high quality standard.
We are aware that the controller should not draw a part of the real work and we hope to contribute with our
products to an effective and troublefree realisation of your work.
Yours
VACUUBRAND GMBH + CO KG

page 3 of 17
Documents are only to be used and distributed completely and unchanged. It is strictly the users´ responsibility to check
carefully the validity of this document with respect to his product. manual-no.: 999039 / 16/12/2009
Attention! Important notes!
Not permitted! Misuse may cause damage.
Caution! Hot surface!
Isolate equipment from mains.
Note.
Contents
Safety information! ....................................................................................................4
Technical data............................................................................................................6
Use and operation .....................................................................................................7
Troubleshooting ......................................................................................................10
Cleaning the gauge head ........................................................................................11
Readjustment ..........................................................................................................11
Calibration in the factory.........................................................................................13
Notes on return to the factory ................................................................................14
Health and safety clearance form ..........................................................................15

page 4 of 17
Documents are only to be used and distributed completely and unchanged. It is strictly the users´ responsibility to check
carefully the validity of this document with respect to his product. manual-no.: 999039 / 16/12/2009
Safety information!
Remove all packing materials, remove the equipment from its packing-box, remove
the protective covers and inspect the equipment.
If the equipment is damaged, notify the supplier and the carrier in writing within three
days; state the item number of the equipment together with the order number and the
suppliers´ invoice number. Retain all packing materials for inspection.
Do not use the equipment if it is damaged.
☞Read this manual before installing or operating the equipment.
Obey national safety regulations and safety requirements concerning the use of
vacuum and electrical equipment.
☞Product must be connected only to a suitably fused and protected electrical supply
and a suitable earth point. Failure to connect the device to ground may result in
deadly electrical shock.
☞Check that mains voltage and current conform with the product (see rating plate).
☞Ensure that installation is in compliance with limitations from the degree of protec-
tion, see “Technical data“.
☞The product is equipped with a short circuit proof transformer with an integrated
overload protection (no fuses).
Operate the equipment only in combination with VACUUBRAND genuine accessories.
Obey all other relevant safety requirements (e. g. accident prevention regulations for
working in laboratories and explosion protection guidelines) and provide protective
measures.
Max. ambient temperature: 40°C
☞Make sure ventilation is adequate if product is installed in an enclosure or if ambi-
ent temperature is elevated.
The devices are not suitable when working with dangerous or explosive gases or
explosive or flammable mixtures. Ensure that the materials of the wetted parts are
compatible (see “Technical data“). If necessary adopt suitable measures.
☞Temperature of the Pirani sensor is about 170°C.
☞If residues can occur or if aggressive or condensable substances may enter the
product, install suitable protection (e. g. gas washing bottle).
☞Position the product in the vacuum system so as to avoid flow of condensate
towards the gauge head.
DVR 5:
Max. permitted pressure: 1.5 bar (absolute).
☞At a pressure greater than 1060 mbar the digital pressure display and the warning
triangle are flashing.
Attention: At a pressure greater than 1100 mbar the pressure measurement is incor-
rect (saturation limit of the pressure transducer).
VAP 5:
Max. permitted pressure: 1.5 bar (absolute).
Exclude sudden pressure changes when gauge head is operated.
☞Pirani filament can be destroyed.
Ensure that the gauge head is electroconductively connected to an earthing wire when
the Pirani sensor is exposed to charged particles (ion-beam, plasma).
☞Use only electroconductive centring/clamping rings. Do not connect the gauge head
via a nonconductive hose.
page 5 of 17
Documents are only to be used and distributed completely and unchanged. It is strictly the users´ responsibility to check
carefully the validity of this document with respect to his product. manual-no.: 999039 / 16/12/2009
Ensure that maintenance is done only by suitably trained and supervised technicians.
Ensure that the maintenance technician is familiar with the safety procedures which
relate to the equipment processed by the vacuum system and that the equipment if
necessary is approximately decontaminated before starting maintenance.
Use only genuine spare parts and accessories.
☞Otherwise safety and performance of the equipment as well as the electromagnetic
compatibility of the equipment might be reduced.
Return of the equipment to the factory for repair, the manufacturer accepts warranty
only if housing has not been opened.
Repair of the gauge head VSP 5 and VSK 5 is not possible.
In order to comply with law (occupational, health and safety regulations and regulations
for environmental protection) products returned to the manufacturer can be repaired /
DKD calibrated only when following certain procedures (see section ”Notes on return
to the factory”).

page 6 of 17
Documents are only to be used and distributed completely and unchanged. It is strictly the users´ responsibility to check
carefully the validity of this document with respect to his product. manual-no.: 999039 / 16/12/2009
Technical data
We reserve the right for technical modification without prior notice!
stnenopmoC strapdetteW
5PSV
tnemaliFdellarips,netsgnuT
edisni,daeheguaG)iSgMlA(muinimulA
hguorhtdeeflacirtcelefognilaeSMPF
retlifev
itcetorPeznorbderetniS
5KSV
sgnilaeS remotsaleoroulftnatsiseryllacimehc
gnisuohdaeheguaG leetssselniatsnoEFTPdecrofniercitsalpor
uD
recudsnarterusserP cimarecedixomuinimulA
elzzonesoHSPP
epyT 5PAV 5RVD
egnargnirusaeM01-rabm0001
3-
rabmrabm1.0-rabm0011
elpicnirpgnirusaeM,noitcudnoclamreht
epytsagnotnedneped
,eviticapac
epytsagfotnedneped
ni
ytniatrecnU
tnatsnocta,tnemtsujdaluferacretfa(
ton,wenhtiwdnaerutarepmet
)daeheguagdetanimatnoc
-/+%01
ni
htiw,eulavdetacidnifo(
01-rabm001
2-
rabm
)egnar
-/+=/<)tigid1-/+(rabm1
tneiciffeocerutarepmeTdeificepstonK/rabm70.0<
)noitarepo(egnarerutarepmet
tneibmAC°04+otC°01+C°04+otC°01+
)egarots(egnarerutarepmettneibmAC°06+otC°01-C°06+otC°01-
)etalpgnitarees(yl
ppussniaMV021-001~,+,%01-/5
zH06-05
ro
V032~,-/+06-05,%01
zH
V021-001~,+,%01-/5
zH06-05
ro
V032~,-/+06-05,%01
zH
925CEInoitcetor
pfoeergeD
tnemurtsnignirusaeM
daeheguaG
02PI
04PI
02PI
45PI
wardrewoPAV5.7AV5.7
elacs/stinuerusserPaPhrorroT,rab
maPhrorroT,rabm
ssaM
tnemurtsnignirusaeM
daeheguaG
gk3.1
gk51.0
gk3.1
gk5.0
HxWxLsnoisnemiDxmm231xmm791
mm78
xmm2
31xmm791
mm78
)dedulcni(gnitnuomdnatSretemaid:dorniwercs
baldradnatsrof(8M"2/1
)spmalc
retemaid:dorniwercs
b
aldradnatsrof(8M"2/1
)spmalc
daeheguaG5PSV5KSV
daeheguagehtfonoitcennocmuucaV/01WNegnalfllams
)nohsup(8WNeso
h
dna61WNegnalfllams
esohdeppetsni-wercs
elzzon
daeheguagehtotsdaelfohtgneLm2.xorppam5.2.xorppa
ecafretnI-C232
SR

page 7 of 17
Documents are only to be used and distributed completely and unchanged. It is strictly the users´ responsibility to check
carefully the validity of this document with respect to his product. manual-no.: 999039 / 16/12/2009
Use and operation
Display
Rear side
key-button for
digital adjustment
and electronic scale
conversion (pressure unit)
☞at the side of the housing male connector
for mains cable
thread M8
for stand rod
female connector for
connecting cable to
the gauge head
serial interface
(only DVR 5)
mains switch
rating plate
adjustment mode
warning symbol
selectable
pressure units
after switching on together with display ”CAL”
(internal check and adjustment routine)

page 8 of 17
Documents are only to be used and distributed completely and unchanged. It is strictly the users´ responsibility to check
carefully the validity of this document with respect to his product. manual-no.: 999039 / 16/12/2009
Description VAP 5
The vacuum gauge VAP 5 relies on the fact that the thermal conductivity of the residual gas in the vacuum
chamber is a measure for the gas pressure. The thermal conductivity of gases is proportional to the
pressure within a certain range and is related to the molecular mass.
The thermal conductivity of gases and vapours varies with their molecular mass. The gauge has been
adjusted for air (nitrogen) at the factory.
☞Pressure of gases with similar mass, such as O2or CO, can be read off directly within the uncertainty
of the measurement.
☞With gases of lower or higher mass (H2, He, Ar, CO2) it is advisable to readjust the gauge head, primarily
at atmospheric pressure, using the gas to be measured, see section “Readjusting the gauge head“.
Description DVR 5
The DVR 5 is equipped with a ceramic pressure transducer to measure the actual pressure according to the
capacitive principle of measurement independent of the gas type and depending on the vacuum, i. e.
absolute. Electrically, the pressure transducer corresponds to a plate capacitor. A change in capacity
indicates a pressure change.
The pressure value is displayed with a resolution of 0.1 mbar in the range of 0.1 to 10 mbar and with a
resolution of 1 mbar for pressures > 10 mbar.
Preparing for operation
➨➨
➨➨
➨Connect gauge head with connecting cable to the female connector at the rear side of the equipment.
Screw the plug into the female connector.
➨Connect the gauge head to the vacuum chamber via the small flange connection or a hose nozzle.
Avoid contamination (oil/oil mist) of the gauge head when generating the vacuum with an oil-filled
vacuum pump.
☞Do not mount the gauge head directly at the pump.The diameter of the pipelines should be as large as
possible.
➨➨
➨➨
➨Switch on the equipment.
☞After switching on the vacuum gauge, an internal check and adjustment routine starts automatically
(indicated by the clock symbol and “CAL“ in the display).
How to change the pressure unit
The vacuum gauge comes switched to the mbar-scale (230 V version) or Torr-scale (110 V version). To
convert reading to mbar, Torr or hPa:
➨➨
➨➨
➨Press key-button by using a small screwdriver or the tip of a pencil (and hold) during switching on.
➨➨
➨➨
➨“Set“ and the pressure units (mbar, Torr, hPa) are displayed, the pressure unit as from last operation is
flashing.
➨➨
➨➨
➨Press key-button to change pressure unit. Approximately 2 sec. after the last tip the mode is termi-
nated.
Serial interface
The vacuum gauge DVR 5 is equipped with a serial interface at the rear side of the housing.
☞Respectively plug-into or remove the cable from the interface (cable RS 232C, 9-pole, Sub-D) only if the
equipment is switched off.
☞The interface is not electrically isolated from the measuring circuit.

page 9 of 17
Documents are only to be used and distributed completely and unchanged. It is strictly the users´ responsibility to check
carefully the validity of this document with respect to his product. manual-no.: 999039 / 16/12/2009
Units: MBAR, TORR, HPA
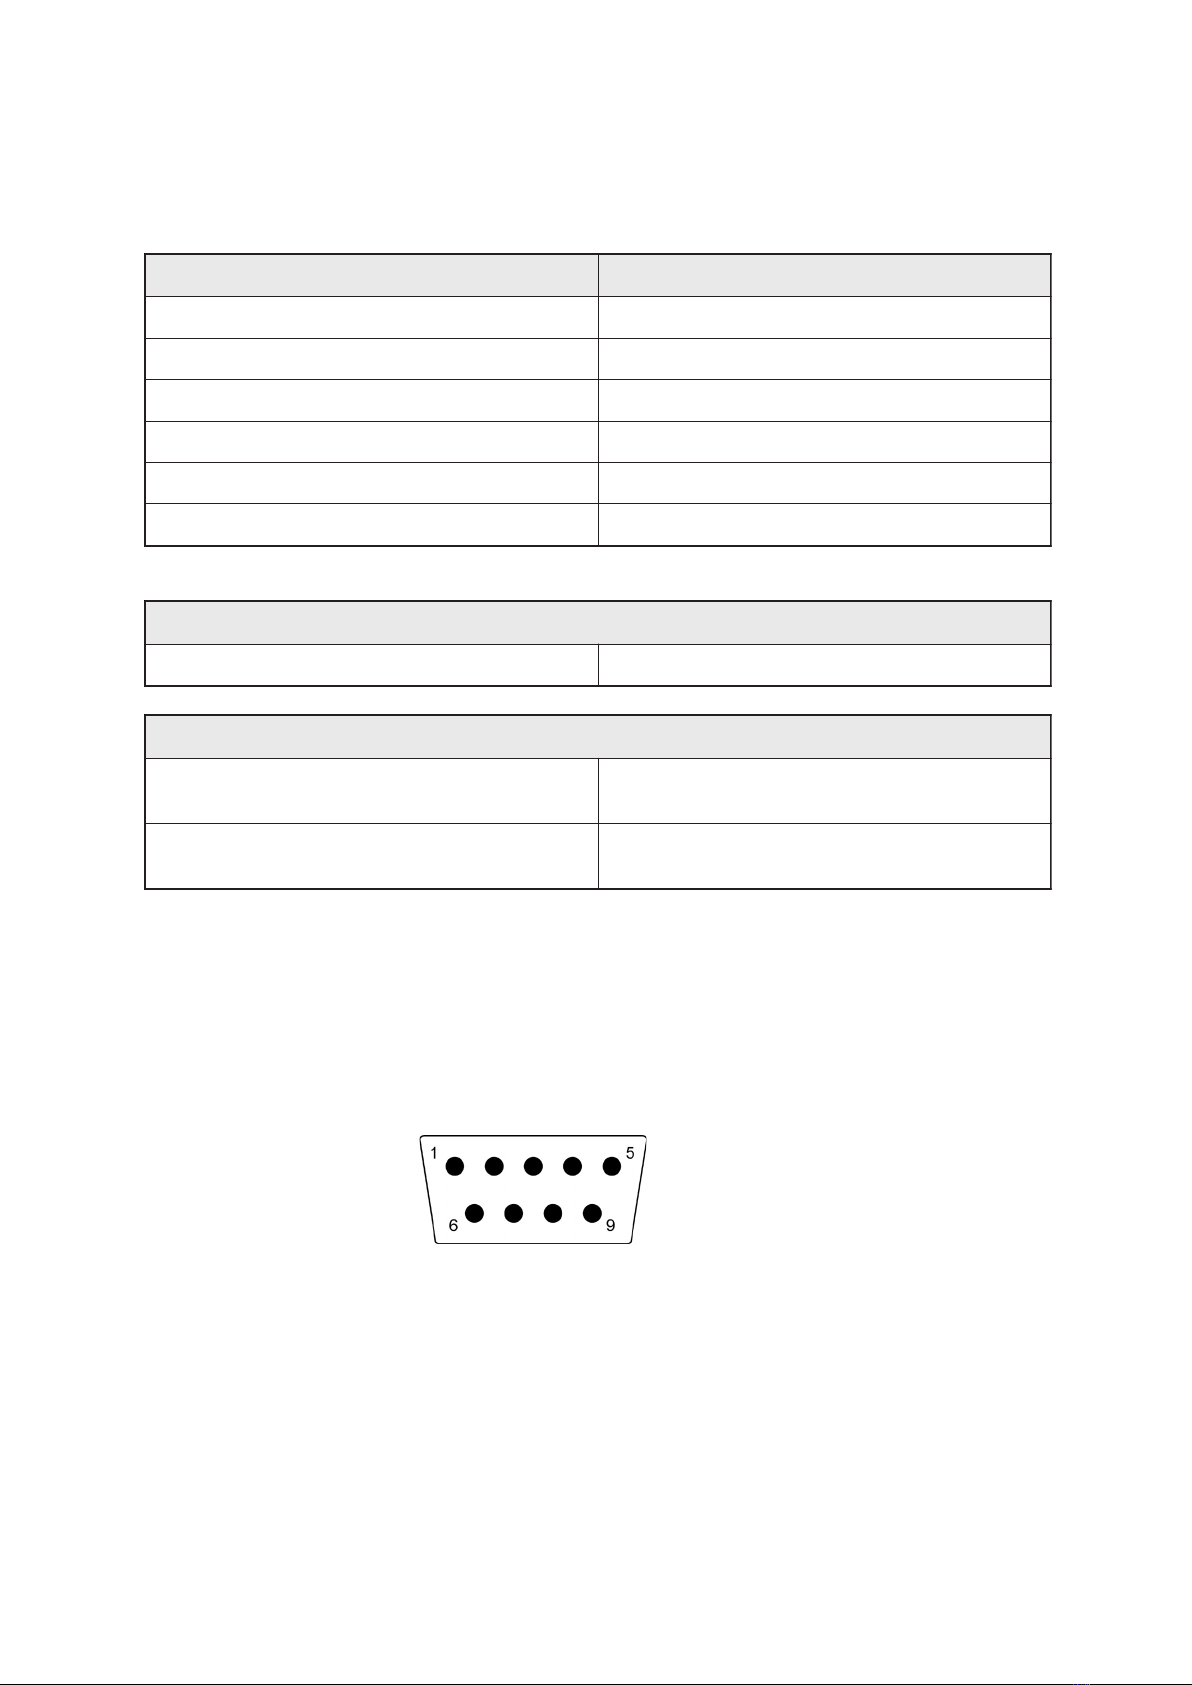
Connector assignment:
(nine-pole Sub-D-plug )
2: RxD
3: TxD
4: DTR
5: GND
Interface parameters
Interface parameters at the COM port have to be set as follows (the interface parameters at the DVR 5
cannot be changed):
Via the interface the actual pressure value can be read out.
The single abbreviations of a command are separated by underscores (ASCII 5FH).The string is terminated
with <CR><LF> (ASCII 0DH, ASCII 0AH).
retemarapecafretnI
etarduaB0069
stibataD8
stibtratS1
stibpotS1
ytiraPenon
ekahsdnaHenon
dnammocecafretnI
">FL<>RC<1_VP_NI" eulaverusserpfotuodaer
tuptuO
">FL<>RC<]tinu[X.XXXX" gnirusaemetelpmoc(rabm1.0fonoituloser
)egnar
">FL<>RC<1-" erusserprotacidnin
oitcnuflam(tluaffoesacni
)recudsnart

page 10 of 17
Documents are only to be used and distributed completely and unchanged. It is strictly the users´ responsibility to check
carefully the validity of this document with respect to his product. manual-no.: 999039 / 16/12/2009
Troubleshooting
tluaF esuacelbissoP ydemeR
.yalpsidoN Îon,nideggulptonsniaM
?elbaliavarewop
)kcehc,gulpsniamtresnI
.sesufsniam
Îecived(sesuacrehtO
?)
evitcefed
)ehtotecivedehtnruteR
.riaperrofyrotcaf
,ffo/nognitanretlasiyalpsiD
noitcetorpdaolrevolanretni
.detautcasemoceb
Îsi,daolrevolamrehT
ooterutarepmettneibma
?hgih
)sinoitalitneverusekaM
.etauqeda
Îecived(s
esuacrehtO
?)evitcefed
)ehtotecivedehtnruteR
.riaperrofyrotcaf
rotacidninoitcnuflaM
recudsnarterusserp
,gn
ihsalfsielgnairtgninraw(
.)deyalpsidsi"rrE"
Î
Î
tondaeheguaG
?detcennoc
rorecudsnarterusserP
elbacgnitcennoc
?evitcefed
)
)
.daeheguagtcennoC
rodaeheguagecalpeR
fielbacgnitcennoc
.yrassecen
ootsignidaererusserpehT
eru
sserpwolehtnihgih
.egnar
Î
Î
eguagniretlifevitcetorP
daeh 5PSV ?deggolc
daeheguaG
?detanimatnoc
)
)
roretlifevitc
etorpnaelC
.yrassecenfienowenesu
dnadaeheguagnaelC
.tsujdaer
Î?gnorwsitnemtsujdA ).daeheguagtsujdaeR
Îtcatn
oclacirtcelerooP
dnadaeheguagneewteb
?tnemurtsnignirusaem
)ehtfosniptekcosnaelC
.elbac
ootsignidaererusse
rpehT
cirehpsomtatawol
.erusserp
Î
Î
?daeheguagdetsujdasiM
5PAVylnO sesaG:
roriamorftnereffid
?negortin
)
)
.daeheguagtsujdaeR
tadaeheguagtsujdaeR
htiwerusserpcirehpsomta
.sageht
sierusserpdeyalpsiD
.gnitautculf
Îoteudn
oitautculferusserP
muucavehtfopu-teseht
?metsys
)kcehc,tluafgnirusaemoN
ehtfopu-tesegnahcdna
fimetsysmuuca
v
.yrassecen
ÎdaeheguagehtmorfgulP
?nidewercsyltcerrocton
)elamefotnigulpwercS
.rotcennoc
Îehtoteudnoitcnuf
laM
ehttaecafretni 5RVD oot(
?)ecnerefretnihgih
)foecruosetanimilE
esuroecnerefretni
.retlifecafretni
Îdaeheg
uagehtfonoitisoP
5KSV degnahcneebsah
otlatnozirohmorf.g.e(
ehtfonoitautculF?)lacitrev
ehtnierusserpdeyalps
id
?rabm4.0-2.0foegnar
)fi(yrassecenfitsujdaeR
sinoitacidnierusserptcaxe
.)deriuqer

page 11 of 17
Documents are only to be used and distributed completely and unchanged. It is strictly the users´ responsibility to check
carefully the validity of this document with respect to his product. manual-no.: 999039 / 16/12/2009
Cleaning the gauge head
The gauge itself is maintenance-free.
➨➨
➨➨
➨Only VSP 5: Using small screw driver or pencil tip, release locking ring in gauge head connection and
remove protective filter with shim, keep locking ring.
➨➨
➨➨
➨Fill the gauge head chamber with a solvent (e. g. benzene) and allow sufficient cleaning time. Observe
all regulations concerning usage and disposal of solvents!
➨➨
➨➨
➨Drain the solvent and dispose of in accordance with regulations, repeat cleaning if necessary.
➨➨
➨➨
➨Rinse the gauge head chamber several times with alcohol in order to remove all solvent residues.
➨➨
➨➨
➨Allow the pressure transducer to dry.
➨➨
➨➨
➨Only VSP 5: Assemble protective filter and locking ring, replace protective filter if necessary.
➨➨
➨➨
➨Readjust gauge head if necessary.
Note:
The gauge head VSP 5 can be used without protective filter, if only the protective filter is not compatible
with the pumped media (see “Technical data“).
If the vacuum system is contaminated (oil, particles etc.):
☞Replace the protective filter (cat. no.: 63 87 29) in the gauge head VSP 5 if necessary.
➨➨
➨➨
➨Using small screw driver or pencil tip, release locking ring in gauge head connection and remove
protective filter with shim, keep locking ring.
Readjustment
Readjusting the gauge head VSP 5
Readjustment at atmospheric pressure can be performed easily. Readjustment “vacuum“ at a pressure
< 5 x 10⁻⁴ mbar should only be performed, if that vacuum range can be reached with a vacuum pump
available. Readjustment under vacuum is only necessary when, due to aging or contamination of the
filament, incorrect readings are observed. Clean a contaminated gauge head prior to readjustment.
Adjustment at atmospheric pressure:
➨➨
➨➨
➨Vent vacuum system or gauge head, make sure, that gauge head is exposed to atmospheric pressure.
➨➨
➨➨
➨Push key-button at the side of the housing with a pencil tip or a small screw driver. Status indication
adjustment (”Set”) is displayed.
➨➨
➨➨
➨Push key-button again in order to adjust pressure reading to atmospheric pressure. Status indication
adjustment vanishes.
Instructions for repair with directions for repair and spare parts list is available on
request.
☞The instructions are for trained service people.

page 12 of 17
Documents are only to be used and distributed completely and unchanged. It is strictly the users´ responsibility to check
carefully the validity of this document with respect to his product. manual-no.: 999039 / 16/12/2009
Adjustment under vacuum:
➨➨
➨➨
➨Evacuate gauge head to a pressure < 5 x 10⁻⁴ mbar. Status indication vacuum is displayed.
Note: Adjustment under vacuum with an actual pressure > 5 x 10
-4
mbar reduces the accuracy of the
measurement.
➨➨
➨➨
➨Push key-button at the side of the housing with a pencil tip or a small screwdriver. Status indication
readjustment is displayed.
➨➨
➨➨
➨Push key-button again in order to adjust pressure reading to 1 x 10⁻³ mbar. Status indication readjust-
ment vanishes.
Note: If the warning triangle flashes three times, the gauge head is exposed to a pressure where
readjustment is not possible. Push key-button again to stop readjustment operation.Vent or evacuate
the vacuum system in order to adjust required pressure. If due to aging or contamination an old gauge
cannot be adjusted, replace gauge head.
Adjustment to a factory-set reference pressure:
Instead of adjustment under vacuum, adjustment to a factory-set reference pressure is possible.
The reference mark is only valid, if a new clean gauge head is used, otherwise readjustment may reduce
the accuracy of measurement. Proceed only if a pressure < 5 x 10⁻⁴ mbar cannot be achieved, i. e. if a
suitable vacuum pump is not available.
Note: If due to aging or contamination an old gauge cannot be adjusted under vacuum, replace gauge head.
➨➨
➨➨
➨Push key-button at the side of the housing with a pencil tip or a small screwdriver. Status indication
readjustment (”Set”) is displayed.
➨➨
➨➨
➨Disconnect leads from housing connector.The warning triangle flashes.
➨➨
➨➨
➨Push key-button again in order to adjust pressure reading to the factory-set reference mark as adjust-
ment under vacuum. Status indication readjustment vanishes.
➨➨
➨➨
➨Insert leads into housing connector.The warning triangle vanishes.
Adjustment of the pressure transducer VSK 5
The device has been adjusted at the factory. In general there is no need for readjustment by the user
because of the excellent longtime stability.
Depending on operation conditions, type of application and accuracy requirements, an inspection and
readjustment may become necessary.
Adjustment at atmospheric pressure:
➨➨
➨➨
➨Admit air to the vacuum gauge. Make sure that the vacuum connection at the vacuum gauge is at
atmospheric pressure
Note:To determine the exact actual pressure, use an accurate barometer or get accurate reading
from the weather service, e. g. next airport..... (take into account the difference in altitude between e. g.
airport and laboratory).
➨➨
➨➨
➨Push key-button at the side of the housing by using a pencil tip or a small screwdriver. Status indication
readjustment (”Set”) and the actual pressure are displayed.
➨➨
➨➨
➨With a second tip within two seconds or continuous pressing, a pressure range from 700 to 1060 mbar
is running. Use the key-button to adjust the display to actual atmospheric pressure (short tips in steps
of 1 mbar). When the key-button is released, the adjustment mode is terminated and the selected
pressure value is stored automatically.

page 13 of 17
Documents are only to be used and distributed completely and unchanged. It is strictly the users´ responsibility to check
carefully the validity of this document with respect to his product. manual-no.: 999039 / 16/12/2009
Adjustment under vacuum:
➨➨
➨➨
➨Evacuate the device to a pressure < 5 x 10⁻² mbar.
Note: Adjustment under vacuum with an actual pressure higher than 5 x 10
-2
mbar reduces the accu-
racy of measurement. If the pressure is significantly higher than 5 x 10
-2
mbar, adjustment to a refer-
ence pressure is recommended.
➨➨
➨➨
➨Push key-button at the side of the housing by using a pencil tip or a small screwdriver. The reading is
automatically adjusted to “zero“.
Adjustment to a reference pressure:
➨➨
➨➨
➨Evacuate the vacuum gauge to an exactly known reference pressure within the range of 0.....10 mbar.
Note: The accuracy of the value of the reference pressure will directly affect the accuracy of the
measurement.
➨➨
➨➨
➨Push key-button at the side of the housing by using a pencil tip or a small screwdriver. The reading is
automatically adjusted to “zero“.
➨➨
➨➨
➨Use the key-button to adjust the display to the reference pressure at the vacuum line within the range
of 0......10 mbar.
Note: If the nominal ultimate vacuum of a diaphragm pump is used as reference vacuum, the accuracy
of adjustment might be doubtful. The diaphragm pump may not achieve the specified value (due to
condensate, poor state, failure of the valves or the diaphragm).
Calibration in the factory
Control of measuring equipment
The VACUUBRAND DKD calibration laboratory is accredited by the Physikalisch-Technische Bundesanstalt
(PTB; German national institute for science and technology and the highest technical authority of the
Federal Republic of Germany for the field of meteorology and certain sectors of safety engineering) for the
measurable variable pressure in the pressure range from 10-3 mbar to 1000 mbar in accordance with
the general criteria for the operation of testing laboratories defined in the standard EN ISO/IEC 17025:2000.
Calibration in the VACUUBRAND calibration laboratory:
- To meet the requirements of the DIN ISO 9000ff and 10012 series of standards regarding the calibration
of inspection, measuring and test equipment at specified intervals.
- To document that the vacuum gauges calibrated are traceable to national standards of the PTB.

page 14 of 17
Documents are only to be used and distributed completely and unchanged. It is strictly the users´ responsibility to check
carefully the validity of this document with respect to his product. manual-no.: 999039 / 16/12/2009
Notes on return to the factory
Repair - return - DKD calibration
Safety and health of our staff, laws and regulations regarding the handling of danger-
ous goods, occupational health and safety regulations and regulations regarding safe
disposal of waste require that for all pumps and other products the “Health and safety
clearance form“
must be send to our office duly completed and signed before any equipment is dis-
patched to our premises.
Fax or post a completed copy of the health and safety clearance form to us in advance.
The declaration must arrive before the equipment. Enclose a second completed copy
with the product. If the equipment is contaminated you must notify the carrier.
No repair / DKD calibration is possible unless the correctly completed form is
returned. Inevitably, there will be a delay in processing the equipment if informa-
tion is missing or if this procedure is not obeyed.
If the product has come in contact with chemicals, radioactive substances or other
substances dangerous to health or environment, the product must be decontaminated
prior to sending it back to the factory.
☞Return the product to us disassembled and cleaned and accompanied by a cer-
tificate verifying decontamination or
☞Contact an industrial cleaning and decontamination service directly or
☞Authorize us to send the product to an industrial cleaning facility at your expense.
To expedite repair and to reduce costs, please enclose a detailed description of the
problem and the product´s operating conditions with every product returned for repair.
We submit quotations only on request and always at the customer´s expense. If an
order is given, the costs incurred are offset from the costs for repair or from the pur-
chase price, if the customer prefers to buy a new product instead of repairing the
defective one.
☞☞
☞☞
☞If you do not wish a repair on the basis of our quotation, the equipment might
be returned to you disassembled and at your charge!
In many cases, the components must be cleaned in the factory prior to repair.
For cleaning we use an environmentally responsible water based process. Unfortu-
nately the combined attack of elevated temperature, cleaning agent, ultrasonic treat-
ment and mechanical stress (from pressurised water) may result in damage to the
paint. Please mark in the health and safety clearance form if you wish a repaint at
your expense just in case such a damage should occur.
We also replace parts due to optical aspects upon your request.
Before returning the equipment ensure that (if applicable):
☞Oil has been drained and an adequate quantity of fresh oil has been filled in to
protect against corrosion.
☞Equipment has been cleaned and/or decontaminated.
☞All inlet and outlet ports have been sealed.
☞Equipment has been properly packed, if necessary, please order an original pack-
aging (costs will be charged), marked as appropriate and the carrier has been noti-
fied.
☞Ensure that the completed health and safety declaration is enclosed.
We hope for your understanding for these measures, which are beyond our control.
Scrapping and waste disposal:
Dispose of the equipment and any components removed from it safely in accordance
with all local and national safety and environmental requirements.Particular care must
be taken with components and waste oil which have been contaminated with danger-
ous substances from the process. Do not incinerate fluoroelastomer seals and “O“
rings.
☞You may authorize us to dispose of the equipment at your expense.

page 15 of 17
Documents are only to be used and distributed completely and unchanged. It is strictly the users´ responsibility to check
carefully the validity of this document with respect to his product. manual-no.: 999039 / 16/12/2009
Health and safety clearance form
Declaration concerning safety, potential hazards and safe disposal of waste, e. g. used oil.
Safety and health of our staff, laws and regulations regarding the handling of dangerous goods, occupational health and safety
regulations, safety at work laws and regulations regarding safe disposal of waste, e. g. waste oil, require that for all pumps and
other products this form must be sent to our office duly completed and signed before any equipment is dispatched to our
premises. Products will not be accepted for any procedure and handling and repair / DKD calibration will not start
before we have received this declaration.
a) Fax or post a completed copy of this form to us in advance. The declaration must arrive before the equipment. Enclose
a second, completed copy with the product. If the product is contaminated you must notify the carrier (GGVE, GGVS,
RID, ADR).
b) Inevitably, the repair process will be delayed considerably, if this information is missing or this procedure is not obeyed. We
hope for your understanding for these measures which are beyond our control and that you will assist us in expediting the
repair procedure.
c) Make sure that you know all about the substances which have been in contact with the equipment and that all
questions have been answered correctly and in detail.
1. Product (Model): ........................................
2. Serial No.: ..................................................
3. List of substances in contact with the
equipment or reaction products:
3.1 Chemical/substance name,
chemical symbol:
a) ...................................................................
b) ...................................................................
c) ...................................................................
d) ...................................................................
3.2 Important information and precautions,
e. g. danger classification:
a) ...................................................................
b) ...................................................................
c) ...................................................................
d) ...................................................................
4. Declaration (please mark as applicable):
❑4.1 for non dangerous goods:
We assure for the returned product that
- neither toxic, corrosive, biologically active, explosive, radio-
active nor contamination dangerous in any way has
occurred.
- the product is free of dangerous substances.
- the oil or residues of pumped media have been drained.
❑4.2 for dangerous goods:
We assure for the returned product that
- all substances, toxic, corrosive, biologically active, explo-
sive, radioactive or dangerous in any way which have
pumped or been in contact with the product are listed in 3.1,
that the information is complete and that we have not
withheld any information.
- the product, in accordance with regulations, has been
❑ cleaned ❑ decontaminated ❑sterilized.
5. Way of transport / carrier:
...........................................................................................
Day of dispatch to VACUUBRAND:
...........................................................................................
If the paint is damaged, we wish a repaint or
a replacement of parts due to optical
aspects at our expense (see ”Notes on return
to the factory”):
❑yes ❑no
We declare that the following measures -
where applicable - have been taken:
- The oil has been drained from the product.
Important: Dispose of according to national
regulations.
- The interior of the product has been cleaned.
- All inlet and outlet ports of the product have been
sealed.
- The product has been properly packed, if necessary,
please order an original packaging (costs will be
charged) and marked as appropriate.
- The carrier has been informed about the hazardous
nature of the goods (if applicable).
We assure VACUUBRAND that we accept liability for any
damage caused by providing incomplete or incorrect
information and that we shall indemnify VACUUBRAND from
any claims as regards damages from third parties.
We are aware that as expressed in § 823 BGB (Public
Law Code of Germany) we are directly liable for injuries or
damages suffered by third parties, particularly
VACUUBRAND employees occupied with handling/
repairing the product.
Signature: ...........................................................................
Name (print): ......................................................................
Job title (print): ...................................................................
Company´s seal: ...............................................................
Date: ...................................................................................
VACUUBRAND GMBH + CO KG
-Technology for Vacuum Systems-
©2003 VACUUBRAND GMBH + CO KG Printed in Germany
Alfred-Zippe-Str. 4 - 97877 Wertheim
Tel.: +49 9342 808-0 - Fax: +49 9342 808-450
E-Mail: [email protected]
Web: www.vacuubrand.com

page 16 of 17
Documents are only to be used and distributed completely and unchanged. It is strictly the users´ responsibility to check
carefully the validity of this document with respect to his product. manual-no.: 999039 / 16/12/2009
Konformitätserklärung
Declaration of conformity
Déclaration de conformité
Vakuum-Controller / Vacuum controller / Régulateur de vide
DVR 5 (230V; 682910, 682911, 682912)
VAP 5 (230V; 682850, 682858, 682881, 682880)
Hiermit erklären wir, dass das oben bezeichnete Gerät in Konzeption und Bauart sowie in der von uns in
Verkehr gebrachten Ausführung den grundlegenden Anforderungen der zutreffenden, aufgeführten EU-
Richtlinien entspricht. Bei einer mit uns nicht abgestimmten Änderung an dem Gerät verliert diese Erklä-
rung ihre Gültigkeit.
We herewith declare that the product designated above is in compliance with the basic requirements of
the applicable EC-directives stated below with regard to design, type and model sold by us. This certificate
ceases to be valid if the product is modified without the agreement of the manufacturer.
Par la présente, nous déclarons que le dispositif désigné ci-dessus est conforme aux prescriptions de
base des directives EU applicables et indiqués en ci que concerne conception, dessin et modèle vendu par
nous-mêmes. Cette déclaration cesse d´être valable si des modifications sont apportées au dispositif
sans notre autorisation préalable.
Niederspannungsrichtlinie / Low-Voltage Directive / Directive Basse Tension
2006/95/EG
Richtlinie Elektromagnetische Verträglichkeit / Electromagnetic Compatibility Directive / Directive
Compatibilité Electromagnétique
2004/108/EG
Angewandte Harmonisierte Normen / Harmonized Standards applied / Normes Harmonisées utilisées
DIN EN 61010-1, DIN EN 61326-1
Managementsysteme / Management systems / Systèmes de Management
EN ISO 9001, EN ISO 14001 (1997-2006)
VACUUBRAND GMBH + CO KG
-Vakuumtechnik im System-
-Technology for Vacuum Systems-
-Technologie pour système à vide-
. . . . . . . . . . . . . . . . . . . . . . . . . . . .
(Dr. F. Gitmans)
Geschäftsführer / Managing Director / Gérant
. . . . . . . . . . . . . . . . . . . . . . . . . . . .
Ort, Datum / place, date / lieu, date
Wertheim, 16.12.2009
. . . . . . . . . . . . . . . . . . . . . . . . . . . . . . . . .
(Dr. J. Dirscherl)
Technischer Leiter / Technical Director / Directeur technique
ppa.
Alfred-Zippe-Str. 4 - 97877 Wertheim
Tel.: +49 9342 808-0 - Fax: +49 9342 808-450
E-Mail: [email protected]
Web: www.vacuubrand.com

page 17 of 17
Documents are only to be used and distributed completely and unchanged. It is strictly the users´ responsibility to check
carefully the validity of this document with respect to his product. manual-no.: 999039 / 16/12/2009
Disclaimer: Our technical literature is only intended to inform our customer.The validity of general empirical
values and results obtained under test conditions for specific applications depend on a number of factors
beyond our control. It is therefore strictly the users´ responsibility to very carefully check the validity of
application to their specific requirements. No claims arising from the information provided in this literature
will, consequently, be entertained.
VACUUBRAND GMBH + CO KG
-Technology for Vacuum Systems-
©2009 VACUUBRAND GMBH + CO KG Printed in Germany
Alfred-Zippe-Str. 4 - 97877 Wertheim
Tel.: +49 9342 808-0 - Fax: +49 9342 808-450
E-Mail: [email protected]
Web: www.vacuubrand.com
This manual suits for next models
1
Table of contents
Other vacuubrand Measuring Instrument manuals