Valentin Pica 104/8 User manual

Operating manual – English
Thermal Transfer Printer
Pica Series
79.28.055 • May 2005
All rights reserved.
Carl Valentin GmbH • Neckarstraße 78 – 80 & 94 • 78056 Villingen-Schwenningen


Table of contents
1
PRINTER DRIVER INSTALLATION .......................................................................................1
Windows 95, Windows 98 and Windows Me ...........................................................................................................1
Windows NT ............................................................................................................................................................3
Windows 2000 Professional ....................................................................................................................................5
INITIAL OPERATION ..............................................................................................................7
INSTALLATION....................................................................................................................... 7
Printer rear...............................................................................................................................................................8
LOADING OF PRINT MATERIAL ........................................................................................... 9
Loading of labels in standard mode.........................................................................................................................9
Loading of labels in rewinding mode .....................................................................................................................10
Loading of labels in cutter mode............................................................................................................................12
Loading of labels in peel-off mode.........................................................................................................................13
Loading of fan-fold material ...................................................................................................................................14
Loading of transfer ribbon......................................................................................................................................15
TECHNICAL DATA ............................................................................................................... 16
TEAR-OFF ............................................................................................................................ 17
CLEANING OF CUTTER ...................................................................................................... 18
OPERATING AND DISPLAY ELEMENTS ............................................................................ 19
FUNCTIONS ......................................................................................................................... 20
Print .......................................................................................................................................................................20
Status print ............................................................................................................................................................20
Label feed..............................................................................................................................................................20
Saving ...................................................................................................................................................................20
REWINDING UNIT PR28 ...................................................................................................... 21

Table of contents
2
OPTIONS .............................................................................................................................. 22
Dispenser operating modes...................................................................................................................................22
Cutter operating modes .........................................................................................................................................23
INPUT AND OUTPUT ........................................................................................................... 24
ERROR CORRECTION ........................................................................................................ 25
Error table..............................................................................................................................................................26
OPERATING CONDITIONS.................................................................................................. 31
Conditions for the place of installation ...................................................................................................................31
Installation of power supply ...................................................................................................................................31
Technical data of power supply .............................................................................................................................31
Stray radiation and immunity from disturbance......................................................................................................32
Connecting lines to external machines ..................................................................................................................32
Installation data lines .............................................................................................................................................32
Air convection ........................................................................................................................................................32
Limit values............................................................................................................................................................33
Guarantee .............................................................................................................................................................33
INDEX ................................................................................................................................... 35

Manual
1
PRINTER DRIVER INSTALLATION
Windows 95, Windows 98 and Windows Me
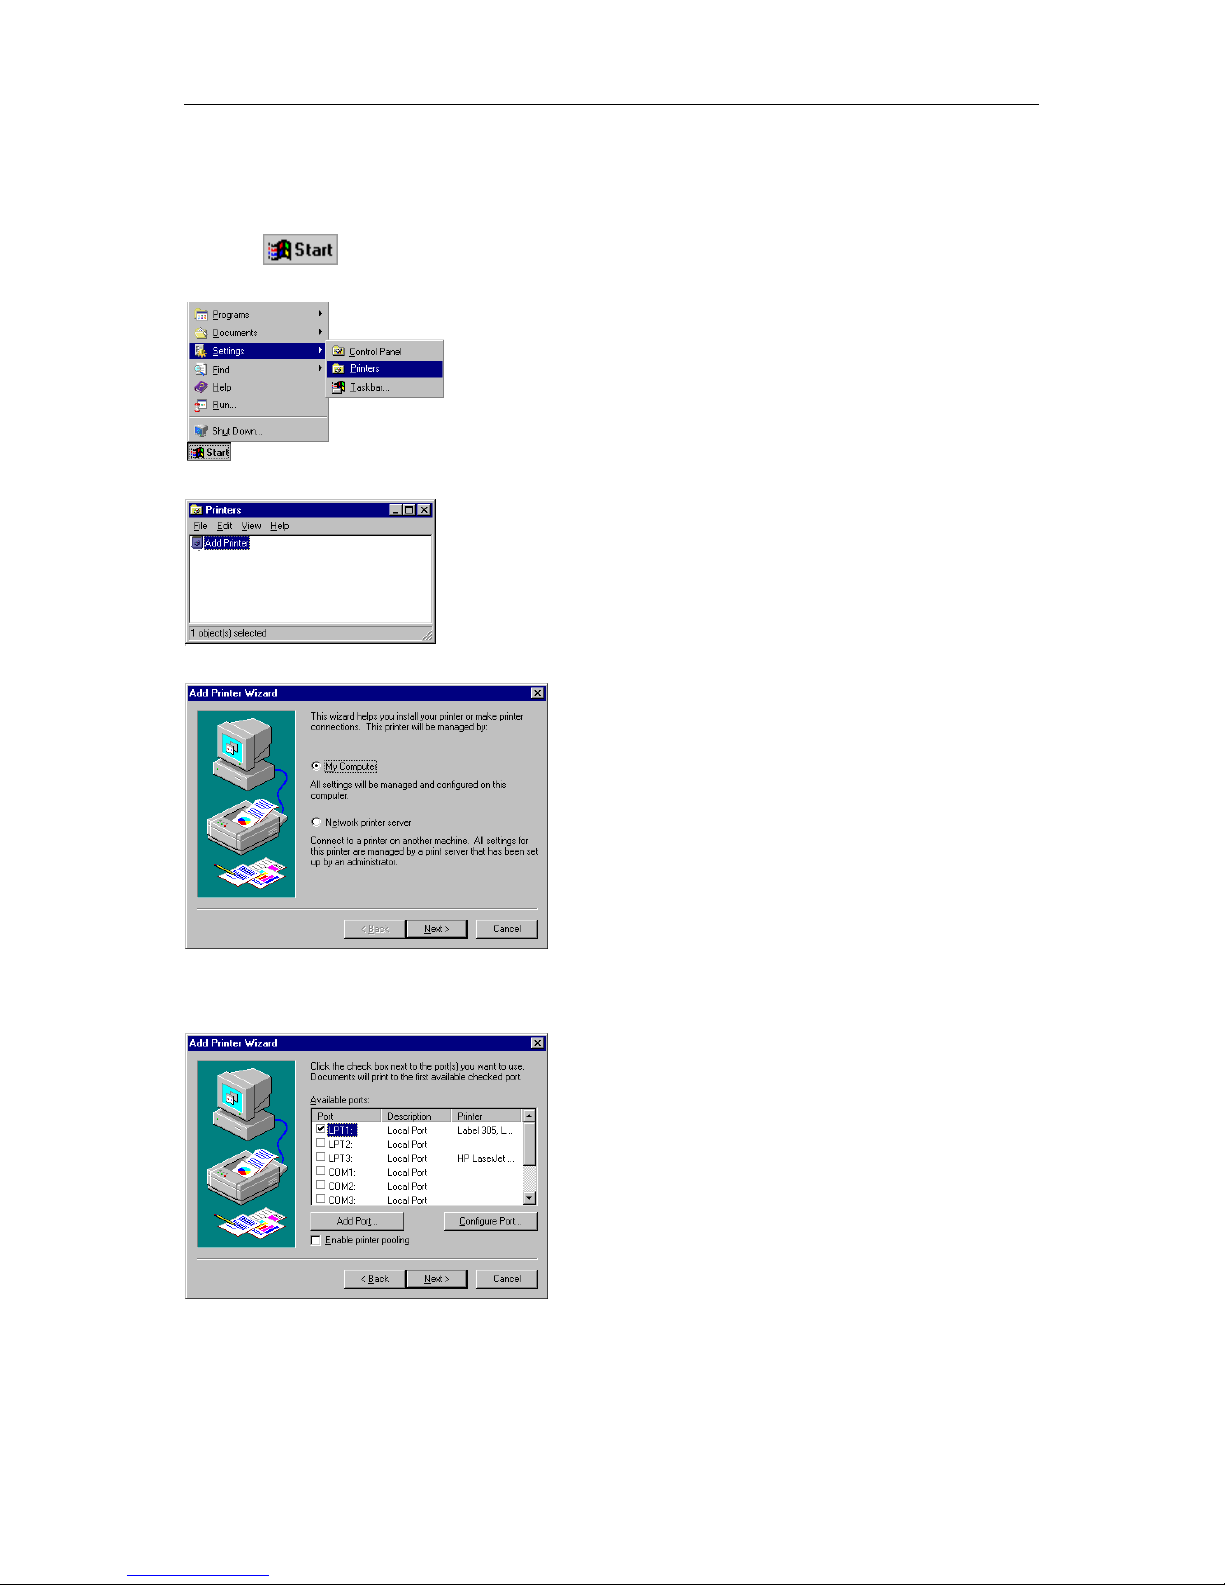
Start the computer and wait until the operating system is ready.
Click the button.
Place the cursor first on Settings and then on Printers (see illustration below).
The following window appears:
Double click Add Printer and the first dialog of the Add Printer Wizard appears.
Click the Next button and the next dialog of the wizard appears.
Select either Local printer or Network printer and confirm your selection with Next.
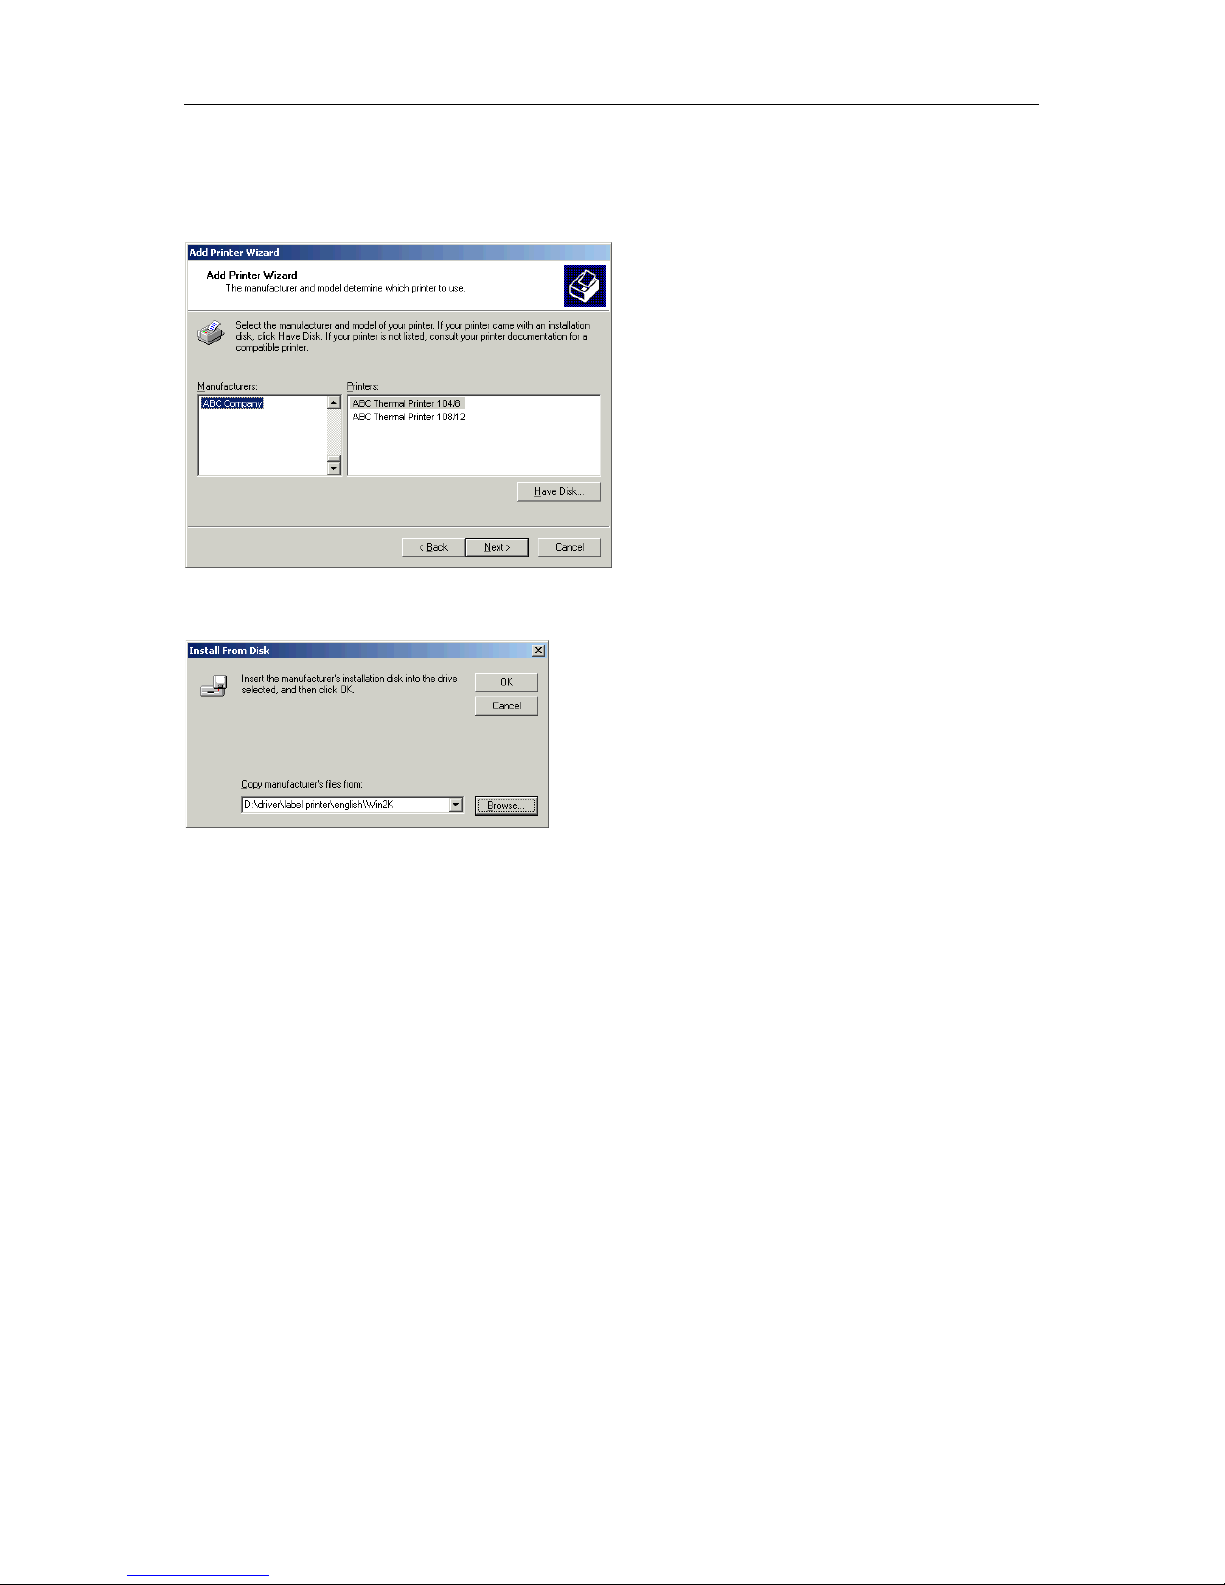
Insert your installation CD and then click the Disk button.
Click the Browse button and the Open dialog box appears.
Select from the Drives field the drive which you are using.

Manual
2
Double click driver and then select one of the available languages.
At the moment you can either chose german or english.
Depending on your operating system select win95, win98 or winme.
The Open dialog box should appear as illustrated below.
Confirm the selection with OK and the following window appears.
Click again the OK button and select the desired printer from the list.
Confirm the selection with Next and the next page of the wizard appears.
Select from the list of Available ports the one which you desire.
Confirm the selection with Next and the next page of the wizard appears.
Click the Printer name field to enter another name as the already existing.
Confirm with Finish and the data is copied from the installation CD into the corresponding directory.
After this procedure the printer is add to the list of Available printers and the installation process is
finished.
Manual
3
Windows NT
Start your computer and wait until the operating system is ready.
Click the button.
Place the cursor first on Settings and then on Printers (see illustration below).
The following window appears:
Double click Add Printer and the first dialog of the Add Printer Wizard appears.
Select if the printer you want to install is a local printer (My Computer) or a network printer (Network
printer service).
Confirm your selection with Next and the next page of the wizard appears
Select from the list of Available ports the one which you desire and confirm the selection with Next.
Insert the installation CD and click the Disk button.
Click the Browse button and the Locate File dialog box appears.
Select from the Drives field the drive which you are using.

Manual
4
Double click driver and then select one of the available languages.
At the moment you can either chose german or english.
Select WinNT and the Locate File dialog should appear as illustrated below
Double click the oemsetup.inf file and the following dialog appears.
Click again the OK button and select the desired printer from the list.
Confirm the selection with Next and the next page of the wizard appears.
Click the Printer name field to enter an other name as the already existing.
Confirm with Finish and the data is copied from the installation CD into the corresponding directory.
After this procedure the printer is add to the list of Available printers and the installation process is
finished.

Manual
5
Windows 2000 Professional
Start your computer and wait until the operating system is ready.
Click the button.
Place the cursor first on Settings and then on Printers (see illustration below).
Following dialog box appears:
Double click the Add Printer icon and the Add Printer Wizard appears.
Select either Local printer if you want to install a local printer or select Network printer if you want to
install the printer directly to the network.
Confirm your selection with Next and the next page of the Add Printer Wizard appears.
Manual
6
From the list of available ports, select the one you want the printer to use and confirm your selection
with Next. The next page of the Add Printer Wizard appears.
Insert the installation CD, then click the Have Disk button.
Click the Browse button and the Locate File dialog appears.
Double click the Driver folder, then select the desired printer.
After double clicking the desired printer you have the possibility to select one of the available
languages.
At this time you have the possibility either to select german or english.
Double click the Win2K (Windows 2000) folder.
Double click the *.inf file and you return to the Install From Disk dialog (see above).
Click the OK button and a list of available printers appears. Select the desired printer type and confirm
your selection with Next.
Click the Printer name field to enter another name as the already proposed one.
Follow the further instructions at the screen and data is copied from the installation CD into the
corresponding directory.
After termination of this procedure the printer is add to the list of Available printers and the
installation is finished.
This manual suits for next models
1
Table of contents
Other Valentin Printer manuals


