manuals.online logo
Brands
  1. Home
  2. •
  3. Brands
  4. •
  5. Vanguard
  6. •
  7. Network Hardware
  8. •
  9. Vanguard 6500 PLUS User manual

Vanguard 6500 PLUS User manual

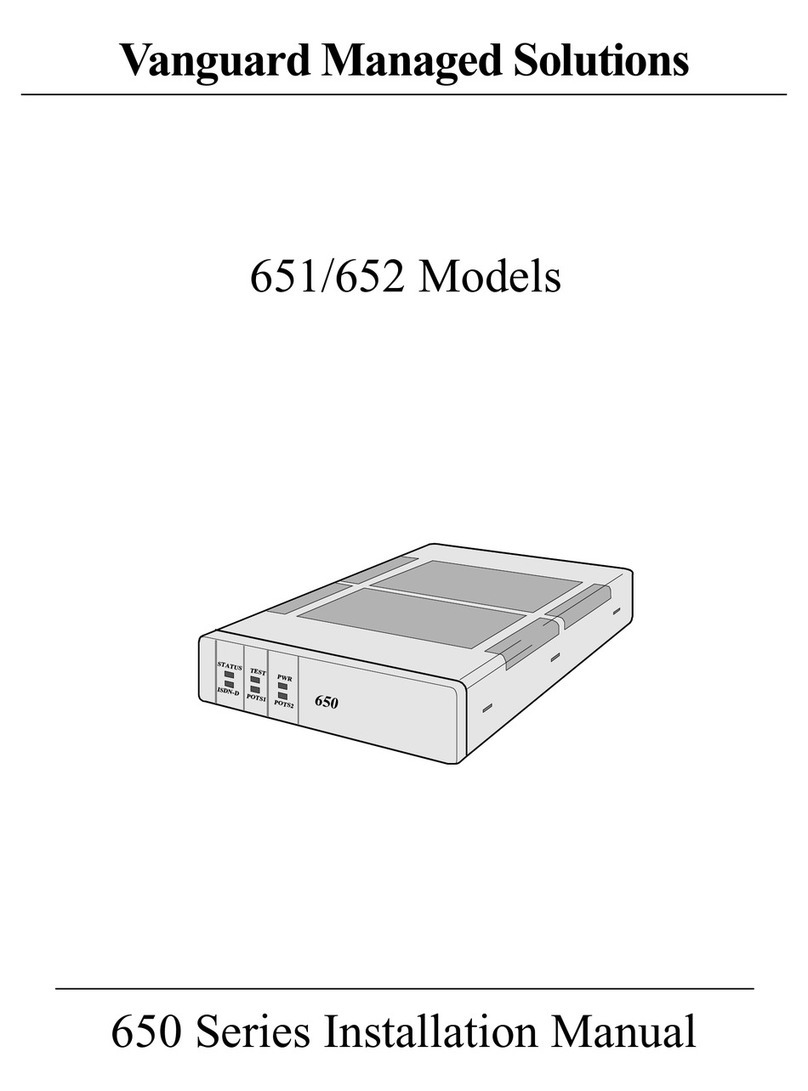
Vanguard Managed Solutions
Vanguard 6500PLUS Installation Manual
Notice
©2002 Vanguard Managed Solutions, LLC
575 West Street
Mansfield, Massachusetts 0204
(50 ) 261-4000
All rights reserved
Printed in U.S.A.
Restricted Rights Notification for U.S. Government Users
The software (including firmware) addressed in this manual is provided to the U.S.
Government under agreement which grants the government the minimum “restricted rights”
in the software, as defined in the Federal Acquisition Regulation (FAR) or the Defense
Federal Acquisition Regulation Supplement (DFARS), whichever is applicable.
If the software is procured for use by the Department of Defense, the following legend
applies:
Restricted Rights Legend
Use, duplication, or disclosure by the Government
is subject to restrictions as set forth in
subparagraph (c)(1)(ii) of the
Rights in Technical Data and Computer Software
clause at DFARS 252.227-7013.
If the software is procured for use by any U.S. Government entity other than the Department
of Defense, the following notice applies:
Notice
Notwithstanding any other lease or license agreement that may pertain to,
or accompany the delivery of, this computer software, the rights of the
Government regarding its use, reproduction, and disclosure are as set forth
in FAR 52.227-19(C).
Unpublished - rights reserved under the copyright laws of the United States.
Notice (continued)
Proprietary Material
Information and software in this document are proprietary to Vanguard Managed Solutions
(or its Suppliers) and without the express prior permission of an officer of VanguardMS, may
not be copied, reproduced, disclosed to others, published, or used, in whole or in part, for any
purpose other than that for which it is being made available. Use of software described in this
document is subject to the terms and conditions of the VanguardMS Software License
Agreement.
This document is for information purposes only and is subject to change without notice.
Radio requency Interference Regulations
This equipment has been tested and found to comply with the limits for a Class A digital
device, pursuant to Part 15 of the FCC Rules. These limits are designed to provide reasonable
protection against interference when the equipment is operated in a commercial environment.
This equipment generates, uses, and can radiate radio frequency energy and, if not installed
and used in accordance with the instruction manual, may cause harmful interference to radio
communications.
Changes or modifications not expressly approved by VanguardMS could void the user's
authority to operate the equipment.
This Class A digital apparatus meets all requirements of the Canadian Interference-Causing
Equipment Regulations.
This is a Class A product. Operation of this equipment in a residential environment may
cause radio interference, in which case the user may be required to take adequate measures to
correct the interference at his/her own expense.
You can obtain the proper cables from VanguardMS.
To comment on this manual, please send e-mail to LGEN031@vanguardms.com
Writer: Bob Nichols
Publication Specialist: Denise Skinner
Illustrator: Tim Kinch
Part No. T0002, Rev C
Publication Code: KP
First Printing: April 1996
Manual is current for Release 5.2 of VanguardMS’sOperating Network Software.
Contents
i
About This Manual
Chapter 1. About the 6500PLUS
Software Features ......................................................................................... 1-2
Hardware ...................................................................................................... 1-3
Enclosures and Backplanes ...................................................................... 1-4
6500PLUS Processor Cards ..................................................................... 1-6
6500PLUS Auxiliary Processor Cards ....................................................... 1-10
6500PLUS Asynchronous and Universal I/O Cards ................................ 1-11
6500PLUS Network Storage Option Card ............................................... 1-13
6500PLUS Token Ring Interface Module Option ..................................... 1-15
6500PLUS Integral DSU .......................................................................... 1-17
Chapter 2. Installation
Installing Standalone Units ........................................................................... 2-20
Replacing Processor Cards in Standalone Enclosures ............................. 2-22
Installing Nodes in Modulus Enclosures ...................................................... 2-2
Multiprocessor Nodes .............................................................................. 2-29
Replacing Master Processor of Multi-Processor Node ............................ 2-30
Adding a Secondary 6500PLUS Processor with FLASH .......................... 2-32
Installing/Replacing Processor Cards ...................................................... 2-35
Requirements for Installing a TRIM Card ............................................... 2-36
Installing and Connecting a TRIM Card .................................................. 2-45
Removing/Replacing TRIM Cards .......................................................... 2-4
Preparing Modulus Enclosures for RFI Suppression ............................... 2-49
Starting Up the Node .................................................................................... 2-53
Replacing Processor Card Components ....................................................... 2-54
Replacing DIMs ....................................................................................... 2-55
Installing SIMMs ..................................................................................... 2-59
Replacing FLASH Modules ..................................................................... 2-61
Replacing ID Modules ............................................................................. 2-63
Replacing PROM Chips ........................................................................... 2-64
Replacing the CMEM Chip ...................................................................... 2-65
DSU DIM Installation .................................................................................. 2-66
Configuring the 6500PLUS for DSU Operation ........................................ 2-6
DSU Input and Output Signaling ............................................................. 2-69
Troubleshooting DSU DIM Installation ................................................... 2-71
DSU DIM FCC Information .................................................................... 2-72
Power-Up Verification .................................................................................. 2-74
Setting Node to Default Configuration ......................................................... 2-76
ii
Contents (continued)
Chapter 2 Installation (Continued)
Installing Software Options .......................................................................... 2-77
Accessing Node Serial Number from Node Statistics ............................. 2-7
Enabling A Software Access Key ............................................................ 2- 0
Installing New Software Options in an Existing Network ....................... 2- 1
Enhanced LAN Option ............................................................................. 2- 2
Appendix A. Cables
Appendix B. Specifications
Index
i
About This Manual
Overview
Introduction This manual describes features, hardware, specifications, and applications for the
6500PLUS.
Note
For information on operating system software and configuration, see the
Vanguard Basics Manual.
Audience This manual is intended for operators of the 6500PLUS.
How To Use This
Manual
The following table describes the contents of this manual.
Downloading
Software
For operating software download procedures, refer to 6500PLUSDownloading
Procedures.
This Chapter... Describes:
Chapter 1 6500PLUS hardware and software features, and FCC
and telephone company procedures and requirements.
Chapter 2 Installing the hardware on the 6500PLUS, powerup and
verification, and installation of software options.
Appendix A Cable pinouts for Ethernet and Token Ring.
Appendix B Product specifications.
ii
About This Manual (continued)
Special Notices The following notices emphasize certain information in the manual. Each serves a
special purpose and is displayed in the format shown:
Note
Note is used to emphasize any significant information.
Caution
Caution provides you with information that, if not followed, can result in damage to
software, hardware, or data.
Mise en garde
Une mise en garde vous fournit des informations qui, si elles ne sont pas observées,
peuvent se traduire par des dommages pour le logiciel, le matériel ou les données.
Vorsicht
Ein Vorsichtshinweis macht Sie darauf aufmerksam, daß Nichtbefolgung zu
Software-, Hardware- oder Datenschäden führen kann.
Warning
Warning is the most serious notice, indicating that you can be physically hurt.
Avertissement
Un avertissement constitue le message le plus sérieux, indiquant que vous pouvez
subir des blessures corporelles.
Warnung
Eine Warnung ist der ernsthafteste Hinweis auf Körperverletzungsgefahr.
Software Revision
Level
This manual describes Release 5.2 of the Operating Network Software.
About the 6500PLUS 1-1
Chapter 1
About the 6500PLUS
Overview
Introduction The 6500PLUS is a family of networking devices that can operate in private networks
or over public data networks. A 6500PLUS node can have from 6 to 54 ports, with
terminal port speeds of up to 3 .4 kbps and network port speeds of up to 3 4 kbps.
1-2 About the 6500PLUS
Software Features
Software eatures
Introduction You can configure, administer, and troubleshoot a 6500PLUS node from a local or
remote terminal acting as a control terminal. The terminal calls into the node's
Control Terminal Port (CTP), a software module that acts as the logical control
terminal port.
In addition, configurations can be saved and restored when a PC (with Kermit
protocol) is used as the local or remote control terminal.
eatures and
Protocols
For a list of features and protocols supported by the 6500PLUSrefer to the Software
Release Notice that came with the operating software.
About the 6500PLUS 1-3
Hardware
Hardware
Introduction A 6500PLUS node consists of at least one processor card, one or more optional
support cards, and, optionally, a TRIM card. A node can be contained in a standalone
enclosure, which can support only a processor card, or in a Modulus nest enclosure,
which can support one or more processor cards and several support cards.
Card Types The 6500PLUS includes the following types of cards:
•6500
PLUS processor cards
• Auxiliary processor cards
• Asynchronous I/O (AIO) card
• Universal I/O (UIO) card
• Network storage option (NSO) card
• Token Ring Interface Module (TRIM) card
Processor Cards The 6500PLUS processor cards provide the basic functions of a 6500PLUS node and can
be modified as required. The 6500PLUS processor cards are necessary to run 6500PLUS
Release 3.10 and greater software.
Support Cards The AIO, UIO, and NSO cards work with the processor cards to provide additional
ports and data storage.
TRIM Card The TRIM card provides access to Token Ring local area networks and supports
IBM/IEEE 02.5-compatible LANs.
The 6500PLUS does not have a dedicated control terminal port. Instead, any
asynchronous PAD port can become a control terminal port when an attached
terminal calls the node's control terminal facility and the proper password is entered.
For more details, refer to the Vanguard ONS Basics Protocols Manual (T0106).
1-4 About the 6500PLUS
Hardware
Enclosures and Backplanes
Introduction The two types of enclosures for the 6500PLUS are:
• Standalone
• Modulus
Standalone
Enclosure
A standalone enclosure (Figure 1-1) holds just one card, which must be a processor
card. A standalone unit supports up to six X.25 or terminal ports depending on the
type of processor card installed.
Figure 1-1. 6 00PLUS Standalone Enclosure
Modulus Enclosure The Modulus enclosure provides a 6500PLUS node with space for one or more
processor cards and several support cards, such as auxiliary processor cards, I/O
cards, or NSO cards (Figure 1-2).
Figure 1-2. Modulus 21 Enclosure
About the 6500PLUS 1-5
Hardware
Supports Other
VanguardMS
Products
A Modulus enclosure contains plug-in card versions of VanguardMS products,
including Network Access Products, providing common housing and power to
multiple products. A single Modulus enclosure can include, for example, 35xx DSU/
CSUs, 326x dial modems, or 33xx leased-line modems in addition to 65xx nodes.
Types of Modulus
Enclosures
There are four types of Modulus enclosures. The Modulus and Modulus 1
enclosures are older models; the Modulus 9 and Modulus 21 enclosures are newer
models that are based on the Modulus /1 enclosures.
Modulus 8
Modulus has slots, holds four 6500PLUS product cards, and supports up to 24
ports. It is designed to be a desktop unit.
Modulus 18
Modulus 1 has 1 slots, holds eight 6500PLUS product cards, and supports up to 4
ports. It is designed to be installed in an industry-standard 19-inch rack.
Modulus 9
Modulus 9 has 9 slots, holds four 6500PLUS product cards, and supports up to 24
ports. It is designed as a desktop unit.
Modulus 21
Modulus 21 has 21 slots, holds nine 6500PLUS product cards, and supports up to 54
ports. It is designed to be installed in an industry-standard 19-inch rack.
Note
Two processor cards are needed to support 54 ports.
Backplanes To accommodate the variety of products that you can install in Modulus enclosures,
VanguardMS has a line of product-specific backplanes to carry the signal and data
flow between the cards and the external environment and to provide cable
connections to the product card. Backplanes connect to the 6500PLUS cards on the
inside of the enclosure. Both the Modulus /1 and the Modulus 9/21 enclosures
have 25-pin DB25 connectors on the outside. (Older versions of Modulus 9/21
enclosures/backplanes have 26-pin DB26 connectors).
You can mount more than one backplane in a Modulus /1 and Modulus 9/21
enclosure to form independent nodes, but signals between backplanes cannot be
physically bridged. In other words, you cannot bridge two 24-port backplanes to
form a single backplane.
For general information on setting up Modulus /1 enclosures and inserting
6500PLUS cards into the enclosures, refer to the Modulus Planning and Installation
uide (Product Code 0300). For Modulus 9/21 enclosures, see the Modulus 9 and
21 Installation and Operation uide (Part No. 09564, Rev B).
1-6 About the 6500PLUS
Hardware
6500PLUS Processor Cards
Introduction The 6500PLUS processor card provides the main processing power in a 6500PLUS
node. There are three types of processor cards:
•6505
PLUS Asynchronous Access Server
•6507
PLUS Multifunctional Access Server
•6525
PLUS Network Concentrator
Description 6500PLUS processor cards are shipped with Single Inline Memory Modules (SIMMs)
in sockets U79 and U 0. The processor card cannot operate without SIMMs.
Each processor card has six ports. You can password protect all ports on the
6505PLUSand 6507PLUS cards and all asynchronous ports on the 6525PLUS . You can
also configure processor cards from a locally or remotely connected terminal.
6505PLUS
Asynchronous
Access Server
The 6505PLUS is an asynchronous packet assembler/disassembler (PAD). If your node
is based on the 6505PLUS processor card, you can:
• Use only one 6505PLUS processor card in each node.
• Increase the maximum number of ports to 24 by adding up to three
asynchronous I/O (AIO) cards.
• Have only two network ports per node; these must be Ports 1 and 2 of the
processor card.
• Have a maximum number of 23 DTE ports per node.
Note
You can use UIO cards in 6505PLUS nodes if the UIO is configured only for PAD
ports.
6507PLUS
Multifunctional
Access Server
The 6507PLUS is a multifunction/multiprotocol packet assembler/disassembler
(PAD). If your node is based on the 6507PLUS processor card, you can:
• Have up to two 6507PLUS processor cards in each node.
• Have a maximum number of 24 ports per node (combination of processor
cards, AIO, or UIO cards).
• Have a maximum number of 4 network ports per node.
• Have a maximum number of 23 DTE ports per node.
• Optionally, configure ports to operate with network protocols (Frame Relay,
MX.25, XDLC), or with synchronous protocols (BSC 3270, BSC 27 0,
SDLC). Any port can be configured as an asynchronous PAD port or to
operate with optional synchronous protocols.
About the 6500PLUS 1-7
Hardware
6525PLUS Network
Concentrator
A 6525PLUS is a multifunction/multiprotocol packet assembler/disassembler (PAD)
and X.25 switch. If your node is based on the 6525, you can:
• Have up to nine 6525PLUS processor cards in a node.
• Have a maximum number of 54 ports per node (combination of processor
cards, AIO, or UIO cards).
• Have a maximum number of 54 network ports per node.
• Have a maximum number of 53 DTE ports per node.
• Configure any or all ports as X.25, MUX, or PAD ports because the 6525PLUS
allows switching on all six ports. Optionally, you can configure ports to
operate with synchronous protocols (SDLC, BSC27 0/3270, and so on).
Port
Configurations
A 6500PLUS node contains only one type of processor card. For example, a single
node may include up to nine 6525PLUS processor cards, but it cannot contain a mix of
6525PLUS and 6507PLUS processor cards. The following table shows the port
configurations available for the different processor cards.
Card Maximum Processor
Cards Per Node
Port
Type
Port Speed Port
Number
6505PLUS 1 PAD 50 bps to 3 .4 kbps 1, 2, 3, 4, 5, 6
MUX 1200 bps to 0 kbps 1, 2
X.25 1200 bps to 0 kbps 1, 2
6507PLUS 2 PAD 50 bps to 3 .4 kbps 1, 2, 3, 4, 5, 6
MUX 1200 bps to 0 kbps 1, 2, 3, 4, 5, 6
X.25 1200 bps to 12 kbps,
optionally to 3 4 kbps
1, 2, 3, 4, 5,
6*
6525PLUS 9 PAD 50 bps to 3 .4 kbps 1, 2, 3, 4, 5, 6
MUX 1200 bps to 0 kbps 1, 2, 3, 4, 5, 6
X.25 1200 bps to 12 kbps,
optionally to 3 4 kbps
1, 2, 3, 4, 5,
6*
*On 6507PLUS and 6525PLUS cards, Ports 3, 4, 5, and 6 have a maximum port speed of 0 kbps
if configured as X.25 ports.
1- About the 6500PLUS
Hardware
Processor Card Figure 1-3 shows the front panel display for the processor card. From the front panel,
you can reset the card, test the lights, and monitor data transmissions by observing
the lights.
Physically, the processor cards are identical. The ID Module of each processor card
(located in socket U40) is unique and provides the functions specific to each type of
processor card.
Figure 1-3. 6 00PLUS Processor Card Front Panel
6500 CPU PLUS
R
I
POWER
STATUS
WATCHDOG
TEST
D
A
T
A
I
N
D
A
T
A
O
U
T
P
O
R
T
1
2
3
4
5
6
RESET
LAMP TEST
T
M
1
2
3
4
5
6
CTP PT.6
DIAG.
D LT NODE
P.C. 68700
LAN
COMPATIBLE
P
O
R
T
POWER (Green)
On: Power on
Off: Power off
WATCHDOG (Red)
On: Processor failed to reset timer in
specified period, normally indicating
hardware or software failure.
(Press LAMP TEST to reset)
Off: Processor OK
DATA IN (Yellow)
On: Data entering port = SPACE
Off: Data entering port = MARK
STATUS (Green)
On: Software running.
Off: Software not running (hardware fault).
lashing: Software running and download
in progress.
TEST (Red)
Indicates status and result of test
affecting any part of the node. Tests
can be locally or remotely initiated.
On: Test failed.
Off: Normal condition.
Flashing: Test in progress.
DATA OUT (Yellow)
On: Data leaving port = SPACE
Off: Data leaving port = MARK
RESET
Push button to initiate
hardware reset function.
RI/TM
Set to RI position if port
is to emulate a dial modem;
otherwise, set to TM.
LAMP TEST
When switch is pressed, all lights
on front panel come on.
WATCHDOG light, if latched ON
due to previous failure, is cleared
when switch is released.
DIAG
Specifies how internal hardware
diagnostics will be implemented
when the node is powered on or reset.
Left: Diagnostics will run once.
Right: Diagnostics will run 10 times.
D LT NODE
To reset all configurable parameters to default
value, press RESET, set this switch to the right,
and press RESET again.
REMOVE LAN I/O CABLE,
REAR FASTENERS AND
FRONT FILLERS BEFORE
REMOVING THIS CARD.
CAUTION
CTP > PT 6
When set to left, port 6 is configured as defined
in node configuration. When set to right and node
is booted, port 6 becomes a default-configured
asynchronous port that can be used to call the
control terminal port facility.
About the 6500PLUS 1-9
Hardware
Optional LASH
Module
Optionally, a FLASH memory module can be attached to a processor card to provide
software distribution and software download capabilities. This optional daughtercard
contains up to 3 Mbytes of nonvolatile FLASH memory and is used for remote
software distribution and software download.
1-10 About the 6500PLUS
Hardware
6500PLUS Auxiliary Processor Cards
Introduction 6500PLUS auxiliary processor cards increase throughput for 6507PLUS and 6525PLUS
nodes. They provide additional processing power, as well as six additional ports.
Description A 6500PLUS auxiliary processor card is a 6507PLUS or 6525PLUS processor card without
a FLASH module, meaning that the card lacks software storage capabilities.
Optionally, you can purchase a FLASH module for a 6500PLUS auxiliary processor
card for downloading software. The front panel is the same as the front panel of the
6500PLUS processor cards shown in Figure 1-3.
Note
You cannot use a 6500PLUS auxiliary processor card as the primary processor
card in a node and cannot install it in the lowest-numbered slot in the node.
The 6500PLUS auxiliary processor card is intended to be used for redundancy and
to increase node performance.
About the 6500PLUS 1-11
Hardware
6500PLUS Asynchronous and Universal I/O Cards
Introduction Two types of I/O cards are:
• Asynchronous I/O (AIO)
• Universal I/O (UIO)
AIO Card You can use an AIO card with all 6500PLUS processor cards. It provides six
asynchronous ports that can be configured as PAD ports. This card supports PAD
port speeds from 50 to 19200 bps and split speed operation (75 bps inbound and
1200 bps outbound) on all ports.
UIO Card You can use a UIO card with 6507PLUS and 6525PLUS cards. The UIO card provides
six asynchronous or synchronous ports. You can configure ports as X.25, MUX, or
PAD ports. Optionally, you can configure them to operate with synchronous access
protocols (SDLC, BSC3270, BSC27 0/37 0, and so on). This card supports PAD
port speeds from 50 to 19200 bps, and synchronous speeds from 1200 bps to 0
kbps.
Note
You can use UIO cards with 6505PLUS processors if you configure them only for
PAD ports.
Description The following table describes the characteristics of each card.
Card Type Works with... Port Types Split Speed
AIO • 6505PLUS
• 6507PLUS
• 6525PLUS
PAD Yes
UIO • 6507PLUS
• 6525PLUS
• 6505PLUS, if PAD
ports only
•PAD
•MUX
•X.25
• optional
synchronous
protocols
No
1-12 About the 6500PLUS
Hardware
ront Panel Display Figure 1-4 shows the front panel display, which is the same for both types of I/O
cards.
.
Figure 1-4. 6 00PLUS Universal I/O or Asynchronous I/O Card Front
Panel
6500 I/0
R
I
TEST
D
A
T
A
I
N
D
A
T
A
O
U
T
P
O
R
T
1
2
3
4
5
6
T
M
1
2
3
4
5
6
P.C. 68904
P
O
R
T
DATA IN (Yellow)
On: Data entering port = SPACE
Off: Data entering port = MARK
TEST (Red)
Indicates status and result of
test affecting any part of node. Tests
can be locally or remotely initiated.
On: Test failed
Off: Normal condition
Flashing: Test in progress
DATA OUT (Yellow)
On: Data leaving port = SPACE
Off: Data leaving port = MARK
RI/TM
Set to RI position if port
is to emulate a dial modem;
otherwise, set to TM.

Other manuals for 6500 PLUS

1

This manual suits for next models

1

Other Vanguard Network Hardware manuals

Vanguard Daughtercard Header Operation and maintenance manual

Vanguard

Vanguard Daughtercard Header Operation and maintenance manual

Vanguard 6435 User manual

Vanguard

Vanguard 6435 User manual

Vanguard 342 User manual

Vanguard

Vanguard 342 User manual

Vanguard 650 Series User manual

Vanguard

Vanguard 650 Series User manual

Popular Network Hardware manuals by other brands

Weidmüller ACT20P quick start guide

Weidmüller

Weidmüller ACT20P quick start guide

Huawei EchoLife HS8245W installation guide

Huawei

Huawei EchoLife HS8245W installation guide

Siemens WTT662 Series Operating and installation instructions

Siemens

Siemens WTT662 Series Operating and installation instructions

Kedacom NVR2860E installation guide

Kedacom

Kedacom NVR2860E installation guide

Nortel SONET AccessNode user guide

Nortel

Nortel SONET AccessNode user guide

Panasonic Transistors 2SD1819G Specifications

Panasonic

Panasonic Transistors 2SD1819G Specifications

Centrica Panoramic Power Series Installation and configuration guide

Centrica

Centrica Panoramic Power Series Installation and configuration guide

ADDER AdderView CATxIP 000 user guide

ADDER

ADDER AdderView CATxIP 000 user guide

Sonoff ZB Bridge-P user manual

Sonoff

Sonoff ZB Bridge-P user manual

Enterasys BRIM-F0 user guide

Enterasys

Enterasys BRIM-F0 user guide

Arrive RoomPoint 4242-HDw user manual

Arrive

Arrive RoomPoint 4242-HDw user manual

Safety Vision roadrecorder 7006 series user guide

Safety Vision

Safety Vision roadrecorder 7006 series user guide

Patton electronics ipRocketLink 3088FR quick start guide

Patton electronics

Patton electronics ipRocketLink 3088FR quick start guide

V-Chip Microsystems VT-CC1110PA-470M user guide

V-Chip Microsystems

V-Chip Microsystems VT-CC1110PA-470M user guide

Teletronics International EzBridge 5800 user manual

Teletronics International

Teletronics International EzBridge 5800 user manual

Abocom HL2000 Specification sheet

Abocom

Abocom HL2000 Specification sheet

ProfiTap X2-3200G quick start guide

ProfiTap

ProfiTap X2-3200G quick start guide

Lorex N844 Series Quick setup guide

Lorex

Lorex N844 Series Quick setup guide

manuals.online logo
manuals.online logoBrands
  • About & Mission
  • Contact us
  • Privacy Policy
  • Terms and Conditions

Copyright 2025 Manuals.Online. All Rights Reserved.