Vaporfi Orbit User manual

USER MANUAL
ENGLISH • ESPAÑOL


01
VAPORFI™ ORBIT USER MANUAL
Thank you for purchasing the VaporFi™ Orbit Dry Herb Vaporizer. In order to use your device
correctly, efficiently and safely, please follow the instructions in this manual.

THE VAPORFI™ ORBIT STARTER KIT INCLUDES:
»(1) 2200 mAh Rechargeable Vaporizer
»(1) USB Charging Cable
»(1) Cleaning Brush
»(5) Mesh Replaceable Filters
»(5) Silicone Mouthpiece Covers
»(1) User Manual
MOUTHPIECE
POWER
BUTTON
CHARGING
PORT

03
GETTING STARTED
1. Snap and remove the mouthpiece from the Orbit
2. Insert ground dry herbs into the center heating chamber of the vaporizer. (Make sure not
to overfill and do not pack too tightly as this will restrict the airflow and produce negative
results)
3. Push and connect the mouthpiece back onto the vaporizer.
4. Quickly press down and release on the power button 5 times within 2 seconds to turn on the
vaporizer.
5. The heating chamber will begin to heat and the herbs will begin to vaporize shortly
thereafter. To adjust the heating temperature, press and hold the power button for 3-5
seconds while switching between temperatures:
TEMPERATURE CONTROL
LOWEST HEAT – WAIT 60 SECONDS AFTER THE DEVICE HAS TURNED ON BEFORE USE.
When the small indicator light illuminates red, this indicates the temperature is at 360F.

MID HEAT – WAIT 90 SECONDS AFTER THE DEVICE HAS TURNED ON BEFORE USE.
When the small indicator light illuminates green, this indicates the temperature is at
380F.
HIGHTEST HEAT – WAIT 120 SECONDS AFTER THE DEVICE HAS TURNED ON BEFORE
USE. When the small indicator light illuminates blue, this indicates the temperature is at
420F.
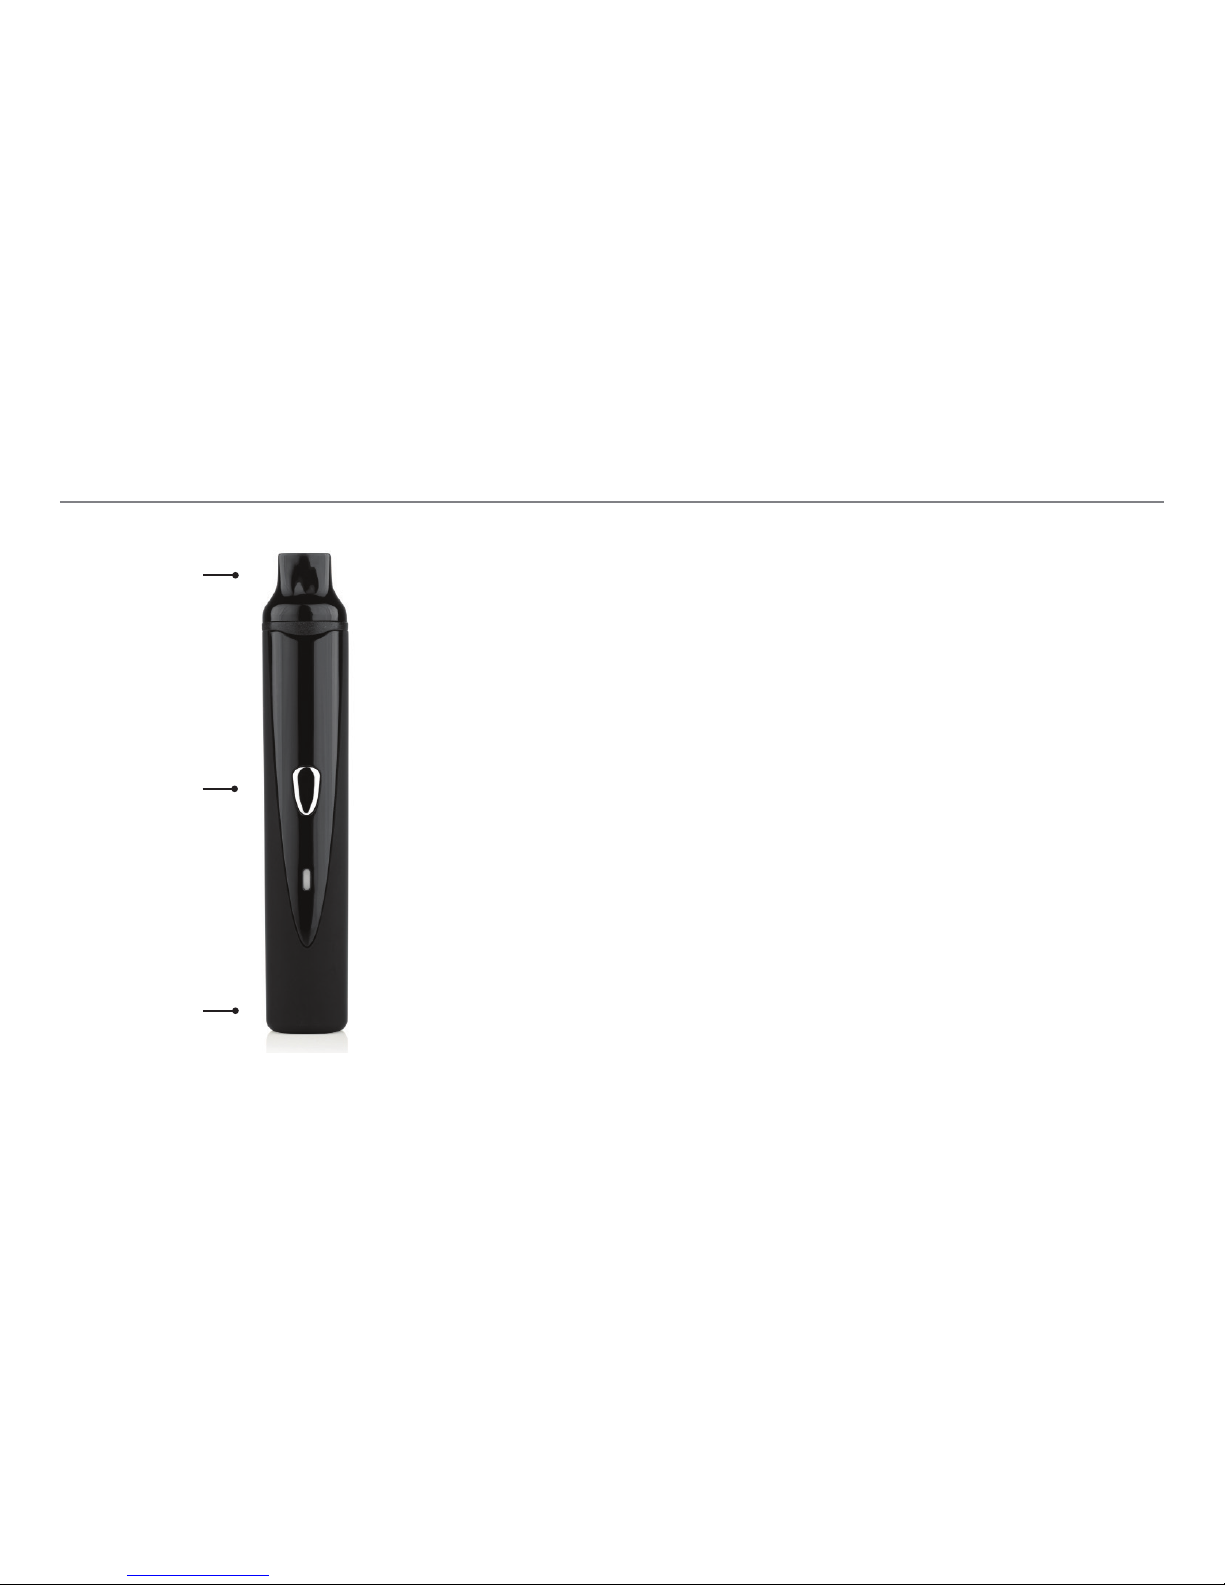
Note: When using the VaporFi™ Orbit at 420F it is strongly recommend to use the
provided silicone mouthpiece cover as the mouthpiece will become hot.
The highest temperature can create a significantly hotter vapor and should be used
carefully. When using the device at this high temperature setting carefully draw slower
and smaller amounts of vapor to avoid burning your throat.
6. To use the vaporizer, begin puffing on the mouthpiece and enjoy! (To experience the best
results, it is recommended to take slow and steady puffs)
7. To turn the vaporizer off, quickly press down and release on the power button 5 times
within 2 seconds.
8. As a safety feature your battery will go into standby if left on for 10 minutes of heating

05
CLEANING & MAINTENANCE
Use the provided VaporFi™ cleaning brush to sweep and clean the inside of the heating
chamber. We recommend cleaning the heating chamber after every use. Always turn the
device off before cleaning and never clean or fill while charging. DO NOT USE CLEANING
SOLUTIONS OR A CLEANING BRUSH THAT IS NOT FROM VaporFi™.
1. To replace the filter, snap and remove the mouthpiece.
2. Underneath your mouthpiece, locate the metal cap and remove it by turning
counterclockwise.
3. Use the tip of the cleaning brush to push out the mesh filter, and then replace with new
mesh filter.
4. Screw the metal cap back onto the mouthpiece by turning it clockwise.
Note: To experience the best taste, we recommend replacing your filter every 5 uses.

CHARGING BATTERY
1. The indicator light on the battery will flash red 5 times and turn off, indicating the
battery needs to be charged.
2. Connect the USB charging cable to the small port on the bottom of the vaporizer.
3. Connect the other end of the USB charging cable to either the USB port of your
VaporFi™ wall charging adapter or to a USB port on a computer.
4. The power button indicator light will turn red on the battery when charging and will
illuminate green when charging is complete.
5. Allow 8-12 hours for the first charge to complete and 1.5-2 hours for each charge
thereafter.

07
WARNING
1. Always turn the device off before cleaning and never clean or fill while charging.
2. Only use accessories such as USB chargers or USB cords that are VaporFi™ approved.
3. Keep this device out of reach of children, and avoid improper operation.

GUARANTEE
A 90-day warranty applies on manufacturing defects only. We cannot guarantee products
that have been damaged through improper use or have been mistreated. Visit our website
(www.VaporFi™.com) for more details.
DISCLAIMER
VaporFi™ products are not smoking cessation products and have not been tested as such.
The U.S. FDA has not approved these products for any use and they are not intended to
diagnose, cure, mitigate, treat or prevent any disorder, disease, or physical or mental
condition. VaporFi™ products contain nicotine, a chemical know to the State of California
to cause birth defects or other reproductive harm. Nicotine is addictive and habit forming,
and it is very toxic by inhalation, in contact with the skin, or if swallowed. Ingestion of the
non-vaporized concentrated ingredients in the cartridges can be poisonous.

09
Physical effects of nicotine may include increased heart rate and accelerated blood
pressure. If the cartridge is swallowed, seek medical assistance immediately. VaporFi™
products are intended for the use by adults of legal smoking age (18 or older in California),
and not by children, women who are pregnant or breast feeding, or persons with or at
risk of heart disease, high blood pressure, diabetes or taking medicine for depression or
asthma. VaporFi™ products may not be sold to minors. Identification of all persons under
26 will be required before purchase. KEEP OUT OF REACH OF CHILDREN.


11
MANUAL DE USUARIO

MANUAL DE USUARIO DE VAPORFI™ ORBIT
Gracias por comprar el Vaporizador para hierbas secas VaporFi™ Orbit. Para poder usar su
dispositivo en forma correcta, eficiente y segura, siga las instrucciones de este manual.

13
EL KIT INICIAL DE VAPORFI™ ORBIT INCLUYE:
» (1) vaporizador recargable de 2200 mAh
» (1) cable de carga USB
» (1) cepillo de limpieza
» (5) filtros reemplazables de malla
» (5) boquillas covertoras de silicona
» (1) manual de usuario
BOQUILLA
PUERTO DE
CARGA
BOTÓN DE
ENCENDIDO

PARA EMPEZAR
1. Haga presión y retire la boquilla del Orbit.
2. Introduzca las hierbas secas en la cámara de calor central del vaporizador. (Asegúrese
de no llenarlo demasiado o sobrecargarlo, ya que esto restringirá el flujo de aire y
producirá resultados negativos).
3. Empuje y conecte la boquilla de nuevo en el vaporizador.
4. Presione y suelte rápidamente el botón de encendido 5 veces en 2 segundos para
encender el vaporizador.
5. La cámara de calor comenzará a calentarse y las hierbas comenzarán a vaporizar poco
después. Para ajustar la temperatura de calor, presione y mantenga presionado el botón
de encendido durante 3 a 5 segundos mientras alterna entre temperaturas.

15
TEMPERATURE CONTROL
CALOR MÁS BAJO: ESPERE 60 SEGUNDOS DESPUÉS DE QUE EL DISPOSITIVO SE
HAYA ENCENDIDO ANTES DE USARLO. Cuando la luz indicadora se encienda en rojo,
esto indica que la temperatura está en 360 ºF.
CALOR MEDIO: ESPERE 90 SEGUNDOS DESPUÉS DE QUE EL DISPOSITIVO SE HAYA
ENCENDIDO ANTES DE USARLO. Cuando la luz indicadora se encienda en verde, esto
indica que la temperatura está en 380 ºF.
CALOR MÁS ALTO: ESPERE 120 SEGUNDOS DESPUÉS DE QUE EL DISPOSITIVO SE
HAYA ENCENDIDO ANTES DE USARLO. Cuando la luz indicadora se encienda en azul,
esto indica que la temperatura está en 420 ºF.
Nota: Cuando use el VaporFi™ Orbit a 420 ºF, se recomienda usar la tapa provista de la
boquilla de silicona, ya que la boquilla se calentará.
Una temperatura más alta puede aumentar el calor del vapor de manera significativa,
por lo tanto se debe utilizar cuidadosamente. Si utiliza el dispositivo a alta temperatura
asegúrese que de absorber cuidadosa y lentamente pequeñas cantidades de vapor para
evitar quemaduras a su garganta.

6. Para usar el vaporizador, comience dando pitadas en la boquilla y ¡a disfrutar! (Para obten-
er los mejores resulta
dos, se recomienda dar pitadas lentas y continuas).
7. Para apagar el vaporizador, presione y suelte rápidamente el botón de encendido 5 veces
en 2 segundos.
8. Como característica de seguridad, la batería quedará en suspensión si se deja calentar
durante 10 minutos.

17
LIMPIEZA Y MANTENIMIENTO
Use el cepillo de limpieza provisto SOLO para barrer y limpiar el interior de la cámara de
calor. Recomendamos limpiar la cámara de calor después de cada uso. Siempre apague el
dispositivo antes de limpiarlo y nunca lo limpie ni lo llene mientras se está cargando. NO
USE SOLUCIONES DE LIMPIEZA.
Reemplazo del filtro
1. Para reemplazar el filtro, haga presión y retire la boquilla.
2. Debajo de la boquilla, ubique la tapa de metal y quítela girándola en sentido
contrario a las agujas del reloj.
3. Use la punta del cepillo de limpieza para empujar el filtro de malla y luego
reemplácelo por un filtro de malla nuevo.
4. Enrosque la tapa de metal de nuevo en la boquilla girándola en el sentido de las

CARGAR LA BATERÍA
1. La luz indicadora de la batería parpadeará en rojo 5 veces y luego se apagará, lo que
indica que hace falta cargar la batería.
2. Conecte el cable cargador USB en el puerto pequeño que está en la parte inferior del
vaporizador.
3. Conecte el otro extremo del cable de carga USB al puerto USB que está en el adaptador
de carga para pared del VaporFi™ o a un puerto USB de una computadora.
4. La luz indicadora del botón de encendido se pondrá roja en la batería cuando esté
cargando y luego se pondrá verde cuando la carga esté completa.
5. La primera carga tardará 8 a 12 horas y, en adelante, de 1 hora y media a 2 horas.
Table of contents
Languages:
Other Vaporfi Electronic Cigarette manuals