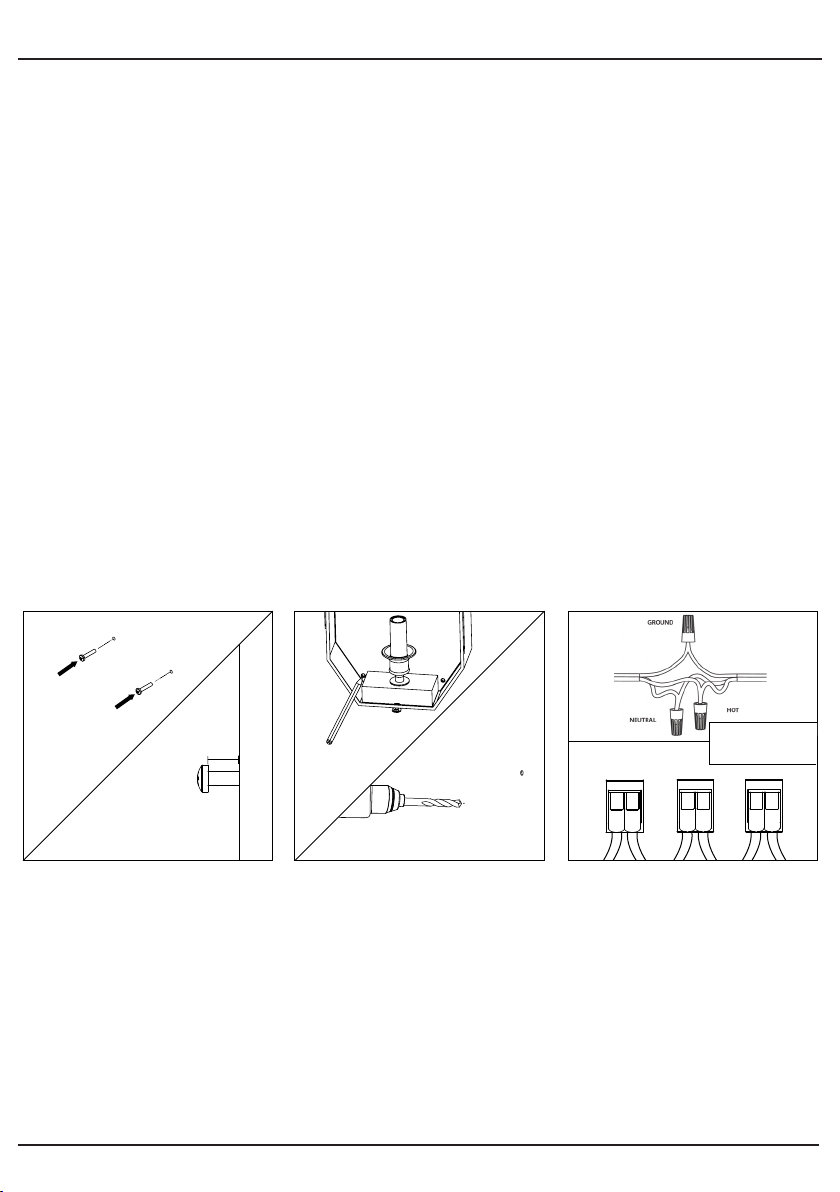
1. Mesurez et marquez les xations murales avant l'installation.
Placez les trous de vis à un endroit approprié autour de la boîte.
Vissez des xations appropriées aux deux emplacements de
montage supérieurs.
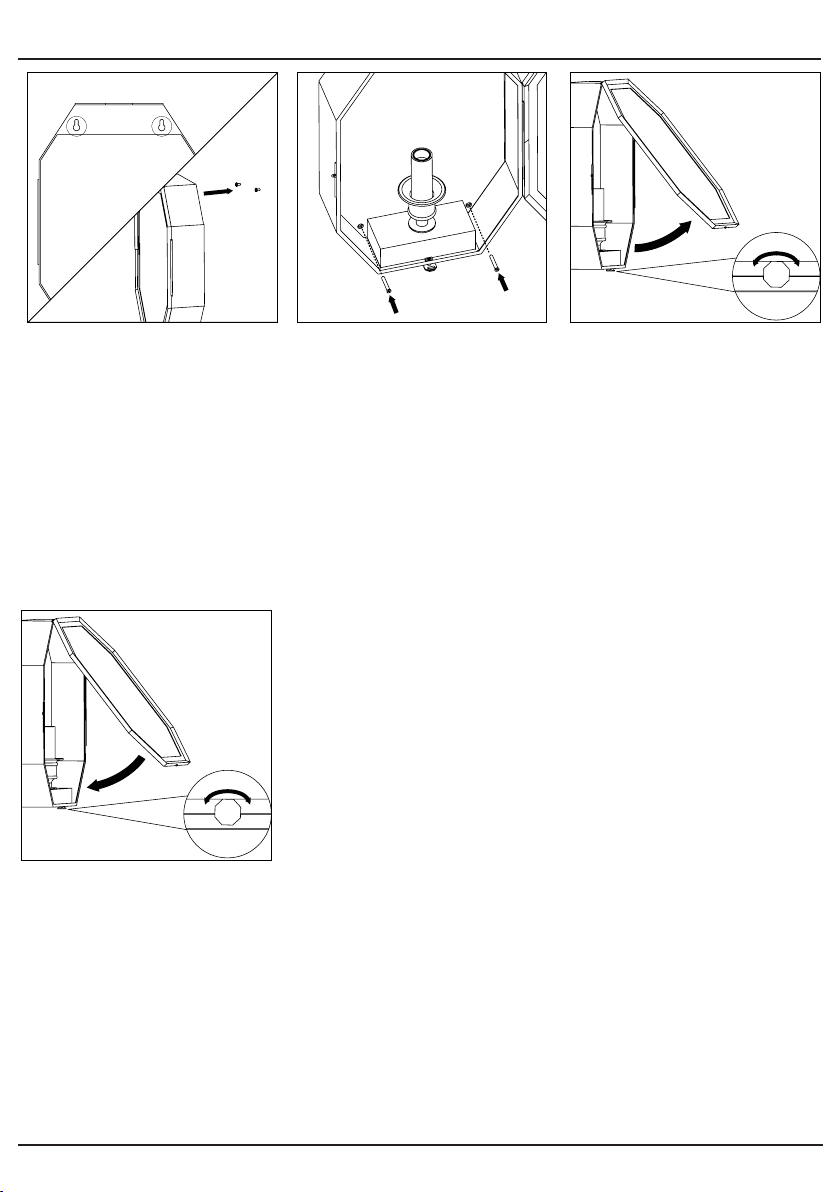
2. Positionnez le produit sur le mur en alignant les trous
d'emplacement du produit avec ceux des vis de montage. Retirez
le produit du mur, prépercez les trous et installez les chevilles
murales.
3. Après avoir identié le câblage domestique, connectez les
câbles d'alimentation du bâtiment et les câbles du produit
ensemble dans les connecteurs de ls comme indiqué ci-dessus.
4. Positionnez le produit sur le mur en alignant les trous
d'emplacement du produit avec ceux des vis de montage.
5. Fixez le bas du produit au mur à l'aide de vis de montage.
Assurez-vous que le produit est bien xé au mur.
6. Pour accéder à l'ampoule, tirez sur le loquet an de libérer la
porte.
7. Après avoir accédé à l'ampoule, fermez doucement la porte.
Fermez le loquet et assurez-vous qu'il est sécurisé.
Français
1. Mida y marque las jaciones de la pared antes de la instalación.
Coloque los oricios de los tornillos en una ubicación adecuada
alrededor de la caja. Atornille las jaciones adecuadas en los dos
lugares de montaje superiores.
2. Alinee los oricios de ubicación del producto con los de los
tornillos de montaje para colocarlo en la pared. Quite el producto
de la pared, taladre previamente los agujeros e instale los tacos de
pared.
3. Una vez identicado el cableado de la casa, conecte el
suministro del edicio y los cables del producto juntos en los
conectores de cables como se muestra arriba.
4. Alinee los oricios de ubicación del producto con los de los
tornillos de montaje para colocarlo en la pared.
5. Asegure la parte inferior del producto a la pared con tornillos
de montaje. Compruebe que el producto esté asegurado a la
pared.
6. Para acceder a la bombilla, tire del pestillo para abrir la
compuerta.
7. Después de acceder a la bombilla, cierre suavemente la
compuerta. Cierre el pestillo y asegúrese de que este quede jado
de forma segura.
Español
1. Messen und markieren Sie die Wandmarkierungen vor der Montage.
Positionieren Sie die Schraublöcher an einem geeigneten Ort rund um
die Dose. Schrauben Sie geeignete Befestigungen an die zwei oberen
Befestigungsstellen.
2. Positionieren Sie das Produkt an der Wand, indem Sie die Aufnahme-
bohrungen des Produkts mit denen der Befestigungsschrauben
ausrichten. Entfernen Sie das Produkt von der Wand, bohren Sie die
Löcher vor und bringen Sie die Dübel an.
3. Nach Identikation der Hausstromverkabelung verbinden Sie die
Gebäudeversorgung und die Produktkabel in den Leitungsverbindern
wie oben gezeigt.
4. Positionieren Sie das Produkt an der Wand, indem Sie die Aufnahme-
bohrungen des Produkts mit denen der Befestigungsschrauben
ausrichten.
5. Befestigen Sie den Boden des Produkts mit Hilfe der Befestigungss-
chrauben an der Wand. Stellen Sie sicher, dass das Produkt an der Wand
befestigt ist.
6. Um an die Glühbirne zu gelangen, ziehen Sie an der Verriegelung, um
die Klappe zu entriegeln.
7. Nachdem Sie die Glühbirne herausgezogen haben, schließen Sie die
Klappe vorsichtig wieder. Schließen Sie den Riegel und vergewissern Sie
sich, dass er fest sitzt.
Deutsche
1. Misurare e segnare i sostegni a parete prima dell'installazione.
Posizionare i fori per le viti a distanze adeguate intorno alla scatola.
Avvitare supporti adeguati alle due posizioni di montaggio in cima.
2. Posizionare il prodotto sulla parete allineando i fori di posizione del
prodotto a quelli delle viti di montaggio. Rimuovi il prodotto dal muro,
pratica i fori e installa i tasselli.
3. Dopo aver individuato l'impianto elettrico domestico, collegare
l'alimentazione dell'edicio ai cavi del prodotto nei connettori per cavi
come mostrato sopra.
4. Posizionare il prodotto sulla parete allineando i fori di posizione del
prodotto a quelli delle viti di montaggio.
5. Fissare la parte inferiore del prodotto alla parete utilizzando le viti di
montaggio. Assicurarsi che il prodotto sia ssato alla parete.
6. Per accedere alla lampadina, tirare il fermo per rilasciare lo sportello.
7. Dopo aver operato sulla lampadina, chiudere delicatamente lo
sportello. Richiudere il fermo e assicurarsi che sia ben saldo.
Italiano
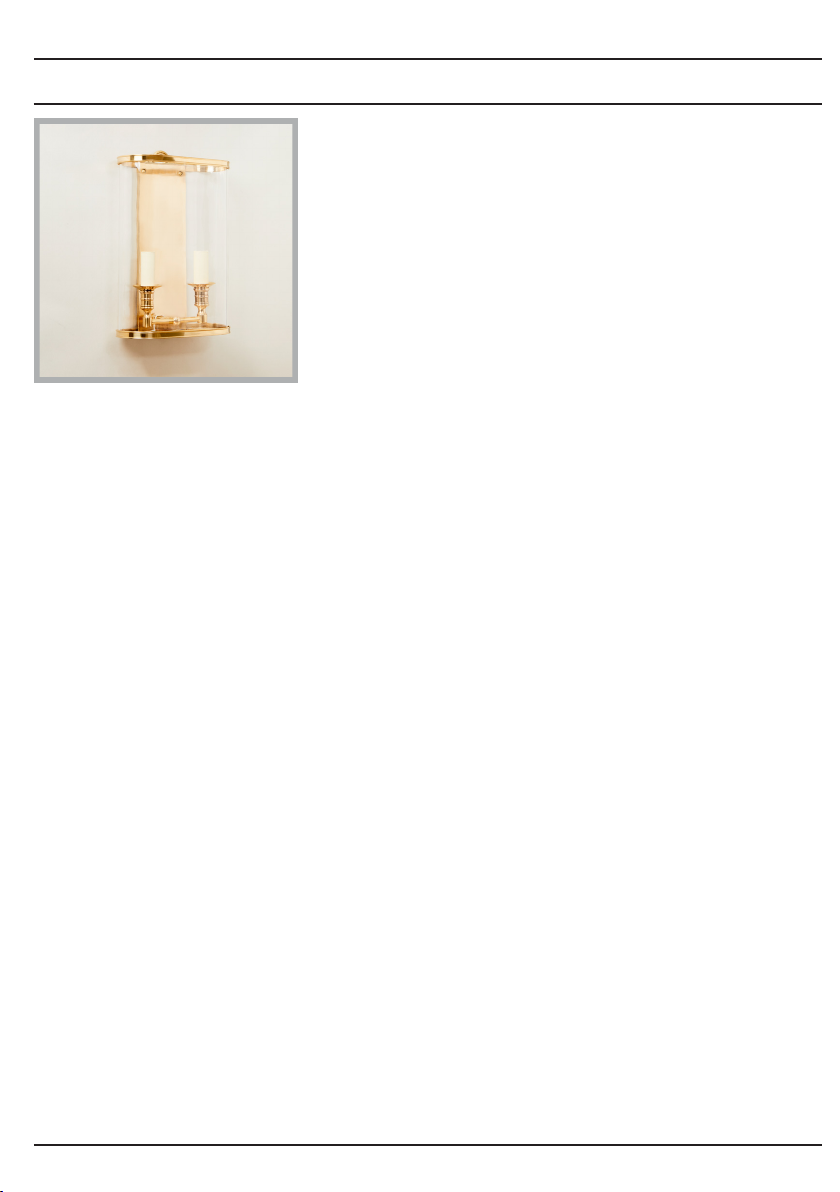
Ovington Wall Lantern
WA0373
WA0373_US_IG