CARE & MAINTENANCE
- Clean surface area regularly with mild soap and water.
- Do not use abrasive cleaners that will scratch the finish.
- Allow product to dry between uses. ONE YEAR WARRANTY
This warranty is solely for the benefit of the original consumer purchaser. This device was built to precise standards and carefully inspected prior to shipment. Your
Vaunn Medical product is warrano be free of defects in materials and workmanship for a period of one year. If within such warranty period, the product proves
defe, the product will be repaired or replaced, at the opaunn Medical. This warranty does not cover device failure due to owner misuse or negligence, or
normal wear and tear. This warranty does not extend to non-durable components, such as rubber accessories and grips, which are subject to normal wear and will
require periodic replacement. For quesegarding your Vaunn Medical products, please contact our authorized dealer – Beyond Med Shop Tel: 832-939-8290.
Ref no: M725N-DLWH-CHVM Manual V9120319 PAGE 2 OF 2
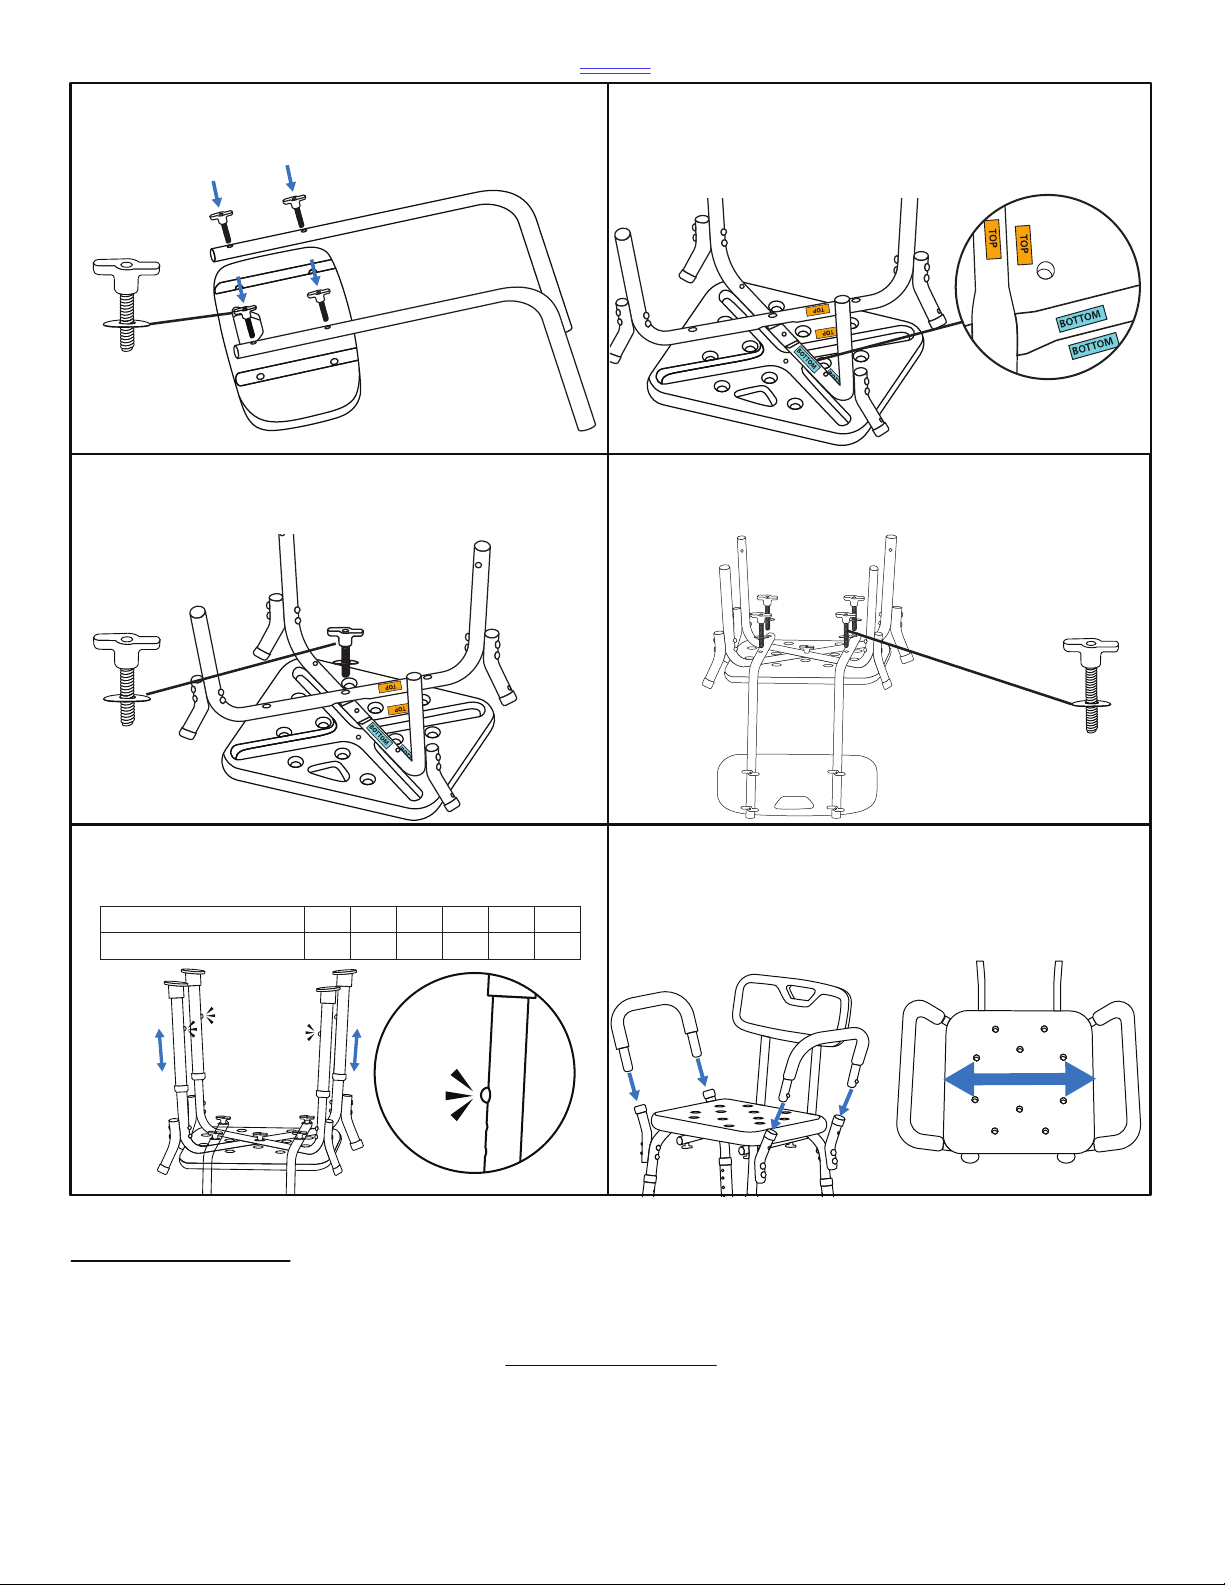
4) Install Arm Rests at an outward angle away from Seat. You will
hear a ‘click’ once Arm Rests are secured.
IMPORTANT: Before use, ensure Shower Chair is on an even
surface with 4 legs standing firmly on the floor. Regularly
�ghten all screws as loosening may occur over �me.
5) Insert Leg Extensions intt height
according to the distance between the user’s knees to the floor.
You will hear a ‘click’ once legs are secured.
Adjustment Hole
Distantce Knee to Floor
1 2 3 4 5 6
16” 17” 18” 19” 20” 21”
1) Align screw holes of Back Brace Bar to Back Rest. Securely
Fasten with SHORT Screw Knob w/ Washers (x4). Set aside for
later use.
2) Place Seat on flat surface with screw holes facing up. Match
coloro Seat.
Note: “TOP” leg sec�on must be placed above the “BOTTOM”
leg sec�on.
3) Affix SHORT Screw Knob w/Washer (x1) in the center screw
DO NOT TIGHTEN SCREW KNOB
COMPLETELY.
4) From step 1, align screw holes on Back Brace Bar to Leg
asten securely with LONG Screw Knob w/Washers (x4).
TIGHTEN ALL 5 SCREW KNOBS.
SHORT
SHORT LONG
CLICK
TO INSTALL WITH BACK REST


