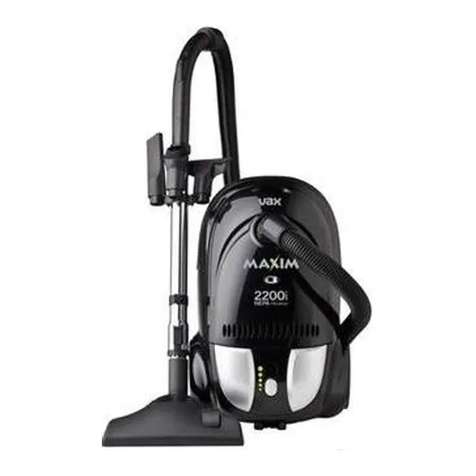
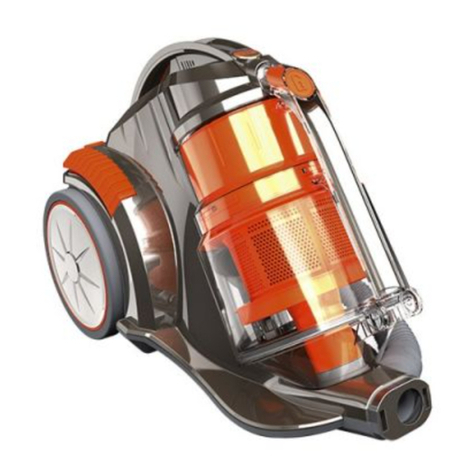
Vax power7 User manual

V rsion 1.2
C89-P7 v1.2alleSprachenTeil1_User guide 21.12.11 07:52 Seite 168
All manuals and user guides at all-guides.com
all-guides.com

C89-P7 s ri s
GB
CZ
DE
DK
ES
F
FI
HU
IT
NL
NO
PL
PT
U
SE
T
Bagless Cylinder
Bezs čkový vysavač
beutelloser Bodenstaubsauger
Posefri støvsuger
Aspirador sin bolsa
Aspirateur traîneau sans sac
Pölypussiton pölynimuri
Porzs k nélküli porszívó
Aspirapolvere senza sacchetto
Zakloze stofzuiger
Poseløs støvsuger
Odkurzacz bezworkowy
Aspirador sem saco
Пылесос без мешка для сбора пыли
Påslös dammsugare
Torbasız elektrik süpürgesi
powerpower7
C89-P7 v1.2alleSprachenTeil1_User guide 21.12.11 07:52 Seite 1
All manuals and user guides at all-guides.com

---
2
C89-P7 v1.2alleSprachenTeil1_User guide 21.12.11 07:52 Seite 2
All manuals and user guides at all-guides.com

3
English 04 -13
Česky 14 - 23
Deutsch 24 - 33
Dansk 34 - 43
Espa ol 44 - 53
Français 54 - 63
Suomi 64 - 73
Magyar 74 - 83
Italiano 84 - 93
Nederlands 94 - 103
Norsk 104 - 113
Polski 114 - 123
Português 124 - 133
Русский 134 - 143
Svenska 144 - 153
Türkçe 154 - 163
Service 164
GB
CZ
DE
DK
ES
F
FI
HU
IT
NL
NO
PL
PT
U
SE
T
C89-P7 v1.2alleSprachenTeil1_User guide 21.12.11 07:52 Seite 3
All manuals and user guides at all-guides.com

---
11
4
2 3 10
87 91
Unit
Acc ssori s
6
12
5
Filt rs
19
14
15
16
17
1 Hos conn ctor
2 Dirt contain r
3 Cyclon s parator and shroud
4 Dirt disposal button (hidd n)
5 Carry handl
6 Dirt contain r r l as button
7 On/off button
8 Variabl pow r dial
9 Floor h ad parking slot
10 Cord r wind button
11 Wh l
12 Pr -motor filt r
13 HEPA E12 post-motor filt r/
HEPA E12 antibact rial post-motor filt r
(som mod ls only)
14 Dusting brush
15 Cr vic tool
16 Upholst ry tool
17 Hos and handl
18 TurboTool (som mod ls only)
19 Ext nsion tub and tool caddy
20 Str tch hos (som mod ls only)
21 Combination floor h ad (som mod ls only)
22 Turbobrush (som mod ls only)
23 Hard floor tool (som mod ls only)
24 TurboTool conn ctor (som mod ls only)
PLEASE NOTE: som parts may vary according to
mod l. Pl as ch ck insid flap of box for mor
d tails.
13
22
23
18 20
24 21
Machin Ov rvi w
4
GB
C89-P7 v1.2alleSprachenTeil1_User guide 21.12.11 07:52 Seite 4
All manuals and user guides at all-guides.com

FOR HOUSEHOLD USE ONLY.
Wh n using th vacuum cl an r, basic saf ty pr cautions should always b obs rv d, including th following:
1. R ad this manual prior to us .
2. Only us th vacuum cl an r indoors on dry surfac s.
Do not handl th plug or vacuum cl an r with w t
hands. Do not us outdoors or on w t surfac s.
3. Turn off th vacuum cl an r controls b for
disconn cting or conn cting from th mains supply.
4. B for cl aning or p rforming maint nanc on th
applianc , nsur that th plug has b n r mov d from
th l ctrical sock t.
5. DO NOT modify or r pair th applianc yours lf.
6. Always unplug th vacuum cl an r b for conn cting
or disconn cting th vacuum hos and acc ssori s.
7. Cl aning and us r maint nanc shall not b p rform d
by childr n without sup rvision. Childr n must not b
allow d to stand or sit on th applianc . Childr n must
not b allow d to play with th applianc . Packing
mat rial must not b us d to play with. Th r is dang r
of suffocation.
G n ral Saf ty Information
5
GB
C89-P7 v1.2alleSprachenTeil1_User guide 21.12.11 07:52 Seite 5
All manuals and user guides at all-guides.com
all-guides.com

---
G n ral Saf ty Information
6
8. This applianc can b us d by childr n ag d from 8
y ars and abov and p rsons with r duc d physical,
s nsory or m ntal capabiliti s or lack of xp ri nc
and knowl dg if th y hav b n giv n sup rvision or
instruction conc rning us of th applianc in a saf
way and und rstand th hazards involv d. How v r,
for r asons of saf ty w strongly r comm nd that v n
childr n ag d from 8 y ars and abov do not op rat
th d vic as th y d finit ly cannot und rstand all
sp cific dang rs arising from it. K p th applianc out
of r ach of p opl of th s groups.
GB
C89-P7 v1.2alleSprachenTeil1_User guide 21.12.11 07:52 Seite 6
All manuals and user guides at all-guides.com

G n ral Saf ty Information
7
9. Us only as d scrib d in this manual. Us only Vax
r comm nd d attachm nts.
10. Do not us th vacuum cl an r if it has b n
dropp d, damag d, l ft outdoors or dropp d into
wat r. Do not us th vacuum cl an r with a
damag d cord or plug. If th supply cord is
damag d, it must b r plac d by th manufactur r
or a r comm nd d S rvic Ag nt to avoid hazard
and invalidating th guarant .
11. Do not pull or carry by cord. Do not us th cord
as a handl , clos a door on th cord or pull cord
around sharp dg s or corn rs. Do not run th
vacuum cl an r ov r th cord. K p th cord away
from h at d surfac s.
12. Do not put any obj cts into op nings. Do not us
with any op nings block d and do not r strict
airflow. K p all op nings fr of dust, lint, hair or
anything that might r duc airflow.
13. N v r us th vacuum on p opl , animals or plants.
K p hair, loos clothing, fing rs and all parts of
th body away from op nings and moving parts.
14. Do not pick up hot coals, cigar tt butts, match s
or any hot, smoking or burning obj cts.
15. Do not pick up flammabl or combustibl mat rials
(light r fluid, p trol, k ros n tc.) or us in th
pr s nc of xplosiv liquids or vapours.
16. Do not vacuum up harmful or toxic mat rials
(chlorin , bl ach, ammonia, drain cl an r tc.).
17. Do not vacuum up hard or sharp obj cts such as
glass, nails, scr ws, coins, tc.
18. Do not vacuum rubbl , plast r, c m nt fin drilling
dust, mak -up tc. Th s might damag th
applianc .
19. Do not us without ALL of th filt rs in plac .
20. Tak xtra car wh n vacuuming on stairs.
21. K p vacuuming ar a w ll lit.
22. Stor th vacuum cl an r in a cool, dry ar a.
23. Us only CE-approv d 13 amp xt nsion cords.
Non-approv d cords may ov rh at. Car should b
tak n to arrang th cord so that th cord cannot
b tripp d ov r.
WARNING: Always switch off and unplug th
vacuum cl an r from th l ctrical outl t b for
ass mbling, op ning or mptying th dirt
contain r, or b for conn cting/disconn cting th
attachm nts.
CAUTION: Th vacuum cl an r is a v ry
pow rful unit. B for plugging th cord into th
l ctrical outl t, mak sur th switch is in th
‘off’ position.
IMPORTANT: If th inl t, hos or t l scopic tub
is block d, switch off th vacuum cl an r and
r mov th blockag (s) b for r -starting th
vacuum cl an r. S Maint nanc : Cl aring blockag s.
IMPORTANT: Washing filt rs maintains vacuum
p rformanc . Vax r comm nds that th y should
b ch ck d and cl an d p riodically (d p nding
on th l v l of us ). Mak sur all filt rs ar compl t ly
dry b for ins rting back into th vacuum cl an r.
IMPORTANT: Th motor is quipp d with a
th rmal cut-out. If for any r ason th unit should
ov rh at, th th rmostat will automatically turn
th unit off. Should this occur, unplug th vacuum
cl an r from th l ctrical outl t and turn off th switch.
R mov dirt contain r and mpty. Cl an filt rs. Allow
th unit
to cool for approximat ly on (1) hour. To r -
start, plug into an l ctrical outl t and switch back on.
This vacuum cl an r is int nd d for hous hold us
only and NOT for comm rcial or industrial us .
PLEASE KEEP INSTRUCTIONS
FOR FURTHER USE.
!
!
!
!
!
GB
C89-P7 v1.2alleSprachenTeil1_User guide 21.12.11 07:52 Seite 7
All manuals and user guides at all-guides.com

---
Op ration
Ass mbling your vacuum cl an r
Op rating th applianc
12
NOTE: Fully unwind th pow r cord. A
y llow mark on th cord indicat s th
r comm nd d cord l ngth. Do not xc d
th cord l ngth b yond th y llow mark.
8
K p your Vax lik n w IMPORTANT: Th condition of th filt rs aff cts th
p rformanc of your machin . Pl as ch ck and wash filt rs
p riodically (d p nding on th l v l of us ). For full cl aning
instructions, s pag s 9 and 10.
!
IMPORTANT: Do not us th vacuum cl an r without all of th
filt rs in plac .
!
NOTE: Th Turbobrush, hard floor tool, cr vic tool, upholst ry tool and dusting brush can all b attach d dir ctly
to th t l scopic tub or hos handl . Th TurboTool should b attach d via th suppli d conn ctor.
Carp ts
Hard floors
WARNING: Ensur th unit is unplugg d from l ctricity b for fitting th hos and tools.
!
IMPORTANT: Th optional Turbo Tool is only for vacuuming scratch-r sistant carp ts, rugs, mats, and th
lik . Do not cl an furnitur , or mat rials with a d licat t xtur , nor any oth r high-quality or polish d substrat s
with th Turbo Tool, oth rwis mat rial damag might occur. If in doubt pl as r frain from using th Turbo Tool.
In v ry instanc obs rv th instructions for car and cl aning of th r sp ctiv manufactur r.
!
GB
C89-P7 v1.2alleSprachenTeil1_User guide 21.12.11 07:52 Seite 8
All manuals and user guides at all-guides.com

Maint nanc (K p your Vax as good as n w)
12
Packing away and storag
Emptying and cl aning th dirt contain r
9
NOTE: For conv ni nc th r is a parking slot locat d at th r ar of th vacuum cl an r wh r th floor h ad
and tub s can b attach d for storag and carrying.
1
2
tap
40° C max
!
Cl aning th pr -motor filt r
WARNING: Ensur th unit is unplugg d from l ctricity b for mptying dirt contain r.
WARNING: Ensur th unit is unplugg d from l ctricity b for cl aning th filt r.
IMPORTANT: Parts must b compl t ly dry b for using your vacuum cl an r.
!
!
!
24hr
GBGB
C89-P7 v1.2alleSprachenTeil1_User guide 21.12.11 07:52 Seite 9
All manuals and user guides at all-guides.com

---
10
GB
Maint nanc (K p your Vax as good as n w)
Cl aning th post-motor filt r
tap
Cl aning th shroud
tap
40° C max
!
NOTE: Th shroud is acc ss d by r moving th dirt contain r lid and is locat d und rn ath th pr -motor filt r.
WARNING: Ensur th unit is unplugg d from l ctricity b for cl aning th shroud.
IMPORTANT: Parts must b compl t ly dry b for using your vacuum cl an r.
!
!
WARNING: Ensur th unit is unplugg d from l ctricity b for cl aning th filt r.um cl an r.
!
24hr
C89-P7 v1.2alleSprachenTeil1_User guide 21.12.11 07:52 Seite 10
All manuals and user guides at all-guides.com
all-guides.com

Maint nanc (K p your Vax as good as n w)
11
GB
Cl aring blockag s
WARNING: To r duc th risk of l ctric shock, th pow r cord must b disconn ct d b for p rforming
maint nanc /troubl shooting ch cks. Turn th vacuum cl an r off and unplug from th l ctrical sock t.
!
Hos blockag s
Th fl xibl hos may b disconn ct d
from th vacuum cl an r. Car fully r mov
any blockag s found and r conn ct th
hos s cur ly.
Switch th vacuum cl an r off and disconn ct th pow r plug from th
l ctrical outl t.
Lay th Turbobrush on a flat surfac and turn ov r to xpos th
brushbar. Using a pair of scissors, cut through any thr ads or hairs
caught around th brush s and brushbar.
Acc ssory blockag s
R mov acc ssory from th hos /t l scopic tub .
Car fully r mov th blockag and r turn to th
cl an r.
R moving blockag s from th TurboTool (som mod ls only)
Locking ring
Tabs
Turn th TurboTool ov r and
slid off th locking ring.
R moving blockag s from th Turbobrush (som mod ls only)
D tach low r housing and
r mov blockag .
To r -ass mbl th TurboTool,
nsur that th tabs ar ngag d
and pivot th low r housing
clos d. Slip th locking ring ov r
th n ck of th TurboTool and into
th groov to finish.
C89-P7 v1.2alleSprachenTeil1_User guide 21.12.11 07:52 Seite 11
All manuals and user guides at all-guides.com

---
12
!
WARNING: to r duc th risk of p rsonal injury, unplug th vacuum cl an r from l ctricity b for
p rforming maint nanc /troubl shooting ch cks.
GB
FAQs
Is th r an acc ssory missing?
• Ch ck th ‘Parts Ov rvi w’ pag in this guid to
mak sur th part is d finit ly includ d in your unit.
• If it is missing, w ’r h r to h lp. S s rvic
contact information on pag 164.
Why won’t th vacuum cl an r pick up?
• Th dirt contain r may b incorr ctly install d;
r mov th dirt contain r from th unit by pr ssing
th dirt contain r r l as catch and th n r -
attaching it to th unit, nsuring it is lock d firmly
back into plac .
• Th filt r may b clogg d; r f r to ‘Maint nanc :
Cl aning th filt rs’ on pag s 9 and 10.
• Th dirt contain r may b block d; r f r to
‘Maint nanc : Emptying and cl aning th dirt
contain r’ on pag 9.
• Th r may b a blockag in th hos /tub ;
disconn ct from th vacuum cl an r. Car fully
r mov any blockag s found and r conn ct
s cur ly.
Why is dust scaping from th vacuum?
• Th filt r may b clogg d; r f r to ‘Maint nanc :
Cl aning th filt rs’ on pag s 9 and 10.
• Th dirt contain r may b block d; r f r to
‘Maint nanc : Emptying and cl aning th dirt
contain r’ on pag 9.
• Th dirt contain r may b incorr ctly install d;
r mov th dirt contain r from th unit by pr ssing
th dirt contain r r l as catch and th n r -
attaching it to th unit, nsuring it is lock d firmly
back into plac .
What do I do if th unit/an acc ssory b com s
damag d or brok n?
•W ’r h r to h lp. S s rvic contact information
on pag 164.
Why won’t th acc ssori s pick up prop rly?
• Hos blockag s: r mov th hos from th unit.
Car fully r mov any blockag s found and
r conn ct hos s cur ly.
• Acc ssory blockag s: r mov acc ssory from
handl /tub . Car fully r mov blockag and r -
attach to th vacuum cl an r.
•Th acc ssory may b faulty. S s rvic contact
information on pag 164.
Why will th vacuum cl an r not run?
• It may not b plugg d into th l ctrical outl t
corr ctly; nsur that th plug is push d in
s cur ly.
• Th l ctrical outl t may not b working prop rly;
ch ck th fus or br ak r, or consult an l ctrician.
• Th motor th rmostat may hav tripp d; switch off
and unplug th vacuum cl an r, and l av for on
hour b for switching th cl an r back on.
we´re here to help
Inst ad of taking m back
to th shop, simply call:
See page 164
This do s not aff ct your statutory rights
C89-P7 v1.2alleSprachenTeil1_User guide 21.12.11 07:52 Seite 12
All manuals and user guides at all-guides.com

Contact and S rvic
S s rvic contact information on pag 164
T chnical Sp cification
Voltag : 220-240V ~50Hz
Wattag : 2400W
Capacity: 4L
Filt rs: Pr -motor filt r (washabl )
HEPA E12 post-motor filt r/HEPA E12 antibact rial post-motor filt r
(d p nding on mod l) (tap to cl an)
Cord l ngth: 8 m (approx)
W ight: 5.9 kg (approx)
Subj ct to t chnical chang without notic .
EEC Stat m nt of Complianc
Manufactur r/EEC import r: Vax Limit d, h r by on our own r sponsibility, d clar that th
C89-P7 s ri s is manufactur d in complianc with th following Dir ctiv s:
Saf ty: 2006/95/EC Low Voltag Dir ctiv
EMC: 2004/108/EC El ctromagn tic Compatibility Dir ctiv
Disposal
Wast l ctrical products should not b dispos d of with hous hold wast . Pl as r cycl wh r faciliti s
xist. Ch ck with your Local Authority or r tail r for r cycling advic .
13
Oth r Information GB
C89-P7 v1.2alleSprachenTeil1_User guide 21.12.11 07:52 Seite 13
All manuals and user guides at all-guides.com

---
11
4
2 3 10
87 91 6
12
5
19
14
15
16
17
13
22
23
18 20
24 21
Př hl d Součástí Přístroj CZ
Přístroj
Doplňky
Filtry
14
1 Spojka pro připoj ní hadic
2 Nádoba na n čistoty
3 Cyklonový s parátor a mřížka
4 Tlačítko na uvolnění n čistot
5 Držadlo pro př náš ní
6 Tlačítko na uvolnění nádoby s n čistotami
7 Tlačítko vypnutí/zapnutí
8 Tlačítko nastav ní výkonu
9 Záchytná drážka pro hubici
10 Tlačítko pro navíj ní napáj cího kab lu
11 Kolo
12 Př dmotorový filtr
13 HEPA filtr E12 za motor m/
antibakt riální HEPA filtr E12 za motor m
(pouz u někt rých mod lů)
14 Kartáč na prach
15 Hubic na štěrbiny
16 Hubic na čalounění
17 Hadic a držadlo
18 Turbohubic (pouz u někt rých mod lů)
19 T l skopická trubka a držák na hubic
20 Pružná hadic (pouz u někt rých mod lů)
21 Univ rzální podlahová hubic
(pouz u někt rých mod lů)
22 Turbokartáč (pouz u někt rých mod lů)
23 Hubic na tvrdé podlahy
(pouz u někt rých mod lů)
24 Spojka pro turbohubici
(pouz u někt rých mod lů)
UPOZORNĚNÍ: někt ré části s mohou u
různých mod lů lišit. Víc informací najd t na
vnitřní straně obalu.
C89-P7 v1.2alleSprachenTeil1_User guide 21.12.11 07:52 Seite 14
All manuals and user guides at all-guides.com

Vš ob cné B zp čnostní Informac
POUZE PRO POUŽITÍ V DOMÁCNOSTECH.
Při používání vysavač by měla být vždy dodržována základní b zp čnostní pravidla, vč tně těchto:
1. Př d použitím přístroj si př čtět t nto návod.
2. Vysavač použív jt pouz v int riéru a vysáv jt jím
pouz suché povrchy. S l ktrickou zástrčkou ani s
vysavač m n manipulujt s mokrýma rukama. Přístroj
n použív jt v v nkovním prostoru či k vysávání
mokrých či vlhkých povrchů.
3. Př d odpoj ním vysavač od napáj cí sítě či př d j ho
připoj ním k napáj cí síti vysavač vypnět .
4. Př d čištěním či prováděním údržby přístroj vytáhnět
z l ktrické zásuvky j ho zástrčku.
5. Přístroj sami n upravujt ani n opravujt .
6. Př d připojováním či odpojováním vysávací hadic a
přísluš nství vysavač vypojt .
7. Čištění a uživat lskou údržbu n smějí provádět děti b z
dohl du. N dovolt , aby si na přístroj stoupaly či s daly
děti. N dovolt , aby si s přístroj m hrály děti. Obalový
mat riál n ní hračka. Hrozí n b zp čí uduš ní.
CZ
15
C89-P7 v1.2alleSprachenTeil1_User guide 21.12.11 07:52 Seite 15
All manuals and user guides at all-guides.com
all-guides.com

---
Vš ob cné B zp čnostní Informac CZ
16
8. T nto přístroj smějí používat děti starší osmi l t a
osoby s om z nými fyzickými, smyslovými či
duš vními schopnostmi n bo n dostatk m zkuš ností
a znalostí, j stliž na ně někdo dohlíží n bo obdrž ly
pokyny ohl dně b zp čného používání přístroj a
chápou n b zp čí, kt rá z j ho používání vyplývají. Z
b zp čnostních důvodů však důrazně doporučuj m ,
aby ani děti starší osmi l t přístroj n používaly, n boť
rozhodně n jsou schopny pochopit vš chna sp cifická
n b zp čí, kt rá z j ho používání vyplývají. Přístroj
uchováv jt mimo dosah lidí spadajících do těchto
skupin.
C89-P7 v1.2alleSprachenTeil1_User guide 21.12.11 07:52 Seite 16
All manuals and user guides at all-guides.com

Vš ob cné B zp čnostní Informac CZ
17
9. Přístroj použív jt výhradně tak, jak j to popsáno v
tomto návodu. Použív jt výhradně nástavc
doporuč né firmou Vax.
10. Vysavač n použív jt , j stliž vám př dtím upadl na
z m, došlo k j ho poškoz ní, byl pon chán v
v nkovním prostoru n bo byl ponoř n do vody.
N použív jt vysavač s poškoz ným napáj cím
kab l m či l ktrickou zástrčkou. J stliž dojd k
poškoz ní napáj cího kab lu a chc t př d jít
vzniku n b zp čí a zachovat si platnost záruky,
musí j j vyměnit výrobc n bo doporuč ný s rvis.
11. Přístroj n tah jt ani n př náš jt za kab l. Kab l
n použív jt místo rukoj ti, n přivír jt j j do dv ří
a n tah jt j j kol m ostrých hran či rohů.
Vysavač m n př jíždějt př s kab l. Kab l chraňt
př d horkými povrchy.
12. Do otvorů n vklád jt žádné př dměty. Přístroj
n použív jt , pokud jsou někt ré z j ho otvorů
zablokované. N braňt průtoku vzduchu přístroj m.
Z vš ch otvorů odstraňujt prach, žmolky, vlasy a
v šk ré př dměty, kt ré by mohly om zit průtok
vzduchu přístroj m.
13. Vysavač nikdy n použív jt na lidi, zvířata či
rostliny. D jt pozor, aby s vám do otvorů přístroj
či j ho pohybujících s částí n dostaly vlasy, volné
obl č ní, prsty ani žádné jiné př dměty.
14. Přístroj m n vysáv jt žhavé uhlíky, cigar tové
n dopalky, zápalky ani horké, doutnající či hořící
př dměty.
15. Přístroj m n vysáv jt hořlavé či zápalné mat riály
(b nzin do zapalovačů, automobilový b nzin, p trol j
atd.) a n použív jt j j za přítomnosti výbušných
kapalin či výparů.
16. N vysáv jt škodlivé či j dovaté mat riály (chlor,
bělidla, čpav k, čistič odpadů atd.).
17. N vysáv jt tvrdé či ostré př dměty, jako jsou sklo,
hř bíky, šrouby, minc atd.
18. N vysáv jt sutiny, omítku, c m nt, j mný prach z
vrtání, líčidla atd. Tyto mat riály by mohly přístroj
poškodit.
19. N jsou-li v přístroji nainstalovány VŠECHNY filtry,
n použív jt j j.
20. Při vysávání na schod ch db jt zvýš né opatrnosti.
21. Db jt na dostat čné osvětl ní prostoru, kt rý
vysávát .
22. Vysavač skladujt na chladném, suchém místě.
23. Použív jt pouz 13A prodlužovací kab ly opatř né
značkou CE. N schvál né kab ly by s mohly
př hřát. Kab l vždy v ďt tak, abyst o něj n mohli
zakopnout.
VAROVÁNÍ: Př d s stavováním, ot víráním n bo
vyprazdňováním nádoby na n čistoty a př d
připojováním/odpojováním přídavného
přísluš nství vysavač vždy vypnět a vypojt z zásuvky.
POZOR: Vysavač j v lmi výkonné zaříz ní. Př d
připoj ním přívodního kab lu do l ktrické sítě s
ujistět , ž j spínač v pozici „vypnuto“.
DŮLEŽITÉ: Jsou-li přívod, hadic n bo
t l skopická trubic ucpány, vypnět vysavač a
odstraňt př d opětovným uv d ním do chodu
blokující př dmět(y). Viz s kc Údržba: Odstraňování
ucpáv k.
DŮLEŽITÉ: Pravid lným praním filtrů zajistít d lší
výkonnost Vaš ho vysavač . Vax Vám doporučuj
kontrolovat a čistit filtry pravid lně (dl míry
používání). Př d umístěním vyčištěných filtrů zpět do
vysavač s ujistět , ž jsou zc la suché.
DŮLEŽITÉ: Motor j vybav n t rmostatickou
pojitskou. Dojd -li z jakéhokoliv důvodu k př hřátí
přístroj , t rmostat vysavač automaticky vypn .
Nastan -li tato situac , vypojt vysavač z l ktrické sítě a
vypnět j j. Vyjmět nádobu na n čistoty a vyprázdnět
ji. Vyčistět filtry. N cht vysavač přibližně j dnu (1)
hodinu vychladnout. Pro opětovné uv d ní do chodu
zapojt do l ktrické sítě a zapnět .
T nto vysavač j urč n výhradně pro použití v
domácnosti a NE pro kom rční n bo průmyslové úč ly.
USCHOVEJTE SI NÁVOD K DALŠÍMU POUŽITÍ.
!
!
!
!
!
C89-P7 v1.2alleSprachenTeil1_User guide 21.12.11 07:52 Seite 17
All manuals and user guides at all-guides.com

---
Použití CZ
S stav ní Vaš ho vysavač
Provoz přístroj
POZNÁMKA: Zc la vytáhnět přívodní kab l. Žlutá značka na kab lu označuj doporuč nou délku kab lu.
N vytahujt kab l dál n ž za tuto značku.
Udržujt svůj vysavač Vax jako nový
DŮLEŽITÉ: Stav filtrů Vaš ho vysavač ovlivňuj j ho výkon.
Kontrolujt a čistět proto filtry pravid lně (dl míry použití).
Kompl tní informac o údržbě najd t na stránkách 19 a 20.
!
DŮLEŽITÉ: N použív jt vysavač b z filtrů.
!
VÝSTRAHA: Př d nasazováním hadic a nástrojů odpojt přístroj od napáj ní.
!
POZNÁMKA: Turbokartáč, hubic na tvrdé podlahy, hubic na štěrbiny,
hubic na čalounění a kartáč na prach lz připojit přímo na t l skopickou tyč an bo na držák hadic . Turbohubic
musí být n jprv připoj na k dodané spojc a poté ji lz připojit k držáku hadic .
DŮLEŽITÉ: Volit lná turbohubic j urč na pouz k vysávání kob rců, rohoží a podobných mat riálů
odolných proti poškrábání. Turbohubicí n čistět nábyt k či mat riály s j mnou t xturou, ani jiné vysoc kvalitní či
l štěné podklady – mohlo by dojít k j jich poškoz ní. V případě pochybností turbohubici n použív jt . V každém
případě dodržujt pokyny pro péči a čištění poskytované příslušným výrobc m.
Kob rc
Tvrdé podlahy
18
!
12
C89-P7 v1.2alleSprachenTeil1_User guide 21.12.11 07:52 Seite 18
All manuals and user guides at all-guides.com

12
1
2
Údržba (Udržujt svůj vysavač Vax jako nový) CZ
Slož ní a skladování
Vyprázdnění a čištění nádoby na n čistoty
POZNÁMKA: Na zadní straně vysavač j záchytná drážka pro up vnění hubic a trubky při př náš ní n bo
skladování vysavač .
VÝSTRAHA: Př d vyprazdňováním nádoby na n čistoty odpojt přístroj od napáj ní.
VÝSTRAHA: Př d čištěním filtru odpojt přístroj od napáj ní.
DŮLEŽITÉ: Př d použitím vysavač mus jí být j ho části zc la suché.
Vykl p jt
40°C max
!
Čištění př dmotorového filtru
24 hod.
19
!
!
!
C89-P7 v1.2alleSprachenTeil1_User guide 21.12.11 07:52 Seite 19
All manuals and user guides at all-guides.com
Other manuals for power7
1
Table of contents
Languages:
Other Vax Vacuum Cleaner manuals

Vax
Vax V027 User manual

Vax
Vax H85-ACH-B Specification sheet

Vax
Vax essentials VEU-104 User manual

Vax
Vax VCAPH1500 User manual

Vax
Vax LiFE2-in-1 Specification sheet

Vax
Vax MACH 7 VZL-6017 Series User manual

Vax
Vax Oasis User manual

Vax
Vax Rapide Classic V-025 Series User manual

Vax
Vax Lightweight V-044AP User manual

Vax
Vax VHFM700 User manual

Vax
Vax VZL-901 User manual

Vax
Vax Rapide Spring Clean VCWRS700 User manual

Vax
Vax U90-MVX-P User manual

Vax
Vax VX48 User manual

Vax
Vax VX74 User manual

Vax
Vax Essentials VEC-01 User manual

Vax
Vax C91-P1 SERIES User manual

Vax
Vax ALL TERRAIN V-125 User manual

Vax
Vax W86-DP-B User manual

Vax
Vax Rapide Ultra W90-RU User manual