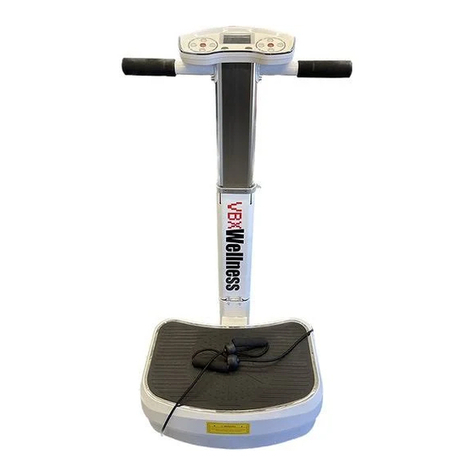
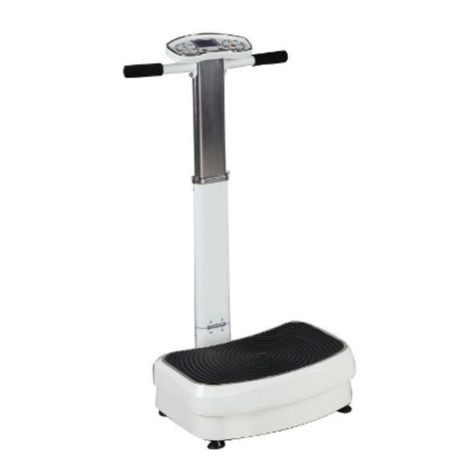
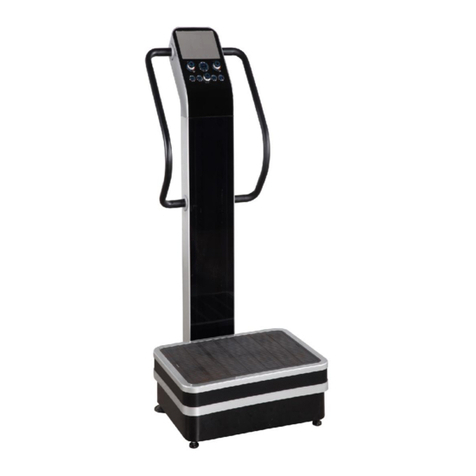
VBX Wellness 4000 User manual

Safety Information
Warranty Information
Machine Diagram
Assembly Instructions
Display Diagram
Control Panel Diagram
Control Panel Operation
Modes & Programs
Operating Instructions
Specifications
Quick Reference
02-03
03
04
05
06
07
08-09
09-10
11
12
13
BEFORE USE…
•Check the exercise speed before operating to ensure it’s at a safe and comfortable
level for you.
•Hold the safety handle before beginning the program to ensure your balance.
•Keep a recommended gap of 30cm between your feet in the initial stages.
•Prior to cleaning the machine, make sure the machine is off and the power cord is
unplugged.
✴NOTE: Using corrosive cleaner is prohibited. Do not use benzene or thinner to
clean the machine. Do not spray insecticide on the machine.
•When the machine is not in use, turn off the power and unplug the power cord, to
both save energy and reduce the risk of fire.
•When the machine is not in use, use a cover to protect the vibration plate from
accumulating dust.
USE CAUTION
•IMMEDIATELY DISCONTINUE USE IF YOU HAVE ANY DISCOMFORTS AND
DO NOT RESUME USE UNTIL CONSULTING A PHYSICIAN.
•Do not coil the power cords, as this may cause the machine to malfunction and
could damage the power cords.
•Do not exercise in the same pose for more than ten (10) minutes, as this may
result in muscle cramping.
•Do not operate the machine with more than one person at a time, as this may
result in injury or machine damage.
•Do not operate the machine with wet hands, as this could cause an electric shock.
of213
SAFETY INFORMATION
TABLE OF CONTENTS

•Do not reduce or use force to relocate the product, as this may cause damage to
the machine.
•Do not store the vibration plate near heat or open flame; in direct sunlight or high
temperatures for a prolonged period of time; or in humidity.
•Do not use any kind of sharp tools (i.e. knife) on the vibration plate.
•Do not use the machine 30 minutes before and after eating a meal.
•Do not use the machine for any purpose other than exercise.
•Do not use the machine in wet areas (i.e. bathroom), as this may result in electrical
shock.
•Do not use the vibration plate for any purpose other than its intended use, as
described in this manual.
FIVE (5) YEAR - Limited Warranty
The manufacturer warrants that this machine, when subject to normal and proper use,
will be free from manufacturing defects for a period of five (5) years from the date of
purchase. Should any defect occur during the specified time period, the manufacturer
will repair the defective product, or provide replacement parts and components
material, at its own option. The manufacturer also reserves the right to issue a full
refund of the purchase price in lieu of repair or replacement. This warranty is not
transferable. This warranty replaces all other oral or written warranties, liabilities or
obligations of the manufacturer. Pertinent state law shall control for what period of time
following the purchase a consumer may seek a remedy under the implied warranty of
merchantability or fitness for a particular purpose. In no event shall the manufacturer
be liable for consequential or incidental damages of any kind resulting from the breach
of this warranty. Some states do not allow limitations on - or the exclusion of -
incidental or consequential damages, so the above exclusions may not apply to you.
This warranty gives you specific legal rights, and you may also have other rights which
vary from state to state.
of313
WARRANTY INFORMATION

1. Screw (M5x8)
2. Display Board
3. Signal Line Connectors
4. Deco Cover
5. Handrail
6. Tower
7. Screw (M8x55)
8. Screw (M8x20)
9. Gaskets
10. Step Board
11. Base
of413
MACHINE DIAGRAM
1
2
3
4
5
6
7
8
9
10
11

1. Place the base on a flat surface.
•NOTE: The base is extremely heavy. We recommend two
people removing it from the packaging.
2. Using the tower, connect the upper and lower signal lines.
•NOTE: We recommend having one person hold the tower
firmly, while the other connects the signal lines.
3. Attach the base and tower together.
•NOTE: Use care when attaching the pieces, as they can jam
the signal cables, which will result in the machine not working
as intended.
4. Lock the base and tower together tightly with the
appropriate screws (included).
5. Install the handrails to the tower with the appropriate screws
(included).
6. Adjust the horizontal cushion to set the machine steady.
7. Connect the power plug.
8. Turn on the power switch (located on the backside of the
base).
9. Press the START button.
of513
ASSEMBLY INSTRUCTIONS

of613
DISPLAY DIAGRAM
1
2
3
4
5
6
7
8
9
10-2
10-1
11
12
13
14

of713
CONTROL PANEL DIAGRAM
1
2
3
4-1
4-2
4-3
4-4
4-5
5-1
5-2
6
7
8
9
10-2
10-1
11-2
11-1
12
13
14
15

1. The pulse indicator light flickers when the machine detects your pulse.
2. The linear vibration time display displays the linear vibration time or displays
the linear and horizontal vibration times combined. The preset time is 0-20 minutes.
3. The linear vibration speed display displays the linear vibration speed, ranging
from L00-L60
•NOTE: When the display reads “L00”, the horizontal vibration will not work.
4. The mode/program lights will turn on when selected. [see page 07]
4.1. Manual mode
4.2. USB
4.3. Auto Program (P1)
4.4. Auto Program (P2)
4.5. Auto Program (P3)
5. The linear vibration time/speed button will adjust the linear vibration time
when displaying time, or the linear vibration speed when in manual mode.
5.1. (+) will increase linear vibration time/speed
5.2. (–) will decrease linear vibration time/speed
6. The on/off button turns the display on and off.
7. The time button adjusts the vibration time when the machine is not in manual
mode.
8. The program button changes the program mode. Pressing the button cycles
through manual mode and auto program P1-P3, when a USB is not inserted, or
cycles through USB user programs U1-U6, when a USB is inserted.
9. The mode/time change button cycles between displaying mode or time on both
#2 and #14 displays simultaneously.
10. The time/speed buttons adjust the vibration time, when displaying time, or the
vibration speed, when displaying speed.
10.1.(+) will increase vibration time or speed by two
10.2.(–) will decrease vibration time or speed by two
of813
CONTROL PANEL OPERATION

11. The horizontal vibration time/speed button will adjust the horizontal vibration
time when displaying time, or the horizontal vibration speed when in manual mode.
11.1. (+) will increase horizontal vibration time/speed
11.2. (–) will decrease horizontal vibration time/speed
12. The horizontal vibration speed display displays the horizontal vibration speed,
ranging from H00-H60
•NOTE: When the display reads “H00”, the linear vibration will not work.
13. The horizontal vibration time display displays the horizontal vibration time or
displays the horizontal and linear vibration times combined. The preset time is 0-20
minutes.
14. The time indicator indicates the time.
15. The USB interface is where the (optional) USB gets plugged in.
Manual Mode
There are three (3) preset manual programs. Each program runs for ten (10) minutes.
•P1: Cardio - both vibration modes work together, with the speed changing one (1)
time every five (5) seconds.
•P2: Detoxify - both vibration modes work together, with the speed changing one
(1) time every five (5) seconds.
•P3: Full Body - one (1) vibration mode works while the other does not, with the
speed changing one (1) time every two (2) seconds.
User Programs
You can define the program by using a USB flash drive and connecting it to the
machine.
of913
MODES & PROGRAMS

How To Use Modes & Programs
1. Open the reset interface by double clicking ‘BOCH-USB-DUL’ under ‘BOCH-USB’ in
the USB flash drive.
2. You can choose U1-U6 by clicking User’s Defined Program.
3. Fill in the data as desired. (Speed range: 0-60 seconds)
•Checking ONCE means that the vibration mode will only run that pattern once.
•Checking LOOP and entering running time (1-12 minutes) means that the
vibration mode will repeat during the running time.
4. After amending the data to your preference, you will see the Running Column
change. The height of the column indicates speed, while the width of the column
indicates the time.
5. Function buttons access the data files.
•LOAD FACTORY accesses the factory data.
•LOAD DEFAULT accesses the data that you set.
•SAVE DEFAULT saves the data as ‘active.’
6. Insert the USB flash drive into the machine.
of10 13
Running Column
Function Button
“H” Vibration Data
“L” Vibration Data
User’s Defined Program

1. Insert the power plug into the power socket on the back side of the base (vibration)
plate, check the voltage, and switch on.
2. Prepare for your desired posture on the vibration plate.
3. Press START to being the program.
•NOTE: When using automatic program modes, the speed cannot be adjusted
manually. The machine will alternate the vibration speed at the preset intervals.
To use the puls-i-meter, hold the metal sheet on the handrail when the machine is
stopped. The pulse light will flicker according to your pulse and will display “ECG-P085,”
with the last three digits being your pulse. If the pulse light does not flicker, check if the
metal sheet is clean and dry.
It is strongly advised to drink at least 20oz of water after each use.
For best results, complete one session in the morning and one session in the evening,
with a minimum 15-20 minute break between sessions.
WARNING: DO NOT USE THE MACHINE FOR MORE THAN TEN (10) MINUTES
PER SESSION OR TWENTY (20) MINUTES PER DAY.
of11 13
OPERATING INSTRUCTIONS

of12 13
SPECIFICATIONS
Machine Color
Black
Light Color
Blue
Machine Height
58”
Machine Weight
126 lbs
Max Weight Capacity
400 lbs
Footprint
26” x 20”
Base Height
8.5”
Base Amplitude
10mm
Frame Construction
Steel
Motor
2: Horizontal, Linear
Motor Horsepower
2.0 HP Duty
Motor Wattage
800W
Vibration Speeds
120
Vibration Force
15.4 G’s
Operating Frequency
1Hz-60Hz
Programs
9+: 3 Pre-Programmed, 6 User Defined
(w/ USB), + hundreds available (w/ USB)

The ‘H’ (horizontal) vibration is the triangular oscillation vibration, which is good for
muscle contraction. This type of vibration is the one that gives you a workout.
The ‘L’ (linear) vibration is the more subtle spiral vibration, which is more therapeutic
than the ‘H’ vibration. It helps improve circulation, reduce inflammation, assists with
muscle recovery, etc.
Using both vibrations at once intensifies the effect of each vibration. There really isn’t a
“magic” way to use the machine; the most important part is using it consistently –
which is how you’ll see the best results.
Different users will use the machine at different speeds. An elderly person, for example,
would use the machine at lower speeds while an elite athlete would use higher speeds.
As a general recommendation, start out at speeds below 30 for the first few weeks of
use and slowly go faster and faster as your body allows. Experimenting with varying
speeds is also good to do, as different speeds affect your body differently. This is where
the preset programs (P1-3) come in handy – they change the speed automatically and
frequently, which gives your body a different stimulus than simply maintaining a
consistent speed. When keeping the speed consistent, pick five (5) different positions
(see pg. 9-12) and hold each position for 1-2 minutes. When the speed varies, stand
with legs straight, bend your knees slowly, hold it, and return to the starting position.
It’s recommended to use the machine twice per day: in the morning, use a consistent
speed, and in the evening, utilize the varying speeds. Be sure to give your body at least
one day of rest per week. Be careful not to overdo it in the beginning; this is a common
mistake.
of13 13
Quick Reference
Table of contents
Other VBX Wellness Fitness Equipment manuals