Vega CAMtronic User manual

VEGA
DYNAMIC SCREEN
CAMtronic
Version 20181212
USER MANUAL

VEGA
DYNAMIC SCREEN
CAMtronic
Version 20181212
Description
Introduction
VEGA is a dynamic multimedia display. This standalone module connects on a screen and to your network. The user
can then send to the box a file to display via his Internet browser.
Log in
The VEGA case has a power connector (with an on / off button), an HDMI port for connection to the display, an
Ethernet port for network connection, and a USB port for the CEC module. The box comes with a USB key containing
its configuration file.
CEC module connection
The CEC module is an option. It allows the VEGA module to automatically control the screen to turn it off and on at
fixed times (see configuration file). To use this HDMI-CEC module, connect VEGA to the CEC module (PC) via a mini
HDMI cable and then the CEC module to the screen (TV). Finally, connect the micro USB cable of the CEC (DATA)
module to the VEGA USB port (next to the HDMI port).

VEGA
DYNAMIC SCREEN
CAMtronic
Version 20181212
Configuration
USB key
VEGA modules come with a USB configuration key. This key must be inserted on the module when it is started and
must remain in place during module operation. This key contains :
The "vega.ini" configuration file of the module,
The module configuration software (Windows and Mac),
Possibly your logo in the form of an image,
Possibly some files to read at startup in ‘files’ directory.
Module configuration
To configure the VEGA module, remove the USB flash drive and insert it into your computer. On the key, run the
VEGA configuration program (.exe for Windows or .app for Mac). Follow the on-screen instructions and save the
configuration. Once the configuration has been saved, remove the key and insert it back into the VEGA module.
Logo
VEGA can display your logo in the background when it does not display a slideshow. To use this function, select your
PNG or JPG image in the 'logo' section of the configuration software. The VEGA module will display it automatically
when it does not display a slide show. The dimensions of the image must be smaller than that of the screen. For a
Full HD display (1920 * 1080), we recommend an image of 1000 pixels by 600 pixels maximum.
Startup file
VEGA can display files directly at module startup without going through its administration interface and without
network. To do this, simply copy your files to its configuration USB key in the ‘files’ directory.

VEGA
DYNAMIC SCREEN
CAMtronic
Version 20181212
Start and stop
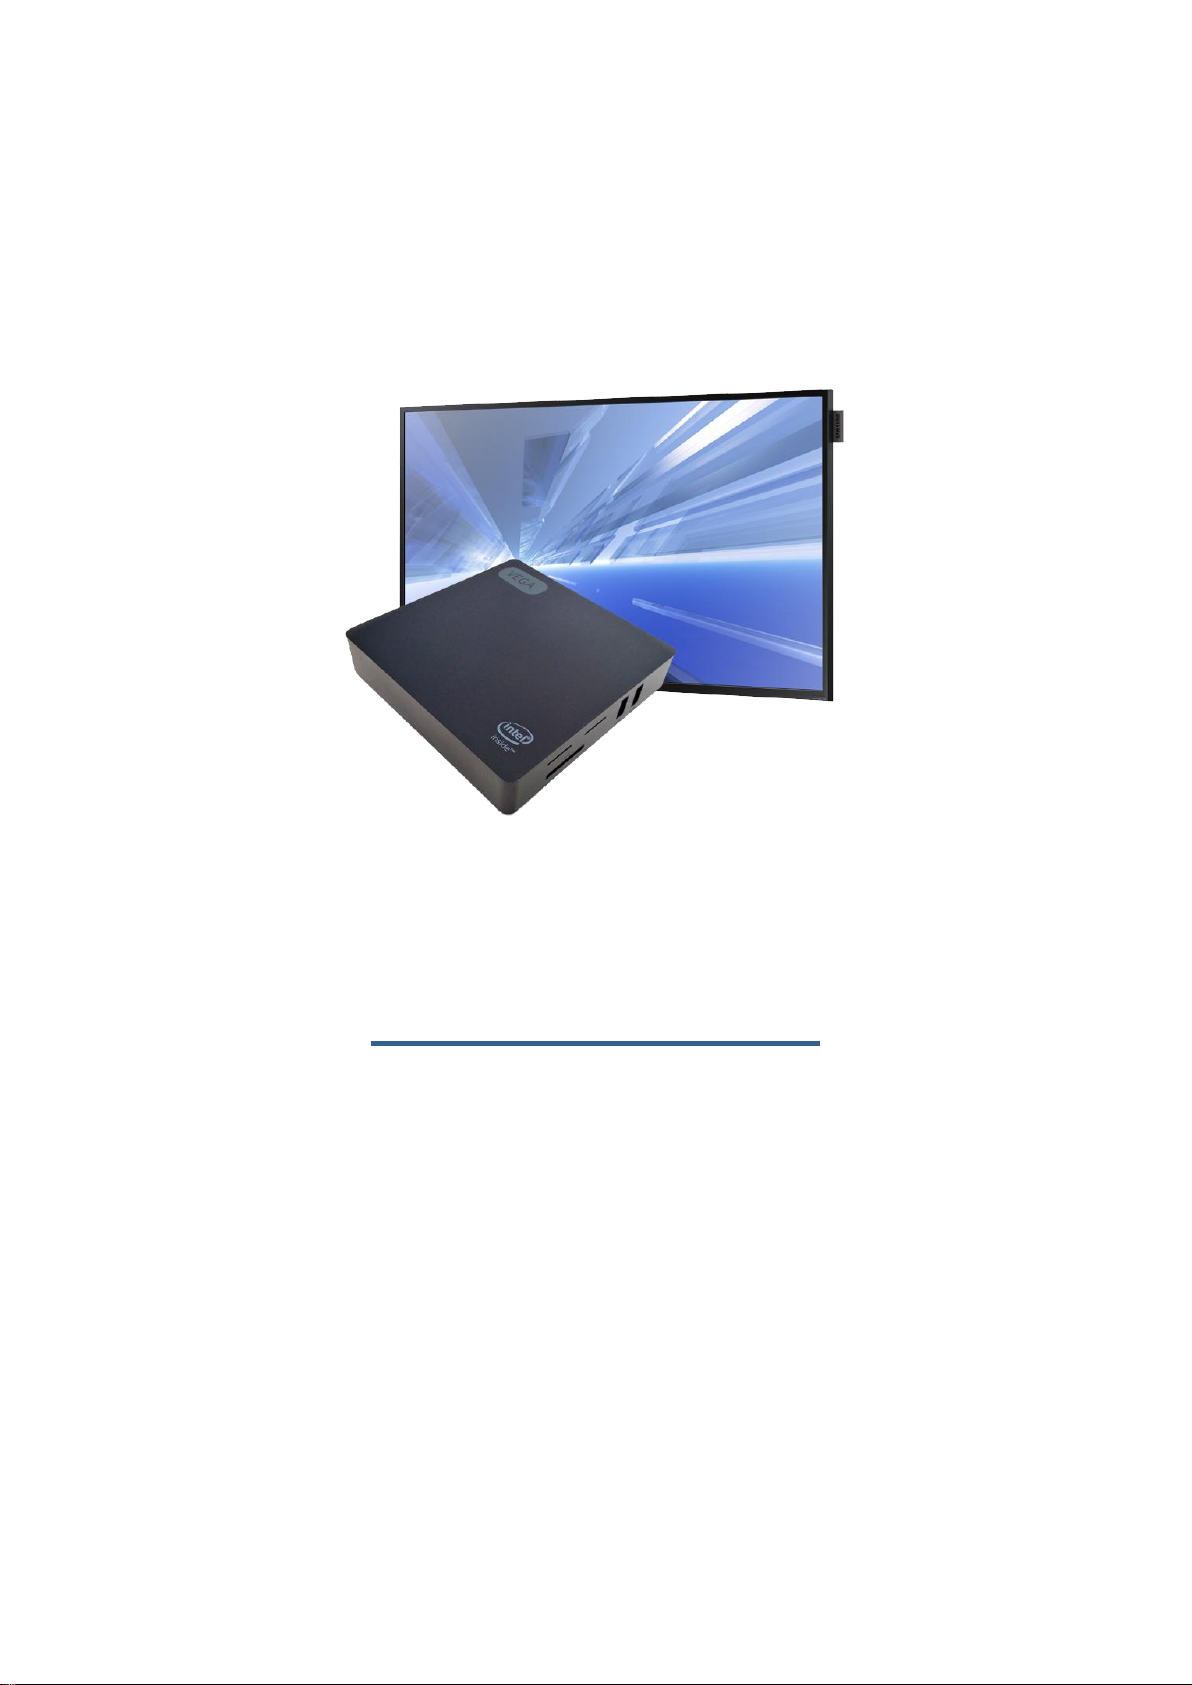
To start VEGA, connect the module to the display using the HDMI cable. If necessary, connect the CEC module and
connect the network via an Ethernet cable if this mode is used. Then plug in its power and press the VEGA power
button for a few seconds. A small blue LED on the front of the module indicates that it has started well. To stop it,
simply press its power button again and wait for the blue LED to go out before removing the power plug.
CAUTION: VEGA uses an internal hard drive and should never be shut down by unplugging the module directly.
This can cause a total loss of the system. Always stop the module via its power button.
First connection
At startup, the VEGA screen displays all the operations it performs (file configuration, network connection, etc ...). If
one of the configuration parameters is wrong, VEGA will indicate it in its start screen. In this case, stop the module
with the power button and change its configuration to fix the error. When the module starts correctly (correct
configuration file and successful network connection), the module displays the network address to which it can be
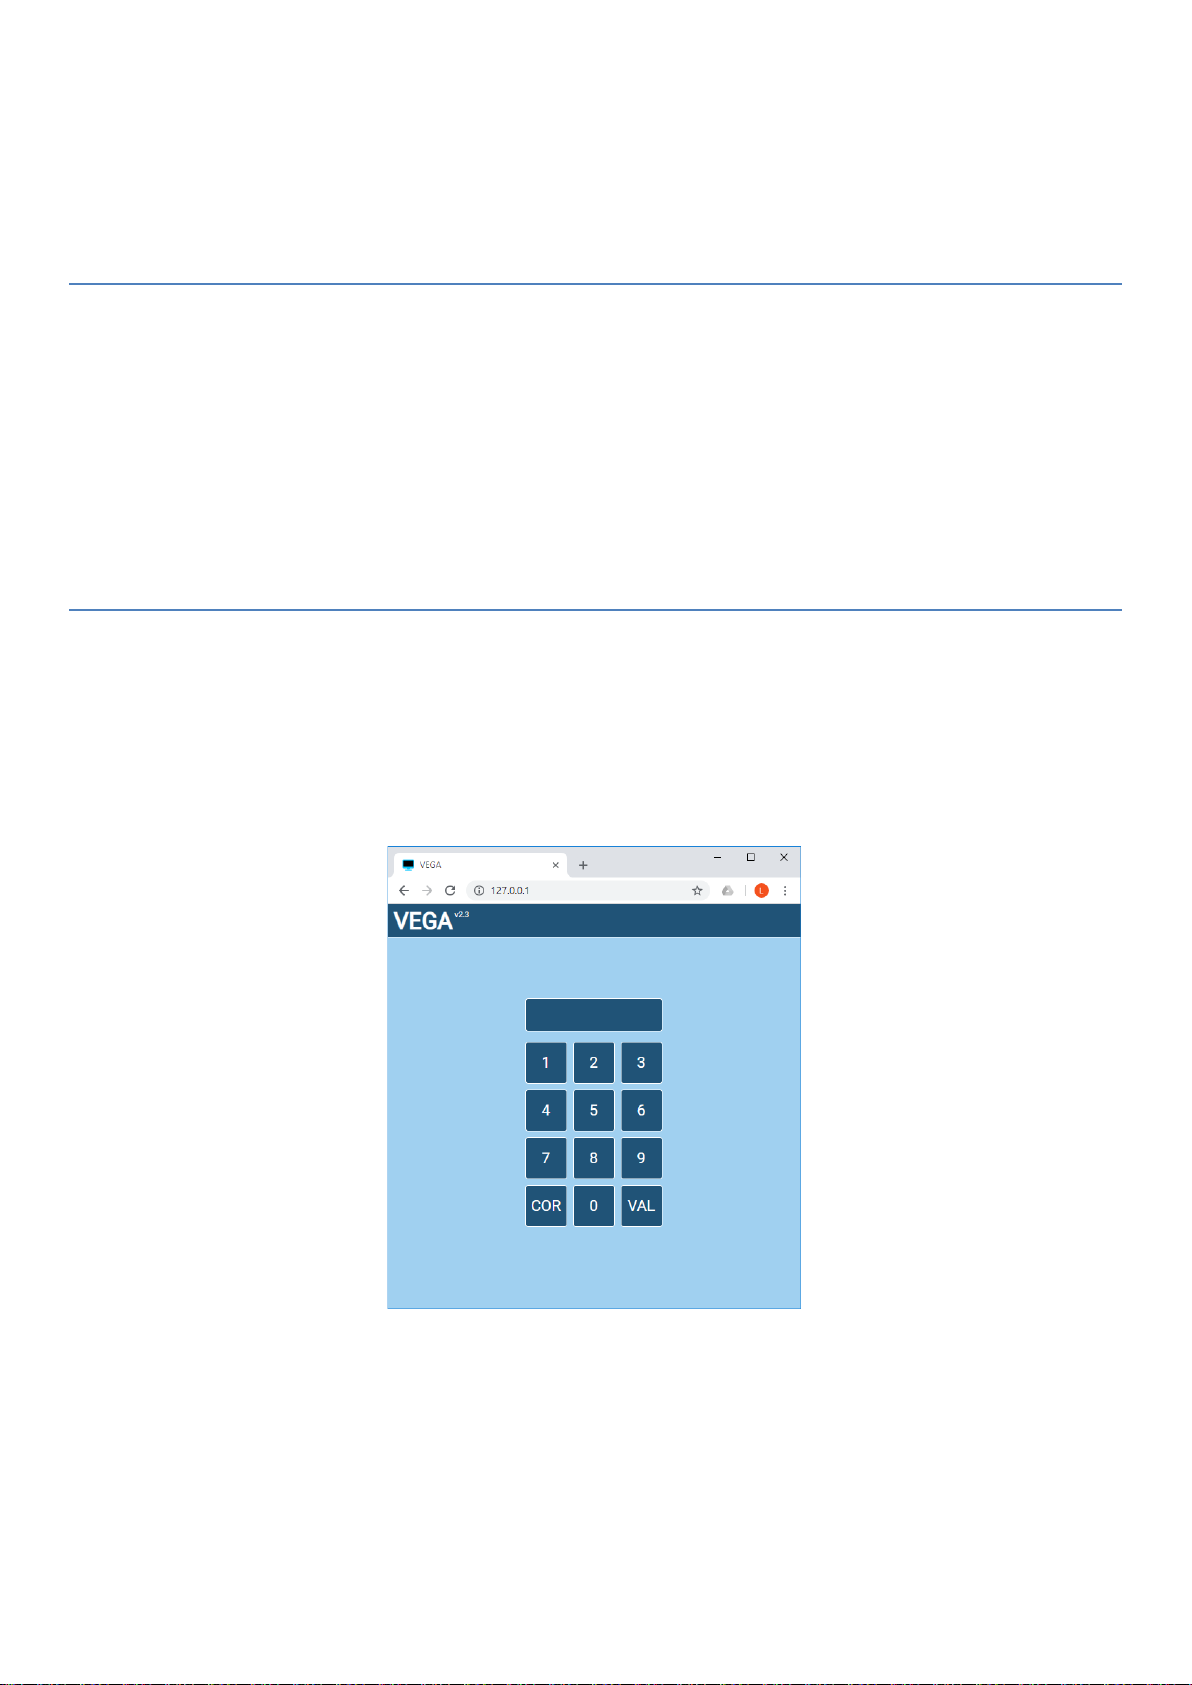
attached (for example: 192.168.5.55). On your computer, launch your browser and type the address indicated by
VEGA in the address bar of the browser and press the "enter" key. The following interface appears:
Type the module pin code and click on the "VAL" button. The VEGA interface appears (the number of screens
displayed depends on the number of VEGA modules on the network).
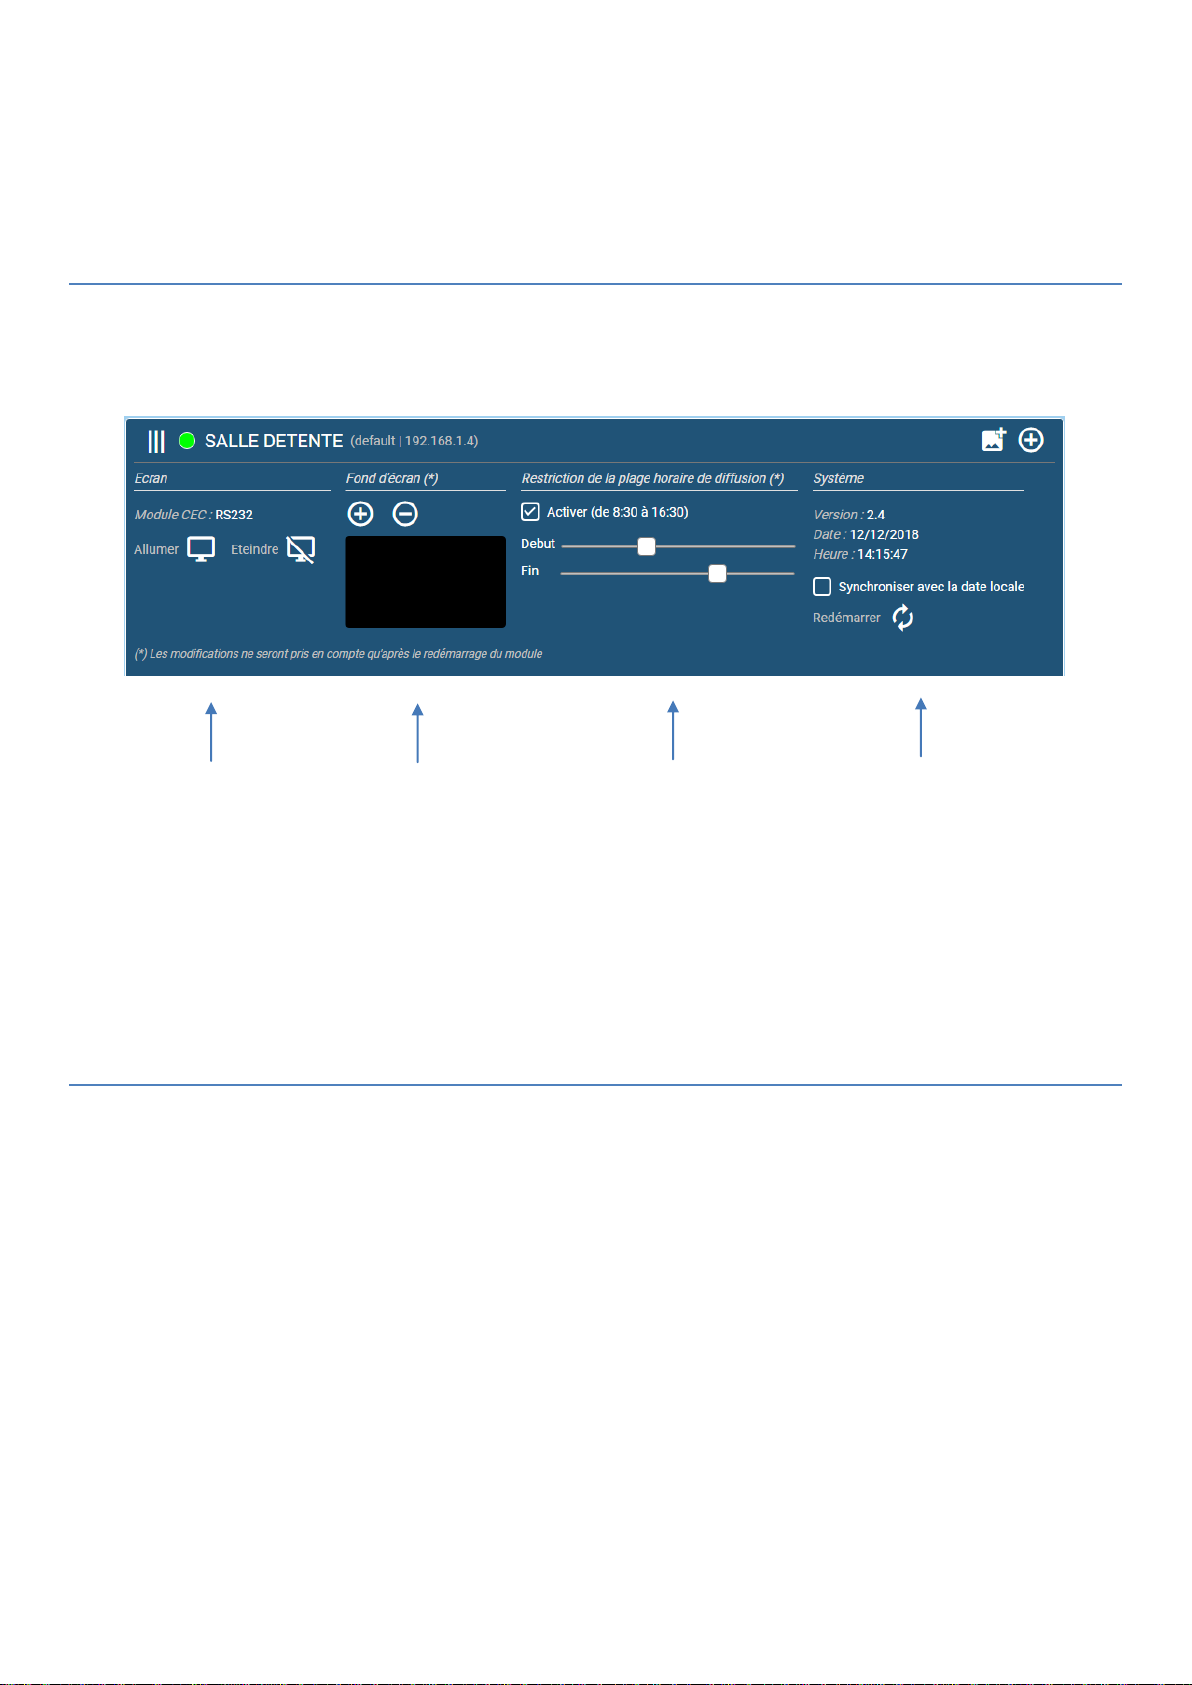
Note 1 : A correctly entered PIN code is automatically saved in the browser. He will not be asking again at the next
login. If you want to log out, click the logout button at the top right of the interface.
Note 2 : VEGA modules automatically form a shared network between the different screens. When you connect to
one of the modules, you automatically have access to all the screens in the group (see Group multiple screens).

VEGA
DYNAMIC SCREEN
CAMtronic
Version 20181212
Main screen
Each VEGA screen is display as follow :
Screen status (CEC module)
Gray - no CEC module detected
Red - screen off
Orange - transient state or unknown
Green - screen on
Name and IP address of the screen
Add a photo album
Add a file
Delete this file
File type and playing
time
Reading in progress
File name
Menu for additional options

VEGA
DYNAMIC SCREEN
CAMtronic
Version 20181212
Additional options
By clicking on the screen menu, you get the following additional options:
Warning : some modifications require a restart of the module.
Guidelines for your slideshows
To be presented and displayed correctly, PowerPoint®, Libre Office, or Open Office files must be properly configured.
Here are the instructions for your presentations:
Layout
Preferably use a layout format close to the screen display format (usually 16: 9). For example, in PowerPoint® 2010,
select the 'create' then 'layout' tab and choose the 'On Screen Display (16: 9)' format. Under Libre Office, in the
menu 'slide' then 'properties' choose the format '16: 9 screen'.
Slideshow mode
A PowerPoint® file without animations and transitions will automatically be played for 10s. For your slideshows, do
not use the 'watched by a terminal' mode. This has the effect of playing the file in a loop without VEGA detecting
the end of the file.
System version and
date in real time
Module restart
button with
possibility to
synchronize its clock
to your PC
Automatic switching
on and off of the
screen at certain
times
CEC module type
Manual screen on /
off button
Wallpaper or logo
image

VEGA
DYNAMIC SCREEN
CAMtronic
Version 20181212
Shortcut on the desktop
For even easier use of the software, you can create an application shortcut on your desktop. Here is an example of
creating a shortcut with the Google Chrome browser on Windows:
Launch the browser and connect to a VEGA module,
Optionally type your pin code to get the screen page,
In the Chrome menu at the top right, choose 'More tools' then 'Add to desktop ...',
In the window that opens, click on the 'Add' button,
Close Chrome,
You can now directly launch the application by its shortcut on your desktop.
Supported formats
The VEGA module is compatible with the following formats:
PowerPoint® .pptx, .ppsx,
Adobe® PDF,
Any photo format (jpg, png, gif, etc.),
Any video format (avi, flv, mov, mp4, etc ..),
Photos album (directory).

VEGA
DYNAMIC SCREEN
CAMtronic
Version 20181212
Group multiple screens
If you have several VEGA modules, you can group them under a common domain ("group" parameter of the
configuration file). To do this, specify the same group name for the screens to be grouped (example: group =
"purchase service"). In this configuration, when you connect to one of the modules in the group, you will only have
access to the identified group of screens. Here is an example of a possible configuration:
In this example, the managers of the 'purchase service' and 'administrative' services only see the screens of their
respective services in their interfaces. They can display slide shows thanks to the pin code provided by the IT
manager. The IT manager has access to both networks by connecting to one or the other network.

VEGA
DYNAMIC SCREEN
CAMtronic
Version 20181212
Software update
To update the VEGA software via the network :
• Download the latest version of the software from http://camtronic.fr/vega (".cam" file),
• In the interface, click on the icon next to the VEGA version number,
• In the window, select the update file,
• The update file is downloaded to each module and then each module is restarted,
• You can cancel your update at any time by clicking the cancel button,
• When all the modules have restarted, refresh your browser.
To update the VEGA software manually:
• Download the latest version of the software from http://camtronic.fr/vega (".cam" file),
• Switch off VEGA and copy the downloaded file to its configuration USB key,
• Restart the module.
Table of contents