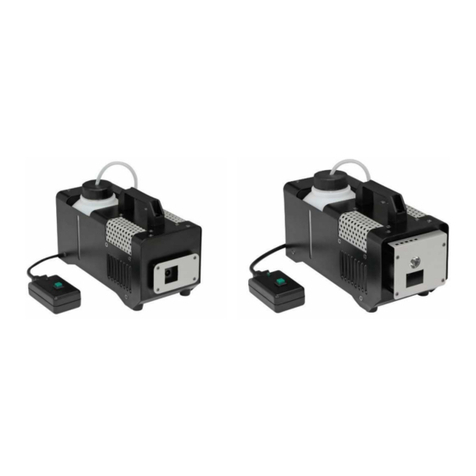
Velleman HQ Power HQSM10006 User manual

HQSM10006
V. 01 –06/01/2016 2 ©Velleman nv

HQSM10006
V. 01 –06/01/2016 3 ©Velleman nv

HQSM10006
V. 01 –06/01/2016 4 ©Velleman nv
terminator
eindweerstand
résistance de terminaison
terminación
Terminierung
How to turn the controller line from 3-pins into 5-pins (plug and socket).
Controller line van 3-pin naar 5-pin aanpassen (stekker en contact).
Modifier la ligne du contrôleur de 3 broches en 5 broches (fiche et contact).
Modificar la línea del controlador de 3 polos y 5 polos (conector y contacto).
Die Controller-Linie von 3-Pin nach 5-Pin anzupassen (Stecker und Kontakt).

HQSM10006
V. 01 –06/01/2016 5 ©Velleman nv
USER MANUAL
1. Introduction
To all residents of the European Union
Important environmental information about this product
This symbol on the device or the package indicates that disposal of the device after its lifecycle
could harm the environment. Do not dispose of the unit (or batteries) as unsorted municipal
waste; it should be taken to a specialized company for recycling. This device should be returned
to your distributor or to a local recycling service. Respect the local environmental rules.
If in doubt, contact your local waste disposal authorities.
Thank you for choosing HQPower™! Please read the manual thoroughly before bringing this device into
service. If the device was damaged in transit, do not install or use it and contact your dealer.
2. Safety Instructions
Be very careful during the installation: touching live wires can cause life-threatening
electroshocks.
Always disconnect mains power when device not in use or when servicing or
maintenance activities are performed. Handle the power cord by the plug only.
Indoor use only. Keep this device away from rain, moisture, splashing and dripping
liquids. Never put objects filled with liquids on top of or close to the device.
Keep this device away from children and unauthorized users.
Caution: device heats up during use.
Do not connect this device to a dimmer pack.
Install the device at a minimal distance of 12 m from flammable and explosive
objects or substances.
Respect a minimum distance of 3 m between the device’s output and any
surface.
There are no user-serviceable parts inside the device. Refer to an authorized dealer
for service and/or spare parts.
This device falls under protection class 1. It is therefore essential that the device be earthed. Have a
qualified person carry out the electric connection.
Make sure that the available voltage does not exceed the voltage stated in the specifications of this
manual.
Do not crimp the power cord and protect it against damage. Have an authorised dealer replace it if
necessary.
Use an appropriate safety cable to fix the device (e.g. VDLSC7N or VDLSC8N).
The maximum ambient temperature is 45 °C. Do not operate the device at higher temperatures.

HQSM10006
V. 01 –06/01/2016 6 ©Velleman nv
3. General Guidelines
Refer to the Velleman®Service and Quality Warranty on the last pages of this manual.
Keep this device away from dust and extreme temperatures. Make sure the ventilation
openings are clear at all times. For sufficient air circulation, leave at least 6" (± 15 cm) in
front of the openings.
Protect this device from shocks and abuse. Avoid brute force when operating the device.
Familiarise yourself with the functions of the device before actually using it. Do not allow operation by
unqualified people. Any damage that may occur will most probably be due to unprofessional use of the device.
All modifications of the device are forbidden for safety reasons. Damage caused by user modifications
to the device is not covered by the warranty.
Only use the device for its intended purpose. All other uses may lead to short circuits, burns, electroshocks,
lamp explosion, crash, etc. Using the device in an unauthorised way will void the warranty.
Damage caused by disregard of certain guidelines in this manual is not covered by the warranty and
the dealer will not accept responsibility for any ensuing defects or problems.
Mechanical wear and LEDs are not covered by warranty.
A qualified technician should install and service this device.
Do not switch the device on immediately after it has been exposed to changes in temperature.
Protect the device against damage by leaving it switched off until it has reached room temperature.
This device is designed for professional use on stage, in discos, theatres, etc.
Use the appropriate power supply (see Technical Specifications below).
There may be some smoke or a particular smell when the device is activated for the first time. This is
normal and any smoke or smell will gradually disappear.
Use the original packaging if the device is to be transported.
Keep this manual for future reference.
4. Features
burst function and intense, large effects
on-board LCD control allows quickly and easily setting of DMX function, output volume and fluid
sensor
adjustable forward and upward outputs
removable 2.5 L fluid tank
1 DMX channel for ease of use in production situations
fluid sensor: device shuts off automatically when the fluid is low
5. Overview
Refer to the illustrations on page 2 of this manual.
1
power input + fuse holder
6
fluid level
2
on-off switch
7
carrying handle
3
DMX input + output
8
safety eyelet
4
display + control buttons
9
output nozzle
5
fluid tank access door

HQSM10006
V. 01 –06/01/2016 7 ©Velleman nv
6. Installation
Have the device installed by a qualified person, respecting EN 60598-2-17 and all other applicable norms.
The carrying construction must be able to support 10 times the weight of the device for 1 hour
without deforming.
The installation must always be secured with a secondary attachment e.g. a safety cable.
Never stand directly below the device when it is being mounted, removed or serviced. Have a
qualified technician check the device once a year and once before you bring it into service.
Install the device in a location with few passers-by that is inaccessible to unauthorised persons.
Install the device in a location where you can easily access the power cord.
Install the device in a well-ventilated area.
Overhead mounting requires extensive experience: calculating workload limits, determining the
installation material to be used… Have the material and the device itself checked regularly. Do not
attempt to install the device yourself if you lack these qualifications as improper installation may
result in injuries.
For truss mounting, use an appropriate clamp (not incl.) and fit an M10 bolt through the centre of the
(folded) bracket.
Adjust the desired inclination angle via the mounting bracket and tighten the bracket screws.
Make sure there is no flammable material within a 0.5 m radius of the device.
Have a qualified electrician carry out the electric connection.
Connect the device to the mains with the power plug. All devices must be powered directly off a
grounded switched circuit. Do not connect to a dimmer pack.
The device has a power output to supply power to another device. When connecting several devices
in a daisy chain via this output, make sure that the total current does not exceed the power line’s
nominal current. Use power cables with an adequate section.
The installation has to be approved by an expert before the device is taken into service.
7. Operation
7.1 Preparing Your Smoke Machine
1. Make sure the smoke machine is switched off.
2. Open the tank compartment, remove the fluid tank from its compartment and remove the cap.
3. Verify that the plastic hoses attached to the cap are in place and in good condition.
4. Pour smoke fluid into the tank and close the tank.
5. Replace the tank into its compartment and close the compartment. Make sure the plastic hose
entering the smoke machine from the fluid tank is not bent or kinked.
6. If you have not done so, connect the smoke machine to the mains, switch it on and let it warm up.
The smoke machine is ready-to-use after approximately 7 minutes.
In any operation mode, the display must read READY TO FOG to output
smoke.
7.2 Using your Smoke Machine
Control Panel Description
FUNCTION
enter the programming mode
VOLUME
output volume control
TIMER
start timer operation
MANUAL
manual smoke output
UP
upwards through the menu list
DOWN
downwards through the menu list
Menu
Refer to the illustration on page 3 of this manual.
HQSM10006
V. 01 –06/01/2016 8 ©Velleman nv
Start-Up
1. Make sure the smoke machine is switched off before connecting it to the mains.
2. Switch on the smoke machine.
3. Press <VOLUME>.
4. Adjust the smoke output volume with <UP> or <DOWN>.
DMX Configuration
To set the smoke machine in DMX mode:
1. Connect the smoke machine to the mains, switch it on and let it warm up.
2. Connect a DMX cable to the DMX input of the smoke machine and the DMX output of a controller
(not included).
3. To activate the DMX function, press <FUNCTION> repeatedly until DMX512 ADD is displayed.
Select the start address from 1 to 512 with <UP> or <DOWN>.
Make sure that the starting address of the interconnected smoke machines
do not overlap.
A DMX terminator is recommended for installations where the DMX cable has to run a long distance or is
in an electrically noisy environment (e.g. discos). The terminator prevents corruption of the digital
control signal by electrical noise. The DMX terminator is simply an XLR plug with a 120 Ω resistor
between pins 2 and 3, which is then plugged into the XLR output socket of the last device in the chain.
Setting the Output Volume
1. Press <FUNCTION> repeatedly until VOLUME OUT is displayed.
2. Select the desired output volume (1-100 % or non-stop) with <UP> or <DOWN>.
3. Press <VOLUME> to confirm.
4. Press <VOLUME> again to trigger the smoke at the set output.
The smoke machine will memorize the set output after switch-off. To reset
the smoke output, repeat the steps above.
Activating the Fluid Sensor
The integrated fluid sensor measures the fluid level in the tank. To activate the fluid sensor:
1. Press <FUNCTION> repeatedly until FLUID SENSOR is displayed.
2. Select ON with <UP> or <DOWN>.
3. Select OFF with <UP> or <DOWN> to deactivate the fluid sensor.
Timer Mode
In timer mode, the smoke machine will output smoke in pre-configured time intervals (see Timer Mode
Parameters below).
1. Press <TIMER> until a timer is displayed.
2. The smoke machine starts outputting smoke when the counter reaches zero (0).
3. Set the timer duration in the DURATION SET menu option; set the output volume in the TIMER OUT
menu option.
4. The cycle repeats itself until you press <TIMER> again or until the smoke machine runs out of
fluid.
Manual Mode
In manual mode, the smoke machine will output smoke for as long as the button remains pressed. The
output volume will be at 100 % output volume.
1. Keep <MANUAL> pressed to output smoke.
2. Release <MANUAL> to stop the smoke output.

HQSM10006
V. 01 –06/01/2016 9 ©Velleman nv
Time Mode Parameters
These parameters determine the interval and output volume in timer mode.
1. Press <FUNCTION> repeatedly until INTERVAL SET is displayed.
2. Select the interval time (1-200 sec.) with <UP> or <DOWN>.
3. Press <FUNCTION> repeatedly until DURATION SET is displayed.
4. Select the duration time (1-200 sec.) with <UP> or <DOWN>.
5. Press <FUNCTION> repeatedly until TIMER OUT is displayed.
6. Select the desired output volume (1-100 % or non-stop) with <UP> or <DOWN>.
8. Troubleshooting
There is no power.
Check the mains power supply.
Check the fuse.
There is no smoke output.
Check the fluid level.
Check the remote control.
The remote control does not work.
Make sure the remote control is well connected.
The fluid tank is filled but the sensor indicates it is not.
Try resetting the smoke machine by switching it off and on again.
Contact your dealer if the problem persists.
The smoke machine is not heating up.
Contact your dealer.
9. Cleaning and Maintenance
Before starting any cleaning or maintenance activities:
1. Unplug the device's power cord from the outlet.
2. Let the device cool down.
Cleaning
Make sure to empty the tank before cleaning.
Use normal glass cleaner and a soft cloth to wipe off the outside casing.
Clean the external optics with glass cleaner and a soft cloth every 20 days.
Always be sure to dry all parts completely before plugging the unit back in.
Cleaning frequency depends on the environment in which the unit operates (i.e. smoke, fog residue,
dust, dew).
Do not immerse the device in any liquid.
Maintenance
All screws should be tightened and free of corrosion.
The housing, the lenses, the mounting supports and the installation location (e.g. ceiling, suspension,
trussing) should not be deformed, modified or tampered with; e.g. do not drill extra holes in
mounting supports, do not change the location of the connections…
Mechanically moving parts must not show any signs of wear and tear.
The electric power supply cables must not show any damage. Have a qualified technician maintain
the device.
There are no user-serviceable parts, apart from the fuse and the lamp.
Refer to an authorized dealer for service and/or spare parts.

HQSM10006
V. 01 –06/01/2016 10 ©Velleman nv
9.2 Replacing the fuse
1. Unplug the device's power cord from the outlet.
2. Let the device cool down.
3. Remove the rear cover with a flat-head screwdriver.
4. Open the fuse holder.
5. Replace with an appropriate fuse.
6. Insert the fuse holder back in its place, replace the rear cover and reconnect power.
10. Technical Specifications
power supply.........................................................................220-240 V~, 50/60 Hz
power consumption .....................................................................................2000 W
fuse ............................................................................................................. F10A
heating time.................................................................................................7 min.
output ......................................................................... ca. 1699 m³, 60000 ft³/min.
tank capacity................................................................................................. 2.5 L
fluid consumption ..........................................................................450-600 ml/min.
IP rating ........................................................................................................ IP20
dimensions.............................................................................. 422 x 200 x 265 mm
options
standard smoke liquid (5 L) ....................................................................VDLSL5
high-density smoke liquid (5 L) .............................................................VDLSLH5
pro high-density smoke liquid (5 L) .....................................................VDLSLHT5
Use this device with original accessories only. Velleman nv cannot be held responsible in the
event of damage or injury resulting from (incorrect) use of this device. For more info
concerning this product and the latest version of this manual, please visit our website
www.hqpower.eu. The information in this manual is subject to change without prior notice.
© COPYRIGHT NOTICE
The copyright to this manual is owned by Velleman nv. All worldwide rights reserved. No part
of this manual may be copied, reproduced, translated or reduced to any electronic medium or otherwise
without the prior written consent of the copyright holder.

HQSM10006
V. 01 –06/01/2016 11 ©Velleman nv
HANDLEIDING
1. Inleiding
Aan alle ingezetenen van de Europese Unie
Belangrijke milieu-informatie betreffende dit product
Dit symbool op het toestel of de verpakking geeft aan dat, als het na zijn levenscyclus wordt
weggeworpen, dit toestel schade kan toebrengen aan het milieu. Gooi dit toestel (en eventuele
batterijen) niet bij het gewone huishoudelijke afval; het moet bij een gespecialiseerd bedrijf
terechtkomen voor recyclage. U moet dit toestel naar uw verdeler of naar een lokaal
recyclagepunt brengen. Respecteer de plaatselijke milieuwetgeving.
Hebt u vragen, contacteer dan de plaatselijke autoriteiten betreffende de verwijdering.
Dank u voor uw aankoop! Lees deze handleiding grondig door voor u het toestel in gebruik neemt. Werd
het toestel beschadigd tijdens het transport, installeer het dan niet en raadpleeg uw dealer.
2. Veiligheidsvoorschriften
Wees voorzichtig bij de installatie: raak geen kabels aan die onder stroom staan, om
dodelijke elektroshocks te vermijden.
Trek de stekker uit het stopcontact voordat u het toestel reinigt of als u het niet
gebruikt. Houd de voedingskabel altijd vast bij de stekker en niet bij de kabel.
Gebruik het toestel enkel binnenshuis. Bescherm het toestel tegen regen,
vochtigheid en opspattende vloeistoffen. Plaats nooit objecten gevuld met vloeistof op
of naast het toestel.
Houd dit toestel buiten het bereik van kinderen en onbevoegden.
Opgelet: de behuizing wordt zeer warm tijdens gebruik.
Niet aansluiten op een dimmerpack.
Installeer het toestel op een minimumafstand van 12 m van ontvlambare en
explosieve voorwerpen of stoffen.
Zorg voor een minimumafstand van 3 m tussen de lichtuitgang van het
toestel en het belichte oppervlak.
Er zijn geen onderdelen in het toestel die door de gebruiker gerepareerd kunnen
worden. Contacteer uw verdeler voor eventuele reserveonderdelen.
Dit toestel valt onder beschermingsklasse 1. Het toestel moet dus geaard zijn. Een geschoolde
technicus moet de elektrische aansluiting verzorgen.
De beschikbare netspanning mag niet hoger zijn dan de spanning in de specificaties achteraan de
handleiding.
De voedingskabel mag niet beschadigd zijn of ingekort worden. Laat uw dealer zo nodig een nieuwe
kabel plaatsen.
Maak het toestel vast met een geschikte veiligheidskabel (bvb. VDLSC7N of VDLSC8N).
De maximale omgevingstemperatuur bedraagt 45 °C. Gebruik het toestel nooit bij hogere
temperaturen.

HQSM10006
V. 01 –06/01/2016 12 ©Velleman nv
3. Algemene richtlijnen
Raadpleeg de Velleman® service- en kwaliteitsgarantie achteraan deze handleiding.
Bescherm tegen stof en extreme temperaturen. Zorg ervoor dat de ventilatieopeningen
niet verstopt geraken. Voorzie een minimumafstand van 15 cm tussen het toestel en elk
ander voorwerp.
Bescherm tegen schokken. Vermijd brute kracht tijdens de bediening van het toestel.
Leer eerst de functies van het toestel kennen voor u het gaat gebruiken. Ongeschoolde personen
mogen dit toestel niet gebruiken. Meestal is beschadiging het gevolg van ondeskundig gebruik van
het toestel.
Om veiligheidsredenen mag u geen wijzigingen aan het apparaat aanbrengen. Schade door
wijzigingen die de gebruiker heeft aangebracht aan het toestel valt niet onder de garantie.
Gebruik het toestel enkel waarvoor het gemaakt is. Andere toepassingen kunnen leiden tot
kortsluitingen, brandwonden, elektrische schokken, enz. De garantie vervalt automatisch bij
ongeoorloofd gebruik.
De garantie geldt niet voor schade door het negeren van bepaalde richtlijnen in deze handleiding en
uw dealer zal de verantwoordelijkheid afwijzen voor defecten of problemen die hier rechtstreeks
verband mee houden.
De leds en mechanische schade vallen niet onder de garantie.
Laat dit toestel installeren en onderhouden door een geschoolde technicus.
Schakel het toestel niet onmiddellijk in nadat het werd blootgesteld aan temperatuurschommelingen.
Om beschadiging te vermijden, moet u wachten tot het toestel de kamertemperatuur heeft bereikt.
Dit toestel is ontworpen voor professioneel gebruik op podia, in disco's, enz.
Gebruik een geschikte voeding (zie Technische specificaties hieronder). .
Wanneer u het toestel voor het eerst gebruikt, kan dit gepaard gaan met een bepaalde geur. Dit is
normaal en de eventuele rook of geur zal geleidelijk verdwijnen.
Gebruik de oorspronkelijke verpakking tijdens het transport.
Bewaar deze handleiding voor verdere raadpleging.
4. Eigenschappen
functie 'continue uitstoot' (burst) en functie 'intensieve uitstoot'
met LCD-aansturing voor een snelle en eenvoudige instelling van de DMX-functies, het rookvolume
en de vloeistofniveausensor
instelbare uitstoot (verticaal en horizontaal)
verwijderbare vloeistoftank van 2.5 L
1 DMX-kanaal voor een eenvoudige bediening
vloeistofsensor: automatische uitschakeling wanneer het vloeistofniveau te laag is
5. Omschrijving
Raadpleeg de afbeeldingen op pagina 2 van deze handleiding.
1
voedingsingang + zekeringhouder
6
vloeistofniveau
2
aan/uit-schakelaar
7
handgreep
3
DMX-ingang/uitgang
8
veiligheidsoog
4
display + bedieningstoetsen
9
rookuitgang
5
toegangsdeurtje vloeistoftank

HQSM10006
V. 01 –06/01/2016 13 ©Velleman nv
6. Montage
Laat het toestel installeren door een geschoolde technicus, conform EN 6-0598-17 en andere
toepasselijke normen.
De draagconstructie waaraan het toestel wordt bevestigd, moet gedurende 1 uur 10 x het gewicht
van dit toestel kunnen dragen zonder te vervormen.
Maak het toestel ook altijd vast met een tweede bevestigingsmiddel bv. een veiligheidskabel.
Sta nooit recht onder het toestel wanneer u het monteert, verwijdert of herstelt. Laat het toestel
controleren door een geschoolde technicus voor u het in gebruik neemt en laat het 1 x per jaar
volledig nakijken.
Installeer het toestel op een plaats waar weinig mensen voorbijkomen en die niet toegankelijk is voor
onbevoegden.
Plaats het toestel zodanig dat de voedingskabel gemakkelijk bereikbaar is.
Plaats het toestel in een goed geventileerde ruimte.
Vermijd brute kracht tijdens de bediening. u moet de maximumbelasting van de draagconstructie
kunnen berekenen, weten welk constructiemateriaal u kunt gebruiken, … Laat het materiaal en het
toestel regelmatig nakijken. Monteer het toestel niet zelf indien u er geen ervaring mee heeft. Een
slechte montage kan leiden tot verwondingen.
Voor montage op een lichtbrug, gebruik een geschikte klem (niet meegelev.) en draai een M10-bout
doorheen het midden van de (geplooide) beugel.
Regel de gewenste invalshoek door middel van de montagebeugel en draai de regelschroeven stevig
aan.
Verwijder alle brandbaar materiaal in een straal van 0.5 m rond het toestel.
De elektrische aansluiting mag alleen door een vakman uitgevoerd worden.
Sluit het toestel aan op het lichtnet met de stroomkabel. Alle toestellen moeten via een geaard
stopcontact gevoed worden. Niet aansluiten op een dimmerpack.
Het toestel heeft een voedingsuitgang waar een volgend toestel kan op aangesloten worden. Bij het
aansluiten van meerdere toestellen in een reeks via deze uitgang mag de totale stroom de nominale
stroom van de stroomkring niet overschrijden. Gebruik voedingskabels met een geschikte diameter.
De installatie moet voor het eerste gebruik gekeurd worden door een expert.
7. Gebruik
7.1 De rookmachine voorbereiden
1. Schakel het microfoon uit.
2. Open het vak met het reservoir, verwijder het reservoir en de dop.
3. Controleer of de plastic slangen van de dop correct aangesloten en niet beschadigd zijn.
4. Giet nevelvloeistof in het reservoir en sluit deze.
5. Plaats het reservoir terug in het vak en sluit. Zorg ervoor dat de plastic slang van het reservoir niet
geplooid of gekneld is.
6. Sluit het toestel aan op het net, schakel in en laat opwarmen. De nevelmachine is na ongeveer 7 tot
8 minuten gebruiksklaar.
In alle bedrijfsmodi moet het display READY TO FOG weergeven, voordat u
nevel kunt uitstoten.
7.2 De rookmachine gebruiken
Beschrijving van het controlepaneel
FUNCTIE
programmeermodus openen
VOLUME
instelknop uitstootvolume
TIMER
de timer activeren
MANUAL
knop manuele rookuitstoot
UP
naar boven in het menu scrollen
DOWN
naar onder in het menu scrollen

HQSM10006
V. 01 –06/01/2016 14 ©Velleman nv
Menu
Raadpleeg de afbeeldingen op pagina 3 van deze handleiding.
Opstarten
1. Zorg ervoor dat de nevelmachine uitgeschakeld is voor u de stekker in het stopcontact steekt.
2. Schakel het toestel in.
3. Druk op <VOLUME>.
4. Stel het uitstootvolume in met <UP> of <DOWN>.
DMX-configuratie
Om de DMX-modus in te schakelen:
1. Steek de stekker in het stopcontact, schakel de nevelmachine in en laat deze opwarmen.
2. Sluit de DMX-kabel aan op de DMX-ingang van de nevelmachine en op de DMX-uitgang van een
controller (niet meegeleverd).
3. Om de DMX-functie in te schakelen, druk herhaaldelijk op <FUNCTION> tot DMX512 ADD wordt
weergegeven. Selecteer het startadres van 1 tot 512 met <UP> of <DOWN>.
Zorg ervoor dat het startadres niet met het startadres van andere
aangesloten nevelmachines overeenkomt.
Een DMX-eindweerstand is aanbevolen als de DMX-kabel vrij lang is of wordt gebruikt in een omgeving
met veel elektrische ruis (bv. een discotheek). De eindweerstand voorkomt corruptie van het digitale
controlesignaal door elektrische ruis. De DMX-eindweerstand is niets meer dan een XLR-stekker met een
weerstand van 120 Ω van pin 2 naar 3. Deze XLR-stekker wordt dan aangesloten op de XLR-uitgang van
het laatste toestel in de reeks.
Het uitgangsvolume instellen
1. Druk herhaaldelijk op <FUNCTION> tot VOLUME OUT wordt weergegeven.
2. Selecteer het gewenste uitstootvolume (1-100% of continu) met <UP> of <DOWN>.
3. Druk op <VOLUME> om te bevestigen.
4. Druk nogmaals op <VOLUME> om de neveluitstoot te activeren.
De nevelmachine slaat het ingestelde uitstootvolume op na het
uitschakelen. Om het uitstootvolume te resetten, herhaal de bovenstaande
stappen.
De vloeistofsensor inschakelen
De ingebouwde vloeistofsensor meet het vloeistofniveau in het reservoir. Om de vloeistofsensor in te
schakelen:
1. Druk herhaaldelijk op <FUNCTION> tot FLUID SENSOR wordt weergegeven.
2. Selecteer ON met <UP> of <DOWN>.
3. Selecteer OFF met <UP> of <DOWN> om de vloeistofsensor uit te schakelen.
Timermodus
In timermodus wordt nevel op vooraf ingestelde tijdsintervallen uitgestoten (zie Parameters van de
timermodus).
1. Druk op <TIMER> tot een timer wordt weergegeven.
2. De nevelmachine start de neveluitstoot wanneer de teller 0 bereikt.
3. Selecteer DURATION SET, om de duur van de timer in te stellen. Selecteer TIMER OUT, om het
uitstootvolume in te stellen.
4. De cyclus herhaalt zich tot u <<TIMER> nogmaals indrukt of tot het reservoir geen nevelvloeistof
meer bevat.

HQSM10006
V. 01 –06/01/2016 15 ©Velleman nv
Manuele modus
In manuele modus blijft de nevelmachine nevel uitstoten zolang u de knop ingedrukt houdt. Het
uitstootvolume staat op het maximum.
1. Houd <MANUAL> ingedrukt om nevel uit te stoten.
2. Laat <MANUAL> los om de neveluitstoot te stoppen.
Parameters van de timermodus
Deze parameters bepalen het interval en het volume in timermodus.
1. Druk herhaaldelijk op <FUNCTION> tot INTERVAL SET wordt weergegeven.
2. Selecteer het interval (1-200 s) met <UP> of <DOWN>.
3. Druk herhaaldelijk op <FUNCTION> tot DURATION SET wordt weergegeven.
4. Selecteer de duur (1-200 s) met <UP> of <DOWN>.
5. Druk herhaaldelijk op <FUNCTION> tot TIMER OUT wordt weergegeven.
6. Selecteer het gewenste uitstootvolume (1-100% of continu) met <UP> of <DOWN>.
8. Problemen en oplossingen
Het toestel schakelt niet in.
Controleer de voeding
Controleer de zekering.
Het toestel stoot geen rook uit.
Controleer het vloeistofniveau.
Controleer de afstandsbediening.
De afstandsbediening werkt niet.
Kijk na of de afstandsbediening correct is aangesloten.
Het reservoir is gevuld maar de sensor geeft aan dat deze leeg is.
Reset de rookmachine door deze uit en opnieuw in te schakelen.
Contacteer uw dealer indien u het probleem niet kunt oplossen.
Het toestel warmt niet op.
Gelieve uw dealer te contacteren.
9. Reiniging en onderhoud
Voor het reinigen of onderhoud:
1. Ontkoppel het toestel van het lichtnet.
2. Laat het toestel afkoelen.
Reiniging
Leeg het reservoir voordat u het toestel reinigt.
Gebruik een glasreiniger en een zachte doek om de behuizing te reinigen.
Reinig de externe lenzen om de 20 dagen met een glasreiniger en een zachte doek.
Zorg ervoor dat alle onderdelen volledig droog zijn voordat u het toestel opnieuw aansluit.
De frequentie van de reiniging hangt van de omgeving af (bijv. rook, stof, vocht).
Dompel het toestel nooit onder in een vloeistof.
Onderhoud
Alle schroeven moeten goed zijn aangespannen en mogen geen sporen van roest vertonen.
De behuizing, de lenzen, de montagebeugels en de montageplaats (bijvoorbeeld plafond, ophanging
of gebinte) mogen niet vervormd of aangepast worden; bv. geen extra gaten in montagebeugels
boren, de aansluitingen niet verplaatsen ...
Mechanisch bewegende delen mogen geen sporen van slijtage vertonen.
De voedingskabels mogen niet beschadigd zijn. Laat het toestel onderhouden door een geschoolde
technicus.
Er zijn geen door de gebruiker vervangbare onderdelen in dit toestel, behalve de zekering en de
lamp.
Contacteer uw verdeler voor eventuele reserveonderdelen.

HQSM10006
V. 01 –06/01/2016 16 ©Velleman nv
9.2 De zekering vervangen
1. Ontkoppel het toestel van het lichtnet.
2. Laat het toestel afkoelen.
3. Verwijder het afdekplaatje met een schroevendraaier.
4. Open de zekeringhouder.
5. Vervang door een geschikte zekering.
6. Plaats de zekeringhouder terug in het toestel en schakel de stroom weer in.
10. Technische specificaties
voeding ................................................................................220-240 V~, 50/60 Hz
verbruik.....................................................................................................2000 W
zekering ....................................................................................................... F10A
opwarmtijd ...................................................................................................7 min
rookuitstoot .................................................................................ca. 1699 m³/min.
inhoud reservoir ............................................................................................ 2.5 L
vloeistofverbruik .............................................................................450-600 ml/min
IP-norm ......................................................................................................... IP20
afmetingen.............................................................................. 422 x 200 x 265 mm
optioneel
standaard rookvloeistof (5 L) ..................................................................VDLSL5
high-density rookvloeistof (5 L).............................................................VDLSLH5
professionele high-density rookvloeistof (5 L) ....................................... VDLSLHT5
Gebruik dit toestel enkel met originele accessoires. Velleman nv is niet aansprakelijk voor
schade of kwetsuren bij (verkeerd) gebruik van dit toestel. Voor meer informatie over dit
product en de laatste versie van deze handleiding, zie www.hqpower.eu. De informatie in deze
handleiding kan te allen tijde worden gewijzigd zonder voorafgaande kennisgeving.
© AUTEURSRECHT
Velleman nv heeft het auteursrecht voor deze handleiding. Alle wereldwijde rechten
voorbehouden. Het is niet toegestaan om deze handleiding of gedeelten ervan over te nemen, te
kopiëren, te vertalen, te bewerken en op te slaan op een elektronisch medium zonder voorafgaande
schriftelijke toestemming van de rechthebbende.

HQSM10006
V. 01 –06/01/2016 17 ©Velleman nv
MODE D'EMPLOI
1. Introduction
Aux résidents de l'Union européenne
Informations environnementales importantes concernant ce produit
Ce symbole sur l'appareil ou l'emballage indique que l’élimination d’un appareil en fin de vie peut
polluer l'environnement. Ne pas jeter un appareil électrique ou électronique (et des piles
éventuelles) parmi les déchets municipaux non sujets au tri sélectif ; une déchetterie traitera
l’appareil en question. Renvoyer l'appareil à votre fournisseur ou à un service de recyclage local.
Il convient de respecter la réglementation locale relative à la protection de l’environnement.
En cas de questions, contacter les autorités locales pour élimination.
Nous vous remercions de votre achat™! Lire attentivement le présent mode d'emploi avant la mise en
service de l’appareil. Si l'appareil a été endommagé pendant le transport, ne pas l’installer et consulter
votre revendeur.
2. Consignes de sécurité
Être prudent lors de l'installation : toucher un câble sous tension peut causer des
électrochocs mortels.
Toujours déconnecter l’appareil s’il n’est pas utilisé et avant le nettoyage ou
l'entretien. Tirer sur la fiche pour débrancher l'appareil ; non pas le câble.
Utiliser à l'intérieur uniquement. Protéger l'appareil de la pluie, de l'humidité,
d'éclaboussures et des projections d’eau. Ne jamais placer d’objets contenant du
liquide sur ou près de l’appareil.
Garder l'appareil hors de la portée des enfants et des personnes non autorisées.
Attention : l'appareil chauffe pendant l’usage.
Ne pas connecter cet appareil à un variateur.
Installer l'appareil à une distance minimale de 12 m de tout objet ou produit
inflammable ou explosif.
Respecter une distance minimale de 3 m entre la sortie lumière de
l’appareil et la surface illuminée.
Il n’y a aucune pièce réparable par l’utilisateur dans l'appareil. Commander des pièces
de rechange éventuelles chez votre revendeur.
Cet appareil ressort à la classe de protection 1. L'appareil doit donc être mis à la terre. La connexion
électrique doit être effectuée par un technicien qualifié.
S'assurer que la tension réseau ne dépasse pas la tension mentionnée dans les spécifications à la fin
de cette notice.
Le câble d’alimentation ne peut pas être replissé ou endommagé. Demander à votre revendeur de le
remplacer si nécessaire.
Utiliser un câble de sécurité approprié pour fixer l'appareil (p. ex. VDLSC7N ou VDLSC8N).
La température ambiante maximale s'élève à 45 °C. Ne pas utiliser l'appareil à des températures plus
élevées.

HQSM10006
V. 01 –06/01/2016 18 ©Velleman nv
3. Directives générales
Se référer à la garantie de service et de qualité Velleman® en fin de ce mode d'emploi.
Protéger contre la poussière et les températures extrêmes. Veiller à ce que les fentes de
ventilation ne soient pas bloquées. Laisser une distance de minimum 15 cm entre
l’appareil et tout autre objet.
Protéger l’appareil des chocs et de l'abus. Traiter l'appareil avec circonspection pendant
l’opération.
Se familiariser avec le fonctionnement de l'appareil avant de l'utiliser. Seules des personnes
qualifiées sont autorisées à utiliser cet appareil. La plupart des dégâts sont causés par un usage non
professionnel de l'appareil.
Toute modification est interdite pour des raisons de sécurité. Les dommages occasionnés par des
modifications par le client ne tombent pas sous la garantie.
N’utiliser l'appareil qu’à sa fonction prévue. Tout autre usage peut causer des courts-circuits, des
brûlures, des électrochocs, explosion de lampe, chute, etc. Un usage impropre annule d'office la
garantie.
La garantie ne se s’applique pas aux dommages survenus en négligeant certaines directives de ce
mode d'emploi et votre revendeur déclinera toute responsabilité pour les problèmes et les défauts qui
en résultent.
Les LED et l’usure mécanique ne tombent pas sous la garantie.
Confier l’installation et l’entretien à un technicien qualifié.
Ne pas brancher immédiatement l’appareil après exposition à des variations de température. Afin
d’éviter des dommages, attendre jusqu’à ce que l’appareil ait atteint la température ambiante.
Cet appareil a été développé pour un usage professionnel dans des discothèques, des théâtres, etc.
Utiliser une source d'alimentation appropriée (voir Spécifications techniques ci-dessous).
La première mise en service peut s’accompagner d’une odeur particulière. C'est normal, la fumée ou
l'odeur disparaîtra graduellement.
Transporter l’appareil dans son emballage originel.
Garder ce mode d'emploi pour toute référence ultérieure.
4. Caractéristiques
fonction de sortie continue (burst) et fonction de sortie intense
afficheur LCD pour un réglage rapide et facile des fonctions DMX, le volume de sortie et le capteur de
niveau de liquide
émission de fumée réglable (vertical et horizontal)
réservoir amovible (2.5 L)
1 canal DMX pour un pilotage facile
capteur de niveau de liquide : extinction automatique lorsque le niveau de liquide est trop bas
5. Description
Se référer aux illustrations en page 2 de ce mode d'emploi.
1
entrée d’alimentation + porte-fusible
6
niveau du liquide
2
interrupteur on-off
7
poignée de transport
3
entrée/sortie DMX
8
oeillet de sécurité
4
afficheur + boutons de réglage
9
sortie de fumée
5
trappe d'accès du réservoir

HQSM10006
V. 01 –06/01/2016 19 ©Velleman nv
6. Installation
Un technicien qualifié doit installer l’appareil en respectant la norme EN 6-0598-17 et toute autre
norme applicable.
La construction portante de l’appareil doit être capable de supporter 10 fois le poids de l’appareil
pendant une heure, sans qu’une déformation de la construction en résulte.
Toujours fixer l'appareil avec une sécurité additionnelle, p.ex. un câble de sécurité.
Éviter de se positionner en dessous de l’appareil pour l’enlever ou lors du montage ou du nettoyage.
Un technicien qualifié doit réviser l’appareil avant la mise en service et ensuite une fois par an.
Installer l’appareil à un endroit où il n'y a pas beaucoup de passage et inaccessible à des personnes
non autorisées.
Installer l'appareil afin de pouvoir accéder facilement au câble d'alimentation.
Installer l'appareil dans un endroit bien ventilé.
L’installation de cet appareil exige une solide expérience pratique : le calcul de la charge max. de la
construction, les matériaux d’installation requis,… Un technicien qualifié doit vérifier régulièrement la
construction portante et l’appareil même. Ne pas essayer d’installer cet appareil si vous n’avez pas
les qualifications requises; une installation incorrecte peut entraîner des blessures.
Pour un montage en suspension, utiliser un crochet de suspension approprié (non incl.) et passer un
boulon M10 à travers le support (plié).
Ajuster l’angle d’inclinaison avec un support de montage et serrer les vis de support.
Enlever tout matériau inflammable dans un rayon de 0.5 m autour de l’appareil.
La connexion électrique doit être effectuée par un technicien qualifié.
Brancher l’appareil sur le réseau électrique. Tout appareil doit être branché sur une prise de courant
avec mise à la terre. Ne pas connecter à un bloc de puissance.
L'appareil dispose d’une sortie secteur à laquelle un autre appareil peut être branché. En connectant
plusieurs appareils en série via cette sortie, il faut s'assurer que le courant total ne dépasse pas le
courant nominal du circuit électrique. Utiliser des câbles d'alimentation avec une section appropriée.
Un expert doit approuver l’installation avant qu’elle puisse être mise en service.
7. Emploi
7.1 Préparer la machine à fumée
1. S'assurer d'éteindre l'appareil.
2. Ouvrir la trappe d'accès du réservoir, sortir le réservoir et dévisser le bouchon.
3. S’assurer que les tuyaux en plastique du bouchon sont fixés correctement et ne sont pas
endommagés.
4. Verser du liquide dans le réservoir et fermer le.
5. Replacer le réservoir dans son compartiment et refermer la trappe d'accès. S’assurer que le tuyau
en plastique qui entre dans le réservoir n’est pas plié ou coincé.
6. Brancher l'appareil au réseau électrique, l'allumer le laisser chauffer. La machine à brouillard est
prête à l’emploi après environ 7 à 8 minutes.
Dans tous les modes de fonctionnement, l’afficheur doit visualiser READY
TO FOG pour émettre de la fumée.
7.2 Utiliser la machine à fumée
Description du panneau de contrôle
FONCTION
accéder au mode de programmation
VOLUME
contrôle du volume de la sortie de fumée
TIMER
activer le minuteur
MANUEL
bouton de sortie de fumée manuelle
UP
naviguer vers le haut dans le menu
DOWN
naviguer vers le bas dans le menu

HQSM10006
V. 01 –06/01/2016 20 ©Velleman nv
Menu
Se référer aux illustrations en page 3 de ce mode d'emploi.
Démarrage
1. S’assurer que la machine à brouillard est éteinte avant de la brancher.
2. Allumer l'appareil.
3. Appuyer sur <VOLUME>.
4. Ajuster la sortie de fumée avec <UP> ou <DOWN>.
Configuration DMX
Pour activer le mode DMX :
1. Brancher la machine à brouillard, allumer la et laisser la chauffer.
2. Connecter un câble DMX à l’entrée DMX de la machine à brouillard et à la sortie DMX d’un contrôleur
(non incl.).
3. Pour activer la fonction DMX, appuyer plusieurs fois sur <FUNCTION> jusqu’à ce que DMX512 ADD
s’affiche. Sélectionner l’adresse de départ de 1 à 512 avec <UP> ou <DOWN>.
S’assurer que l’adresse de départ de plusieurs machines à brouillard
interconnectées ne coïncident pas.
Une résistance de terminaison DMX est à recommander si le câble DMX doit couvrir une grande distance
ou s’il est utilisé dans un environnement avec beaucoup de bruit électrique (p. ex. une discothèque). La
terminaison évite la corruption du signal de contrôle numérique par le bruit électrique. La résistance de
terminaison DMX n’est rien d’autre qu’une fiche XLR avec une résistance de 120 Ω de broche 2 vers
broche 3, qui est à son tour connectée à la sortie XLR du dernier appareil de la série.
Régler le volume de sortie
1. Appuyer plusieurs fois sur <FUNCTION> jusqu'à ce que VOLUME OUT s'affiche.
2. Sélectionner la sortie de fumée souhaitée (1-100 % ou sortie continue) avec <UP> ou <DOWN>.
3. Appuyer sur <VOLUME> pour confirmer.
4. Appuyer à nouveau sur <VOLUME> pour activer la sortie de fumée.
La machine à fumée mémorisera la sortie de fumée programmée après
l'extinction. Pour réinitialiser la sortie de fumée, répéter les étapes décrites
ci-dessus.
Activer le capteur de niveau de liquide
Le capteur de niveau de liquide incorporé mesure le niveau de liquide. Pour activer le capteur de niveau
de liquide :
1. Appuyer plusieurs fois sur <FUNCTION> jusqu'à ce que FLUID SENSOR s'affiche.
2. Sélectionner ON avec <UP> ou <DOWN>.
3. Sélectionner OFF avec <UP> ou <DOWN> pour désactiver le capteur de niveau de liquide.
Mode minuteur
En mode minuteur, la machine à brouillard émettra de la fumée à des intervalles préprogrammés (voir
Paramètres du mode minuteur).
1. Appuyer sur <TIMER> jusqu'à ce qu'un minuteur s'affiche.
2. La machine à brouillard commencera à émettre de la fumée lorsque le compteur atteint zéro (0).
3. Sélectionner DURATION SET pour régler la durée du minuteur. Sélectionner TIMER OUT pour régler
le volume de sortie.
4. Le cycle continue de se répéter jusqu’à ce que <TIMER> est appuyé à nouveau ou jusqu’à ce que
le réservoir est vide.
This manual suits for next models
1
Table of contents
Languages:
Other Velleman Fog Machine manuals

Velleman
Velleman HQ Power HQSM10005 User manual

Velleman
Velleman HQ POWER HQSM10010 User manual

Velleman
Velleman HQ POWER HQPE10015 User manual

Velleman
Velleman HQ POWER VDP1500SSM2 User manual

Velleman
Velleman VDP700SM User manual

Velleman
Velleman HQSM10001 User manual

Velleman
Velleman HQ Power VDP1500SSM User manual

Velleman
Velleman HQ Power HQHZ10003 User manual

Velleman
Velleman HQ-Power VDL500SM User manual

Velleman
Velleman HQ Power VDL1200SM User manual