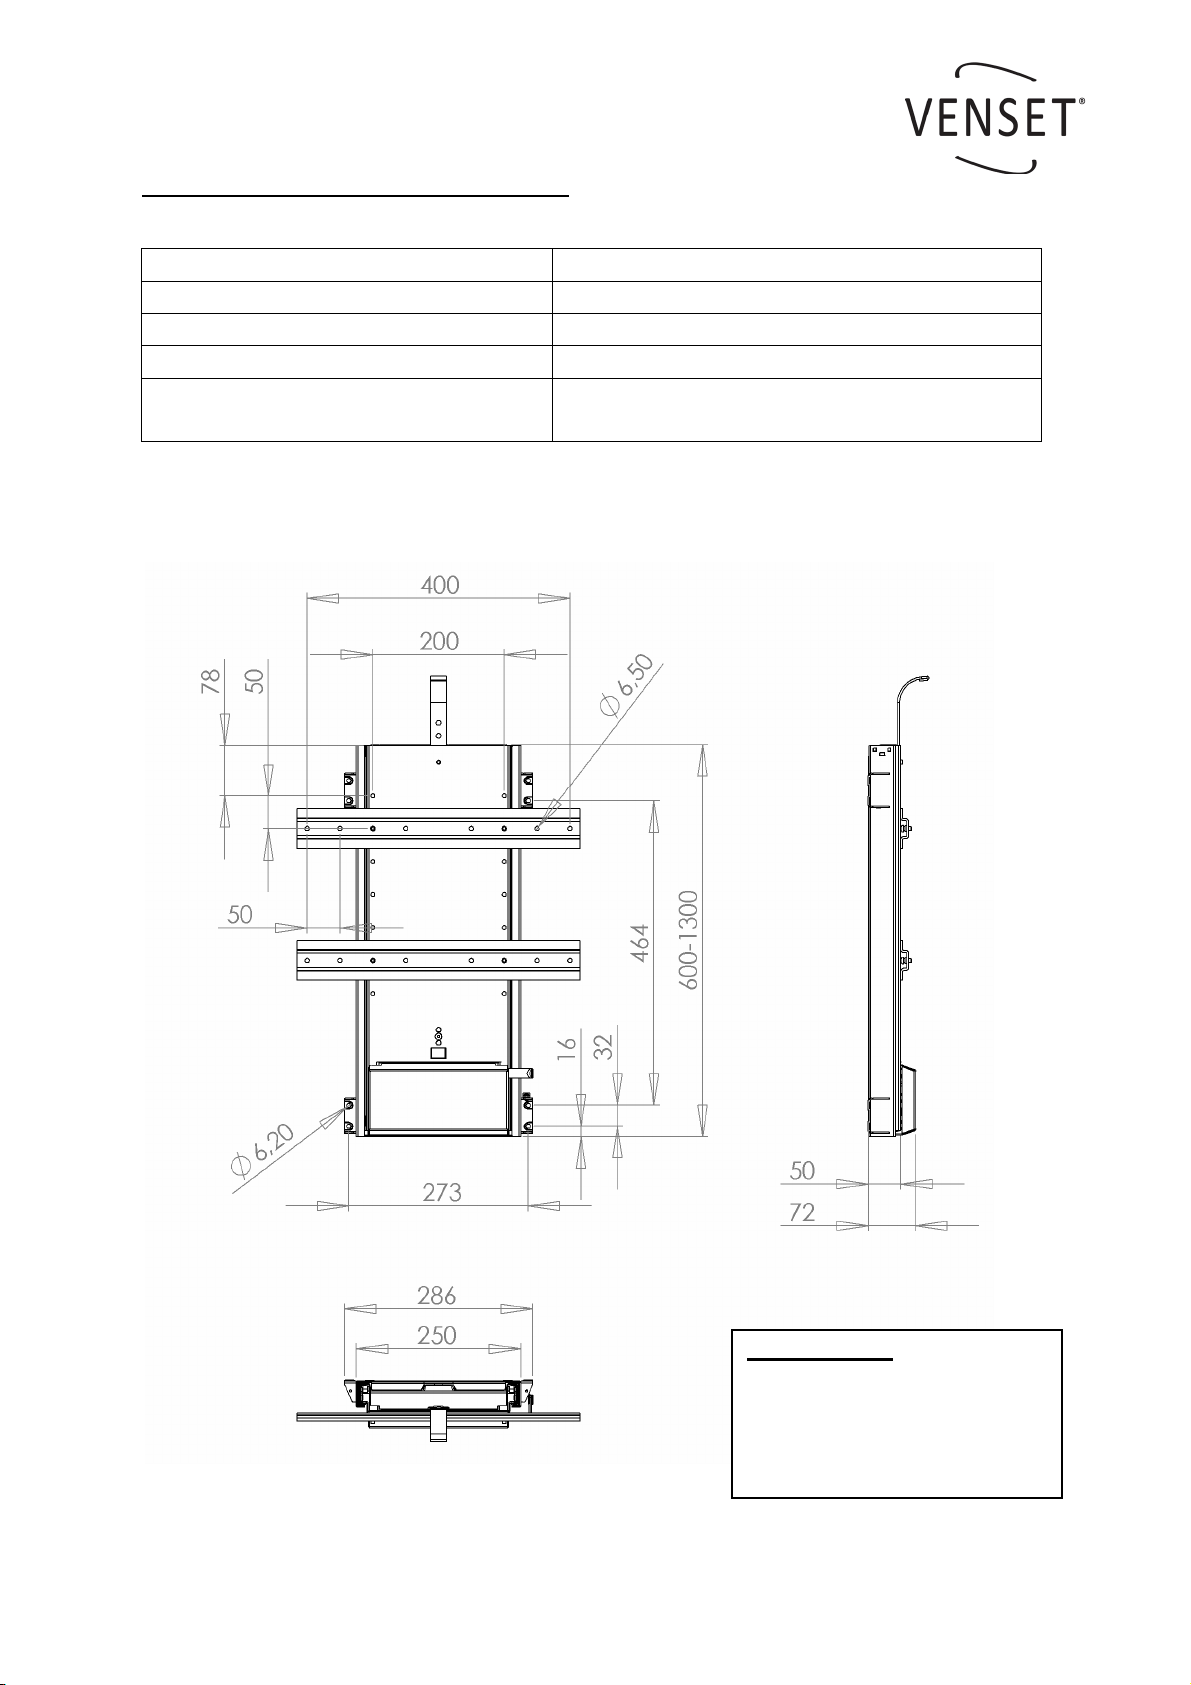
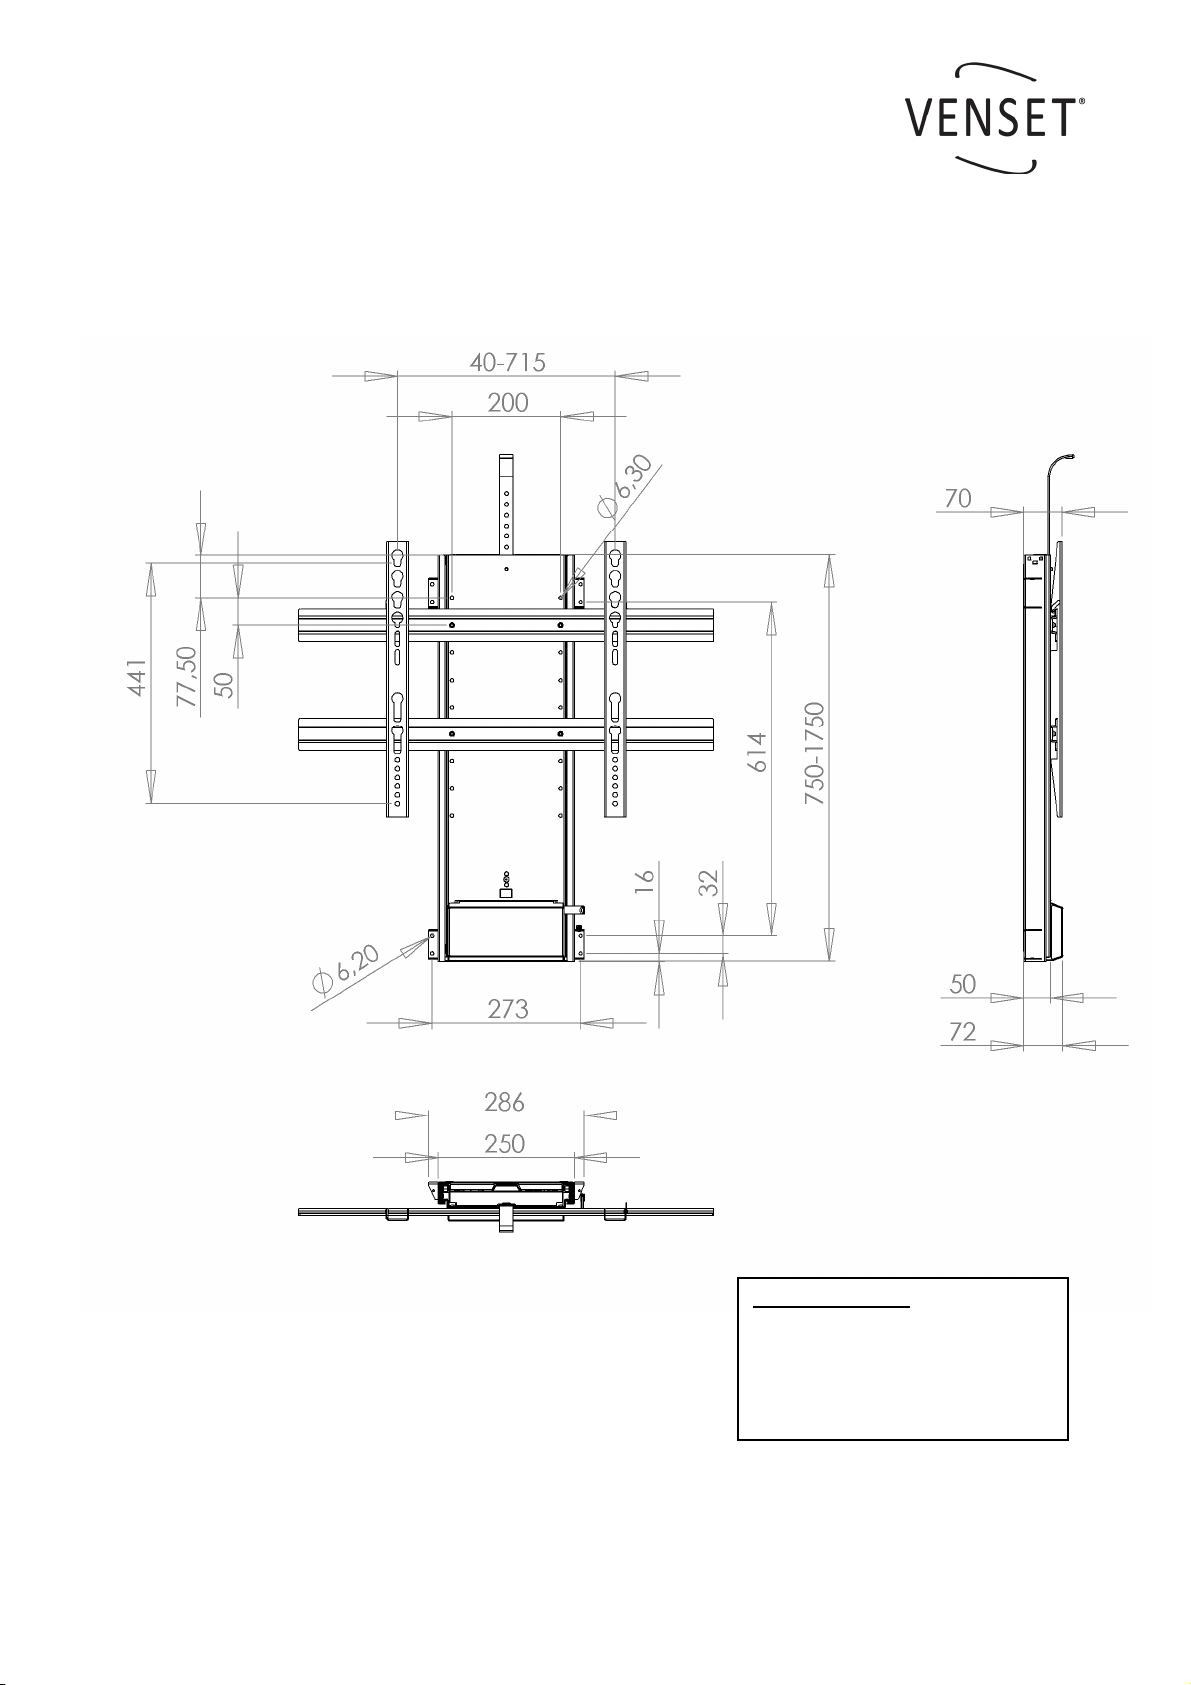
Electric TV Lift, TS700A & TS1000A
2
1. Important safety Instructions.
Use the following safety guidelines to help protect your lift from potential damage and to
ensure your own personal safety.
•Read all the installation instructions before testing or installing your lift.
•Read and follow all safety instructions.
•Keep remote control out of reach of children.
•To prevent bodily injury keep hands and clothing away from the lift while the lift is in
operation.
•Before installing the lift or working with its connections, unplug the lift from the
electrical shock.
•Do not install the lift, power supply or R.F. module in places subject to extreme
temperatures for example near a radiator, or heating vent.
•The TV lift must only be mounted in a dry area and it must ensured before use that
the lift is safe or protected from liquid contact or spillage.
•To avoid damaging the power supply, R.F. module and power cord, do not put
anything on it or place it where it could become damaged.
•Unplug the lift in the following conditions:
When the power cord or plug is damaged or frayed.
If liquid has spilled into the lift, power supply or RF module.
If the lift, power supply or RF module has been exposed to rain or
water.
If the lift exhibits a distinct change in performance, indicating a need
for servicing.
•MANUFACTURES who build this Flat Lift into other products or use it with other
products, MUST make sure to prevent bodily injury. The MANUFACTURER is
responsible to give the end user proper warnings and instructions for use.
CAUTION: Before you begin any of the Installation procedures
read and follow the warnings and safety instructions on this page.
WARNING ! THIS IS NOT A TOY !
REMOTE CONTROL !