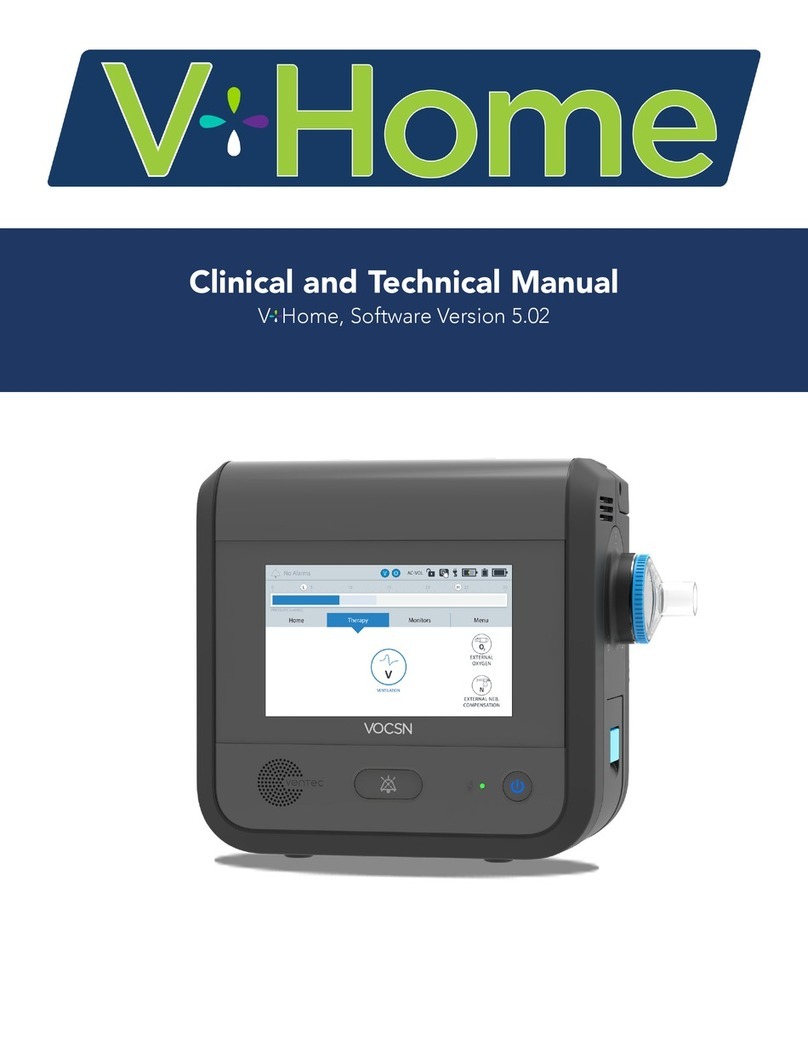
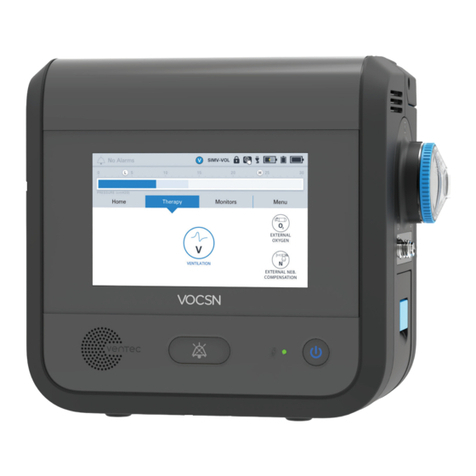
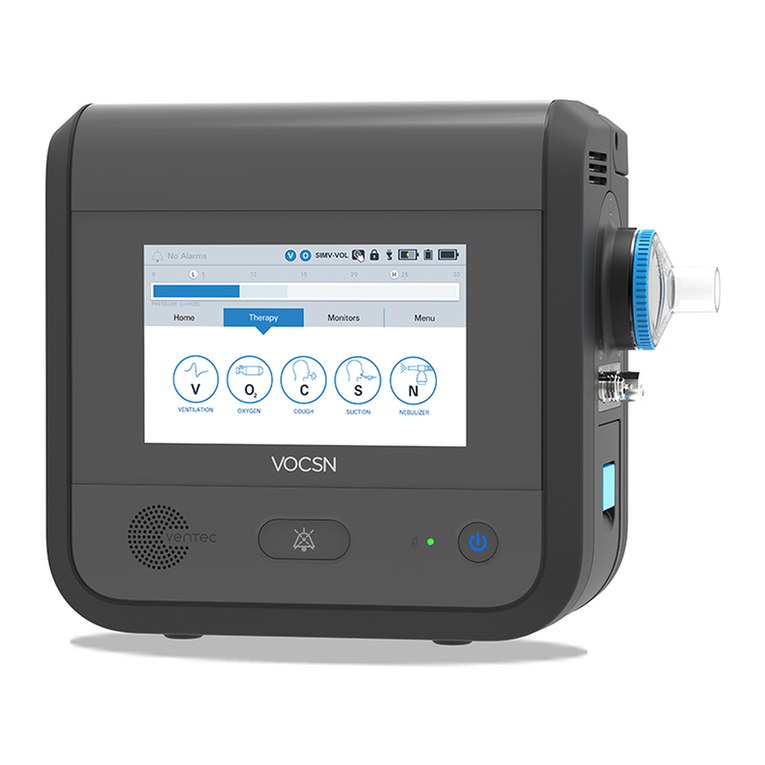
Ventec Life Systems VOCSN User manual

Clinical Quick Start Guide

VOCSN offers mechanical Ventilation, Oxygen, Cough, Suction, and Nebulizer therapies in one compact,
portable, lightweight device.
This Quick Start Guide is intended to provide a high-level overview of VOCSN use, and does not
contain all the information required to operate VOCSN safely. For detailed instructions for use, see
the Clinicial and Technical Manual, available online at VentecLife.com.
Critical Care Ventilator
VOCSN is one of the few portable ventilators to achieve the rigorous critical care
standard1for safety and accuracy. The ventilator provides invasive, noninvasive, and
mouthpiece ventilation and delivers a comprehensive set of modes and settings to
meet patient needs.
6 L/min Equivalent Internal Oxygen Concentrator
The VOCSN internal oxygen concentrator and Oxygen DirectTM system deliver the
equivalent of 6 L/min of oxygen or up to 40% FiO2. External high pressure and low
pressure oxygen sources can be connected when needed.
Touch Button Cough
Touch Button CoughTM therapy is activated in seconds rather than minutes, without
changing the circuit. Breath Sync monitors patient breathing and triggers a cough at
a natural point in the breathing cycle.
Hospital Grade Suction
Hospital grade suction system provides consistent high flows throughout the entire
suction experience. VOCSN Suction therapy is up to three times quieter than
traditional portable suction machines.
High Performance Nebulizer
VOCSN automatically compensates for the airflow from the nebulizer drive to ensure
accurate ventilation and comfortable breathing. VOCSN records each medication
use and turns off the nebulizer when the therapy is complete.
1.ISO 80601-2-12
NEBULIZER
SUCTION
COUGH
OXYGEN
2
VENTILATION

VentecLife.com 1
Quick Start Guide
Table of Contents
VOCSN Configurations . . . . . . . . . . . . . . . . . . . . . . . . . . . . . . . . . . . . . . . . . . . . . . . . . . . . . . . . 2
Hardware Overview. . . . . . . . . . . . . . . . . . . . . . . . . . . . . . . . . . . . . . . . . . . . . . . . . . . . . . . . . . . 2
Software Overview . . . . . . . . . . . . . . . . . . . . . . . . . . . . . . . . . . . . . . . . . . . . . . . . . . . . . . . . . . . 3
Locking and Unlocking the Touchscreen . . . . . . . . . . . . . . . . . . . . . . . . . . . . . . . . . . . . . . . . . . . . 3
Night Mode and Day Mode . . . . . . . . . . . . . . . . . . . . . . . . . . . . . . . . . . . . . . . . . . . . . . . . . . . . . . 4
Clinician Access . . . . . . . . . . . . . . . . . . . . . . . . . . . . . . . . . . . . . . . . . . . . . . . . . . . . . . . . . . . . . . . 4
Permissions. . . . . . . . . . . . . . . . . . . . . . . . . . . . . . . . . . . . . . . . . . . . . . . . . . . . . . . . . . . . . . . . . . . 5
Enable Prescribed Therapies . . . . . . . . . . . . . . . . . . . . . . . . . . . . . . . . . . . . . . . . . . . . . . . . . . . . . 5
Exit Buttons . . . . . . . . . . . . . . . . . . . . . . . . . . . . . . . . . . . . . . . . . . . . . . . . . . . . . . . . . . . . . . . . . . 5
VOCSN Placement. . . . . . . . . . . . . . . . . . . . . . . . . . . . . . . . . . . . . . . . . . . . . . . . . . . . . . . . . . . . 6
Powering VOCSN . . . . . . . . . . . . . . . . . . . . . . . . . . . . . . . . . . . . . . . . . . . . . . . . . . . . . . . . . . . . 6
The Power Supply. . . . . . . . . . . . . . . . . . . . . . . . . . . . . . . . . . . . . . . . . . . . . . . . . . . . . . . . . . . . . . 6
Batteries . . . . . . . . . . . . . . . . . . . . . . . . . . . . . . . . . . . . . . . . . . . . . . . . . . . . . . . . . . . . . . . . . . . . . 7
Connecting Patient Circuits . . . . . . . . . . . . . . . . . . . . . . . . . . . . . . . . . . . . . . . . . . . . . . . . . . . . . 8
Connecting and Removing a Bacterial Filter . . . . . . . . . . . . . . . . . . . . . . . . . . . . . . . . . . . . . . . . . 8
Mouthpiece Patient Circuits . . . . . . . . . . . . . . . . . . . . . . . . . . . . . . . . . . . . . . . . . . . . . . . . . . . . . . 8
Active, Passive, and Valveless Ventec One-Circuits . . . . . . . . . . . . . . . . . . . . . . . . . . . . . . . . . . . . 9
Connecting a Ventec One-Circuit O2 Tube . . . . . . . . . . . . . . . . . . . . . . . . . . . . . . . . . . . . . . 10
Connecting an Active Ventec One-Circuit Multilumen Tube . . . . . . . . . . . . . . . . . . . . . . . . . 10
The Pre-Use Test . . . . . . . . . . . . . . . . . . . . . . . . . . . . . . . . . . . . . . . . . . . . . . . . . . . . . . . . . . . . 10
Changing Ventilation, Oxygen, and Cough Controls . . . . . . . . . . . . . . . . . . . . . . . . . . . . . . . . . 11
Alarms . . . . . . . . . . . . . . . . . . . . . . . . . . . . . . . . . . . . . . . . . . . . . . . . . . . . . . . . . . . . . . . . . . . . 12
Setting Ventilation and Oxygen Alarms . . . . . . . . . . . . . . . . . . . . . . . . . . . . . . . . . . . . . . . . . . . . 12
Alarm Priorities . . . . . . . . . . . . . . . . . . . . . . . . . . . . . . . . . . . . . . . . . . . . . . . . . . . . . . . . . . . . . . . 13
Alarm and Event Logs . . . . . . . . . . . . . . . . . . . . . . . . . . . . . . . . . . . . . . . . . . . . . . . . . . . . . . . . . 13
Silencing Alarms . . . . . . . . . . . . . . . . . . . . . . . . . . . . . . . . . . . . . . . . . . . . . . . . . . . . . . . . . . . . . . 13
Connecting a Nurse Call System or Remote Alarm . . . . . . . . . . . . . . . . . . . . . . . . . . . . . . . . . . . 13
Ventilation Therapy . . . . . . . . . . . . . . . . . . . . . . . . . . . . . . . . . . . . . . . . . . . . . . . . . . . . . . . . . . 14
Oxygen Therapy . . . . . . . . . . . . . . . . . . . . . . . . . . . . . . . . . . . . . . . . . . . . . . . . . . . . . . . . . . . . 14
Connecting External Oxygen . . . . . . . . . . . . . . . . . . . . . . . . . . . . . . . . . . . . . . . . . . . . . . . . . . . . 14
Cough Therapy . . . . . . . . . . . . . . . . . . . . . . . . . . . . . . . . . . . . . . . . . . . . . . . . . . . . . . . . . . . . . 15
Suction Therapy. . . . . . . . . . . . . . . . . . . . . . . . . . . . . . . . . . . . . . . . . . . . . . . . . . . . . . . . . . . . . 15
Connecting a Suction Canister . . . . . . . . . . . . . . . . . . . . . . . . . . . . . . . . . . . . . . . . . . . . . . . . . . . 16
The Ventec Travel Suction Canister . . . . . . . . . . . . . . . . . . . . . . . . . . . . . . . . . . . . . . . . . . . . 16
The External Suction Canister Adapter (Sold Separately) . . . . . . . . . . . . . . . . . . . . . . . . . . . 16
Nebulizer Therapy . . . . . . . . . . . . . . . . . . . . . . . . . . . . . . . . . . . . . . . . . . . . . . . . . . . . . . . . . . . 17
External Nebulizer Compensation . . . . . . . . . . . . . . . . . . . . . . . . . . . . . . . . . . . . . . . . . . . . . . . . 17
Internal Nebulizer Therapy . . . . . . . . . . . . . . . . . . . . . . . . . . . . . . . . . . . . . . . . . . . . . . . . . . . . . . 17
VOCSN Therapy Interactions. . . . . . . . . . . . . . . . . . . . . . . . . . . . . . . . . . . . . . . . . . . . . . . . . . . 18
Maintaining Oxygenation During Nebulizer or Suction . . . . . . . . . . . . . . . . . . . . . . . . . . . . . . . . 18
Comparable Ventilation Modes . . . . . . . . . . . . . . . . . . . . . . . . . . . . . . . . . . . . . . . . . . . . . . . . . 19
Volume Ventilation Modes . . . . . . . . . . . . . . . . . . . . . . . . . . . . . . . . . . . . . . . . . . . . . . . . . . . . . . 19
Pressure Ventilation Modes (Including Volume-Targeted) . . . . . . . . . . . . . . . . . . . . . . . . . . . . . . 19
Non-Invasive Ventilation Modes. . . . . . . . . . . . . . . . . . . . . . . . . . . . . . . . . . . . . . . . . . . . . . . . . . 20
VOCSN Controls Setup . . . . . . . . . . . . . . . . . . . . . . . . . . . . . . . . . . . . . . . . . . . . . . . . . . . . . . . 21

VentecLife.com 2
Clinical Quick Start Guide
VOCSN Configurations
VOCSN may include all five therapies and all the features described in this guide, or just the set of therapies
and features purchased or prescribed by the treating physician. Depending on its configuration, VOCSN will
be able to provide Ventilation, +Oxygen Concentration, +Cough, +Suction, and/or +Nebulizer therapy. It
may also be able to provide oxygen from an external high-pressure source and FiO2 monitoring (+Pro
configurations) or low-pressure oxygen (all configurations). The configuration name is based on the therapies
VOCSN can provide. For example, the V+C configuration provides Ventilation+Cough therapies. The
configuration name is printed on the back of the device.
V+O+C+S+N+Pro
(or “VOCSN”) Yes Yes Yes Yes Yes Yes Yes
V+O+C+S+N Yes Yes Yes Yes Yes No Yes
V+C+Pro
(or “VOCSN-VC”) Yes No Yes No No Yes Yes
V+C Yes No Yes No No No Yes
Hardware Overview
13
14
16
17 18
19
20
21 22 23
24
25
15
1
2
345 6
7
8
9
10
11
12
1 Touchscreen 13 Handle
2 Speaker 14 T-Slot mount
3 Alarm Silence button 15 Cooling air outlet and Cough therapy exhaust
4 External Power / Charge Status indicator light 16 High-pressure O2 input port (+Pro configurations only)
5 Power button and indicator light 17 Low-pressure O2 input port
6 Removable, rechargeable battery 18 Remote alarm or Nurse Call Cable port
7 Active exhalation valve connection port 19 USB port for use by trained personnel only. See the
Clinical and Technical Manual for details.
8 Ventec One-Circuit O2 tube connection port
(+O configurations only) 20 Cooling air intake and filter
9 Nebulizer drive port (+N configurations only) 21 Power connection port
10 External bacterial filter and Ventec One-Circuit
connection port 22 Patient air inlet and filter
11 Handle 23 Removable, rechargeable battery
12 Cooling air outlet 24 Suction interface
25 Cooling air outlet
Configuration
(Located on Device
Rear Label)
Ventilation
(V)
O2
Concentration
(+O)
Cough
(+C)
Suction
(+S)
Nebulizer
+(N)
High-Pressure
External
Oxygen and
FiO2 Monitor
(+Pro)
Low-
Pressure
External
Oxygen

VentecLife.com 3
Clinical Quick Start Guide
Software Overview
0 5 10 15 20 25 30L H
NEBULIZERSUCTIONCOUGHOXYGEN
VENTILATION
No Alarms
PRESSURE (cmH20)
SIMV-VOL
V O
Therapy MenuMonitors
Home
Navigation Links
Pressure Monitor
Link to Active and
Recent Alarms
Active
Therapies
Clinician
Access
Status
Power
Status
Links to VOCSN Thera
p
y Screens
Lock
Screen
Locking and Unlocking the Touchscreen
To lock and unlock the VOCSN touchscreen, use the status bar to press and hold the lock screen button for
three seconds. A pop-up message will appear to confirm your action.
LOCKEDUNLOCKED

VentecLife.com 4
Clinical Quick Start Guide
Night Mode and Day Mode
Use the Home screen to change between
Night Mode and Day Mode.
Preset 1
VENT PRESETBREATH RATE
15
BPM
TIDAL VOLUME
430
mL
0 5 10 15 20 25 30L H
Therapy MenuMonitors
Home
No Alarms
PRESSURE (cmH20)
NIGHT MODE
SIMV-VOL
V O
NIGHT MODE
DAY MODE
1 Press NIGHT MODE to dim the LCD
display.
2 Press DAY MODE for full screen
brightness.
Clinician Access
To lock or unlock VOCSN:
0 5 10 15 20 25 30L H
MY VOCSN
i
LOGSPRE-USE TEST DEVICE
SETTINGS
SETTINGS
& ALARMS
CLINICIAN
ACCESS
No Alarms
PRESSURE (cmH20)
Therapy MenuMonitors
Home
SIMV-VOL
V O
0 5 10 15 20 25 30L H
Menu
MY VOCSN
i
LOGSPRE-USE TEST DEVICE
SETTINGS
Therapy MenuMonitors
Home
SETTINGS
& ALARMS
CLINICIAN
ACCESS
Click OK to enter Clinician
Access mode.
S
ETTIN
GS
C
lick
O
K to ent
e
Access
m
Please enter passcode
for clinician access
2
2
2
E
E
G
G
S
S
S
o
o
o
o
o
r
r
ACCEPTCANCEL
123
456
7
0
89
3
No Alarms
PRESSURE (cmH20)
SIMV-VOL
V O
1 Press CLINICIAN ACCESS in the Menu tab.
2 Locate the device serial number printed on the VOCSN
back label. It is also visible from the Service section of the
MY VOCSN screen.
3 Enter the four-digit Clinician Access passcode (the last
four digits of the device serial number), and then press
ACCEPT.
If the UNLOCK REQUIRED? control is set to No, all VOCSN
controls will be configurable by any VOCSN user. When set to Yes,
controls set to Clinician Only in the PERMISSIONS screen will be
locked.
0 5 10 15 20 25 30L H
MY VOCSN
i
LOGSPRE-USE TEST
PERMISSIONS
R
X
ENABLE PRESCRIBED
THERAPIES
S
COUGH
C
C
COUGH
C
O
NEBULIZE
N
N
DEVICE
SETTINGS
SETTINGS
& ALARMS
CLINICIAN
ACCESS
No Alarms
PRESSURE (cmH20)
Therapy MenuMonitors
Home
SIMV-VOL
V O
0 5 10 15 20 25 30L H
EDIT
INSUFFLATION TIME
3.0 seconds
ALARM VOLUME
Medium
DATE
2017-09-30
TIME
02:32 PM
CALIBRATE TOUCHSCREEN
UNLOCK REQUIRED?
Yes
PRESET 2PRESET 2PRESET 1PRESET 1
DEVICE
SETTINGS
PRESCRIPTIONS
EXIT
No Alarms
PRESSURE (cmH20)
SIMV-VOL
V O
To enable or disable the Clinician Access feature:
1 Press DEVICE SETTINGS in the Menu tab.
2 Press edit, and then change the UNLOCK REQUIRED?
control to Yes or No.

VentecLife.com 5
Clinical Quick Start Guide
Permissions
Using the Permissions feature, VOCSN can be locked so that a
Clinician Access passcode is required to change controls. To
configure which controls are locked, press PERMISSIONS in the
Menu tab. Then, use the toggles to set each control.
NEBULIZER
PERMISSIONS
NEBULIZER
PERMISSIONS
NEBULIZER
PERMISSIONS
COUGH
PERMISSIONS
COUGH
PERMISSIONS
COUGH
PERMISSIONS
VENTILATOR
PERMISSIONS
VENTILATOR
PERMISSIONS
VENTILATOR
PERMISSIONS
EXITEXIT
0 5 10 15 20 25 30L H
User and Clinician
Clinician Only
User and Clinician
User and Clinician
User and Clinician
CIRCUIT TYPE
MODE
HUMIDIFICATION
BREATH RATE
INSPIRATORY TIME
No Alarms
PRESSURE (cmH20)
SIMV-VOL
V O
•User and Clinician - Unlocked. Accessible at all times.
•Clinician Only - Locked. Control changes require the
Clinician Access passcode.
Enable Prescribed Therapies
0 5 10 15 20 25 30L H
MY VOCSN
i
LOGSPRE-USE TEST
PERMISSIONS
R
X
ENABLE PRESCRIBED
THERAPIES
S
COUGH
C
C
COUGH
C
O
NEBULIZE
N
N
DEVICE
SETTINGS
SETTINGS
& ALARMS
CLINICIAN
ACCESS
No Alarms
PRESSURE (cmH20)
Therapy MenuMonitors
Home
SIMV-VOL
V O
Press the ENABLE PRESCRIBED THERAPIES
button to enable or disable VOCSN therapies
such as the internal O2 Concentrator, Cough,
Suction, Nebulizer, and/or the FiO2 Monitor.
This feature allows clinicians to enable a suite of
therapies appropriate for the patient condition,
and disable others.
NOTE: The Enable Prescribed Therapies button is only visible when VOCSN is in Clinician Access mode.
Exit Buttons
VOCSN software has two types of EXIT buttons to navigate to the
previous screen:
0 5 10 15 20 25 30L H
EXIT SETTINGS
& ALARMS
Prepare patient circuit for ventilation,
select preset, and press START to begin.
AC-PRES
NIGHTDAY
SIMV-VOL
MOBILE
SIMV-PRES
ACTIVE NOW
STARTSTART
No Alarms
PRESSURE (cmH20)
SIMV-VOL
V O
NOW ACTIVE
•Inside therapy screens, the EXIT button appears as a
back arrow on the left-hand side of the screen.
•Inside configuration screens, the EXIT button will
appear as a tab in the upper left-hand corner.
0 5 10 15 20 25 30L H
EDIT
MODE
CIRCUIT TYPE
TIDAL VOLUME
BREATH RATE
INSPIRATORY TIME
PEEP
SIGH
SIMV-VOL
Active
450 mL
20 BPM
1.0 seconds
10 cmH20
OFF
NIGHTDAYEXIT MOBILE
No Alarms
PRESSURE (cmH20)
25 30
H
H
PRESS TO EDIT
PRESS TO EDIT
SIMV-VOL
V O

VentecLife.com 6
Clinical Quick Start Guide
VOCSN Placement
When selecting a place to operate VOCSN, keep the following in mind:
•Do not block VOCSN air inlets and vents.
•Do not operate VOCSN on its back or on compliant bedding, which may obstruct the airflow
around it.
•Do not cover VOCSN with towels or other materials.
•VOCSN should be placed in a well-ventilated area, free of airborne pollutants, contaminants, and
fumes.
•Always have a backup means of ventilation available, as well as a backup means of any other
therapy critical to patient care.
•Do operate VOCSN near smoke, open flame, or heat sources while Oxygen therapy is in use. This
could cause fire or explosion and serious harm to the patient.
•Over time, direct sunlight may compromise the integrity of VOCSN plastic housing or the Ventec
One-Circuit. Place VOCSN in a location that is not exposed to extended periods of direct
sunlight.
•Ensure the environment is within the recommended operating range of temperature, altitude, and
relative humidity for VOCSN. (5 to 40 °C, 700 to 1060 hPA, 15% to 90% RH)
Powering VOCSN
Power
button
Use the Power button on the front right side of VOCSN to turn it on
and off. Listen for two audio tones every time you power on
VOCSN. This verifies the VOCSN backup buzzer, which is used in
case of an Inop alarm condition or issue with the VOCSN speaker.
The Power Supply
Whenever possible, connect VOCSN to an external source of continuous power. Verify the external power
indicator appears on the touchscreen when VOCSN in plugged in.
1
2

VentecLife.com 7
Clinical Quick Start Guide
Batteries
VOCSN comes with two removable, rechargeable
batteries, and one internal battery. Depending on
your settings, these three batteries together may
power VOCSN for up to nine hours.
Batteries are charging (orange)
All batteries are fully charged (green)
Left battery
is charging
VOCSN is
plugged in
Right battery is
fully charged
Internal battery
is fully charged
To remove a battery:
1
2
1 Lift the battery tab until it
clicks.
2 Use the tab remove the
battery.
To connect a battery:
1 Lift the blue tab up, then
insert the battery base-first.
2 Press the top of the battery
into place and then press
the blue tab down until it
clicks and is flat against the
battery.

VentecLife.com 8
Clinical Quick Start Guide
Connecting Patient Circuits
VOCSN may be connected to various circuit types available from Ventec Life Systems: Mouthpiece, or an
Active, Passive, or Valveless Ventec One-Circuit.
Connecting and Removing a
Bacterial Filter
To connect a filter fit it against VOCSN, aligning the tabs on the filter
and VOCSN. Then, firmly twist the filter clockwise to lock it into place.
To remove a filter, firmly push in on the filter toward VOCSN and
then twist it counterclockwise, aligning the tabs on the filter and
VOCSN. Then, pull the filter to remove it.
Mouthpiece Patient Circuits
Connect the Mouthpiece Circuit Kit components in the order depicted below.
4
3
6
5
1
2
1 Reducer cuff
2 15mm circuit tubing (one piece)
3 Optional Mouthpiece Circuit
Support Arm, available separately
4 Coupler
5 Flexible extension (optional)
6 Angled mouthpiece

VentecLife.com 9
Clinical Quick Start Guide
Active, Passive, and Valveless Ventec One-Circuits
Connect patient circuit components in the order depicted below. For additional information, see the VOCSN
Clinical and Technical Manual, available online at VentecLife.com.
PATIENT
INTERFACE
(optional
heated wire)
HME
PATIENT
CIRCUIT
HUMIDIFIER
(choose one)
HUMIDIFIER
BYPASS
(required
for Cough)
BACTERIAL
FILTER
VOCSN
or
or
NEBULIZER
(optional)
NEBULIZER
FILTER
(optional
O2tube)
SECRETION
TRAP
(optional)
N
N
C
S
C
O
VOCSN Bacterial
Filter
Required See “Connecting and Removing a Bacterial Filter” on page 8 for
instructions.
Ventec Humidifier
Bypass
Required for using
Touch Button Cough
therapy with a
connected humidifier
The Ventec Humidifier Bypass prevents water damage to VOCSN
during Cough therapy.
Humidifier Optional Include a form of humidification (either an HME or humidifier).
Active, Passive, or
Valveless Ventec One-
Circuit
Required Use either an active, passive, or valveless Ventec One-Circuit.
Ventec One-Circuits may include an integrated O2 tube for
Oxygen Direct therapy and/or a heated wire. Active Ventec One-
Circuits include flow sensor tubing.
Heat-Moisture
Exchanger (HME)
Optional Include a form of humidification (either an HME or humidifier).
Nebulizer and
Nebulizer Filter
Optional Connect a nebulizer to the nebulizer drive port.
Ventec Secretion Trap Optional Connect a Ventec Secretion Trap, using suction tubing, to a
suction canister.
Patient Interface Required Examples of a patient interface include a mask or tracheal tube.
Active and Passive Ventec One-Circuits include an exhalation valve
and are intended for use with non-vented masks. Valveless Ventec
One-Circuits are intended for use with vented masks.
Item Name Required? Additional Information

VentecLife.com 10
Clinical Quick Start Guide
Connecting a Ventec
One-Circuit O2 Tube
If your Ventec One-Circuit has an
integrated O2 tube, connect the
O2 tube to the oxygen output
port on the right side of VOCSN.
Fit the connection adapter
around the port securely.
Connecting an Active
Ventec One-Circuit
Multilumen Tube
1
2
1 Fit the oval connector
tube into place in the
Active connection port.
2 Fit the connecting screw
cap over the port and
twist it clockwise until it
is firmly secured.
The Pre-Use Test
To ensure therapy is delivered accurately, perform a Pre-Use Test whenever the patient circuit is changed or
the device is powered on. If Ventilation therapy is critical to patient care, provide the patient with backup
ventilation prior to initiating the Pre-Use Test.
NOTE: Though accuracy may be reduced, VOCSN may still be used to provide ventilation therapy without
running the Pre-Use Test. If time constraints make running the test inadvisable, press the EXIT button to
immediately initiate Ventilation therapy.
Some control changes cause VOCSN to prompt you to run a Pre-Use Test. You may also press
the Menu tab and then the PRE-USE TEST button to begin a Pre-Use Test at any time. To run a
Pre-Use Test, carefully follow the on-screen instructions. When instructed, use a clean, gloved
hand to obstruct the circuit completely.
PRE-USE TEST
•If the test completes successfully, reconnect the Ventec One-Circuit to the patient and resume
Ventilation therapy.
•If the test fails, inspect the Ventec One-Circuit configuration for leaks or improper setup. Resolve
any issues with the Ventec One-Circuit, and then press RESTART to run the Pre-Use Test again.

VentecLife.com 11
Clinical Quick Start Guide
Changing Ventilation, Oxygen, and
Cough Controls
Press the Therapy tab, and then the Ventilation, Cough, or Oxygen icon.
1 To configure a Preset, select it and then press the
SETTINGS (or SETTINGS & ALARMS) button.
0 5 10 15 20 25 30L H
EXIT SETTINGS
& ALARMS
Prepare patient circuit for ventilation,
select preset, and press START to begin.
AC-PRES
NIGHTDAY
SIMV-VOL
MOBILE
SIMV-PRES
ACTIVE NOW
STARTSTART
No Alarms
PRESSURE (cmH20)
SIMV-VOL
V O
NOW ACTIVE
Any of the three available Presets can be configured by
pressing the Preset tabs along the top of the configuration
screen.
2 Scroll to the control you want to modify, select it and then
press the EDIT button on the right side of the blue
selection bar.
0 5 10 15 20 25 30L H
EDIT
MODE
CIRCUIT TYPE
TIDAL VOLUME
BREATH RATE
INSPIRATORY TIME
PEEP
SIGH
SIMV-VOL
Active
450 mL
20 BPM
1.0 seconds
10 cmH20
OFF
NIGHTDAYEXIT MOBILE
No Alarms
PRESSURE (cmH20)
25 30
H
H
PRESS TO EDIT
PRESS TO EDIT
SIMV-VOL
V O
The MODE, CIRCUIT TYPE, and VOLUME TARGETED
controls cannot be modified while a Preset is active, and
will appear in gray. If additional controls appear in gray, the
Clinician Access passcode must be entered before
modifying them.
3 Enter the new selection and then press ACCEPT to
confirm the change.
0 5 10 15 20 25 30L H
EDIT
HUMIDIFICATION
CIRCUIT TYPE
BREATH RATE
HME
Active
20 BPM
NIGHTDAYEXIT MOBILE
No Alarms
PRESSURE (cmH20)
25 30H
PRESS TO EDIT
PRESS TO EDIT
ACCEPTCANCEL
123
456
7
0
89
3
SIMV-VOL
V O
4 When configuration is complete, press the EXIT tab along
the top of the screen.
0 5 10 15 20 25 30L H
EDIT
MODE
CIRCUIT TYPE
TIDAL VOLUME
BREATH RATE
INSPIRATORY TIME
PEEP
SIGH
SIMV-VOL
Active
450 mL
20 BPM
1.0 seconds
10 cmH20
OFF
NIGHTDAYEXIT MOBILE
No Alarms
PRESSURE (cmH20)
25 30
H
H
PRESS TO EDIT
PRESS TO EDIT
SIMV-VOL
V O
5 Activate or switch between configured presets at any time
by selecting the appropriate Preset and then pressing
START.
0 5 10 15 20 25 30L H
EXIT SETTINGS
& ALARMS
Prepare patient circuit for ventilation,
select preset, and press START to begin.
AC-PRES
NIGHTDAY
SIMV-VOL
MOBILE
SIMV-PRES
ACTIVE NOW
STARTSTART
No Alarms
PRESSURE (cmH20)
SIMV-VOL
V O
NOW ACTIVE

VentecLife.com 12
Clinical Quick Start Guide
Alarms
For a description of all available alarms and their settings, see the Clinical and Technical Manual, available
online at VentecLife.com.
Setting Ventilation and Oxygen Alarms
NOTE: The High Pressure Delay and Patient Circuit Disconnect alarm settings can be used to help reduce
nuisance alarms.
1 To configure a alarms, select the Ventilation or Oxygen
Preset you want to modify, and then press the
SETTINGS & ALARMS button.
0 5 10 15 20 25 30L H
EXIT SETTINGS
& ALARMS
Prepare patient circuit for ventilation,
select preset, and press START to begin.
AC-PRES
NIGHTDAY
SIMV-VOL
MOBILE
SIMV-PRES
ACTIVE NOW
STARTSTART
No Alarms
PRESSURE (cmH20)
SIMV-VOL
V O
NOW ACTIVE
Any of the three available Presets can be configured by
pressing the Preset tabs along the top of the
configuration screen.
2 Scroll past the controls to view alarms.
EDIT
APNEA
BREATHRATE
MINUTE VOLUME
INSPIRATORY PRESSURE
HIGH EPAP
30 seconds
14 BPM
OFF
4 cmH2O
3 cmH2o above set EPAP
30 BPM
OFF
35 cmH2O
PRESS TO EDIT
No Alarms
PRESSURE (cmH20)
25 30H
SIMV-VOL
V O
PRESSURE
(cmH20)
2
5
30
No
Ala
rm
s
S
IMV-V
OL
V
O
PR
PR
PR
PR
PR
ES
ES
ES
ES
ES
SU
SU
SU
SU
SU
RE
RE
RE
RE
RE
(
(
(
(
(
cm
H2
H2
H2
H2
H2
0)
0)
0)
0)
0)
0 5 10 15 20 25 30L
H
H
NIGHT
DAYEXIT MOBILE
Find the name of the alarm you want to modify, select
it and then press the EDIT button on the right side of
the blue selection bar.
3 If the alarm includes a Low and High setting:
PRESET 2
PRESET 1EXIT
APNEA
BREATHRATE
MINUTE VOLUME
INSPIRATORY PRESSURE
30 seconds
14 BPM
OFF
4 cmH2O
30 BPM
OFF
35 cmH2O
H
0 5 10 15 20 25 30H
PRESS TO EDIT
PRESS TO EDIT
ACCEPTCANCEL
123
456
7
0
89
3
L
No Alarms
PRESSURE (cmH20)
L
OFF ON
HL
SIMV-VOL
V O
•Select the Licon to adjust the Low alarm
setting.
•Select the Hicon to adjust the High alarm
setting.
4 If necessary, use the
OFF ON
toggle to
turn the alarm ON.
PRESET 2
PRESET 1EXIT
APNEA
BREATHRATE
MINUTE VOLUME
INSPIRATORY PRESSURE
30 seconds
14 BPM
OFF
4 cmH2O
30 BPM
OFF
35 cmH2O
H
0 5 10 15 20 25 30H
PRESS TO EDIT
PRESS TO EDIT
ACCEPTCANCEL
123
456
7
0
89
3
L
No Alarms
PRESSURE (cmH20)
L
OFF ON
HL
SIMV-VOL
V O
Then, use the keypad to enter the
desired setting.
5 Press ACCEPT to confirm the new alarm setting(s).
PRESET 2
PRESET 1EXIT
APNEA
BREATHRATE
MINUTE VOLUME
INSPIRATORY PRESSURE
30 seconds
14 BPM
OFF
4 cmH2O
30 BPM
OFF
35 cmH2O
H
0 5 10 15 20 25 30H
PRESS TO EDIT
PRESS TO EDIT
ACCEPTCANCEL
123
456
7
0
89
3
L
No Alarms
PRESSURE (cmH20)
L
OFF ON
HL
SIMV-VOL
V O

VentecLife.com 13
Clinical Quick Start Guide
Alarm Priorities
High
(red banner)
0 5 10 15 20 25 30L H
CLEAR LIST
Alarm Name 11/13/2013 5:19 PM
ALARMSEXIT EVENTS
Alarm Name
PRESSURE (cmH20)
SIMV-VOL
V O
10 tones every 3 seconds
Medium
(yellow banner)
0 5 10 15 20 25 30L H
CLEAR LIST
Alarm Name 11/13/2013 4:43 PM
ALARMSEXIT EVENTS
Alarm Name
PRESSURE (cmH20)
SIMV-VOL
V O
3 tones every 7 seconds
Low
(blue banner)
0 5 10 15 20 25 30L H
CLEAR LIST
Alarm Name 11/13/2013 11:35 AM
ALARMSEXIT EVENTS
Alarm Name
PRESSURE (cmH20)
SIMV-VOL
V O
No auditory indicator
Alarm and Event Logs
To view the VOCSN Alarm Log, press the alarm banner in the
status bar, or press the Menu tab, and then the LOGS button.
To clear the list of all but the active alarm conditions, press the
CLEAR LIST button from the Alarm Log screen.
Silencing Alarms
To inactivate and reactivate alarm signals, use the Alarm Silence
button on the front of VOCSN.
Connecting a Nurse Call System or Remote Alarm
The remote alarm port is behind a protective rubber flap on the
back of VOCSN. This port may be used to connect a remote
alarm, a nurse call system, or other alarm systems that sense
contact closure through a 1/4” phono jack, using the VOCSN
Nurse Call Cable accessory (available separately from Ventec
Life Systems).
Always test the alarm immediately after installation, and
periodically during use to ensure it is functioning as intended.
Alarm Priority Visual Indicator Auditory Indicator

VentecLife.com 14
Clinical Quick Start Guide
Ventilation Therapy
To use Ventilation therapy, press the Therapy
tab, and then the Ventilation icon. 0 5 10 15 20 25 30L H
EXIT SETTINGS
& ALARMS
Prepare patient circuit for ventilation,
select preset, and press START to begin.
AC-PRES
NIGHTDAY
SIMV-VOL
MOBILE
SIMV-PRES
ACTIVE NOW
STARTSTART
No Alarms
PRESSURE (cmH20)
SIMV-VOL
V O
NOW ACTIVE
This preset is
providing
therapy
Press here to
EXIT this
screen
To start using a new
preset, select it and then
press START
Press here
if you need
to change a
control
Use the Home or Monitors tab to view
monitored information about the delivered
Ventilation therapy. The top row of Monitors
displayed on the Monitors tab will also
appear on the Home screen.
Oxygen Therapy
Oxygen Direct therapy may be delivered from
the internal O2 Concentrator in Pulse Dose
mode (through an integrated oxygen tube
inside the patient circuit). The internal O2
Concentrator will deliver the equivalent of
up to 6 L/min of oxygen without
connecting an external oxygen source.
0 5 10 15 20 25 30
EXIT
LH
SETTINGS
& ALARMS
No Alarms
PRESSURE (cmH20)
STOP THERAPYSTOP THERAPY
S
TOP THERAPY
STOP THERAPY
Int. O2 Concentrator
6 L/min
Pulse Dose
PRESET 3
STARTSTART
PRESET 2
40%
FiO2
Ext. High-Pressure
PRESET 1
NOW ACTIVE
4 L/min
Pulse Dose
Ext. High-Pressure
21 30 40 50 60 70 80 90 100
CALCULATED FiO2 MONITOR (%)
O2 FLUSH
6
L/min
SIMV-VOL
V O
This preset is
providing
therapy
Press here to
EXIT this
screen
To start using a new
preset, select it and then
press START
Press here if
you need to
change a
control
O2 Flush
delivers
maximum
oxygen for 2
minutes
With external high-pressure oxygen
connected, Oxygen therapy may be
delivered as either a Pulse Dose or FiO2.
Additive low-pressure oxygen may also be
used.
Connecting External Oxygen
External high-pressure oxygen sources can be connected
to VOCSN to provide Oxygen therapy in either Pulse Dose
or FiO2 mode.
External low-pressure oxygen sources can be connected
to VOCSN by using an O2 Low-Pressure Inlet Adapter
(available separately from Ventec Life Systems). Oxygen
from a low-pressure oxygen source is additive, and can be
used in conjunction with oxygen from the internal O2
concentrator or an external high-pressure source. The flow
of low-pressure oxygen is controlled by the oxygen source,
not by the VOCSN oxygen controls.
1
2

VentecLife.com 15
Clinical Quick Start Guide
Cough Therapy
To use Cough therapy, press the
Therapy tab, and then the Cough
icon.
Prepare patient circuit for Cough therapy,
select preset, and press START to begin.
0 5 10 15 20 25 30L H
EXIT SETTINGS
No Alarms
PRESSURE (cmH20)
-40 / +40
cmH2O
HIGHMEDIUM
-35 / +35
cmH2O
STOP THERAPYSTOP THERAPYSTARTSTART
SIMV-VOL
V O
LOW
-30 / +30
cmH2O
Cough+Suction
This preset has
Cough + Suction
enabled
Press here to
EXIT this
screen
To start Cough therapy,
select a preset and then
press START
Press here if
you need to
change a
control
If you are using a mask with an air
leak in it for Ventilation therapy,
change the mask to one without a
leak for Cough therapy for the
best results. When Cough therapy
is complete, switch back to the
vented mask.
Suction Therapy
NOTE: Oxygen therapy is paused during Suction therapy. See “VOCSN Therapy Interactions” on
page 18 for more information.
To use Suction therapy, press
the Therapy tab, and then the
Suction icon.
No Alarms
PRESSURE (cmH20)
No
Ala
rm
s
PRESSURE
(
cm
H20)
PR
PR
ES
ES
SU
SU
RE
RE
(
(
H2
H2
0)
0)
0 5 10 15 20 25 30L H
STOP THERAPYSTOP THERAPY
START
START
20
16
0
12
4
8
mmHginHg
300
100
150
250
200
400
350
500
450
0
50
550
mmHg
185
EXIT
VACUUM
START
SET
DEFAULT
SIMV-VOL
V O
Press here to start
or stop Suction
therapy
Press here to
exit this screen
Press + and - to
increase or decrease
vacuum intensity
Press here to set
the default
Vacuum setting
(It will also
apply to
Cough+Suction)
Verify there are no leaks and
that Suction therapy is
functioning as intended by
occluding the suction tubing
or attached catheter with a
clean, gloved hand. Observe
the suction monitor (indicated
by the solid fill inside the arc)
and verify it matches the set
vacuum value (displayed as a
numeric value inside the arc,
and a black line).
NOTE: Once the START button is pressed, Suction therapy may take up to 5 seconds to begin.

VentecLife.com 16
Clinical Quick Start Guide
Connecting a Suction Canister
To attach or detach the Suction Cap, Travel Canister, or External Canister Adapter twist them to the left
(unlock and remove) or right (lock and suction).
The Ventec Travel Suction
Canister
Lock
to Suction
Unlock
to Remove
Remove
Filter to
Empty
The Ventec Travel Suction Canister has
a 300 mL capacity. If the canister
overfills, a water-phobic filter will
activate, suction will stop, and the
canister will need to be replaced.
To empty the Travel Suction Canister,
disconnect it, then twist the knob
counterclockwise to the dot position,
and pull the knob out of the canister.
The External Suction
Canister Adapter (Sold
Separately)
2
3
1
Use the External Suction Canister
Adapter (available separately from
Ventec Life Systems) to connect
VOCSN to an external canister.
1 Attach the adapter by placing
it against the suction port and
twisting it to the lock position.
2 Connect 1/4” suction tubing
to the canister
3 Connect suction tubing to the
other port.

VentecLife.com 17
Clinical Quick Start Guide
Nebulizer Therapy
NOTE: Oxygen therapy is paused during internal Nebulizer therapy. See “VOCSN Therapy
Interactions” on page 18 for more information.
External Nebulizer
Compensation
0 5 10 15 20 25 30L H
MINUTES
NEBULIZER DURATION
EXIT
60
5
10
15
20
55
50
45
40
2535
30
15
mins
No Alarms
PRESSURE (cmH20)
SIMV-VOL
V N
START
INTERNAL NEB.
THERAPY
EXTERNAL NEB.
COMPENSATION
Press here to start
internal Nebulizer
therapy
Press here to
EXIT this
screen
Press here to
increase or
decrease how
long the
nebulizer runs
Press here to select
external nebulizer
compensation
All VOCSN configurations can be used to
compensate for the flow added to the patient
circuit from an external 6 L/min. Follow
instructions from the nebulizer manufacturer,
and set the VOCSN Nebulizer Duration
control using the plus (+) and (-) buttons.
Press START underneath the External Neb.
Compensation selection to begin
compensation.
Internal Nebulizer Therapy
VOCSN configurations that include a nebulizer may provide Internal Neb. Therapy from the Nebulizer port:
1 Connect a VOCSN Nebulizer Filter to the nebulizer port.
2 Connect one end of the nebulizer
tubing to the VOCSN Nebulizer Filter,
and the other end to the bottom of
the nebulizer cup.
3 Add medication to the nebulizer cup
by following all instructions from the
nebulizer cup manufacturer.
4 Configure Nebulizer therapy. The
Nebulizer Duration should be set to
provide ample time for all medication in the cup to be delivered to the patient.
5 Before connecting the nebulizer cup to the patient circuit, select Internal Neb. Therapy and then
press START to begin therapy. Confirm an aerosol mist is created from the nebulizer cup.
6 Attach the nebulizer cup and tee between the exhalation valve and the patient interface (or, if the tee
is already in place, attach the nebulizer cup to it). Verify the nebulizer cup is vertical to ensure that all
medication in the cup is properly nebulized.
NOTE: If an HME is used, connect the nebulizer cup between the HME and the patient to prevent
the HME from trapping nebulized medication. If a passive circuit is used, Ventec Life Systems
recommends connecting a filter between the distal end of the circuit and the nebulizer tee to ensure
nebulized material does not collect in the passive valve and obstruct airflow.
7 When nebulizer therapy is complete, disconnect the nebulizer from the Nebulizer Filter, and then
from the patient circuit. Clean the nebulizer cup following all instructions from the nebulizer
manufacturer.

VentecLife.com 18
Clinical Quick Start Guide
VOCSN Therapy Interactions
Only one of the following therapies can be delivered at a time: Oxygen, Suction, or Nebulizer. This page
describes how starting a therapy affects each of the other active VOCSN therapies.
NOTE: It may take up to 5 seconds for a therapy to begin after pressing the START button.
Therapies run
simultaneously
Therapies run
simultaneously
Therapies run
simultaneously
Paused
(automatically
resumes)
Therapies run
simultaneously
Therapies run
simultaneously
N/A Ended
Therapies run
simultaneously
Paused
(automatically
resumes)
Paused
(automatically
resumes)
Paused
(automatically
resumes)
Ended N/A
Therapies run
simultaneously
Therapies run
simultaneously
Paused
(automatically
resumes)
Paused
(automatically
resumes)
Controlled by
Oxygen
Source
Therapies run
simultaneously
Therapies run
simultaneouslyN/A
Therapies run
simultaneously
Therapies run
simultaneously
Therapies run
simultaneously
N/A N/A
Therapies run
simultaneouslyN/A
Therapies run
simultaneously
with Cough
+ Suction
feature
N/A
Ended Ended
Therapies run
simultaneously
Therapies run
simultaneouslyN/A Ended
Ended Ended
Therapies run
simultaneously
Paused
(automatically
resumes)
Ended N/A
Maintaining Oxygenation During Nebulizer or Suction
If it is critical to patient care, the following approaches may be used to maintain patient oxygenation while
Oxygen therapy is paused during Nebulizer and Suction therapies:
•Use the VOCSN O2 Flush feature to oxygenate the patient before providing Nebulizer or Suction
therapy.
•Use an external nebulizer or suction machine to provide the therapy. When using an external
nebulizer, use the External Neb. Compensation feature to minimize nuisance alarms.
•Use an external source of low-pressure oxygen during Nebulizer or Suction therapy. Low-pressure
oxygen flowing through VOCSN and into the patient circuit is additive, and is not paused by
Nebulizer or Suction therapy.
Running Therapy:
Effect of Starting Another Therapy:
Oxygen
(Pulse Dose)
Oxygen
(FiO2)
Oxygen
(Ext. Low-
Pressure)
Cough Suction Nebulizer*
* This table describes the effects of internal Nebulizer therapy. External Nebulizer Compensation does not cancel or
pause any other active therapy. If you are using an external nebulizer, disconnect it and stop nebulizer
compensation before starting Cough therapy to prevent nebulized material from reaching VOCSN.
Ventilation
Oxygen
(Pulse Dose)
Oxygen
(FiO2)
Oxygen
(Ext. Low-
Pressure)
Cough
Suction
Nebulizer*
0 5 10 15 20 25 30L H
NEBULIZERSUCTIONCOUGHOXYGEN
VENTILATION
No Alarms
PRESSURE (cmH20)
SIMV-VOL
V O
Therapy MenuMonitors
Home
START
V
O
O
C
S
N
Other manuals for VOCSN
3
This manual suits for next models
1
Table of contents
Other Ventec Life Systems Medical Equipment manuals