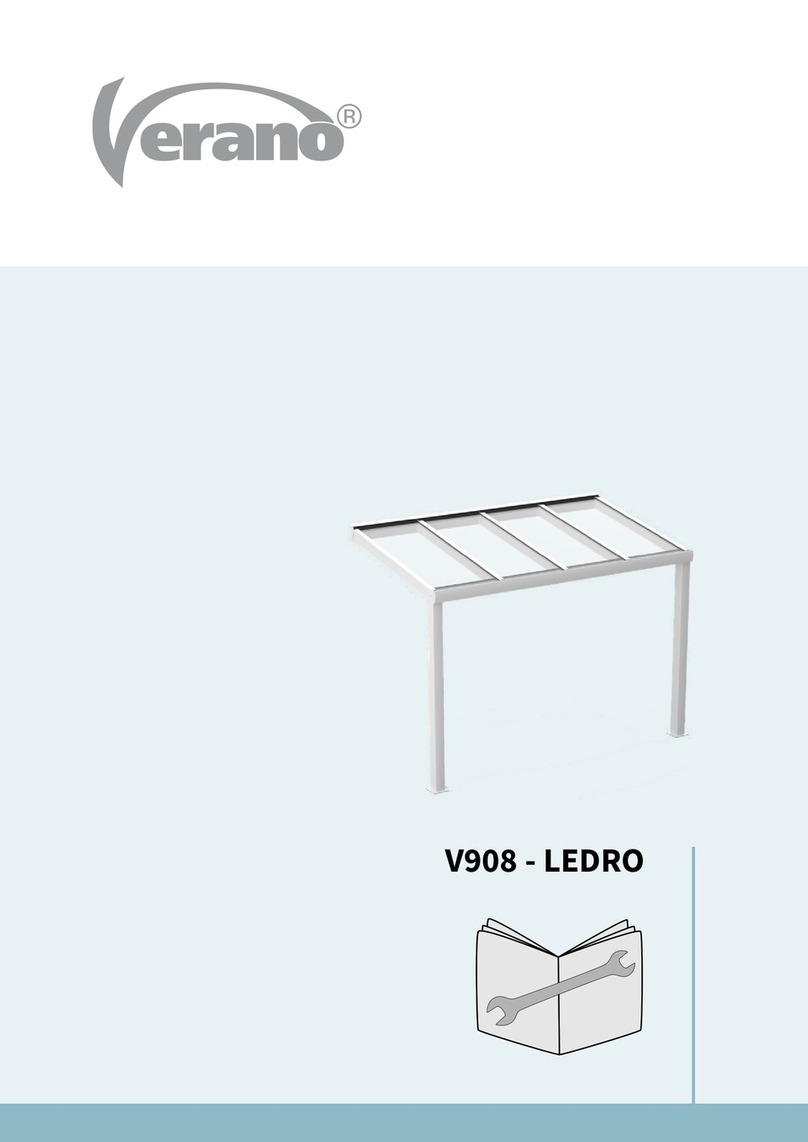
Verano RIVA V920 User manual

INSTALLATION MANUAL
VERANDA V920 - RIVA

1779-160404(2)Drukfouten, fouten en technische wijzigingen voorbehouden.
INSTALLATION MANUAL VERANDA V920 - RIVA
10399-191126EN
1
Subject to misprints, errors and technical modifications.
Index
page
Exploded view 2
Summary of the parts 3
Required tools 4
Important before installation 4
1. Mounting the wall prolel 5
2. Fixing the tilt prole 6
3. Gutter and Post 7
4. Footplate 8
5. Laying the two end proles (outer beams) 9
6. Positioning and lining up 10
7. Anchoring the Footplate 10
8. Laying the beam proles 11
9. How to lay the glass/polycarbonate panels 12
10. Direction of mounting 12
11. Inserting the rubber wall strips 13
12. Placing glass roong panels and rubber strips 14
13. Drain pipe and post click prole 15
Processing the polycarbonate roof panels 16
CE-statement 19

1779-160404(2)Drukfouten, fouten en technische wijzigingen voorbehouden.
INSTALLATION MANUAL VERANDA V920 - RIVA
10399-191126EN
2
Subject to misprints, errors and technical modifications.
Exploded view
123
5
6
12 9
19
20
23
22
16
13
14
8
11
10
17
15
27
15
18
21
15
15
7
42526 24

1779-160404(2)Drukfouten, fouten en technische wijzigingen voorbehouden.
INSTALLATION MANUAL VERANDA V920 - RIVA
10399-191126EN
3
Subject to misprints, errors and technical modifications.
Summary of the parts
1. Wall prole
2. Tilt prole
3. Beam prole
4. End frame beam
5. Gutter prole
6. Post
7. Post click prole
8. Glass strip
9. Rubber for tilt prole
10. Glass rubber strip - below
11. Rubber strip for glass (a) or polycarbonate (b) - above
12. Rubber wall prole
13. Casting beam/gutter
14. T connector
15. Side plates (wall and gutter prole)
16. Footplate
17. Coupling Post/gutter
18. Coupling Aluminium Post/gutter
19. Leave catcher
20. Waste duct
21. Waste duct nut
22. Drain pipe ø 50 mm
23. Drain pipe bracket
24. Condensate prole (poly)
25. Glass
26. Polycarbonate
27. Concrete foundation block
Compri tape
A Crosshead screw DIN 7970 4.8 x 27
B Crosshead screw DIN 7981 4.5 x 2
C Locking screw DIN 916 M5x20
D Bolt DIN 912 M12 x 30
E Washer DIN 125 M12
F Blind rivet nut M122
Inclination
min. 7°
max. 15°
H1
D
B
B
H2

1779-160404(2)Drukfouten, fouten en technische wijzigingen voorbehouden.
INSTALLATION MANUAL VERANDA V920 - RIVA
10399-191126EN
4
Subject to misprints, errors and technical modifications.
Important before installation
Be careful for damages
Don’t use a knife or any other sharp object when opening the packing. This may cause damage to the content of the
package. Put the content of the package on a so surface. Be careful when drilling, falling drill cuttings can cause damages.
Check if the façade is at.
General warning
Installing the Verano® product yourself is at your own risk. Only use this instruction as a tool and for the installation of
this specic Verano® product. If you cannot install the product yourself, you can always opt for professional installation.
The installation team of Verano® is pleased to help you.
Required tools
• Drilling machine
• Metal drill
• Masonry drill
• Crosshead screwdriver
• Allen key set
• Tape measure
• Level
• Pencil
• Cutting plier
• Flathead screwdriver
• Silicone kit
• Rubber hammer

1779-160404(2)Drukfouten, fouten en technische wijzigingen voorbehouden.
INSTALLATION MANUAL VERANDA V920 - RIVA
10399-191126EN
5
Subject to misprints, errors and technical modifications.
1. Mountingthewallprole
1 2
3
• Mount the wall prole (1) using the le end-screw only.
• Ensure that the wall prole is levelled out and mark the position of the remaining holes.
• Dismantle the wall prole and drill the holes where marked.
• Push the compritape into the groove along the complete width of the wall prole (see gure 4).
• Use minimum screw plug size 8 and screw size m8 to screw the prole into the wall.
• Apply sealant (kit) right along the top (see gure 4).
Drill 2 holes (Ø 5 mm) into the wall prole (1) for each corresponding raer.
9 1
100 mm
100 mm
10 mm
KIT
1
Compritape
Place piece of tape to prevent
the tilt profile from falling out
Wall Wall
drilling line
2
2
9 1
100 mm
100 mm
10 mm
KIT
1
Compritape
Place piece of tape to prevent
the tilt profile from falling out
Wall Wall
drilling line
2
2
9 1 100 mm
100 mm
10 mm
KIT
1
Compritape
Place piece of tape to prevent
the tilt profile from falling out
Wall Wall
drilling line
2
2

1779-160404(2)Drukfouten, fouten en technische wijzigingen voorbehouden.
INSTALLATION MANUAL VERANDA V920 - RIVA
10399-191126EN
6
Subject to misprints, errors and technical modifications.
9 1 100 mm
100 mm
10 mm
KIT
1
Compritape
Place piece of tape to prevent
the tilt profile from falling out
Wall
Wall
drilling line
2
2
9 1 100 mm
100 mm
10 mm
KIT
1
Compritape
Place piece of tape to prevent
the tilt profile from falling out
Wall
Wall
drilling line
2
2
2. Fixingthetiltprole
4 5

1779-160404(2)Drukfouten, fouten en technische wijzigingen voorbehouden.
INSTALLATION MANUAL VERANDA V920 - RIVA
10399-191126EN
7
Subject to misprints, errors and technical modifications.
drilling
line
x nr. of beams
D
300 mm
Seal round the edge
before and aer mounting
Seal round the edge
before and aer mounting
Foundation
block
16
Foundation
hole
E
5
19 2120
65 mm
18
17 6
330 mm
A
E
D
F
14
15
B (x6)
drilling
line
x nr. of beams
D
300 mm
Seal round the edge
before and aer mounting
Seal round the edge
before and aer mounting
Foundation
block
16
Foundation
hole
E
5
19 2120
65 mm
18
17 6
330 mm
A
E
D
F
14
15
B (x6)
drilling
line
x nr. of beams
D
300 mm
Seal round the edge
before and aer mounting
Seal round the edge
before and aer mounting
Foundation
block
16
Foundation
hole
E
5
19 2120
65 mm
18
17 6
330 mm
A
E
D
F
14
15
B (x6)
Coupling Post/gutter (2x)
Side plates gutter prole (15) (2x) and T connectors (14) (x nr. of beams).
7
8
3. Gutter and Post
drilling
line
x nr. of beams
D
300 mm
Seal round the edge
before and aer mounting
Seal round the edge
before and aer mounting
Foundation
block
16
Foundation
hole
E
5
19 2120
65 mm
18
17 6
330 mm
A
E
D
F
14
15
B (x6)
drilling
line
x nr. of beams
D
300 mm
Seal round the edge
before and aer mounting
Seal round the edge
before and aer mounting
Foundation
block
16
Foundation
hole
E
5
19 2120
65 mm
18
17 6
330 mm
A
E
D
F
14
15
B (x6)
drilling
line
x nr. of beams
D
300 mm
Seal round the edge
before and aer mounting
Seal round the edge
before and aer mounting
Foundation
block
16
Foundation
hole
E
5
19 2120
65 mm
18
17 6
330 mm
A
E
D
F
14
15
B (x6)
drilling
line
x nr. of beams
D
300 mm
Seal round the edge
before and aer mounting
Seal round the edge
before and aer mounting
Foundation
block
16
Foundation
hole
E
5
19 2120
65 mm
18
17 6
330 mm
A
E
D
F
14
15
B (x6)
Drainage
• First measure the position of the center hole, then drill on the drilling line on the inside of the gutter.
• Drill a 48 mm hole on the outside of the gutter.
• Fix in the waste duct and nut (20 + 21) and the leaf catcher (19).
6
drilling
line
x nr. of beams
D
300 mm
Seal round the edge
before and aer mounting
Seal round the edge
before and aer mounting
Foundation
block
16
Foundation
hole
E
5
19 2120
65 mm
18
17 6
330 mm
A
E
D
F
14
15
B (x6)

1779-160404(2)Drukfouten, fouten en technische wijzigingen voorbehouden.
INSTALLATION MANUAL VERANDA V920 - RIVA
10399-191126EN
8
Subject to misprints, errors and technical modifications.
drilling
line
x nr. of beams
D
300 mm
Seal round the edge
before and aer mounting
Seal round the edge
before and aer mounting
Foundation
block
16
Foundation
hole
E
5
19 2120
65 mm
18
17 6
330 mm
A
E
D
F
14
15
B (x6)
4. Footplate
Position the footplate and foundation block (2x).
Lower the post onto the footplate.
Position the gutter unit.
Anchor the footplate.
9
11
10
12
drilling
line
x nr. of beams
D
300 mm
Seal round the edge
before and aer mounting
Seal round the edge
before and aer mounting
Foundation
block
16
Foundation
hole
E
5
19 2120
65 mm
18
17 6
330 mm
A
E
D
F
14
15
B (x6)
drilling
line
x nr. of beams
D
300 mm
Seal round the edge
before and aer mounting
Seal round the edge
before and aer mounting
Foundation
block
16
Foundation
hole
E
5
19 2120
65 mm
18
17 6
330 mm
A
E
D
F
14
15
B (x6)
drilling
line
x nr. of beams
D
300 mm
Seal round the edge
before and aer mounting
Seal round the edge
before and aer mounting
Foundation
block
16
Foundation
hole
E
5
19 2120
65 mm
18
17 6
330 mm
A
E
D
F
14
15
B (x6)

1779-160404(2)Drukfouten, fouten en technische wijzigingen voorbehouden.
INSTALLATION MANUAL VERANDA V920 - RIVA
10399-191126EN
9
Subject to misprints, errors and technical modifications.
A
C
13
Allow the gutter to slant
towards the drainpipe
drainpipe
90° 90°
90° 90°
14
14
5
3
1
2
2
3
1
3
13
5. Layingthetwoendproles(outerbeams)
Endprole-wall(leandright)
• Slide the end prole (3) into the tilt prole (2).
• Screw them together with 1 screw.
Endprole-gutter(leandright)
• Slide the end prole (3) into the gutter (5).
• Slide the T connector (14) under the end prole.
• Screw it in with the locking screw.
DO NOT TIGHTEN THE SCREW!!
14 15
A
C
13
Allow the gutter to slant
towards the drainpipe
drainpipe
90° 90°
90° 90°
14
14
5
3
1
2
2
3
1
3
A
C
13
Allow the gutter to slant
towards the drainpipe
drainpipe
90° 90°
90° 90°
14
14
5
3
1
2
2
3
1
3
A
C
13
Allow the gutter to slant
towards the drainpipe
drainpipe
90° 90°
90° 90°
14
14
5
3
1
2
2
3
1
3
A
C
13
Allow the gutter to slant
towards the drainpipe
drainpipe
90° 90°
90° 90°
14
14
5
3
1
2
2
3
1
3

1779-160404(2)Drukfouten, fouten en technische wijzigingen voorbehouden.
INSTALLATION MANUAL VERANDA V920 - RIVA
10399-191126EN
10
Subject to misprints, errors and technical modifications.
A
C
14
2
1
3
13
14
5
3
1
2
A
C
14
2
1
3
13
14
5
3
1
2
A
C
13
Allow the gutter to slant
towards the drainpipe
drainpipe
90° 90°
90° 90°
14
14
5
3
1
2
2
3
1
3
A
C
13
Allow the gutter to slant
towards the drainpipe
drainpipe
90° 90°
90° 90°
14
14
5
3
1
2
2
3
1
3
16
19
17
18
6. Positioning and lining up
7. Anchoring the footplate
A
C
13
Allow the gutter to slant
towards the drainpipe
drainpipe
90° 90°
90° 90°
14
14
5
3
1
2
2
3
1
3
• Drill four holes through the footplate (16) into the foundation block.
• Screw the Footplate down onto the foundation block.

1779-160404(2)Drukfouten, fouten en technische wijzigingen voorbehouden.
INSTALLATION MANUAL VERANDA V920 - RIVA
10399-191126EN
11
Subject to misprints, errors and technical modifications.
20
8. Layingthebeamproles
Beam - wall
• Slide the beam (3) into the tilt prole (2).
• Screw it in with 2 screws.
Beam - gutter
• Slide the beam (3) into the gutter (5).
• Slide the T connector (14) under the beam prole.
• Position the beam (3) and then x it.
• Repeat this until all the remaining beams have been xed.
21 22
A
C
14
2
1
3
13
14
5
3
1
2
A
C
14
2
1
3
13
14
5
3
1
2
A
C
14
2
1
3
13
14
5
3
1
2
A
C
14
2
1
3
13
14
5
3
1
2
A
C
14
2
1
3
13
14
5
3
1
2

1779-160404(2)Drukfouten, fouten en technische wijzigingen voorbehouden.
INSTALLATION MANUAL VERANDA V920 - RIVA
10399-191126EN
12
Subject to misprints, errors and technical modifications.
Stopper
3
10 10
Slack of ± 5 mm
= Position of the mechanic
Direction of mounting
12 8 (2x) 11a of 11b (2x)
1 2 3 4
Stopper
3
10 10
Slack of ± 5 mm
= Position of the mechanic
Direction of mounting
12 8 (2x) 11a of 11b (2x)
1 2 3 4
Stopper
3
10 10
Slack of ± 5 mm
= Position of the mechanic
Direction of mounting
12 8 (2x) 11a of 11b (2x)
1
2 3 4
Stopper
3
10 10
Slack of ± 5 mm
= Position of the mechanic
Direction of mounting
12 8 (2x) 11a of 11b (2x)
1
2
3 4
Stopper
3
10 10
Slack of ± 5 mm
= Position of the mechanic
Direction of mounting
12
8 (2x) 11a of 11b (2x)
1 2
3 4
Stopper
3
10 10
Slack of ± 5 mm
= Position of the mechanic
Direction of mounting
12 8 (2x) 11a of 11b (2x)
1 2 3 4
• Start with the end prole on the le-hand side. Lay the glass (or polycarbonate) roof panel.
• Insert the rubber for the wall prole (12) between the beams.
• Insert the glass strips (8) and the end frames (4).
• Insert the rubbers (11a for glass or 11b for polycarbonate).
Repeat steps 1 – 4 until all the panels have been xed.
23
26
24
25
9. How to lay the glass/polycarbonate panels
10. Direction of mounting
Stopper
3
10 10
Slack of ± 5 mm
= Position of the mechanic
Direction of mounting
12 8 (2x) 11a of 11b (2x)
1 2 3 4
= Position of the mechanic
PLEASE NOTE: Lay the glass panels with the polished
facet edge towards the gutter!

1779-160404(2)Drukfouten, fouten en technische wijzigingen voorbehouden.
INSTALLATION MANUAL VERANDA V920 - RIVA
10399-191126EN
13
Subject to misprints, errors and technical modifications.
Polycarbonate
Glass/Polycarbonate Glass/Polycarbonate Glass/Polycarbonate
Glass
Polycarbonate
Glass
11a of 11b
12
12
7
‘click’
‘click’ ‘click’
12
8
11
8
2
1
22
11a of 11b
2
3
1
2
3
1
4
2
1
8
3
8
8
4
4
Polycarbonate
Glass/Polycarbonate Glass/Polycarbonate Glass/Polycarbonate
Glass
Polycarbonate
Glass
11a of 11b
12
12
7
‘click’
‘click’ ‘click’
12
8
11
8
2
1
22
11a of 11b
2
3
1
2
3
1
4
2
1
8
3
8
8
4
4
Polycarbonate
Glass/Polycarbonate Glass/Polycarbonate Glass/Polycarbonate
Glass
Polycarbonate
Glass
11a of 11b
12
12
7
‘click’
‘click’ ‘click’
12
8
11
8
2
1
22
11a of 11b
2
3
1
2
3
1
4
2
1
8
3
8
8
4
4
27 28
29
11. Inserting the rubber wall strips

1779-160404(2)Drukfouten, fouten en technische wijzigingen voorbehouden.
INSTALLATION MANUAL VERANDA V920 - RIVA
10399-191126EN
14
Subject to misprints, errors and technical modifications.
12. Placingglassroongpanelsandrubberstrips
The rubber strips are available in two sizes:
- for glass (11a) 16 mm.
- for polycarbonate (11b) 10 mm
30
31
32
Polycarbonate
Glass/Polycarbonate Glass/Polycarbonate Glass/Polycarbonate
Glass
Polycarbonate
Glass
11a of 11b
12
12
7
‘click’
‘click’ ‘click’
12
8
11
8
2
1
22
11a of 11b
2
3
1
2
3
1
4
2
1
8
3
8
8
4
4
Polycarbonate
Glass/Polycarbonate Glass/Polycarbonate Glass/Polycarbonate
Glass
Polycarbonate
Glass
11a of 11b
12
12
7
‘click’
‘click’ ‘click’
12
8
11
8
2
1
22
11a of 11b
2
3
1
2
3
1
4
2
1
8
3
8
8
4
4
Polycarbonate
Glass/Polycarbonate Glass/Polycarbonate Glass/Polycarbonate
Glass
Polycarbonate
Glass
11a of 11b
12
12
7
‘click’
‘click’ ‘click’
12
8
11
8
2
1
22
11a of 11b
2
3
1
2
3
1
4
2
1
8
3
8
8
4
4
Polycarbonate
Glass/Polycarbonate Glass/Polycarbonate Glass/Polycarbonate
Glass
Polycarbonate
Glass
11a of 11b
12
12
7
‘click’
‘click’ ‘click’
12
8
11
8
2
1
22
11a of 11b
2
3
1
2
3
1
4
2
1
8
3
8
8
4
4
Polycarbonate
Glass/Polycarbonate Glass/Polycarbonate Glass/Polycarbonate
Glass
Polycarbonate
Glass
11a of 11b
12
12
7
‘click’
‘click’ ‘click’
12
8
11
8
2
1
22
11a of 11b
2
3
1
2
3
1
4
2
1
8
3
8
8
4
4

1779-160404(2)Drukfouten, fouten en technische wijzigingen voorbehouden.
INSTALLATION MANUAL VERANDA V920 - RIVA
10399-191126EN
15
Subject to misprints, errors and technical modifications.
13. Drainpipeandpostclickprole
32 The drain pipe is located inside the post.
Drainpipe:
• Click in the drain pipe (22) and connect it to the drains.
• Click the post click prole (7) into the post.
• Fill in the foundation holes.
Polycarbonate
Glass/Polycarbonate Glass/Polycarbonate Glass/Polycarbonate
Glass
Polycarbonate
Glass
11a of 11b
12
12
7
‘click’
‘click’ ‘click’
12
8
11
8
2
1
22
11a of 11b
2
3
1
2
3
1
4
2
1
8
3
8
8
4
4

1779-160404(2)Drukfouten, fouten en technische wijzigingen voorbehouden.
INSTALLATION MANUAL VERANDA V920 - RIVA
10399-191126EN
16
Subject to misprints, errors and technical modifications.
Processing the polycarbonate roof panels
Storage
If you storage the polycarbonate roof panels, to plates need to lie on a at surface, for example pallets.
The plates may not be stacked directly on the ground. Avoid direct sunlight and rainwater and cover
the plates with a white polythene foil. Storage preferably inside. If outside, then under a roof.
Sawing
• Saw with a hand circular saw or jig saw with ne-tooth saw blade.
Use a stable and vibration-free surface and avoid swinging and apping of the plate.
Do not remove the protection foil before the sawing and drilling. This prevents scratching on the surface.
• Clean the canals with dry compressed air.
• Aer that, immediately close with a Anti-dust or transportation tape.
Opslag
- Bij opslag dienen de polycarbonaatplaten op een effen ondergrond
te liggen,
bijvoorbeeld op pallets. De platen mogen niet rechtstreeks
op de grond gestapeld worden.
- Vermijd direct zonlichten en regenwater en dek af met witte
polytheenfolie.
- Opslag bij voorkeur binnen. Indien buiten dan onder een afdak.
Zagen
- Zagen met een handcirkelzaag of decoupeerzaag met fijn getand
zaagblad.
- Gebruik een stabiele en trilvrije ondergrond en voorkom het slingeren
en klapperen van de plaat.
- De beschermfolie niet verwijderen voor het zagen en boren.
Dit voorkomt krassen op het oppervlak.
- Daarna de kanalen met droge perslucht reinigen. Daarna onmiddellijk
met Antidust tape of transport tape dichten.
Speling en installatie
- Door temperatuurschommelingen kunnen polycarbonaatplaten
uitzetten of krimpen.
- De plaat wordt aan de onderzijde geblokkeerd tegen afschuiving door
een eindschotje op het afdekprofiel. De hele speling dient dan aan de
bovenzijde te worden voorzien.
- De zijkant van de plaat dient minimaal een speling van circa 3 mm
te hebben.
Afdichten tegen vocht en condens
- Polycarbonaat is gas- en dampdoorlatend daarom valt condensvocht
niet helemaal te voorkomen. Een juiste dakhelling tussen 7 – 10oo en
een doelmatige afdichting beperkt dit.
- De platen dienen aan de bovenzijde afgeplakt te worden met gesloten
AntiDust tape. De onderkant dient te worden afgeplakt met perforatie
AntiDust tape.
- Mogelijk onder en boven een strookje beschermfolie weghalen
(ca. 3 cm).
- Licht insnijden met stainley mes.
Condensprofiel plaatsen
Na het aanbrengen van de AntiDust tape de plaat aan de onderzijde
voorzien van een condensprofiel over de gehele breedte van de plaat.
Verwijderen beschermfolie van UV-laag
Na het aanbrengen van het condensprofiel kan de polycarbonaatplaat
gemonteerd worden. Het verwijderen van de UV beschermfolie kan
eventueel na het monteren maar ook voor het monteren. Als het voor
het monteren verwijderd wordt is dat eenvoudiger en bovendien veiliger.
Men hoe daarvoor niet het dak op.
Niet op de polycarbonaatplaten gaan staan
De polycarbonaatplaten zijn absoluut sterk, maar onvoldoende bestand
tegen puntbelasting. Loop er niet op! Loop alleen op de randen waar
balken en afdekstrips zitten of gebruik een plank.
Reiniging
- De platen minimaal 1 keer per jaar met lauw water en zeepsop
reinigen. Gebruik eventueel een oplossing van net alkalische zeep in
combinatie met een telescopische autoborstel.
- Gebruik een zachte borstel of spons.
- Nooit schuurmiddelen of oplosmiddelen gebruiken.
- Voor- en naspoelen met veel water en als laatste afnemen met een
zachte doek.
Het verwerken van polycarbonaatplaat
AntiDust tape (gesloten)
UV-laag zit boven
AntiDust tape
(open)
7 - 10oo
Condensprofiel
UV-laag
Condensprofiel
Backlash and installation
Due to temperature uctuations, polycarbonate roof panels can bulb or shrink.
The plate is blocked against shearing on the underside with an end partition on the cover prole.
The whole backlash needs to be provided on the upper side.
The side of the plate needs to have a backlash of 3 mm.
Opslag
- Bij opslag dienen de polycarbonaatplaten op een effen ondergrond
te liggen,
bijvoorbeeld op pallets. De platen mogen niet rechtstreeks
op de grond gestapeld worden.
- Vermijd direct zonlichten en regenwater en dek af met witte
polytheenfolie.
- Opslag bij voorkeur binnen. Indien buiten dan onder een afdak.
Zagen
- Zagen met een handcirkelzaag of decoupeerzaag met fijn getand
zaagblad.
- Gebruik een stabiele en trilvrije ondergrond en voorkom het slingeren
en klapperen van de plaat.
- De beschermfolie niet verwijderen voor het zagen en boren.
Dit voorkomt krassen op het oppervlak.
- Daarna de kanalen met droge perslucht reinigen. Daarna onmiddellijk
met Antidust tape of transport tape dichten.
Speling en installatie
- Door temperatuurschommelingen kunnen polycarbonaatplaten
uitzetten of krimpen.
- De plaat wordt aan de onderzijde geblokkeerd tegen afschuiving door
een eindschotje op het afdekprofiel. De hele speling dient dan aan de
bovenzijde te worden voorzien.
- De zijkant van de plaat dient minimaal een speling van circa 3 mm
te hebben.
Afdichten tegen vocht en condens
- Polycarbonaat is gas- en dampdoorlatend daarom valt condensvocht
niet helemaal te voorkomen. Een juiste dakhelling tussen 7 – 10oo en
een doelmatige afdichting beperkt dit.
- De platen dienen aan de bovenzijde afgeplakt te worden met gesloten
AntiDust tape. De onderkant dient te worden afgeplakt met perforatie
AntiDust tape.
- Mogelijk onder en boven een strookje beschermfolie weghalen
(ca. 3 cm).
- Licht insnijden met stainley mes.
Condensprofiel plaatsen
Na het aanbrengen van de AntiDust tape de plaat aan de onderzijde
voorzien van een condensprofiel over de gehele breedte van de plaat.
Verwijderen beschermfolie van UV-laag
Na het aanbrengen van het condensprofiel kan de polycarbonaatplaat
gemonteerd worden. Het verwijderen van de UV beschermfolie kan
eventueel na het monteren maar ook voor het monteren. Als het voor
het monteren verwijderd wordt is dat eenvoudiger en bovendien veiliger.
Men hoe daarvoor niet het dak op.
Niet op de polycarbonaatplaten gaan staan
De polycarbonaatplaten zijn absoluut sterk, maar onvoldoende bestand
tegen puntbelasting. Loop er niet op! Loop alleen op de randen waar
balken en afdekstrips zitten of gebruik een plank.
Reiniging
- De platen minimaal 1 keer per jaar met lauw water en zeepsop
reinigen. Gebruik eventueel een oplossing van net alkalische zeep in
combinatie met een telescopische autoborstel.
- Gebruik een zachte borstel of spons.
- Nooit schuurmiddelen of oplosmiddelen gebruiken.
- Voor- en naspoelen met veel water en als laatste afnemen met een
zachte doek.
Het verwerken van polycarbonaatplaat
AntiDust tape (gesloten)
UV-laag zit boven
AntiDust tape
(open)
7 - 10oo
Condensprofiel
UV-laag
Condensprofiel

1779-160404(2)Drukfouten, fouten en technische wijzigingen voorbehouden.
INSTALLATION MANUAL VERANDA V920 - RIVA
10399-191126EN
17
Subject to misprints, errors and technical modifications.
Sealing against moisture
Polycarbonate is gas- and vapor-permeable, this is the reason that moisture can not be quite prevented. A right slope of
the roof between 7° – 10° and an eective sealing can limit this.
• The plates need to be taped on the upper side with a closed Anti-dust tape.
• The underside needs to be taped with a perforated AntiDust tape.
• If possible, remove a strip of protection foil below and above (approx. 3 cm).
• Cut lightly with an utility knife.
Opslag
- Bij opslag dienen de polycarbonaatplaten op een effen ondergrond
te liggen,
bijvoorbeeld op pallets. De platen mogen niet rechtstreeks
op de grond gestapeld worden.
- Vermijd direct zonlichten en regenwater en dek af met witte
polytheenfolie.
- Opslag bij voorkeur binnen. Indien buiten dan onder een afdak.
Zagen
- Zagen met een handcirkelzaag of decoupeerzaag met fijn getand
zaagblad.
- Gebruik een stabiele en trilvrije ondergrond en voorkom het slingeren
en klapperen van de plaat.
- De beschermfolie niet verwijderen voor het zagen en boren.
Dit voorkomt krassen op het oppervlak.
- Daarna de kanalen met droge perslucht reinigen. Daarna onmiddellijk
met Antidust tape of transport tape dichten.
Speling en installatie
- Door temperatuurschommelingen kunnen polycarbonaatplaten
uitzetten of krimpen.
- De plaat wordt aan de onderzijde geblokkeerd tegen afschuiving door
een eindschotje op het afdekprofiel. De hele speling dient dan aan de
bovenzijde te worden voorzien.
- De zijkant van de plaat dient minimaal een speling van circa 3 mm
te hebben.
Afdichten tegen vocht en condens
- Polycarbonaat is gas- en dampdoorlatend daarom valt condensvocht
niet helemaal te voorkomen. Een juiste dakhelling tussen 7 – 10oo en
een doelmatige afdichting beperkt dit.
- De platen dienen aan de bovenzijde afgeplakt te worden met gesloten
AntiDust tape. De onderkant dient te worden afgeplakt met perforatie
AntiDust tape.
- Mogelijk onder en boven een strookje beschermfolie weghalen
(ca. 3 cm).
- Licht insnijden met stainley mes.
Condensprofiel plaatsen
Na het aanbrengen van de AntiDust tape de plaat aan de onderzijde
voorzien van een condensprofiel over de gehele breedte van de plaat.
Verwijderen beschermfolie van UV-laag
Na het aanbrengen van het condensprofiel kan de polycarbonaatplaat
gemonteerd worden. Het verwijderen van de UV beschermfolie kan
eventueel na het monteren maar ook voor het monteren. Als het voor
het monteren verwijderd wordt is dat eenvoudiger en bovendien veiliger.
Men hoe daarvoor niet het dak op.
Niet op de polycarbonaatplaten gaan staan
De polycarbonaatplaten zijn absoluut sterk, maar onvoldoende bestand
tegen puntbelasting. Loop er niet op! Loop alleen op de randen waar
balken en afdekstrips zitten of gebruik een plank.
Reiniging
- De platen minimaal 1 keer per jaar met lauw water en zeepsop
reinigen. Gebruik eventueel een oplossing van net alkalische zeep in
combinatie met een telescopische autoborstel.
- Gebruik een zachte borstel of spons.
- Nooit schuurmiddelen of oplosmiddelen gebruiken.
- Voor- en naspoelen met veel water en als laatste afnemen met een
zachte doek.
Het verwerken van polycarbonaatplaat
AntiDust tape (gesloten)
UV-laag zit boven
AntiDust tape
(open)
7 - 10oo
Condensprofiel
UV-laag
Condensprofiel
Placingthemoistureprole
Aer applying the Anti-dust tape, provide the underside of the plate with a condensation strip over the whole width of the
plate.
Opslag
- Bij opslag dienen de polycarbonaatplaten op een effen ondergrond
te liggen,
bijvoorbeeld op pallets. De platen mogen niet rechtstreeks
op de grond gestapeld worden.
- Vermijd direct zonlichten en regenwater en dek af met witte
polytheenfolie.
- Opslag bij voorkeur binnen. Indien buiten dan onder een afdak.
Zagen
- Zagen met een handcirkelzaag of decoupeerzaag met fijn getand
zaagblad.
- Gebruik een stabiele en trilvrije ondergrond en voorkom het slingeren
en klapperen van de plaat.
- De beschermfolie niet verwijderen voor het zagen en boren.
Dit voorkomt krassen op het oppervlak.
- Daarna de kanalen met droge perslucht reinigen. Daarna onmiddellijk
met Antidust tape of transport tape dichten.
Speling en installatie
- Door temperatuurschommelingen kunnen polycarbonaatplaten
uitzetten of krimpen.
- De plaat wordt aan de onderzijde geblokkeerd tegen afschuiving door
een eindschotje op het afdekprofiel. De hele speling dient dan aan de
bovenzijde te worden voorzien.
- De zijkant van de plaat dient minimaal een speling van circa 3 mm
te hebben.
Afdichten tegen vocht en condens
- Polycarbonaat is gas- en dampdoorlatend daarom valt condensvocht
niet helemaal te voorkomen. Een juiste dakhelling tussen 7 – 10oo en
een doelmatige afdichting beperkt dit.
- De platen dienen aan de bovenzijde afgeplakt te worden met gesloten
AntiDust tape. De onderkant dient te worden afgeplakt met perforatie
AntiDust tape.
- Mogelijk onder en boven een strookje beschermfolie weghalen
(ca. 3 cm).
- Licht insnijden met stainley mes.
Condensprofiel plaatsen
Na het aanbrengen van de AntiDust tape de plaat aan de onderzijde
voorzien van een condensprofiel over de gehele breedte van de plaat.
Verwijderen beschermfolie van UV-laag
Na het aanbrengen van het condensprofiel kan de polycarbonaatplaat
gemonteerd worden. Het verwijderen van de UV beschermfolie kan
eventueel na het monteren maar ook voor het monteren. Als het voor
het monteren verwijderd wordt is dat eenvoudiger en bovendien veiliger.
Men hoe daarvoor niet het dak op.
Niet op de polycarbonaatplaten gaan staan
De polycarbonaatplaten zijn absoluut sterk, maar onvoldoende bestand
tegen puntbelasting. Loop er niet op! Loop alleen op de randen waar
balken en afdekstrips zitten of gebruik een plank.
Reiniging
- De platen minimaal 1 keer per jaar met lauw water en zeepsop
reinigen. Gebruik eventueel een oplossing van net alkalische zeep in
combinatie met een telescopische autoborstel.
- Gebruik een zachte borstel of spons.
- Nooit schuurmiddelen of oplosmiddelen gebruiken.
- Voor- en naspoelen met veel water en als laatste afnemen met een
zachte doek.
Het verwerken van polycarbonaatplaat
AntiDust tape (gesloten)
UV-laag zit boven
AntiDust tape
(open)
7 - 10oo
Condensprofiel
UV-laag
Condensprofiel
(closed)
UV-layer on top
UV-layer
Condensation strip
Condensation strip

1779-160404(2)Drukfouten, fouten en technische wijzigingen voorbehouden.
INSTALLATION MANUAL VERANDA V920 - RIVA
10399-191126EN
18
Subject to misprints, errors and technical modifications.
Removing the protection foil of the UV-layer
Aer applying the moisture prole, the polycarbonate roof panel can be installed. The removing of the UV protection foil
can be done aer mounting, but also before mounting. It is more easy and more safe to remove it before mounting.
You do not need to be on the roof to do this.
Do not stand on the polycarbonate roof panel
The polycarbonate roof panels are solid and strong, but not resisted enough against concentrated load.
Do not walk on the panels! Only walk on the edges where beams and cover strips are or use a shelf.
Cleaning
• Clean the polycarbonate roof panels at least once a year with tepid water and soap. If necessary, use non-alkaline soap
in combination with a telescopic car brush.
• Use a so brush or sponge.
• Never use abrasives or solvents!
• Before- and aer rinsing with a lot of water and at last clean with a so cloth.
Opslag
- Bij opslag dienen de polycarbonaatplaten op een effen ondergrond
te liggen,
bijvoorbeeld op pallets. De platen mogen niet rechtstreeks
op de grond gestapeld worden.
- Vermijd direct zonlichten en regenwater en dek af met witte
polytheenfolie.
- Opslag bij voorkeur binnen. Indien buiten dan onder een afdak.
Zagen
-Zagen met een handcirkelzaag of decoupeerzaag met fijn getand
zaagblad.
-Gebruik een stabiele en trilvrije ondergrond en voorkom het slingeren
en klapperen van de plaat.
-De beschermfolie niet verwijderen voor het zagen en boren.
Dit voorkomt krassen op het oppervlak.
-Daarna de kanalen met droge perslucht reinigen. Daarna onmiddellijk
met Antidust tape of transport tape dichten.
Speling en installatie
- Door temperatuurschommelingen kunnen polycarbonaatplaten
uitzetten of krimpen.
-De plaat wordt aan de onderzijde geblokkeerd tegen afschuiving door
een eindschotje op het afdekprofiel. De hele speling dient dan aan de
bovenzijde te worden voorzien.
- De zijkant van de plaat dient minimaal een speling van circa 3 mm
te hebben.
Afdichten tegen vocht en condens
-Polycarbonaat is gas- en dampdoorlatend daarom valt condensvocht
niet helemaal te voorkomen. Een juiste dakhelling tussen 5o– 10oen
een doelmatige afdichting beperkt dit.
-De platen dienen aan de bovenzijde afgeplakt te worden met gesloten
AntiDust tape. De onderkant dient te worden afgeplakt met perforatie
AntiDust tape.
- Mogelijk onder en boven een strookje beschermfolie weghalen
(ca. 3 cm).
- Licht insnijden met stainley mes.
Condensprofiel plaatsen
Na het aanbrengen van de AntiDust tape de plaat aan de onderzijde
voorzien van een condensprofiel over de gehele breedte van de plaat.
Verwijderen beschermfolie van UV-laag
Na het aanbrengen van het condensprofiel kan de polycarbonaatplaat
gemonteerd worden. Het verwijderen van de UV beschermfolie kan
eventueel na het monteren maar ook voor het monteren. Als het voor
het monteren verwijderd wordt is dat eenvoudiger en bovendien veiliger.
Men hoeft daarvoor niet het dak op.
Niet op de polycarbonaatplaten gaan staan
De polycarbonaatplaten zijn absoluut sterk, maar onvoldoende bestand
tegen puntbelasting. Loop er niet op! Loop alleen op de randen waar
balken en afdekstrips zitten of gebruik een plank.
Reiniging
-De platen minimaal 1 keer per jaar met lauw water en zeepsop
reinigen. Gebruik eventueel een oplossing van net alkalische zeep in
combinatie met een telescopische autoborstel.
- Gebruik een zachte borstel of spons.
- Nooit schuurmiddelen of oplosmiddelen gebruiken.
- Voor- en naspoelen met veel water en als laatste afnemen met een
zachte doek.
Het verwerken van polycarbonaatplaat
AntiDust tape (gesloten)
UV-laag zit boven
AntiDust tape
(gesloten)
5o– 10o
Condensprofiel
UV-laag
Condensprofiel

1779-160404(2)Drukfouten, fouten en technische wijzigingen voorbehouden.
INSTALLATION MANUAL VERANDA V920 - RIVA
10399-191126EN
19
Subject to misprints, errors and technical modifications.
EN 1090-1:2009 + A1:2011
Aluminium parts, to be applied in veranda’s according to order:
see sticker on the back of this installation manual
Tolerance on geometric data: EN 1090-3
Weldability: N.A.
Fracture toughness: not for aluminium products
Reaction to re: material classication: class A1
Cadmium emissions: NPD
Radioactive radiation: NPD
Durability: surface powder coated according quality class 3
Constructive properties:
Deadweight: design according EN 1990 (Eurocode 1) and EN 1999
(Eurocode 9): reference order noted on sticker on
the back of this installation
Distortion in serviceability limit state: NPD
Fatigue resistance: NPD
Fire retardend: Class A1
Fabrication: according to part specications; reference order
noted on sticker on the back of this installation
manual and EN 1090-3, EXC1
Verano BV
Bedrijfsweg 8
5683 CP Best, Nederland
Certicate number:
1231-CPR-1090-1-2400-A-293
Registration number TüV The Netherlands QA B.V.: 1231
Table of contents
Other Verano Outdoor Furnishing manuals
Popular Outdoor Furnishing manuals by other brands

Rowlinson Garden Products
Rowlinson Garden Products Haven Arbour Assembly instructions

Gutta
Gutta BS Plus 160 Assembly instructions

BENITO
BENITO Basculante PA623P Anchoring instructions

Outsunny
Outsunny 84C-298 Assembly & instruction manual

Costway
Costway HW66421 user manual

Sunjoy Industries
Sunjoy Industries D-GZ822PCO Assembly instructions

Courtyard Casual
Courtyard Casual Crestview 5534 Product instructions

Shademaker
Shademaker Athens Base Assembly guide

Sunjoy
Sunjoy D-AB001PWI Assembly instructions

sweeek.
sweeek. ELSA TXSUNKDX2 manual

Sunnydaze Decor
Sunnydaze Decor DSL-847 quick start guide

Waltons
Waltons 01GRO0606-V1 General instructions