Vericom V-Sense User manual

V-SenseTM Brake TEST
Quick Start Guide
The Vericom V-SenseTM system is the industry’s leading test kit for advanced brake/frictional testing. The
V-Sense DAQ, RG and MSI units include a simple test system that is ideal for testing nearly all vehicle types
on a variety of surfaces.
What’s Included:
V-Sense POD LED Panel –Power ON/OFF, Battery, Connected:
Press and hold the power button for approximately 3 seconds to power the POD on or off. The light
on the far left of the LED panel will illuminate when power is on. The 4 LED lights on the right side of the
LED panel indicate the battery level of the V-Sense POD.
Connect a V-Sense POD to the Tablet with wireless Bluetooth: The tablet included with your Vericom
V-Sense Brake Meter package is preloaded with the Vericom V-SenseTM Director application. It is also
preconfigured to connect to the V-Sense POD included within the case. To connect the tablet to the V-
Sense POD via Bluetooth, power on the POD and then open the Tools screen on the Vericom V-Sense
Director app (tablet). From the drop-down box, select the POD name desired for connection. Then click
the Connect button. Once the POD is connected, the connection box will show a green check mark and
the Connect button will become a Disconnect button.
(This message shows that the POD and the tablet (This message shows that the POD and the tablet
ARE NOT connected.) ARE connected.)
•Wall Charger/Power Supply
•Tablet with V-Sense Director
•Heavy Duty Vacuum Cup Mount
•16GB of Test Data Storage (10,000+
brake tests)
The V-Sense User Guide can be found on the
Vericom Website and on the USB drive included
with the package.
Power Button V-Sense is ON V-Sense Connected Light V-Sense POD Battery Level

V-SenseTM Brake TEST
Quick Start Guide
The V-Sense Director tablet app includes 6 primary screens: Start Testing, File Setup,
Sensor Setup, Test Viewer, Manage Tests, and Tools.
Start Testing
The Start Testing screen is the screen from where all testing is initiated. This screen
includes the Send Test Setup button –which is used to send the test instructions to
the V-Sense POD. The standard brake testing options include a 3 second brake test
and a 7 second brake test. For most low speed tests 30 MPH (45 KPH) or less, the 3
second test is enough time. If your test is conducted on a slippery surface or with a
test vehicle from a speed above 50 MPH or vehicle/surface with poor braking (less
than 0.4 Gs), the 7 second brake test is used.
Steps for the Brake Test Process
•Power ON the V-Sense POD.
•Power ON the tablet and open the V-Sense Director app.
•Mount the V-Sense POD on the test vehicle (typically on
the wind shield or other fixed location such as a side
window on the vehicle that does not interfere with the
driver’s view of the testing area).
•Connect the V-Sense POD to the tablet via Bluetooth
from the Tools page of the app.
•Move the test vehicle to the test location. Stop the
vehicle on the road/surface where you plan to apply the
brakes of the test vehicle.
•On the Start Testing page, select the 3s Brake Test or the
7s Brake Test. Next, click the Send Test Setup button.
This will send the setup to the V-Sense POD. DO NOT
move the vehicle or POD until the screen shows the
green START TEST and red CANCEL TEST buttons.
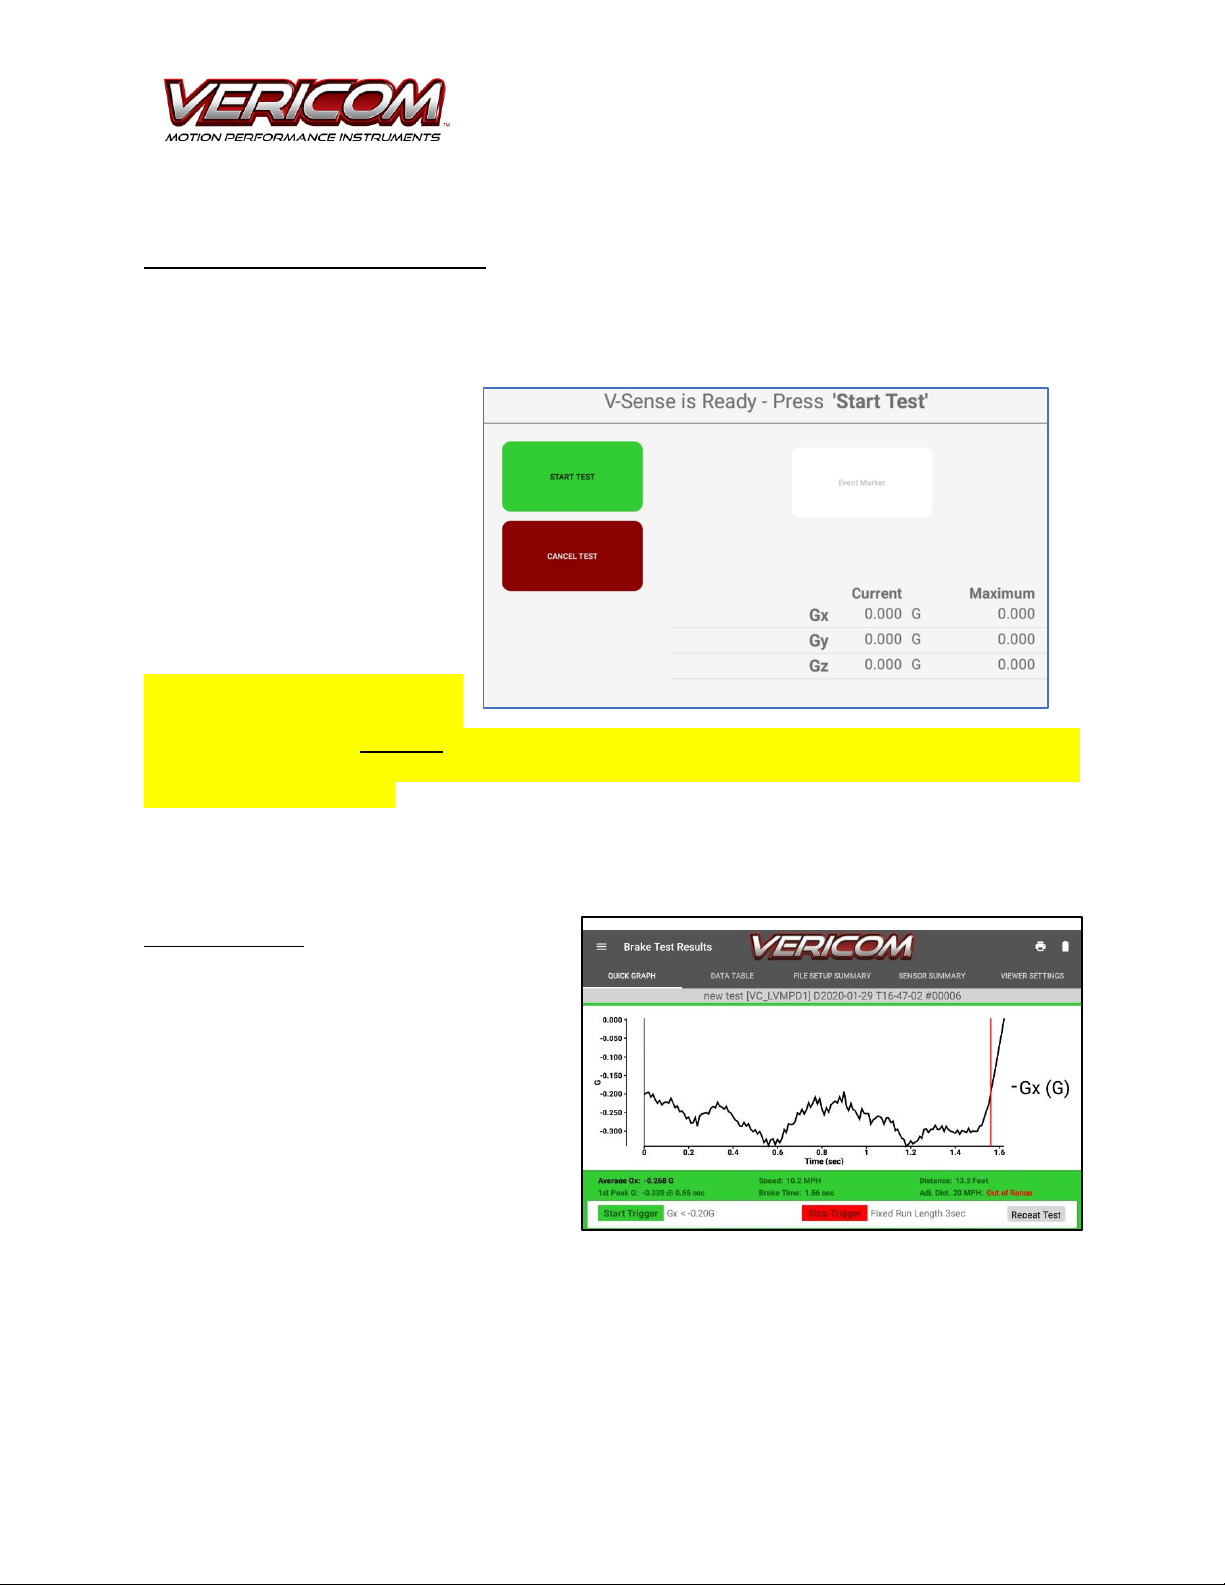
•Reposition the vehicle so that you have enough space to
accelerate to the brake area. Stop the vehicle and click
on the green START TEST button. The tablet is now
waiting for the POD to sense that the brakes have been
applied for the brake test.
•Accelerate HARD to the target speed (generally 10 to 30 MPH).
•When you arrive at the brake test location (the same location where you clicked the Send Test Setup button),
apply the brakes HARD to mimic a ‘panic braking’situation.
•Hold the brakes through the ENTIRE test until the tablet shows the message that the test is completed and ready
for download to the tablet.
V-Sense Director
(Tablet App)

V-SenseTM Brake TEST
Quick Start Guide
Brake Testing –Short Version
After you select the Send Test Setup button, the V-Sense Director app will send the test setup to the V-
Sense POD. The ‘test setup’ is the instructions for the test (meaning defining the start/stop triggers and
the sensors that are turned on for the test). During the ‘Send Test Setup’process the V-Sense POD is also
Zero Adjusting. DO NOT MOVE during the Send Test Setup process. When the V-Sense system is ready,
the screen will display the message
V-Sense is Ready and show green
START TEST and red CANCEL TEST
buttons. When you are ready to
accelerate to the brake test
location, select the green START
TEST button. The V-Sense POD is
now waiting to sense the start
trigger (which is -0.2Gx by default)
and will automatically stop the test
3 or 7 seconds after it commences.
If the vehicle has vibration or shift
events that cause the brake test
‘Start Trigger’to occur too early (meaning the test starts before the brakes are applied) –adjust the
Start Trigger to -0.3 Gx or -0.4 Gx. It is also suggested the V-Sense POD be mounted on the side window
in the center of the vehicle.
After the Test
After the test is completed, the test will load to
the tablet and the V-Sense Director app will
display the test summary with a graph of the
brake data (the graph shows deceleration in
‘Gs’). The ‘Average G’ number is the brake test
result and the primary number used to
determine the braking capability of the vehicle.
If the Pass/Fail option has been configured, the
screen will show a Green/Red background that
matches the Pass/Fail setup.

V-SenseTM Brake TEST
Quick Start Guide
At the Tools page, tap the Connect button to connect the tablet to the V-Sense POD via Bluetooth. Once the
connection is made, the screen will show the V-Sense POD Information (Date/Time, Calibration Date, etc.)
Tablet Home Screen. The Vericom V-
Sense Director app is preloaded. Tap
the Vericom icon to open the V-Sense
Director app.
After the Vericom app is open, select
the menu by tapping the ‘menu’icon.
Next –to connect the tablet to the V-
Sense Sensor POD, select the Tools
menu option.

V-SenseTM Brake TEST
Quick Start Guide
Enter -0.3 (negative 0.3) as the new Start
Trigger. To get the ‘negative sign’tap the
decimal/negative button.
Once the V-Sense POD is connected
to the tablet, use the menu icon to
select the ‘Start Testing’page.
For brake testing, tap the ‘3s Brake
Test’toggle. The brake test is ‘on’
when the toggle shows ‘red.’
If needed, change the Start Trigger
from -0.2 to -0.3. Tap the -0.2 to
highlight and enable the number pad.
This manual suits for next models
1
Table of contents
Other Vericom Test Equipment manuals
Popular Test Equipment manuals by other brands

Circuit Specialists
Circuit Specialists TC-V2.12k user manual

Martindale Electric
Martindale Electric EZ365 instruction manual

Keithley
Keithley 2657A quick start guide

haupa
haupa MultiClamp II operating instructions

Aeroflex
Aeroflex RD-301A Operation manuals

Keysight Technologies
Keysight Technologies E5405A-Pro Series user guide