VERITAS 05P51.01 User manual

Small Plow Plane
05P51.01
05P52.01
U.S. Des. Pat. D591,579

2
The Veritas®Small Plow Plane is a joinery plane, perfect for cutting grooves, such as
used for drawer and box bottoms, cabinet backs, and frame-and-panel construction.
It is also capable of cutting small rabbets (grooves with one open side).
The ductile cast iron body is accurately machined with a 45° blade bed. The plane
comes with a 1/4"wide blade; other blade widths (1/8", 3/16", 5/16"and 3/8") are
available separately. All blades are A2 tool steel and come with the face lapped.
The fence has been sculpted to fit the hand for comfort and proper registration of
the plane to the workpiece.
No tools are required for any of the settings – blade installation, fence or depth
stop. The unique depth stop clamp provides spring pressure to hold the stop when
making adjustments (up to 1/2"). The large brass knobs (with locking collets) make
setting the fence fast and easy.
Blade Installation
Caution: Be aware that the blade is sharp; careless handling can result
in serious injury.
To install a blade, back off the lever
cap knob and the blade guide knob.
Slide the blade (bevel down) into
position on the machined bed such
that the slot at the top engages the
disc on the blade adjustment knob.
Turn the blade guide knob in until
it just contacts the side of the blade.
(This will ensure that the blade is
positioned against the machined bed
side and properly aligned with the
skate.) Lightly clamp the blade with
the lever cap knob.
Figure 1: Plane components.
Figure 2: Blade installation.
Handle
Blade
Blade Adjustment
Knob
Depth Stop
Knob
Depth Stop
Fence Locking Knob
Blade
Guide Knob
Fence
Skate
Body
Lever Cap
Lever Cap Knob
Blade
Blade Adjustment
Knob
Blade
Guide Knob
Lever Cap
Lever Cap
Knob

3
Blade Sharpening
The plow plane blades come with the face lapped and are ground with a 35° bevel.
Since the blade is installed bevel down, the cutting angle is determined by the bed
angle, in this case, 45°. Additional sharpening need only involve honing a small
micro-bevel.
Cutting Grooves
The small plow plane can control the width (A), depth (B) and position (C) of a
groove. Groove width is determined by the blade used; groove depth, by the depth
stop setting; and groove position, by the fence setting.
Depth of Cut
The depth of cut is the amount of material that is removed with each pass of the
plane, typically in the range from 0.005"to 0.020", depending on the hardness of
the wood being cut. Flip the plane upside down and sight down the bottom of the
skate to see how far the blade is protruding. Adjust accordingly, tighten the lever
cap knob, and take a test cut in a piece of scrap wood to confirm setting.
Figure 3: Blade geometry, as supplied.
Figure 4: Groove dimensions.
A1/8"to 3/8"
BMax. 1/2"
CMax 13/8"
(with 1/4"blade)
35° Bevel Angle
45° Cutting Angle
C
A
B

4
Setting the Depth Stop
The depth of the groove is determined by the depth stop setting. To set the depth
stop, loosen the depth stop knob, slide the depth stop to the desired position, and
retighten the knob. Maximum groove depth: 1/2".
When cutting a groove, continue making passes with the plane until the depth stop
contacts the workpiece and the blade is no longer cutting material.
Setting the Fence
The position of the groove (i.e., the
distance from the edge of the workpiece
to the groove) is determined by the fence
setting. Loosen the two fence locking
knobs and slide the fence until the
distance from the face of the fence to the
outside edge of the blade is equal to the
required groove position. Retighten the
fence knobs. Maximum distance of 13/8"
when using the 1/4"blade.
Cutting Small Rabbets
When using the small plow plane for
cutting small rabbets, the outer edge of
the blade is recessed in the pocket in the
face of the fence and the width of the
rabbet is determined by the distance from
the fence to the inner edge of the blade.
As such, the resultant rabbet is narrower
than the width of the blade (e.g., the 1/4"
blade yields a rabbet approximately 7/32"
wide). As with cutting grooves, the depth
is controlled by the depth stop setting.
Figure 5: Depth of cut.
Figure 6: Setting the fence.
Figure 7: Fence rabbeting pocket.
Depth of Groove
Depth Stop
Depth Stop Knob
Fence Locking
Knob Groove Position
Pocket

5
Auxiliary Fence
For cutting a groove in the edge of a wider board, you can add a larger auxiliary
fence to better register the plane to the workpiece. Simply make a wooden fence,
as plain or fancy as you wish, and attach it using wood screws through the holes
in the existing fence. Be sure to use screws that are not so long that they break
through the working face of the wooden fence.
Figure 8: Attaching auxiliary fence.
Figure 9: Auxiliary fence in use.

6
Care and Maintenance
The body of this plane is ductile cast iron and comes treated with rust preventative.
Remove this using a rag dampened with mineral spirits. Clean all machined surfaces.
We recommend that you initially, then periodically, apply a light coat of paste wax
to seal out moisture and prevent rusting; this also has the added bonus of acting as
a lubricant for smoother planing. Wipe off any wood dust from the surfaces that
you will be waxing, apply a light wax coating, let dry, then buff with a clean soft
cloth. At the same time, the solvents in the wax will remove any harmful oils left
from your fingers that can lead to corrosion.
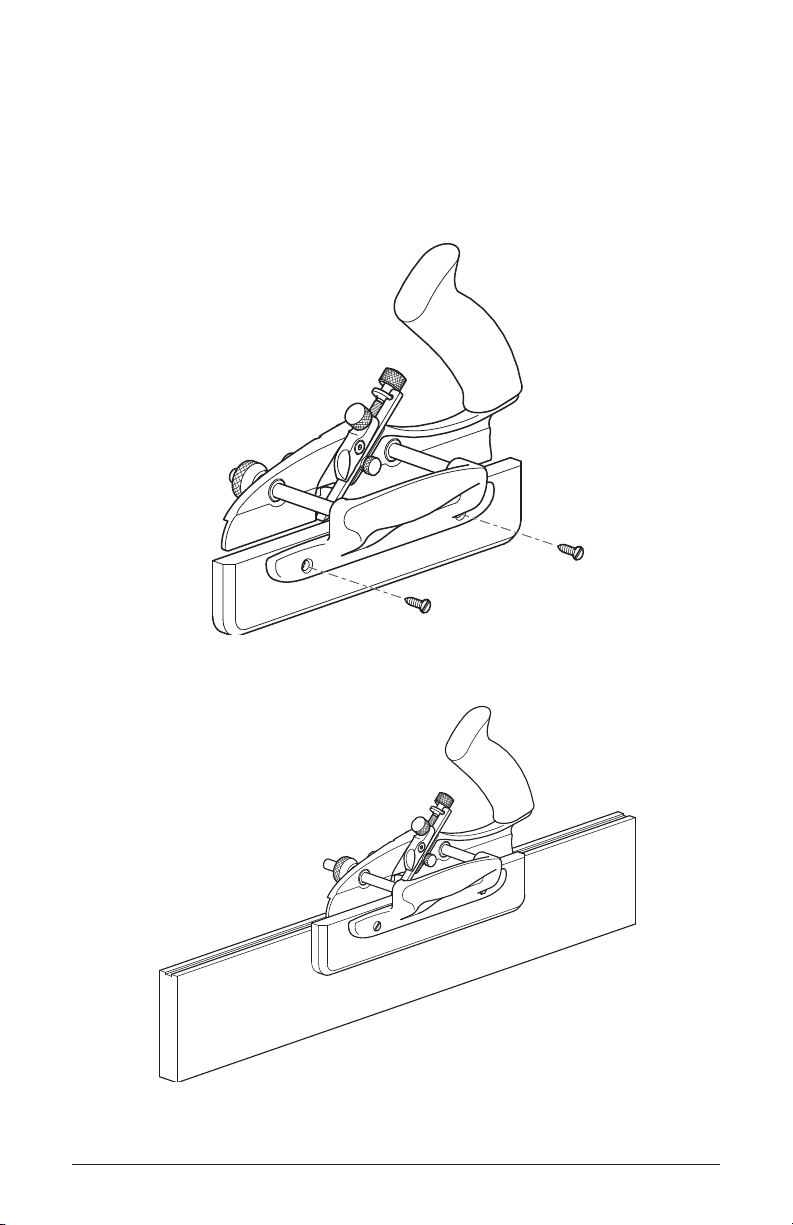
Note: Since the face of the fence and the bottom of the depth stop will come in
contact with the workpiece, it is important to keep these parts coated with paste
wax to prevent marring the workpiece.
Keep in mind that paste wax contains silicone that, if transferred to your workpiece,
could cause finishing problems such as "fish eyes". To avoid this problem, use
silicone-free products, such as Waxilit®sliding agent and glue release, or a tool
surface sealant and lubricant. Either is an excellent alternative to regular paste
wax. However, before treating a plane with a sealant, wipe off any fingerprints
with a cloth dampened with a small amount of light machine oil. Remove any
residual oil; then apply the sealant to the plane’s sole.
If storage conditions are damp or humid, the plane should, in addition to the
treatment outlined above, be wrapped in a cloth or stored in a plane sack. This
precaution will also guard against dings and scratches.
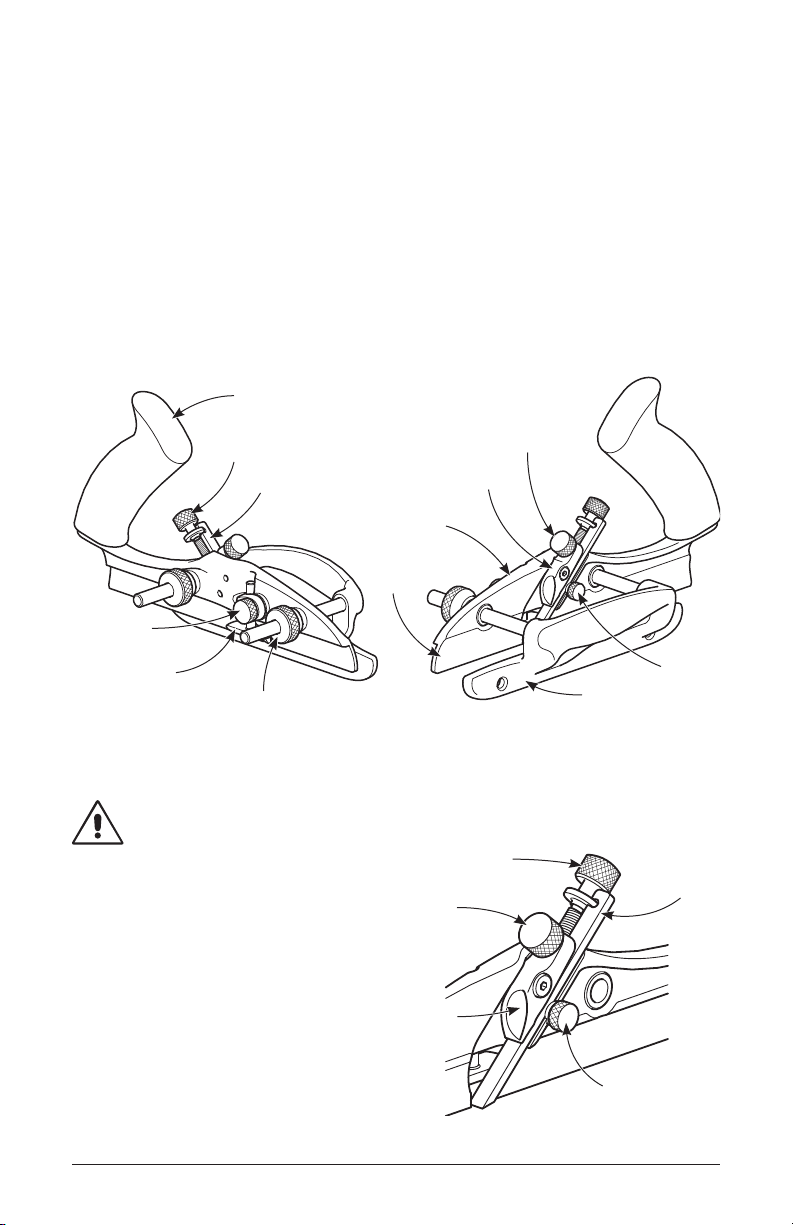
Every so often, take the plane apart to clean it. Remove the blade, the depth stop
and the fence from the body. Clean all parts with a cloth dampened with a dab of
light machine oil. For corroded plane bodies, we recommend you first remove the
rust with a fine rust eraser, then treat as described above.
The bright finish on the brass components can be maintained as above. If a patina
finish is preferred, simply leave the brass components unprotected until the desired
level of oxidation has occurred, then apply a sealant. If you want to make them
bright and shiny again, you can revitalize the surface with a brass polish.

7

Accessories
05P51.02 1/8"Blade, right*
05P51.03 3/16"Blade, right*
05P51.04 1/4"Blade, right
05P51.05 5/16"Blade, right*
05P51.06 3/8"Blade, right*
05P51.10 *Set of 4 blades, right
05P52.02 1/8"Blade, left*
05P52.03 3/16"Blade, left*
05P52.04 1/4"Blade, left
05P52.05 5/16"Blade, left*
05P52.06 3/8"Blade, left*
05P52.10 *Set of 4 blades, left
814 Proctor Avenue
Ogdensburg, New York
13669-2205 USA
1090 Morrison Drive
Ottawa, Ontario
K2H 1C2 Canada
www.veritastools.com
747
© Veritas Tools Inc. 2010
INS-357 Rev. C
Printed in Canada.
This manual suits for next models
1
Table of contents
Other VERITAS Power Tools manuals