manuals.online logo
Brands
  1. Home
  2. •
  3. Brands
  4. •
  5. Versahaul
  6. •
  7. Automobile Accessories
  8. •
  9. Versahaul VH-MI User manual

Versahaul VH-MI User manual

BNK,Inc.9341S.StRd.39 Winamac,IN46996 Problems?Questions?Callusat(888)818-9915
WARNING
1. Read all instrucons for future reference.
2. Follow all warnings and instrucons marked on the
product.
3. Do not stand on the VersaHaul.
4. Do not ride any vehicle while loading the Versahaul.
5. Always store the VersaHaul carrier in a safe place.
6. Never exceed vehicle tongue weight rangs.
7. The connecon for this model was designed based
on government specificaons. It fits onto a 2”
bumper of a military issue Humvee.
8. Improper use, storage or installaon of carrier could
result in death or serious injury.
9. Do not put any VersaHaul on a 5th wheel trailer or
any other kind of trailer.
10. VH-MI carrying capacity is limited to 700 lbs. max.
Your vehicle suspension and hitch may limit the
hauling capacity of the carrier. For more informaon
on vehicles and hauling capacies, visit
www.versahaul.com.
BNK, INC warrants the carrier and related components. This warranty applies to any part found to be defecve due to
material and/or workmanship when inspected at the factory of BNK, Inc., Winamac, IN. BNK Inc. will, at its opon,
repair or replace defecve parts to the original purchaser at no charge other than transportaon. Sale receipt as
proof of date of purchase is required, which will be returned. BNK, Inc. assumes no liabilty for labor charges made in
performance of this warranty.
The warranty periods are as follows from date of purchase:
CARRIER FOR 1 YEAR, VOID IF: frame is broken or bent due to abuse. example: (underside scraped abusively)
ALL WARRANTIES ARE VOID IF: the carrier has been rented, used under abnormal condions, or subjected to
abuse, misuse, neglect, or improper maintenance.
All warranes should be handled at point of purchase unless other arrangements are made.
BNK, Inc. is not liable for any damage claim or liability cliam, personal or otherwise resulng from operaon of this
carrier in any way. All transportaon charges for items returned for warranty evaluaon and/or replacement are to be
borne by the customer.
For one (1) year from the date of purchase, BNK, Inc. will repair or replace for the original purchaser, without charge,
any part or parts are manufactured by BNK, Inc. and found, upon examinaon at our factory in Winamac, to be
defecve in materials and/or workmanship.
All transportaon charges on parts submied for replacement under this warranty must be borne by the purchaser.
This warranty does not apply to parts not manufactured by BNK, Inc. Their manufacturer may warrant these items.
This warranty does not apply to any part which has been damaged by accident, alteraon, abuse, improper
adjustment, normal wear, or any other cause beyond our control.
Use of replacement parts other than genuine BNK, Inc. parts may impair the safety of your machine and void this
warranty.
THIS WARRANTY IS VOID UNLESS THE PRODUCT REGISTRATION CARD IS FILLED OUT COMPLETELY AND
RETURNED TO THE FACTORY AT WINAMAC, IN. WITHIN TEN (10) DAYS OF PURCHASE.
OUR WARRANTY COVERS OUR PRODUCT FOR ONE YEAR. WE ARE NOT ABLE TO EXCHANGE
USED VERSAHAUL CARRIERS FOR REFUNDS OR NEW CARRIERS.
IMPORTANT
LIMITED WARRANTY
The Limited Warranty on the VersaHaul Carrier.
VH-MI Ramps
Main Tube
Main Rail
(Front)
Main Rail
(Rear)
Wheel Stop
Tie-Down Loop
9
/16" Socket 1
/2" Wrench 5⁄16" Wrench
TOOLS
PARTS
(1) VH-MI Main Rail - Rear
9” x 71 1
/2”
VH011
(1) VH-MI Main Rail - Front
9” x 71 1
/2”
VH013
(1) 44” Main Tube
2 1
/2” x 44”
VH0xx
(2) Lock Pin w/Pin Clip
3
/8” x 3”
VH0xx
(2) Wheel Stop
VH050
(4) Tie-Down Loop
VH032
(8) Carriage Bolt
5
/16” x 3
/4”
VH226
(14) Bolt
5
/16” x 3
/4”
VH224
(4) Bolt
1
/4” x 1
/2”
(4) Bolt
1
/2” x 1 1
/2”
(8) Bolt
3
/8” x 1 1
/4”
VH230
(2) Bolt
1
/2” x 4”
(6) 5
/16” Flat Washer
VH225
(2) 7
/16” Flat Washer
VH237
(18) 5
/16” Lock Washer
VH222
(22) 5
/16” Nut
VH223
(4) 1
/4” Nut
(4) 1
/2” Nut
(6) 1
/2” Lock Nut
VH243
(2) VH-MI Ramp Top
8” x 30”
VH065c
(2) VH-MI Ramp Boom
8” x 30”
VH065d
(4) Spring
(4) Spring Bracket
(4) Hinge Bracket
(2) Hinge Pin
(2) Coer Pin
militaryissuemotorcyclecarrier
VH-MI
www.versahaul.com
Posion the assembled VH-MI as shown and aach the
Springs onto the Tie-Down Loops on the Hinge Bracket
and the outer holes on the Spring Brackets. Once the
Springs are aached, pull Ramps upwards to the store
posion and your VH-MI carrier is ready to be used.
Step5
Ramp
Spring
Spring Bracket
Tie-Down Loop
Aach the VH-MI Ramps to the VH-MI Carrier Rails by
using the Hinge Pins. Lock the Hinge Pins using the
Coer Pins.
Step4
Ramp
Main Rail
Hinge Pin
Coer Pin
Aach each of the Hinge Brackets to one end of
the VH-MI Carrier Rails using all of the 5
/16”
Bolts, 5
/16” Lock Washers, and 5
/16” Nuts. The pre-
assembled Tie-Down Loops on that end of the
rail will need to be removed before assembling
the Hinge Bracket. 5
/16” Carriage Bolts previously
holding the Tie-Down Loops will now be
rescrewed to hold the Hinge Bracket as well.
Step3
Main Rail
5
/16” Bolts
5
/16” Carriage Bolts
Hinge Bracket
Tie-Down Loop
5
/16” Lock Washers
5
/16” Nuts
Aach the VH-MI Ramp Top part to the VH-MI Ramp
Boom part by screwing the 1
/2” x 1 1
/2” Bolt with the 1
/2”
Nut, followed by the 1
/2” Lock Nut.
Step2
Ramp Top
Ramp Boom
1
/2” Bolt
1
/2” Nut
1
/2” Lock Nut
Aach each Spring Bracket to each VH-MI Ramp
Top part using the 1
/4” Bolts and Nuts.
ATTACHINGTHERAMPS
Step1
Ramp Top
1
/4” Bolt
1
/4” Nut
Step5
To aach the assembled Versahaul to your vehicle, first slide
the mounng bracket of the Main Tube onto the bumper.
Once in place, use the 7
/16” Washers with the 1
/2” Nuts, and
1
/2” x 4” bolts to secure the carrier in place on the vehicle.
Main Tube
Bumper
1
/2” Bolts
7
/16” Washers
1
/2” Nuts
Mounng Bracket
Step4
As a safety precauon, install the two square Lock
Pins through the main tube. Close and lock them
to ensure the main rails will not come loose.
Main Rail Main Rail
Main Tube
Lock Pin
Lock Pin
Insert the Wheel Stop into the slots on the top of the
Main Rail at the appropriate posion and fasten with 5
/16”
Bolt, Flat Washer, Lock Washer, and Nut.
Step3
5
/16” Bolt
5
/16” Nut
Wheel Stop
Main Rail
5
/16” Flat Washer
Step2
Insert the Main Tube into the Main Rails. Make sure the
main rail with tail-light mount holes and license plate
holes is to the rear when aached to the vehicle. Slide
the Main Rails to desired spacing and lock ght with the
3
/8” x 1 1
/4” Bolts.
Main Tube
Main Rail
3
/8” Bolts
ASSEMBLINGYOURVERSAHAUL
Step1
Insert the Tie-Down
Loops into the Main
Rail and fasten them
with the 5
/16” x 3
/4”
Carriage Bolts, Flat
Washers, Lock
Washers, and Nuts in
that order (Figure 1.1). Insert the Loops from the inside of the rail. The circled area is where
the ramps will be installed (Figure 1.2). These instrucons are described in detail later.
Main Rail
Main Rail
Tie-Down Loop
5
/16” Carriage Bolt
5
/16” Nut
1.1 1.2
5
/16” Flat Washer
FormoreinformationonyourVersaHaul,pleasevisitwww.versahaul.com Problems?Questions?Callusat(888)818-9915
militaryissuemotorcyclecarrier
VH-MIINSTRUCTIONDIAGRAM

Other Versahaul Automobile Accessories manuals

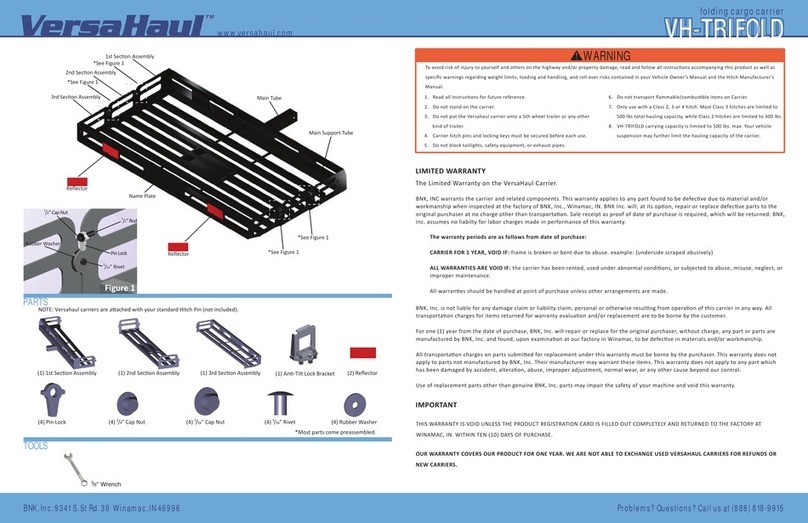
Versahaul VH-TRIFOLD User manual

Versahaul

Versahaul VH-TRIFOLD User manual

Versahaul MAGNUM TIE-DOWN STRAP User manual

Versahaul

Versahaul MAGNUM TIE-DOWN STRAP User manual

Popular Automobile Accessories manuals by other brands

Magneti Marelli AC161 Installation instruction

Magneti Marelli

Magneti Marelli AC161 Installation instruction

FDI uEZ GUI Start here

FDI

FDI uEZ GUI Start here

JCROffroad JT Install instructions

JCROffroad

JCROffroad JT Install instructions

Rostra VOXXElectronics 250-1930 owner's guide

Rostra

Rostra VOXXElectronics 250-1930 owner's guide

TOP VEHICLE TECH GR3FORD5 installation manual

TOP VEHICLE TECH

TOP VEHICLE TECH GR3FORD5 installation manual

Safe Fleet PRIME DESIGN AR-2000-BLK manual

Safe Fleet

Safe Fleet PRIME DESIGN AR-2000-BLK manual

Skoda Fabia Combi 5J Fitting instructions

Skoda

Skoda Fabia Combi 5J Fitting instructions

Camcar 40077 Al Mounting instructions

Camcar

Camcar 40077 Al Mounting instructions

Camcar 40089 AL Mounting instructions

Camcar

Camcar 40089 AL Mounting instructions

Impac Tradesman 2000 installation manual

Impac

Impac Tradesman 2000 installation manual

DVB OFFROAD BRSB-01 installation manual

DVB

DVB OFFROAD BRSB-01 installation manual

Safari Snorkel SS385HF installation guide

Safari Snorkel

Safari Snorkel SS385HF installation guide

ULTIMATE SPEED 279746 Assembly and Safety Advice

ULTIMATE SPEED

ULTIMATE SPEED 279746 Assembly and Safety Advice

SSV Works DF-F65 manual

SSV Works

SSV Works DF-F65 manual

ULTIMATE SPEED CARBON Assembly and Safety Advice

ULTIMATE SPEED

ULTIMATE SPEED CARBON Assembly and Safety Advice

Witter F174 Fitting instructions

Witter

Witter F174 Fitting instructions

WeatherTech No-Drill installation instructions

WeatherTech

WeatherTech No-Drill installation instructions

TAUBENREUTHER 1-336050 Installation instruction

TAUBENREUTHER

TAUBENREUTHER 1-336050 Installation instruction

manuals.online logo
manuals.online logoBrands
  • About & Mission
  • Contact us
  • Privacy Policy
  • Terms and Conditions

Copyright 2025 Manuals.Online. All Rights Reserved.