manuals.online logo
Brands
  1. Home
  2. •
  3. Brands
  4. •
  5. Vestax
  6. •
  7. Controllers
  8. •
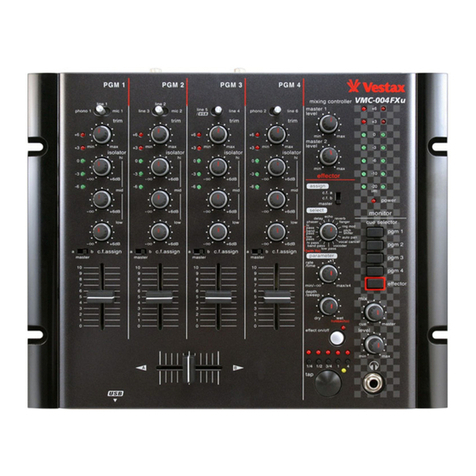
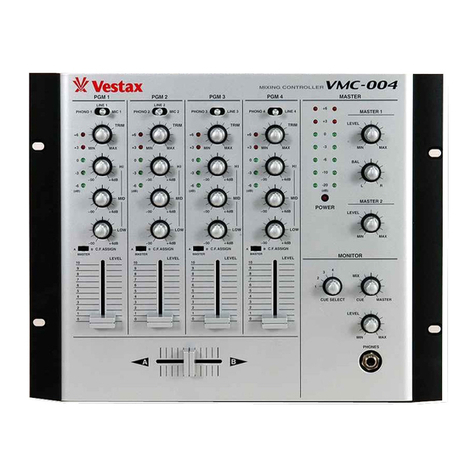
  9. Vestax VMC-004XLu User manual

Vestax VMC-004XLu User manual

VVestax
Vestax Mixing Controller
O u
取扱説
明
書P,2〜
OWNEREs MANUAL P.9〜
精
鶏
躙
澤
llsetag押鴫
ゎ
ぃ
1為Japan
Phone 03・ 3412・ 701l Fax03‐ 3412‐ 7013
Web:wい 囁
Ⅵ
"鮨区
∞m
鵬詣J謝円廿縫 血 :Pak劇 。
n Hamps‖GU34 20L Enghnd,U.K.
Phone1011420‐ 83000 Fax1011420・ 80040
Web:"mttι v凛 ●0.uk
〒154‐0023
凩吾蔀
日ま署rT雪考薔1マ 8‑6フ ァック
ス
03‑34127013 甜語
塁
躁
場
勝
露轟lぽ露
L高穏
駆
L5‐2374
VVeb:www.veStaX.com
CONGRATULAT10NS!
Thank you for purchasing the Vestax VMC-OO4XLu Mixing Controller. We suggest
that you read through this owner's manual thoroughly so that you may enjoy the full
use of this product safety and in the knowledge of all its special features and
suitably applications.
CONttENTS
C A U T 1 0 N… …… ………… …………
9
!MPORTA「I SAFEGUARDS‐ …
…………………………………
…………
……
…………
……
………10
FEATU RES― ―
――
―一
―
一―
―
―‑11
00MROLS AND FUNC丁10NS‐ …
……
……
……………
…………
………
…
……
………………
………‐
12
丁OP PANEL一 ――
………
…
……
…
……
…………
…
…
12
F R O Ntt PANEL一 一 一 一 一 一一一一一一一 一
… … … … … …
13
REAR PANEL… …
……
……………
……………
……
13
′
HOWTOCHANGE THE FADER UNI丁 ―
―
‐
…
…
‐
…
…
…
…
……
…
…
………………
……
…
‐
―
‐
…
………
‐
………
14
CONNEC丁10N DIAGRAM‐ ―一
―
一―
‐
……………
………
…
…
‐
…
………
………
……
…
15
SPECIFICA丁 10NS― …
…
…………………
………
…
…
一
―
…
……
…
……
15
CAUT10N:TO REDUCE THE R:SK OF ELECTR:C SHOCK
DO NOT RttMOVE COVER(OR BACK)
NO USER‐SERV:CEABLE PARTS INSiDE
REFER SERVIC:NG TO QUALiF!ED SERViCE PERSONNEL
The lightning flash with arrowhead synibol,. within an equilateral triangle, is
intended to alert the user to the presence of uninsulated "dangerous voltage"
within the product's enclosure that may be of sufficient magnitude to consitute a
risk of electric shock to persons.
The exclamation point within an equilateral triangle is intended to alert the user
to the presence of important operatiug and maintenance (servicing) instructions
in the literature accompaDying the appliance.
TO RttDUCE THE RISK OF FIRE OR ELECTRIC SHOCK, DO NOT
EXPOSE ttHIS APPLIANCE TO RAIN OR MOISTURE
△△
‑9‑
:MPORttANtt SAFEGUARDS
READ BEFOR「OPERATING EQUIPMEN丁  
This product was designed and manufactured to meet strict quality and safety
standards. There are, however, some installation and operation precautions
which you should be particularly aware of.
1.Read instructions-All the safety and operating
instructions should be read before the
appliance is operated.
2.Retain instructions-The safety and operating
instructions should be retained for future
reference.
3.Heed Warnings-All warnings on the appliance
and in the operating instructions should be
adhered to.
4.Follow lnstructions-All operating and use
instructions should be followed.
5.Cleaning-Do not use liquid cleaners or
aerosol cleaners. Use a damp cloth for
cleaning.
6.Attachments-Do not use attachments not
recommended by the product manufacturer
as they may cause hazards.
T.Water and Moisture-Do not use this product
near water-for example, near a bath tub,
wash bowl, kitchen sink, or laundry tub, in a
wet basement, or near a swimming pool, and
the like.
B.Accessories-Do not place this product on an
unstable cart, stand, tripod, or table. The
product may fall, causing serious injury to a
child or adult, and serious damage to the
appliance. Use only with a cart,. stand,
tripod, bracket, or table recommended by the
manufacturer, or sold with product. Any
mounting of the appliance should follow the
manufacturer's instructions, and should use a
mounting accessory recommended by the
manufacturer.
9.This product should never be placed near or
over a radiator or heat register. This product
should not be placed in a built-in installation
such as a bookcase or rack unless proper
ventilation is provided or the manufacturer's
instructions have been adhered to.
10.Power sources-This product should be
operated only from the type of power source
indicated on the marking label. lf you are not
sure of the type of power supply to your
home, consult your appliance dealer or local
power company.
l l.Lightning-For added protection of this
product during a lightning storm, or when it is
left unattended and unused for long periods
of time, unplug it from the wall outlet. This will
prevent damage to the product due to
lightning and power-line surges.
l2.Overloading-Do not overload wall outlets
and extension cords as this can result in a
risk of fire or electric shock.
13.Object and Liquid Entry-Never push objects
of any kind into this product through
openings as they may touch dangerous
voltage points or short-out parts that could
result in a fire or electric shock. Never spill
liquid of any kind on the product.
14.Servicing-Do not attempt to service product
yourself as opening or removing covers may
expose you to dangerous voltage or other
hazards. Refer all servicing to qualified
personnel.
-10-
15.Damage Requiring Service-Unplug this
product from the wall outlet and refer
servicing to qualified service personnel under
the following conditions:
a.When the power-supply cord or plug is
damaged.
b.lf liquid has been spilled or objects have
fallen into the product.
c.lf the product has been exposed to rain or
water.
d.lf the product dose not operate normally by
following the operating instructions. Adjust
only those controls that are coverd by the
operating instructions as an improper
adjustment of other, controls may result in
damage and will often require extensive
work by a qualified technician to restore the
product to its normal operation,
e.lf the product has been dropped or cabinet
has been damaged.
f. When the product exhibits a distinct change
in performance this indicates need for
service.
FEATURES
l6.Replacement Parts-When replacement
parts are required, be sure the service
technician has used replacement parts
specified by the manufacturer or have the
same characteristics as the original parts.
Unauthorized substitutions may result in fire,
electric shock or other hazards.
17.Safety Check-Upon completion of any
service or repairs to product, ask the service
technician to perform safety checks to
determine that the product is in proper
operating condition.
18.Carts and Stands-The appliance should be
used only with a cart stand that is
recommended by manufacturer.
19.An appliance and cart combination should
be moved with care. Quick stops, excessive
force, and uneven surfaces may cause the
appliance and cart combination to overturn.
OVMC-O04XLu is equipped with 3-band isolator
on each channel, allowing DJs to mix in the
most creative way.
OThe EQ curve has been refined by our
manufacturing team to offer the sweetest
sounding, and most striking EQ available
among mixers in this price zone.
ODigital connection with computers and USB
devices is enabled by installing TUB-1(USB
Board / Sold Separately)to the OPTION
BOARD slot.
OThe cross fader of the VMC-0O4XLu is the
ultra smooth CF-R US, which is the best
quality fader available in this class.
OTo give young DJs all over the world a mixer
that can grow with their career, the cross-
fader in the VMC-O04XLu can be upgraded to
the most double Vestax PRO-fader, CF-PCV
to realize pro-level performance.
-1 1-
⊂
ONTROLS AND FUNC丁 10NS
①
lNPUT SELECTOR 鮒
7量樹
※
When 2 individualinputs are∞ nnected to LiNE 4 and
usB(optiOnal,please read FRONtt PANEL on page18)
and if the input seiect switch of PGM 4 is set to LiNE
4/USB,both signals w‖ l be mixed in to the channel.
②TRIM VOLUME
③ISOLATOR H:
AdiustS the Hlfrequency level of each PGM
④iSOLATOR M:D
AdiustS the MID frequency level of each PGM.
⑤iSOLATOR LOW
AdiustS the LOW frequency level of each PGM.
⑥C.F.ASSIGN SWiTCH
漱
糀s幌認で通」
Thξtts翼譜
「
aT肥
i辮職纏IW鷺
B…・
=∬
=Yよ
∫::き品 肝 "B"pOS蘭on or"ght
⑦
:NPUT LEVEL FADER
鵬::剣 直he mptt bvd d ett PGM
③
:NPUT LEVEL METER
融LfZttFc肝棉醤nttFde he mp戯 JgnJ
⑨CROSS FADER
W:::rV覧雰
u卜 駅鶴
i『
1紹dP需 尉
:
crossfader set to the left side. PGM2 w‖ l be
腺 誕1‖よ:健塁 嵩:rT:Lf需 鷺 』
h&1設 1:R
programs w‖ l be heard. This faderis detachable
for easy replacement with iiCF― R US'when l is
worn out.
⑩
MASTER l LEVEL VOLUME
鵠 ギ L穐繰げVd°uやuぉ ,。 m MASTER l
①
MASTER BALANCE VOLUME
AdiustS the signal balance of the MASTER l
outputs from both L and R sides.
⑫
MASTER 2 LEVEL VOLUME
88ギ舌Lギ百
資き
裂
き
た井
Vd°uゃ戯
s■Om YASttER 2
⑬MASTER LEVEL METER
醜iT:」:X早昴t踪閣lCaememagerJgml
⑭POWER:ND:CATOR
Lights up when the POWER SWiTCH(D is on.
‑12‐
⑮
CUE CHANNEL SELECT SW:TCH
忠網鶴ilま .ξ h∬:iP選卵
lよ[ξt謂Ⅲ調
⑩
MONITOR M:X VOLUME
剤RIぷ│もじ
よ
響鍵1%滉篭
r鶴費
き是
門
電
heard in headphones connected to the nllxer.
When setto CUE,signals from PGM channel
selected by CUE CHANNNEL SELECT
FRONT PANEL
⑩C.E CURVE SELECT SWiTCH
AdiustS the crossfader cuⅣ e. Setlng to the
right side gives a steep crossfader good for
scratching and cutting,whereas,setting to the
SVVITCHc)will be heard.1/Vhen setto MASttER,
signals from OUTPUT will be heard.signals are
mixed as volume knob is turned.
⑫MONITOR LEVEL VOLUME
AdiustS the headphone monlorlevel.
⑩PHONE JACK
Connectthe headphones with the impedance of
8ohm to 600ohm.
left side gives a gentle crossfader good forlong
runnlng mlxes.
⑩
OPT10N BOARD:NSERT
REAR:PANEL
④
POWER SWiTCH
晰
『
:″ 鷲
』
1∫Ψ:[ど1芯htty:当 3用雪W:
蓮暉
;蝋fliF:恥機
群
署
l籠
rnlxer.
②POWER:N JACK
Connect the Vestax AC‑14 an exclusive, AC
adaptor.
④
GROUND TERMINAL
Connect this terminal to the ground lead of the
turntables.
②L:NE INPUT」 ACK
⑮
罷
∬
t柵讐
恥
yp野‖翼
twf鰤■:
turntable is fed to the PGM channels when
Phono inputis selected.
④
椰:1:報サlμ繭
押
‖
儡
柵
『:ふ p新じ
「
,edわ AUX∝ 日
NE I uJng:n
盗
:暫電不R辟¥I鷲1無
倒
輔
響職憮l器:臨昴
④
よ彗1:][│:[fh[F・ COfresponds to φa3
⑩
響
鷲 詐〒lh:
::高:Ъ
『釈:5なL話器lTtttわ AUX or ttNE I
‑13‑
CAUT10N
.When you change the fader, make it sure that
-the main switch is turned off. lf not, may
cause noise or short circuit.
.When you use the screwdriver, make it sure
that you should choose the right side.
Otheruvise, may break screws.
■HOW TO REMOVE THE TOP PANEL.
①Remove a‖ fader knobs and the 4screws.
(See ig.A)
②Remove the top panel.
■HOW TO CHANGE THE FADER UNIT
①
醜
T』,e∝陀ws on tteね dα pand
②Remove the fader unl from the mixer.
③CarefuIly remove the muli‐ cable connector from
fader unit.
(See 19.C)
く)Attach rnulti―cable connectorto new fader unit.
()Position the fader unit carefu‖y and secure wlh
screws.
罰
g.A
Remove the
l靱 [rOm
■HOW TO REPLACE THE CF UNIT VVITHCF・ PCV"
mode.
CAUT:ON
ngc
腔
毬
r累鶴畷
牝限iぽhCed,do nd b9sen
Remove four scews.
│││││││││││
‑14‑
fig.D ():CF―RUS orCF‐ R
◎
:c「Pcv
CONNECT10N DIAGMM Iexamplel
TAPE RE∞ RDER.CD,MD etc CD,MD口ayeL TAPE DECK et
Connectto O岬UT laCk Connectto LINE input,ack
CDptAYER leL―AX CD(1旬 ∞PtA‐ [鮮 VESTAX COX l
︱︱ ︱ ム
¨
AMPLiF:ER
Connectto OUTPUT,ack
SPECIFI《ン
噸
「
10NS
TUR「ABIEは 嘔
瓢

P●X‐3111]
TURNTABLE
Connectto PHONO:nputiack
lNPUr SECI10N NOMINALiNPUr MAXIMUM:NPL「F:MPEDANCE
M:C iN:PGM‐ 1〜2(16.3 PHONE JACKノ UNBULANCED) ‐
52dBv(2.5Vms) ‐
30dBv(32mVrns) 3.3kΩ
PHONO IN:PGM‑1〜 4(RCA P:N」 ACK/UN8ULANCED) ‐
45dBv(5.6Vms) ‐
22dBv(80mVans) 49kQ
LINE IN:PCM‐ 1〜4(RCA PiN」 ACK/UNBじLANCED) ‐
4dBv(1.OV) +1ldBv(70Vrrns) 7kΩ
otrrPuT sECT10N NOMlNAL:NPtrr MAXIMUM INPUT :MPEDANCE
MAS「ER Oじ ■1〜2(RCA PIN」 ACK′ UNBULANCttD) OdBv(1.CIVms) ■
175dBvr7.5V― )2200
PHONES (66.3 PHONE JACK) 100mW (470102d) >80
:SOLATER(PCM■ 〜4) :H: 2.5kHz≦ /B005■+6dB CUT:‐ ∞
:M:D 250Hz〜 25kllz′ B00ST:■6dB 晰‐00
:LOW ≦250H2/800ST:●6dB Cu■ ∞
FREQUENCY RESPONSE :UNE 20Hz〜 20KHz±3dB
S/N RA■0 :日 NE 70dB≦
CROSS TALK :C・F65dB≦
:PGM 65dB≦
OTHER
POWER SUPPLY AC‐14 1AC12V 1000mAl
POWER REQUIREMENT 10W
WElGHT 6.5kg
DIMENS:ONSIWXH× D) 264× 105×260(mm)
‑15‑
」∪N2007 VMC‐o04×Lu①
PN:4301731540
Vestax Corporation
VVestax
mixing controller
選
ヽCo002XLu rCJB
こヽ CaO,りにu石UB
こヽ C‐004FXu TCJB
Supplemental lnstruction Sheet
Vestax Corooration
1-18.6 Wakabayashi, Setagaya-ku, Tokyo 15+0023 Japan
Phon6 03.3412-7011 Fax 03-3412-7013
Web : www.vestax.com
Vestax Europe Technical Support
Rheinsb,zl3 D53332 Bomheim Germany
Phone 49(0)2222-9$2*7 2 F ax 49(012n2-55-2}l 4
Please be sure to completely read this supplementallnstruction sheet along vvith the useris
manual ofthe following products.(PrOducts:abeled‖ 丁
UB‖)
●VMC‑002XLuTUB
●VMC‑004XLu丁 UB
●VMC‐004FXuTUB
◇HOW TO USE USB
Connectthe rnixers USB input/output portto a computers USB port with a USB cable.
Sound lnput/(Dutput vvi‖ be enabled simply by connecting via USE3,using the OS internal driver.
※
USB board features
・
USBl.1(USB2.O compalble)comp‖ ant
・
USB BUS power operated
丁he USB PO1/VER LED ⅥЛ‖‖
ght up afterthe mixeris identified by the computer and the power
has been supp‖ ed.
◇USB PORT CHANNEL ASSICN
(1)VMC‑002XLu ttUB
⇒Please refer to(27),page 13 ofthe VMC‑002XLu users manual.
Assigned to:
!NPUT:LINE2/USB ofPGM2
0∪TPUT:MASTER OUTPU丁
(2)VMC‑004XLuTUB
⇒Please referto(20),page 13 ofthe VMC¨ 004XLu users manual.
Assigned to:
lNPUT:LINE4/USB ofPGM4
0UTPUT:MASTER OUTPUT
≧過1ミ
鳳:ザぷpage 18 of he VMC‐004FXu users manuJ.
Asslgned to:
!NPU丁:LINE5/USB ofPCM3
0UTPU丁:MASTER OUTPU丁
υS3/AIPυ T/Oυ IPυ T PORT
◇SYSTEM REQUIREMENTS
Minimum System requirement
OOS(Operating System )
Windows:
Windows9S/98S E/Me, 2000/XP
(Windows XP will require the latest USB audio driver available from Windows update website)
Macintosh:
. Mac OS X 9.1 and later versions
. Mac OS X 10.0 English Edition and later versions
. Mac OS X 10.1 Japanese Edition and later versions
(Mac OS X 10.0 Japanese Edition is NOT SUPPORTED)
Allversions before OS X 9.1 is NOT SUPPORTED
X NOTE
' The minimum system requirements above are for the mixer. If the minimum system requirement
of the software is higher than the mixers requirement, please prepare an advanced operating
system qualified.
' Macintosh CPU accelerator cards are not supported. The computer must have USB connection.
' YAMAHA AC-XG Audio Device does not work with this mixer.
*Above are minimum requirements and does not guarantee performance for all computers and
devices.
O USB connection confirmation
The USB POWER LED (red) will light up when the mixer is connected to a computer via USB and
indicate that USB input/output is operating.
Please follow the instructions below to confirm if the computer has identified the mixer via USB
connection.
Windows XP:
To check connection status in Windows XP, view [control panel] > [system] > [hardware] > [device
managerl > inside [sound, video and game controller]find [usB Audio device] .
lf both are displayed and the status is "This device is installed correctly", the mixer and computer
is connected correctly.
Macintosh:
To check the connection status in Macintosh, view [Applications] > [Utilities] > [Audio MlDl setting] >
[MlDl device] and find "Vestax Pc-coNTRoLER". The property shall show,
* Device:Vestax PC CONTROLLER
* Manufacturer: Vestax
* Model: Vestax PC-CONTROLLER
The computer and the mixer are connected correctly if the information above is shown.
AUG 2007 MC‐TUB E①
P/N:4301‐7320+0

Other Vestax Controllers manuals

Vestax VMC-002 User manual

Vestax

Vestax VMC-002 User manual

Vestax FADERBOARD User manual

Vestax

Vestax FADERBOARD User manual

Vestax PMC-280 User manual

Vestax

Vestax PMC-280 User manual

Vestax VMC-002 User manual

Vestax

Vestax VMC-002 User manual

Vestax VMC-185XL Quick start guide

Vestax

Vestax VMC-185XL Quick start guide

Vestax PMC-05ProIII User manual

Vestax

Vestax PMC-05ProIII User manual

Vestax PMC 500 User manual

Vestax

Vestax PMC 500 User manual

Vestax VCM-600 User manual

Vestax

Vestax VCM-600 User manual

Vestax VMC-004FX User manual

Vestax

Vestax VMC-004FX User manual

Vestax VMC-185XL User manual

Vestax

Vestax VMC-185XL User manual

Vestax VMC-004FXu User manual

Vestax

Vestax VMC-004FXu User manual

Vestax PMC-06Pro VCA User manual

Vestax

Vestax PMC-06Pro VCA User manual

Vestax PMC-05Pro User manual

Vestax

Vestax PMC-05Pro User manual

Vestax PMC-05PRO3VCA User manual

Vestax

Vestax PMC-05PRO3VCA User manual

Vestax VMC-004 User manual

Vestax

Vestax VMC-004 User manual

Vestax VCI-100 User manual

Vestax

Vestax VCI-100 User manual

Vestax PMC-06Pro T User manual

Vestax

Vestax PMC-06Pro T User manual

Vestax PMC-05ProIII User manual

Vestax

Vestax PMC-05ProIII User manual

Vestax PMC-05ProIII User manual

Vestax

Vestax PMC-05ProIII User manual

Vestax PCV-002 User manual

Vestax

Vestax PCV-002 User manual

Vestax VCI-100MKII User manual

Vestax

Vestax VCI-100MKII User manual

Vestax PCV-003 User manual

Vestax

Vestax PCV-003 User manual

Vestax PMC-05ProSL VCA User manual

Vestax

Vestax PMC-05ProSL VCA User manual

Vestax PMC-580Pro User manual

Vestax

Vestax PMC-580Pro User manual

Popular Controllers manuals by other brands

Valworx 5818 Series installation instructions

Valworx

Valworx 5818 Series installation instructions

OCL CO2 SENSOR quick start guide

OCL

OCL CO2 SENSOR quick start guide

AUMA SAI 07.2 Operation instructions

AUMA

AUMA SAI 07.2 Operation instructions

Tridium JACE-6 Series Mounting and wiring instructions

Tridium

Tridium JACE-6 Series Mounting and wiring instructions

Pentair Biffi ICON 2000 Instructions and operating manual

Pentair

Pentair Biffi ICON 2000 Instructions and operating manual

ASE DS-5C installation manual

ASE

ASE DS-5C installation manual

HEATIZON SYSTEMS M329 instructions

HEATIZON SYSTEMS

HEATIZON SYSTEMS M329 instructions

IWAKI WALCHEM Intuition-6 Series instruction manual

IWAKI WALCHEM

IWAKI WALCHEM Intuition-6 Series instruction manual

Zenith SL-5318-WH-C - Heath - Motion-Sensing Shielded Wide-Angle Twin Security... user guide

Zenith

Zenith SL-5318-WH-C - Heath - Motion-Sensing Shielded Wide-Angle Twin Security... user guide

GEA Bock LR manual

GEA

GEA Bock LR manual

Phoenix Contact ELR H51-IESSC-24DC500AC-06 manual

Phoenix Contact

Phoenix Contact ELR H51-IESSC-24DC500AC-06 manual

OptoSupply OS-OC013AIG2 product manual

OptoSupply

OptoSupply OS-OC013AIG2 product manual

Sinclair SWC-02 user manual

Sinclair

Sinclair SWC-02 user manual

TRACK STAR 1/5 Brushless Sensorless Car ESC instruction manual

TRACK STAR

TRACK STAR 1/5 Brushless Sensorless Car ESC instruction manual

Kitz FBS Operation manual

Kitz

Kitz FBS Operation manual

YASKAWA Motoman DX200 instructions

YASKAWA

YASKAWA Motoman DX200 instructions

Omron CS1W-LCB01 Operation manual

Omron

Omron CS1W-LCB01 Operation manual

Banner Sure Cross DXM100-Bx instruction manual

Banner

Banner Sure Cross DXM100-Bx instruction manual

manuals.online logo
manuals.online logoBrands
  • About & Mission
  • Contact us
  • Privacy Policy
  • Terms and Conditions

Copyright 2025 Manuals.Online. All Rights Reserved.