OTU-8000 - Getting Started Manuel – Ref 7OTU80020/00 – January 2011 – Copyright 2011 JDSU 2
Click the OTU on the brackets.
Fix the spacers in which the plexy protector will be screwed in.
Mark for wrench
HS8 1/4’’ (Inch)
2. ELECTRICAL CONNECTIONS
The OTU-8000 works on a DC -48V power supply. It supports a dual feed.
If using only one source, screw the
source’s wires inside the 5 points
connector as (one the of the options)
shown opposite
Wrap the power cables around the
ferite delivered.
Use the ground connector supplied
to connect the OTU to the ground.
SWITCH ON/OFF PROCEDURES
The OTU-8000 has no ON/OFF button.
It is automatically switched ON once the power is plugged in.
SWITCH-OFF PROCEDURE
To switch the OTU off, the user must follow the procedure below
1. Keep the OFF button pressed for about 3 sec.
2. Wait for the LED Standby to be solid green.
3. Unplug the Power-Supply connector.
OTU-8000 - Getting Started Manuel – Ref 7OTU80020/00 – January 2011 – Copyright 2011 JDSU 3
Test
LAN
Modem
Stanby
Power
Unit
Def IP Off
Server Fuse
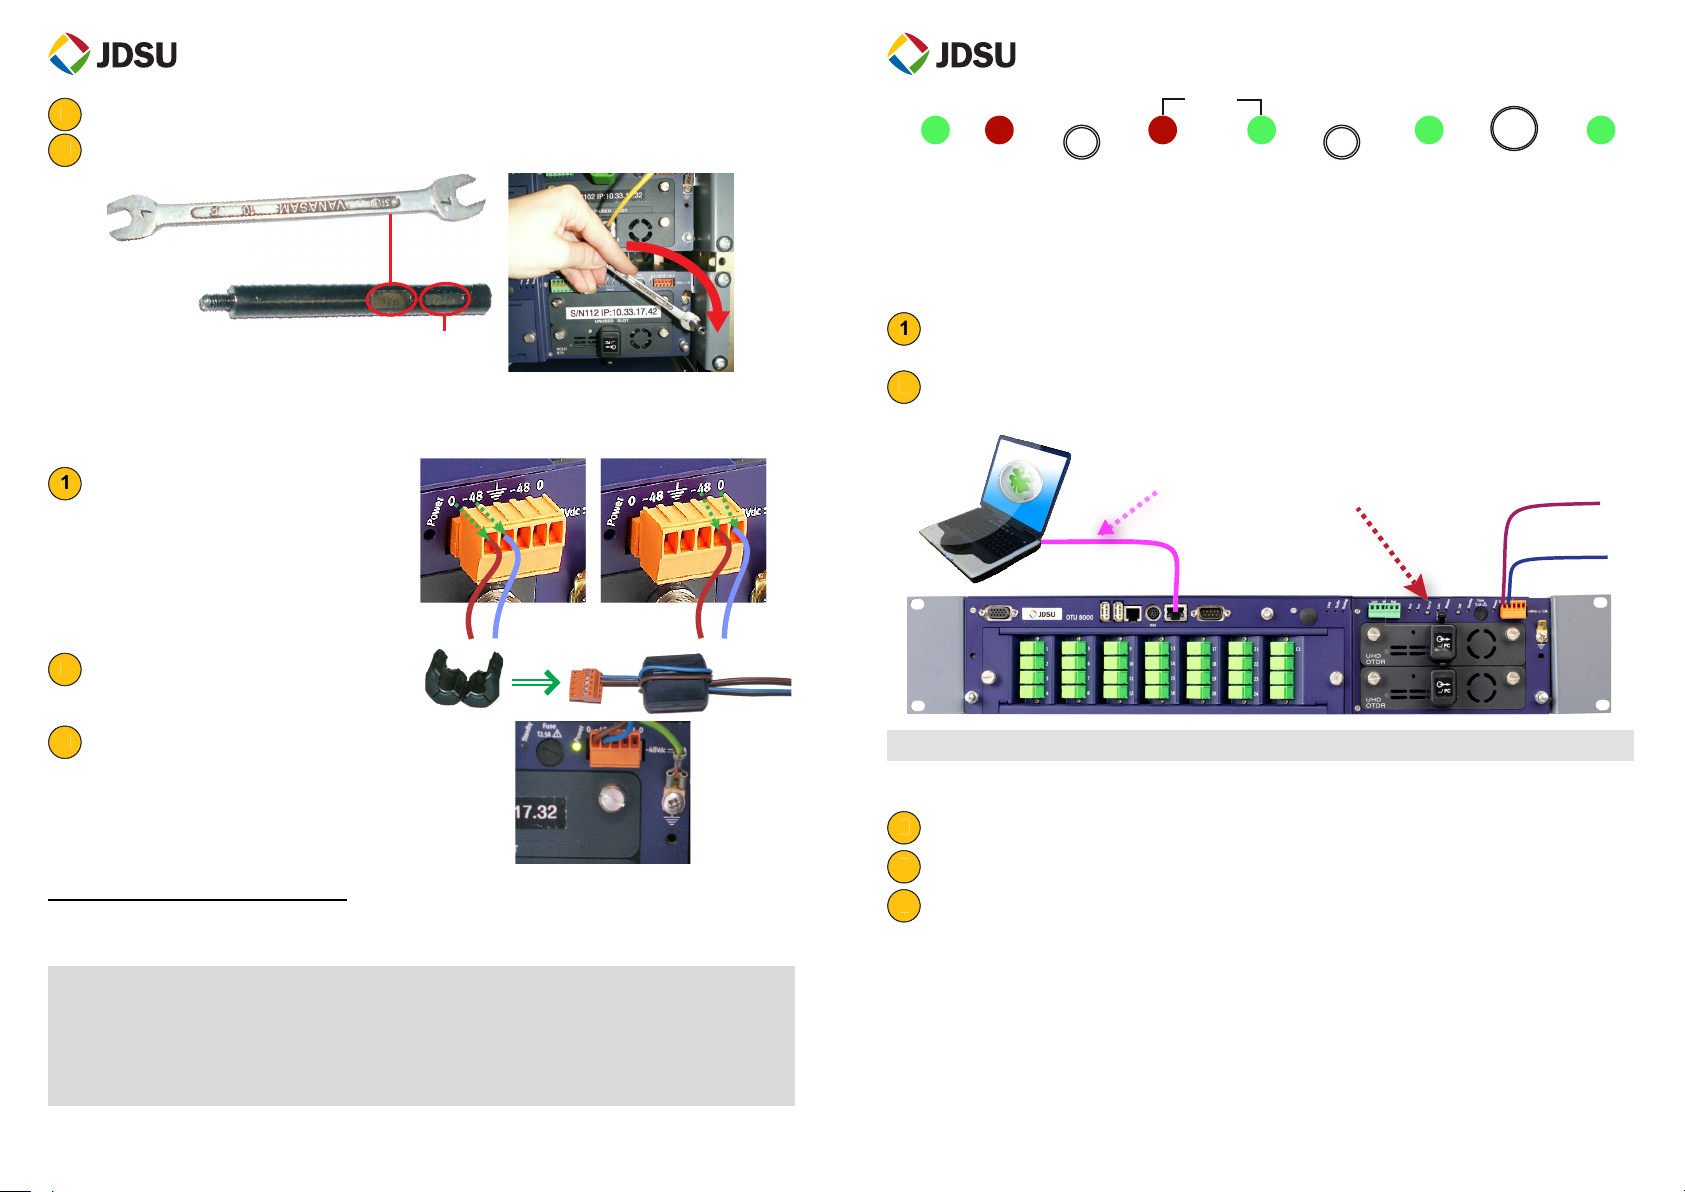
3. COMMUNICATION
The OTU-8000’s network information (IP address, sub-mask and gateway) must be
configured before the OTU-8000 can be reached via the LAN.
This is done by:
Plugging a PC (set in DHCP to obtain an IP automatically) to the OTU-8000 using
a crossed Ethernet cable .
Restarting it into a special mode called Def-IP Mode by keeping pushed during few
seconds the DEF IP button after plugging the power supply.
48 V DC
Def IP buttonCrossed Cable
Once in Def-Ip mode, the LED Server-LAN flashes
To enter the OTU’s network information :
Open your Web Browser http://192.168.1.1 .
Login as “user install”.
5In the configuration menu go to the Ethernet tab and indicate the OTU Network
settings:
-IP Address
-IP Sub-Mask
-IP Gateway
-Domain Name
-DNS Server address


