HOURS
1
2
3
4
5
6
7
11
8
9
10
12
8 9
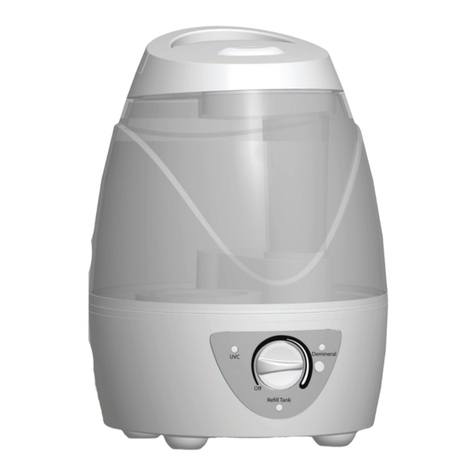
1. Power: With the Power Knob in the OFF position ( O ), plug humidifier into a polarized
120V outlet.
CAUTION: TO AVOID ELECTRIC SHOCK DO NOT PLUG HUMIDIFIER INTO OUTLET
WITH WET HANDS.
2. Output: Turn the Power Knob clockwise to highest setting.
3. Position humidifier to direct mist output away from walls, furniture and bedding. Mist Outlet
can rotate 180° and is removable for cleaning.
4. Humidity Level: When a comfortable humidity level is reached, turn Power Knob to a lower
setting. A comfortable humidity level is between 40-60%.
CONDENSATION: If you notice condensation on the walls, windows or around unit,
your humidity level is too high. Turn humidifier off and open door to room.
To monitor your humidity level, use a humidity monitor such as the Vicks Humidity Monitor
(V70) available at retailers or at www.vickshumidifiers.com.
Note: Auto shut off feature will activate when water runs out of the Tank or the Tank is removed
from the unit. The auto shut off will not turn off the Power Knob light; it will just turn off the fan
and nebulizer.
Step 2 Step 4
Step 3
Step 1
VapoPads®Recommended Usage:
• Not recommended for infants under 10 lbs (4.5 kg).
• For children between 10-22 lbs (4.5-10 kg ) do not use more than 2 pads in a 24 hr period.
Scent Pad Ingredients: VSP-19, VSP19FP, VSP19VPC, VSP-19 CAN: Eucalyptus Oil, Menthol,
Glycol,Cedar Leaf Oil & Others.
Using Your Humidifier
Step 1
Your EasyFill Cool Mist Humidifier can be used with Vicks VapoPads®, VSP-19 or VBR-5 series, to
provide up to 8 hours of soothing vapors. One free sample of the methol VapoPad is included with
your humidifier. To use your unit with scent pads:
1. Open Scent Pad Door.
2. Open Scent Pad by tearing notch on pad bag. Do not touch pad with hands. If pad is touched
do not rub face or eyes as it may cause irritation.
3. Insert Vicks Scent Pad with angled end facing towards the product. Up to two scent pads can
be inserted. Close door.
4. After 8 hours, discard scent pad.
To continue using scent pads, repeat steps 1-4.
Using Vicks®VapoPads®
Step 3Step 2 Step 4
How to Use
1. Turn off, unplug and remove Tank Cover. Empty Water Tank.
2. Empty Reservoir by slowly pouring from the low side of the Housing on the opposite side from
the Mist Outlet and away from Power Knob. Wipe outside of housing to dry any water that
may have escaped between Base and Housing.
3. Rinse Tank, wipe clean and dry with a soft cloth or paper towel.
4. Refill Water Tank with cool water according to Filling/Refilling the Water Tank instructions.
Note: Ensure Float Paddle remains installed correctly. For detailed instructions, refer to
Float Paddle Installation section.
CAUTION: Improper placement of the Float Paddle could result in leaking or water
not feeding into the Reservoir.
Daily Maintenance
Step 2 Step 4
Step 1
MAX
Step 3
10 11
Step 2 Step 3
Step 1
1. 5 C
Step 5 Step 6
Step 4
Cleaning Your Humidifier (Continued)
1. Pour a minimum of 2 cups (.5 liters) of undiluted distilled white vinegar in the Water Tank.
Gently swish vinegar around in the Tank to wet entire inside of Tank.
2. Place Tank on Base. Vinegar will drain into the Water Reservoir and loosen mineral buildup
(scale) in the Reservoir and bottom of the Water Tank. There should be enough vinegar to
cover the bottom of the Tank. If not using a dishwasher, the four removable components can
be soaked in the Tank. Just add enough vinegar to cover the components in the Water Tank.
3. Soak for 20 minutes, then remove Water Tank and slowly empty vinegar into sink. Remove
components placed in Tank. Rinse Tank and components with tap water until the smell of
vinegar is gone.
4. Remove Float Paddle from Reservoir by lifting up on Float Rod and set aside.
Wipe Nebulizer and Reservoir area with a soft cloth to remove loosened minerals.
5. Empty vinegar from the Reservoir by slowly pouring from the low side of the Housing on the
opposite side from the Mist Outlet and away from Power Knob. Pour 1.5 cups of water into
Reservoir, lightly swish water and pour out. Repeat until smell of vinegar is gone. Avoid
getting water into any openings in the Reservoir area by pouring from the low side of the
Housing on the opposite side from the Mist Outlet and away from Power Knob.
CAUTION: Do not submerge the Base in water. Doing so may damage the
humidifier and void the warranty.
6. Place Float Paddle back in Reservoir, ensuring Float Rod is secured in brackets.
For detailed instructions, refer to the Float Paddle Installation section.
CAUTION: Improper placement of the Float Paddle could result in leaking or
water not feeding to the Reservoir.
Wipe outside of housing to dry any water that may have escaped between Base and Housing.
V
2C
MINUTES
Top Le Haut
“Click”
MAX
MAX
Scale Removal
Follow steps 1-5 in Before Cleaning section, then follow the additional steps below.
1. Turn off and unplug humidifier. Never clean the humidifier when it is running.
2. Remove Water Tank and Tank Cover. Empty water from Tank.
3. Remove accessories, including Demineralization Cartridge, from the Tank if being used.
Do not clean accessories.
4. Remove Mist Outlet, Outlet Cover, Mist Chamber, and Tank Cover.
Note: These four components are dishwasher safe. They may be cleaned in the Top Rack of
the dishwasher or by hand as noted in following instructions. Do not place in the bottom
rack of dishwasher.
5. Holding the Base, empty water from Reservoir by slowly pouring from the low side of the
Housing on the opposite side from the Mist Outlet and away from the Power Knob. The
Float Paddle should remain firmly attached to the brackets in the Reservoir.
Cleaning Your Humidifier
To keep your humidifier running efficiently, clean it regularly. Weekly cleaning is recommended. All
maintenance should be done in the kitchen or bathroom on a water resistant surface near a faucet.
To properly clean your humidifier we recommend the separate processes of Scale Removal
and Disinfecting. These two processes must be performed separately.
Before Cleaning
Step 2
Step 4 Step 5
Step 1
Step 3
Do not clean
Cleaning Your Humidifier (Continued) Cleaning Your Humidifier (Continued)
Reassembling
After descaling and disinfecting, follow these steps to reassemble the unit:
1. Replace Mist Chamber over Air Outlet.
2. Place Outlet Cover on top of Mist Chamber and lightly press down until it clicks into place
and sits fully seated on the Housing.
3. Place Mist Outlet into the recess in the Outlet Cover, lining up the opening in the Outlet
with the circle graphic on the Outlet Cover. Press down until you hear a click. This ensures
Mist Outlet is positioned properly.
4. Ensure Float Paddle is installed correctly. Line up Float Paddle with the float paddle shape
on the bottom of the Reservoir. Place Float Rod over both Brackets and press firmly
until you hear it click into both Brackets. Pull gently up on the Float Rod to be sure it
doesn’t pop out of the Brackets.
CAUTION: Improper placement of the Float Paddle could result in leaking or water
not feeding to the Reservoir.
5. Replace Tank Cover and place Tank back onto Base.
End of Season Cleaning and Storage
Follow the cleaning instructions when the humidifier will not be used for at least one week, or at the
end of the season.
At the end of the season, remove any accessories and discard. Allow the humidifier and all compo-
nents to dry completely before storing.
DO NOT store humidifier with water inside the Reservoir or Water Tank.
Pack unit safely and store in cool, dry location.
Step 2
Step 4 Step 5
Step 3
Step 1
“Click”
Top Le Haut
MAX
MAX
“Click”
12 13
1. Mix 1 gallon (3.8 L) of water with 1 teaspoon of bleach. Pour the bleach solution into the Tank.
Note: Using more than 1 teaspoon of bleach to 1 gallon (3.8L) of water may result in damage
to the humidifier.
2. Place Tank on Base. Bleach solution will drain into the Water Reservoir. If not using
a dishwasher, the Mist Outlet, Outlet Cover, Mist Chamber and Tank Cover can be soaked
in the Tank. Just add additional bleach solution to cover the components in the Water Tank.
3. Soak for 20 minutes, then remove the Water Tank and slowly empty bleach solution into
sink. Remove components placed in Tank. Rinse Tank and components with tap water until
the smell of bleach is gone.
4. Remove Float Paddle from Reservoir by lifting up on Float Rod and set aside.
5. Empty bleach solution from the Reservoir by pouring from the low side of the Housing on the
opposite side from the Mist Outlet and away from Power Knob. Pour 1.5 cups of water into
Reservoir, lightly swish water and pour out. Repeat until smell of bleach is gone. Avoid
getting water into any openings in the Reservoir area by pouring from the low side of the
Housing on the opposite side from the Mist Outlet and away from Power Knob.
CAUTION: Do not submerge the Base in water. Doing so may damage the humidifier
and void the warranty.
Wipe outside of housing to dry any water that may have escaped between Base and Housing.
Step 2Step 1
(3,8 l)
B
1tsp
W
1Gal.
Step 3
MINUTES
Step 4
1. 5 C
Step 5
MAX
MAX
Disinfecting
Follow steps 1-5 above in Before Cleaning section, then follow the additional steps below.
NOTE: Bleach may stain clothes. It is recommended that you wear rubber gloves during this process
to protect your hands.
Problem Possible Cause Solution
Mist is coming out from
bottom of Mist Outlet*
Mist Outlet not properly
installed
Outlet Gasket is missing
Remove and replace Mist
Outlet into the recess in the
Outlet Cover and press down
until you hear a click
Contact Consumer Relations
Outlet Cover will not sit
securely on Housing
when reassembling after
cleaning
Outlet Gasket was removed
for cleaning and not securely
replaced in Outlet Cover
Be sure Gasket fits tightly in
Outlet Cover
Mist is escaping from
the area between the
tank and housing, in
addition to the mist
outlet
Outlet Gasket is missing Replace Gasket if it was
removed for cleaning or
contact consumer relations
for a replacement
Humidifier shuts off Water Tank is empty
Float Paddle is not installed
properly
Fill the Tank with Water
Check that the Float Paddle
is secured in Brackets
White Dust accumulating
on surrounding surfaces
Using tap water in your
humidifier in hard water areas
If using, Demineralization
Cartridge has reached life
expectancy
Use distilled water or
use a Protec TWT500
Demineralization Cartridge
Replace Demineralization
Cartridge
Condensation on
windows and walls or
area around humidifier
is damp
Mist intensity is set too high
for room size or pre-existing
humidity level
Humidifier may be too close
to wall or window
Decrease mist output to a
lower setting or open door
to the room
Move humidifier away from
wall or point Mist Outlet away
from wall or window
14 15
Troubleshooting (Continued)
If your humidifier is not working properly, refer to the following:
Problem Possible Cause Solution
Water is not draining
into Reservoir
Plunger is stuck
Float Paddle not installed
correctly
Demineralization Cartridge not
allowing water to flow
Push and release Plunger to be
sure it is moving freely
Check Float Paddle and ensure
it is placed securely
in brackets
Uninstall Demineralization
Cartridge, shake a few times,
and re-install
Power light is on but little
or no mist is released
Water Tank is empty
Power Knob is set too low
Hardened minerals on
the Nebulizer
Mist Chamber is not installed
Fill Water Tank
Turn the Power Knob clockwise
(right) to increase output
Clean Nebulizer (refer to
Cleaning instructions)
Verify that all components are
installed properly
Water leaking from Base
or Reservoir
Float Paddle not placed
correctly
Plunger is damaged
Plunger is sticking
Tank is cracked
Plunger may have foreign
material stuck under the
Tank Gasket
Ensure Float Rod is secured
in Brackets
Contact Consumer Relations
Push and release Plunger to be
sure it is moving freely
Inspect Tank for damage;
contact Consumer Relations
At sink, push and release
Plunger system so water
may flow.
Troubleshooting
If your humidifier is not working properly, refer to the following:
NOTE: Keeping this unit clean from mineral deposits normally contained in water supply will improve
the efficiency and operation of this unit.
*Note: It is normal to see some mist escape around the Mist Outlet when the unit first starts and the
Mist Outlet is dry.
For additional troubleshooting help, call Consumer Relations at 1-800-VAPOR-1-2 (1-800-827-6712).
