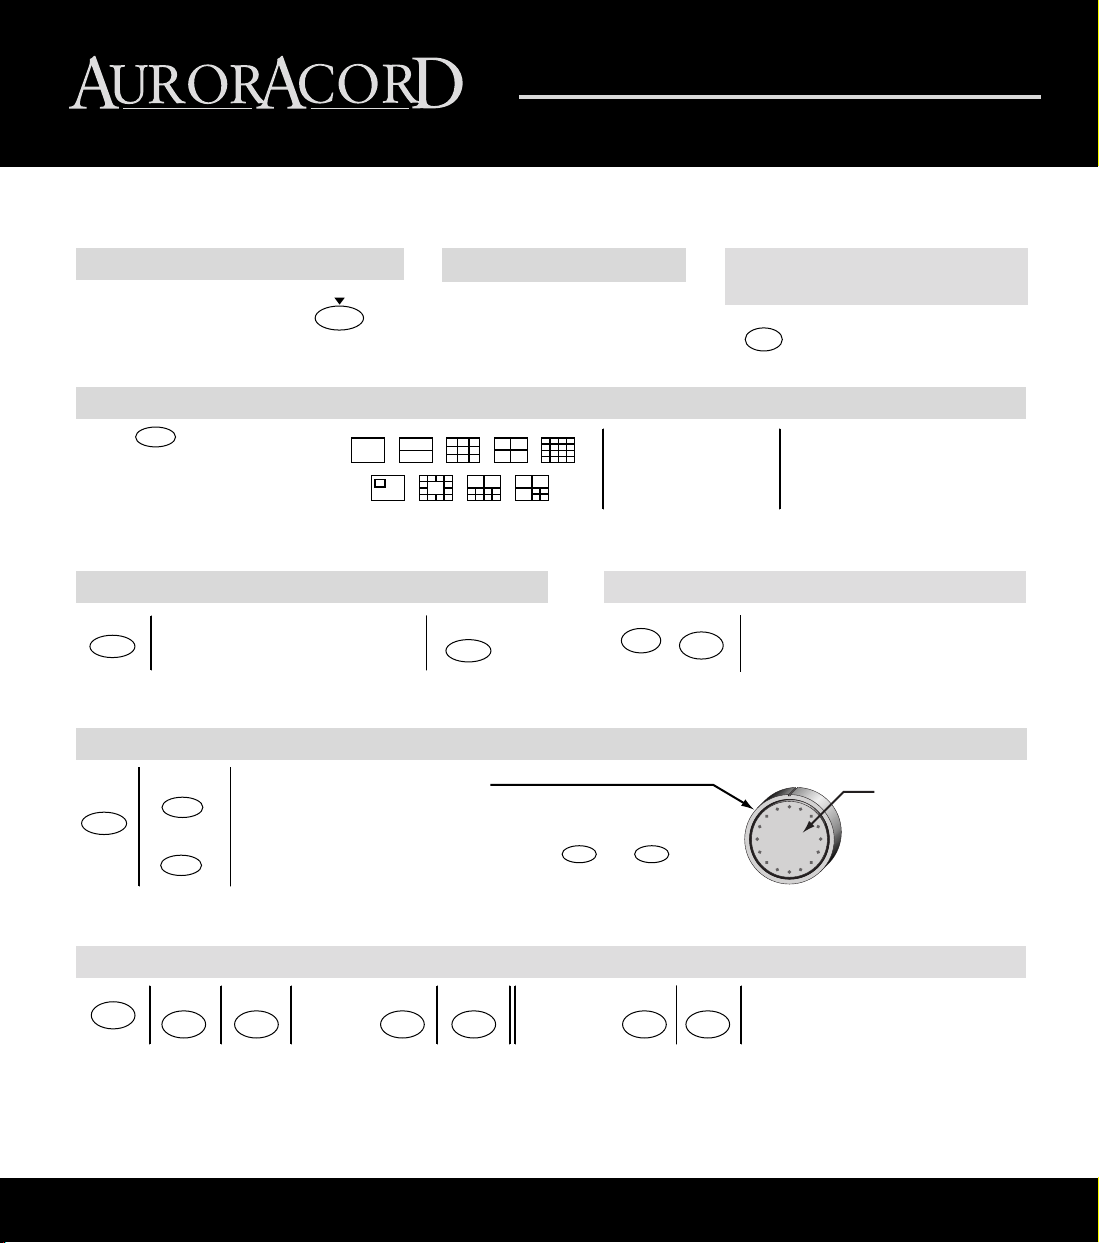
Selecting a Monitor
Viewing Video in Multi-Picture Display Format
Viewing Video in Full
Screen Display Format
Press Spot Monitor to toggle the
monitor selection between the
spot and main display monitors.
There are three monitors for the AurorAcorD system, the spot monitor and two main display monitors. The spot monitor is used as a monitoring station
and does not have the capability of multi-picture display. Use the main display monitors to take advantage of all AurorAcorD features.
The video will sequence
or remain fixed,
depending upon your
programming choices.
Note: Multi-picture display formats
are not available on the spot
monitor. Picture-in-picture format is
unavailable in PAL mode.
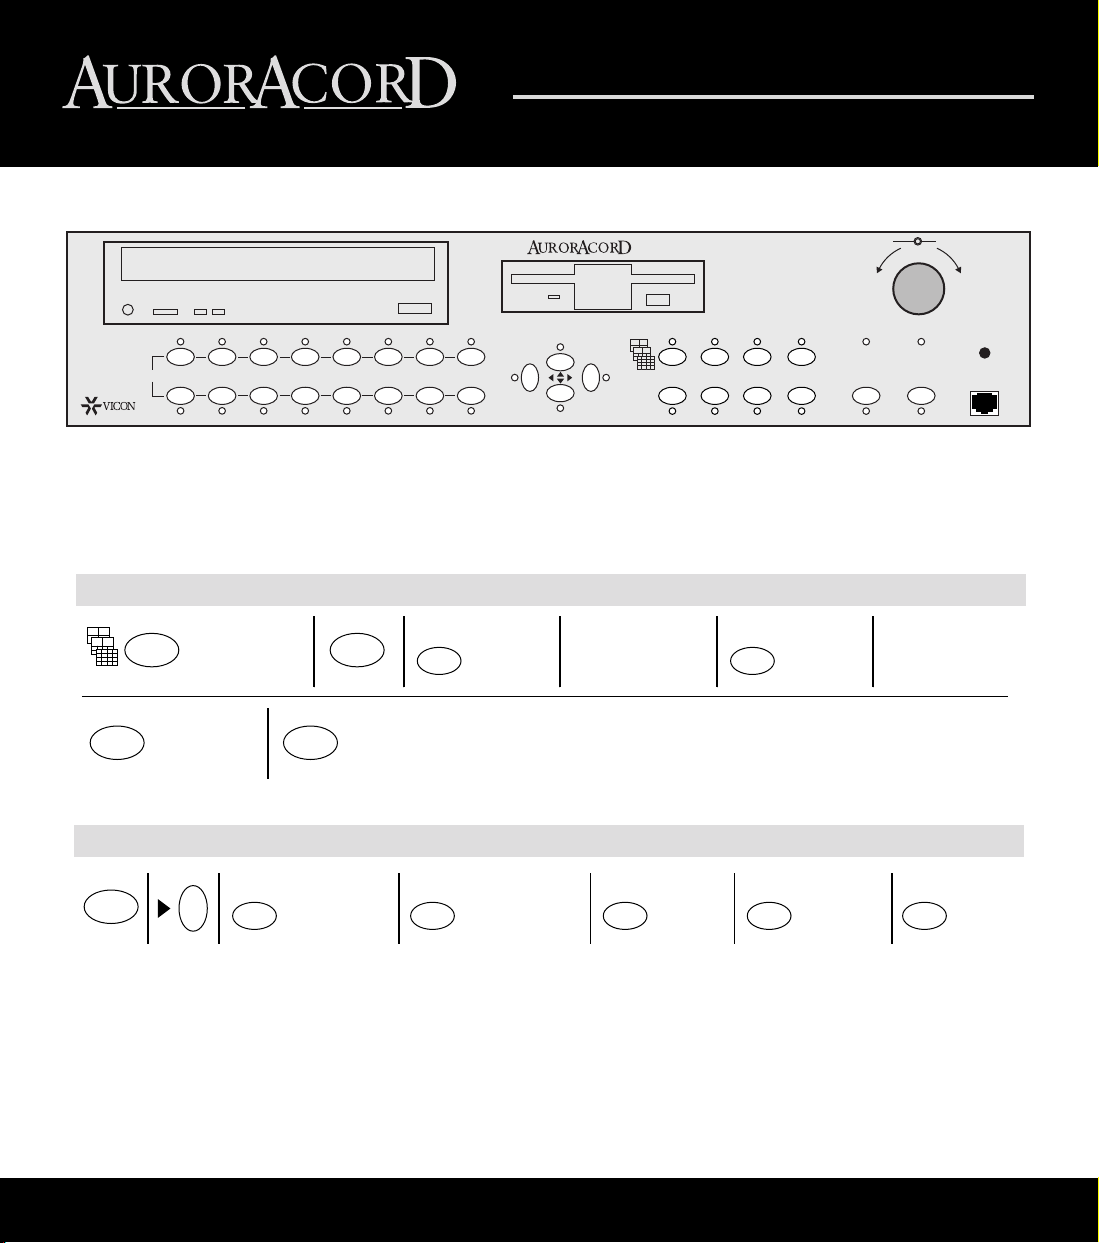
Note: Your AurorAcorD may not
include a CD-RW drive,
depending upon the model.
Press to toggle through the
available display formats. Formats
available in Playback mode are
shown across the top. All formats
are available in Live mode.
Recording Video
The AurorAcorD continuously
records unless halted using
the Record Control screen.
Outer "Shuttle" Ring Functions Inner "Jog"
Ring Functions
For complete instructions, see Instruction Manual XX091.
SPOT
MONITOR
DISPLAY
Playing Back Video
PLAY PLAY
To pause:
PLAY
To resume:
Freezing and Restoring Video
For multi-picture display, press the
window number key to unfreeze/freeze
the video in that window.
FREEZE
To restore:
FREEZE
Press a camera
number key.
1-16
Phone: 631-952-2288 • 800-645-9116 • U.K.: +44 (0) 1489 566300
Erasing the CD-RW or Hard Drive
MENU
8
For Hard
Drive: For CD-RW:
1
AUX1
1
AUX1AUX8
2
AUX2
2
AUX2
3
AUX3
Set the AurorANet remote
address to the address of the
AurorAcorD you wish to control.
Hold
MENU
AurorANet Remote Control
ENTER
In Playback or Pause Mode:
Use the shuttle ring to move
forward and reverse. Twist the
ring a greater or lesser distance
from the center position to
control the speed.
In Playback Mode only:
Use the shuttle lock feature to set a fixed rate for
playback by adjusting the speed to the desired
rate and then pressing . Press
again to resume normal playback speed.
ENTER ENTER
In Pause mode:
Use the jog feature to
advance frame by frame
through the video.
4
Quick GuideOperation