manuals.online logo
Brands
  1. Home
  2. •
  3. Brands
  4. •
  5. Victory
  6. •
  7. Heater
  8. •
  9. Victory Heatlight HLQ Series User manual

Victory Heatlight HLQ Series User manual

Quartz Infrared Zone Heaters
The following information should be considered when installing Quartz Infrared
Heaters.
Installation should always be carried out by a qualified electrician or a competent person
in accordance with current electrical regulations, protected by a suitably rated isolator
and fuse. If using MCB’s type3 or typeC must be used.
The heaters should always be installed using the mounting brackets provided to
ensure adequate clearance from the wall.
A minimum air gap of 450mm should always be allowed between the top of the
heater and the ceiling or roof.
A safety distance of 1mtr should always be left in front of a 1.5KW heater. Heaters
of 3KW and 4.5KW should have a safety distance of at least 1.5mts and the 6KW
heater leave 2mts.
You also should ensure no flammable material could come into contact with the
heater.
Heaters should not be installed in areas where hazardous vapours may be present
as defined in BS5345
It is recommended the heaters be operated with a guard in front of the lamp and
should always be fitted to units mounted below 2.2mtrs.
The heater should only be installed in an indoor or weather protected environment.
The essential element of the heater is a halogen filled quartz linear lamp with a tungsten
element. This operates at about 2200C and has a filter to stop most of the white light
and emit short wave infrared radiant heat. The lamp operates at full infrared output
almost instantly and emits radiant energy at 1.2microns.
Quartz heaters are recommended by The Electricity council and Building Services
Research Association for General space heating, Zone heating and localised spot
heating.
This product conforms to EU Directive 2002/96/EC.
This appliance bears the symbol of the crossed waste bin. This
indicates that, at the end of its useful life, it must not be disposed of
as domestic waste, but must be taken to a collection center for waste
electrical and electronic equipment. It is the user's responsibility to
dispose of this appliance through the appropriate channels at the
end of its useful life. Failure to do so may incur the penalties
established by laws governing waste disposal.
HeatLight Technology
Quartz Infrared
HLQ Series Heating
VICTORY (HeatLight Technology)
Unit 36, Orbital 25 Business Park
Dwight Road
Watford
WD18 9DA U.K.
Tel: +44 (0) 1923 804080
Fax: +44 (0) 1923 804081
www.heatlight.com
[email protected]
INSTRUCTIONS SHOULD BE CAREFULLY READ BEFORE
INSTALLATION AND RETAINED BY THE USER.
Before installing this heater, please read all the enclosed instructions carefully
and follow any recommendations regarding installation and use.
Electrical installation
The HLQ range comprises 1, 2 and 3 lamp Heater Models.
One and two-lamp heater models are factory fitted with high temperature silicon rubber
flexible cable conforming to BS 6500 having a temperature rating of 180°C continuous.
In the three-lamp heater use high temperature silicon rubber flexible cable conforming
to BS 6500 having a temperature rating of 180°C continuous.
Appliances must be earthed.
It is advised that Type 3 (Type C) MCBs are used. In multi-lamp single phase
installations, in order to prevent the initial inrush current causing nuisance tripping,
MCBs over rated by 60 - 70% may be required.
The HLQ fitting has been packed with a separate wall mounting bracket and lamp(s)
ready for attachment and fitting to the heater. Please leave the lamp(s) in transit packing
until ready to fit.
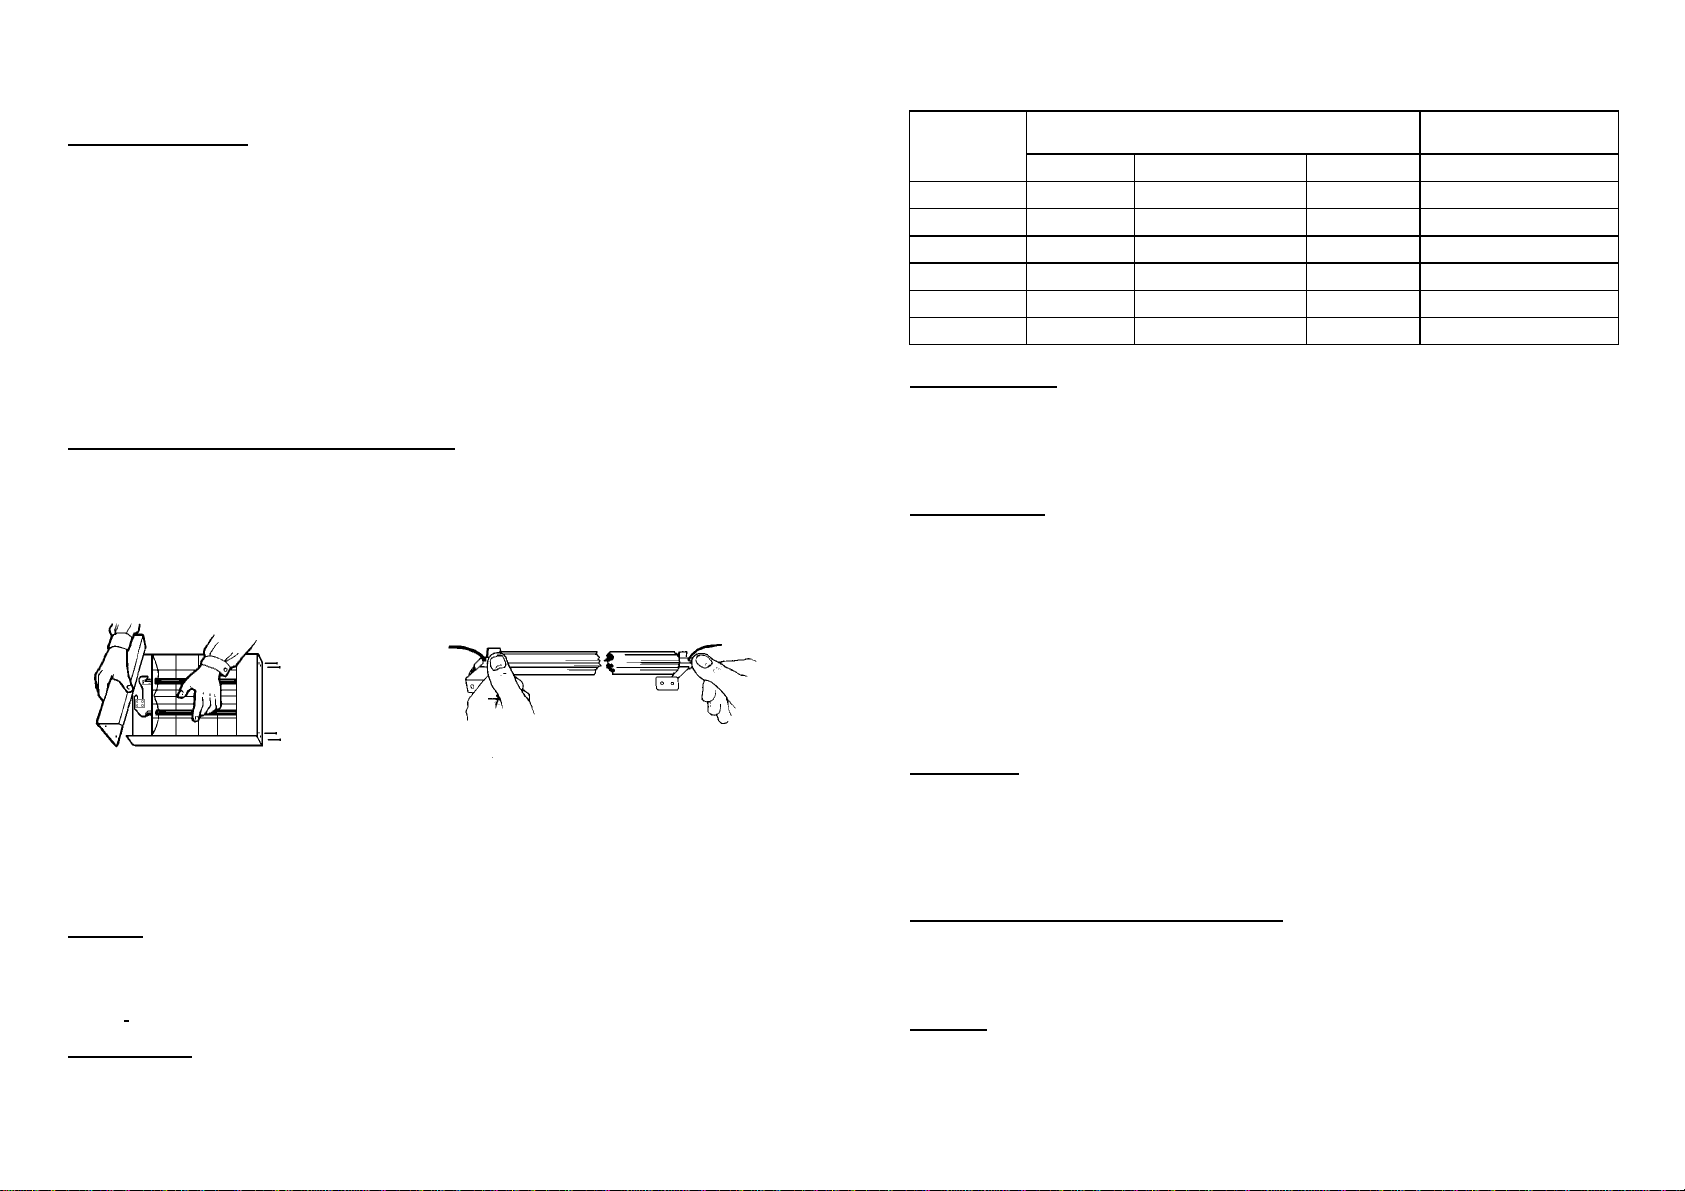
Lamp Installation (If required) or replacement
1) Undo the 4 screws on each end cover, and remove covers.
2) Unscrew the 4 screws securing the guard, remove guard and slide out the end
reflectors.
3) If replacing lamp unscrew lamp leads and remove lamp.
4) Carefully remove new lamp from its box making sure you don not touch the glass
part of the lamp, centre lamp to brackets with leads pointing downwards.
5) Insert each end of lamp halfway under each spring clip.
6) Push slowly each end of lamp with equal thumb pressure fully into clips.
N.B. Any inadvertent finger marks on the tube glass sleeve can be removed using
methylated spirits on a soft cloth
7) Connect lamp leads to connector blocks. Tighten screws
8) Re-assemble heater by sliding the end reflectors back, then secure the guard in
position.
9) Refit the end covers making sure no wires are trapped before tightening the
screws.
Location
Heaters should be ideally angled at 30° to 45° from the vertical whether wall or ceiling
mounted.
There must always be a minimum clearance of 450mm between top of heater and
ceiling.
Wall mounting
Avoid mounting heaters on structures liable to vibrate.
Recommended mounting heights and safety distances should always be observed.
Recommended wall mounting heights
Wall mounting Height
(Metres) Safety distance from
Heater (mts)
Model Minimum
Recommended Maximum Minimum
HLQ15 2.2 2.5 3.0 1.0
HLQ20 2.2 2.5 3.2 1.5
HLQ30 2.2 2.5 3.5 1.5
HLQ40 2.5 3.5 4.0 1.5
HLQ45 3.0 3.5 4.5 1.5
HLQ60 3.5 4.0 5.5 2.0
Ceiling mounting
An optional pack containing 4 hooks and nuts is available from your supplier to enable
the heater to be ceiling mounted on suitable chains.
Heaters should be ideally angled at 30° to 45° from the vertical whether wall or ceiling
mounted.
Commissioning
Perform Insulation and Earth continuity Tests.
Switch on heater(s) and confirm that lamp(s) operating.
Ensure each heater aims its warmth into the target area by adjusting heater angle(s)
as necessary then tighten bracket bolts when satisfactory coverage is achieved.
Check that lamp(s) remain in a horizontal plane for all angles of heater(s).
Lamps must only be operated within 5° of the horizontal plane.
The user/customer should be made aware of all aspects of operation and safety and
strongly advised to retain these instructions for reference.
In unoccupied premises it is recommended that the heating system is switched off and
isolated from the electrical supply.
Maintenance
HeatLight Quartz Heaters contain no moving parts and therefore very little maintenance
is required other than to ensure that there is no excessive build-up of dust/dirt on the
reflectors or lamps as this can cause overheating and premature lamp failure.
Depending on siting conditions a heater should be regularly inspected, but at least once
per year.
Before any maintenance work is carried out
Allow heater case/lamp to cool to avoid injury.
Always isolate appliance(s) from electrical power supply.
Re-read instructions prior to lamp replacement.
Warranty
Your Heatlight product is guaranteed for one year from date of purchase. We will repair
or replace at our discretion any part found to be defective. We cannot assume any
consequential liability. This guarantee in no way prejudices your rights under common
law and is offered as an addition to consumer liability rights

This manual suits for next models

6

Other Victory Heater manuals

Victory HLWA45 Series User manual

Victory

Victory HLWA45 Series User manual

Victory HLWA15-LV Series User manual

Victory

Victory HLWA15-LV Series User manual

Victory HLWA30 User manual

Victory

Victory HLWA30 User manual

Popular Heater manuals by other brands

Farho XANA PLUS Fitting and operating instructions

Farho

Farho XANA PLUS Fitting and operating instructions

Mr. Coffee BVMC-TM33 user manual

Mr. Coffee

Mr. Coffee BVMC-TM33 user manual

German pool HTB-248U user manual

German pool

German pool HTB-248U user manual

Toyostove DC-60 Operating and maintenance instructions

Toyostove

Toyostove DC-60 Operating and maintenance instructions

BLACK DECKER BHDT118 instruction manual

BLACK DECKER

BLACK DECKER BHDT118 instruction manual

BIEMMEDUE GE 20 instruction manual

BIEMMEDUE

BIEMMEDUE GE 20 instruction manual

ORIGO FH-T48P instruction manual

ORIGO

ORIGO FH-T48P instruction manual

Grill'D Cometa Vega Series Installation and operation manual

Grill'D

Grill'D Cometa Vega Series Installation and operation manual

Sonnenkonig BAGNO user manual

Sonnenkonig

Sonnenkonig BAGNO user manual

Re-Verber-Ray LD Series installation manual

Re-Verber-Ray

Re-Verber-Ray LD Series installation manual

U-Line H-8022 manual

U-Line

U-Line H-8022 manual

Scarlett SC-250 instruction manual

Scarlett

Scarlett SC-250 instruction manual

Korona 60002 instruction manual

Korona

Korona 60002 instruction manual

Kooper 2194352 User instructions

Kooper

Kooper 2194352 User instructions

Sterling Separated Combustion Tubular Gas Fired... Installation instructions and parts list

Sterling

Sterling Separated Combustion Tubular Gas Fired... Installation instructions and parts list

Ducasa ALU STONE User's manual and installation

Ducasa

Ducasa ALU STONE User's manual and installation

Flagro FVO-400 Operating instructions manual

Flagro

Flagro FVO-400 Operating instructions manual

Argo HIFAN Black user manual

Argo

Argo HIFAN Black user manual

manuals.online logo
manuals.online logoBrands
  • About & Mission
  • Contact us
  • Privacy Policy
  • Terms and Conditions

Copyright 2025 Manuals.Online. All Rights Reserved.