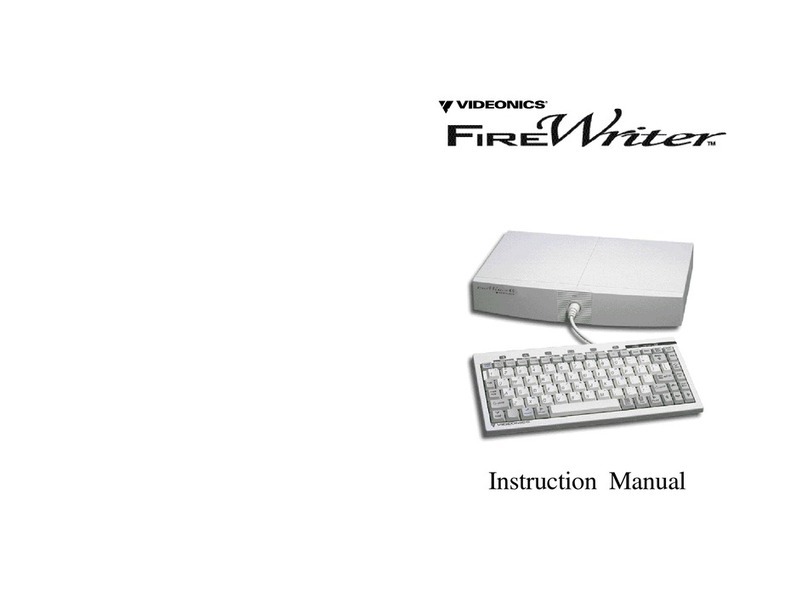
Videonics PTM-1 User manual

Personal
TitleMaker
User Guide
PTM–1
MANL-0715-01

Disclaimers
Television screens are simulated.
Subject to change without notice.
This device is not to be used for the unau-
thorized copying of copyrighted material.
Trademarks
TitleMaker is a trademark of Videonics,
Inc.The Videonics logo, Thumbs Up, and
Videonics Video TitleMaker are registered
trademarks of Videonics, Inc.
Hi8 is a trademark of SONY Corporation.
VHS is a registered trademark of JVC. Other
product and brand names might be trade-
marks or registered trademarks of their
respective companies and are hereby
acknowledged.
Copyright
Personal TitleMaker User Guide © 1997,
Videonics, Inc. No part of this publication
may be reproduced, transmitted, tran-
scribed, stored in a retrieval system, or
translated into any language in any form
withouttheexpressedwrittenpermissionof
Videonics, Inc. All rights reserved.
®

CONTENTS
1 Introduction
Major Features . . . . . . . . . . . . . . . . . . . . . . . . . . . . . . . . . . . . . . . . . . . . . . . . .2
Personal TitleMaker Package Contents . . . . . . . . . . . . . . . . . . . . . . . . . . . . .3
Contacting Videonics . . . . . . . . . . . . . . . . . . . . . . . . . . . . . . . . . . . . . . . . . . .4
About this User Guide . . . . . . . . . . . . . . . . . . . . . . . . . . . . . . . . . . . . . . . . . . .5
Conventions . . . . . . . . . . . . . . . . . . . . . . . . . . . . . . . . . . . . . . . . . . . . . . .6
Personal TitleMaker Keys . . . . . . . . . . . . . . . . . . . . . . . . . . . . . . . . . . . .7
2 Installation Procedures
Basic Configuration . . . . . . . . . . . . . . . . . . . . . . . . . . . . . . . . . . . . . . . . . . . .11
Device Types . . . . . . . . . . . . . . . . . . . . . . . . . . . . . . . . . . . . . . . . . . . . . .11
Input Devices . . . . . . . . . . . . . . . . . . . . . . . . . . . . . . . . . . . . . . . . . .12
Output Devices . . . . . . . . . . . . . . . . . . . . . . . . . . . . . . . . . . . . . . . .12
Personal TitleMaker Connectors . . . . . . . . . . . . . . . . . . . . . . . . . . . . . .12
Basic Configurations . . . . . . . . . . . . . . . . . . . . . . . . . . . . . . . . . . . . . . . . . . .13
Configuration 1 . . . . . . . . . . . . . . . . . . . . . . . . . . . . . . . . . . . . . . . . . . . .13
Configuration 2 . . . . . . . . . . . . . . . . . . . . . . . . . . . . . . . . . . . . . . . . . . . .14
Other Configurations . . . . . . . . . . . . . . . . . . . . . . . . . . . . . . . . . . . . . . . . . . .15
Using Other Videonics Equipment . . . . . . . . . . . . . . . . . . . . . . . . . . . .15
Using GPI with Personal TitleMaker . . . . . . . . . . . . . . . . . . . . . . . . . . .16
Troubleshooting . . . . . . . . . . . . . . . . . . . . . . . . . . . . . . . . . . . . . . . . . . . . . . .17
3 Getting Started
Understanding the Keyboard . . . . . . . . . . . . . . . . . . . . . . . . . . . . . . . . . . . .20
Understanding Components . . . . . . . . . . . . . . . . . . . . . . . . . . . . . . . . . . . .24
Projects . . . . . . . . . . . . . . . . . . . . . . . . . . . . . . . . . . . . . . . . . . . . . . . . . .24
Pages . . . . . . . . . . . . . . . . . . . . . . . . . . . . . . . . . . . . . . . . . . . . . . . . . . . .25
Titles and Lines . . . . . . . . . . . . . . . . . . . . . . . . . . . . . . . . . . . . . . . . . . . .25
Personal TitleMaker Screens . . . . . . . . . . . . . . . . . . . . . . . . . . . . . . . . . . . .26
Page Index Screen . . . . . . . . . . . . . . . . . . . . . . . . . . . . . . . . . . . . . . . . .26
Navigating the Page Index Screen . . . . . . . . . . . . . . . . . . . . . . . .27
Editing Screen . . . . . . . . . . . . . . . . . . . . . . . . . . . . . . . . . . . . . . . . . . . . .28
Navigating the Editing Screen . . . . . . . . . . . . . . . . . . . . . . . . . . . .29
Play Screen . . . . . . . . . . . . . . . . . . . . . . . . . . . . . . . . . . . . . . . . . . . . . . .30
Running the Personal TitleMaker Demo . . . . . . . . . . . . . . . . . . . . . . . . . . .31
About the Lithium Battery . . . . . . . . . . . . . . . . . . . . . . . . . . . . . . . . . . . . . .32

Contents
ii
4 Personal TitleMaker Tutorial
What You Need . . . . . . . . . . . . . . . . . . . . . . . . . . . . . . . . . . . . . . . . . . . . . . .34
Objective . . . . . . . . . . . . . . . . . . . . . . . . . . . . . . . . . . . . . . . . . . . . . . . . . . . . .35
Lesson 1
•
Getting Started . . . . . . . . . . . . . . . . . . . . . . . . . . . . . . . . . . . . . .36
Lesson 2
•
Create Page One . . . . . . . . . . . . . . . . . . . . . . . . . . . . . . . . . . . . .37
Lesson 3
•
Create Page Two . . . . . . . . . . . . . . . . . . . . . . . . . . . . . . . . . . . . .38
Lesson 4
•
Create Page Three . . . . . . . . . . . . . . . . . . . . . . . . . . . . . . . . . . .40
Lesson 5
•
Create Page Four . . . . . . . . . . . . . . . . . . . . . . . . . . . . . . . . . . . .42
Lesson 6
•
Create Page Five . . . . . . . . . . . . . . . . . . . . . . . . . . . . . . . . . . . . .44
Lesson 7
•
Create Page Six . . . . . . . . . . . . . . . . . . . . . . . . . . . . . . . . . . . . . .46
Lesson 8
•
Check Your Progress . . . . . . . . . . . . . . . . . . . . . . . . . . . . . . . . .46
Lesson 9
•
Create Page Seven . . . . . . . . . . . . . . . . . . . . . . . . . . . . . . . . . . .48
Lesson 10
•
Create Page Eight . . . . . . . . . . . . . . . . . . . . . . . . . . . . . . . . . . .48
Lesson 11
•
Create Pages Nine and Ten . . . . . . . . . . . . . . . . . . . . . . . . . . .50
Lesson 12
•
Create Page Eleven . . . . . . . . . . . . . . . . . . . . . . . . . . . . . . . . . .51
Lesson 13
•
Create Page Twelve . . . . . . . . . . . . . . . . . . . . . . . . . . . . . . . . .52
5 Working with Projects
Project Uses . . . . . . . . . . . . . . . . . . . . . . . . . . . . . . . . . . . . . . . . . . . . . . . . . .54
Creating New Projects . . . . . . . . . . . . . . . . . . . . . . . . . . . . . . . . . . . . . . . . . .54
Naming Projects . . . . . . . . . . . . . . . . . . . . . . . . . . . . . . . . . . . . . . . . . . . . . . .55
Renaming Projects . . . . . . . . . . . . . . . . . . . . . . . . . . . . . . . . . . . . . . . . .56
Deleting and Emptying Projects . . . . . . . . . . . . . . . . . . . . . . . . . . . . . . . . . .56
About Empty Projects . . . . . . . . . . . . . . . . . . . . . . . . . . . . . . . . . . . . . .58
Navigating Between Projects . . . . . . . . . . . . . . . . . . . . . . . . . . . . . . . . . . . .58
Copying and Moving Project Text . . . . . . . . . . . . . . . . . . . . . . . . . . . . . . . .59
6 Working with Pages
Identifying Pages . . . . . . . . . . . . . . . . . . . . . . . . . . . . . . . . . . . . . . . . . . . . . .62
Page Index Screen . . . . . . . . . . . . . . . . . . . . . . . . . . . . . . . . . . . . . . . . .62
Editing Screen . . . . . . . . . . . . . . . . . . . . . . . . . . . . . . . . . . . . . . . . . . . . .63
Creating Pages . . . . . . . . . . . . . . . . . . . . . . . . . . . . . . . . . . . . . . . . . . . . . . . .65
Moving and Copying Pages . . . . . . . . . . . . . . . . . . . . . . . . . . . . . . . . . . . . .66
Merging Pages . . . . . . . . . . . . . . . . . . . . . . . . . . . . . . . . . . . . . . . . . . . . . . . .67
Deleting Pages . . . . . . . . . . . . . . . . . . . . . . . . . . . . . . . . . . . . . . . . . . . . . . . .68

Contents
iii
Page Attributes . . . . . . . . . . . . . . . . . . . . . . . . . . . . . . . . . . . . . . . . . . . . . . . .69
Setting In Effects and Page Duration . . . . . . . . . . . . . . . . . . . . . . . . . .69
Setting Out Effects . . . . . . . . . . . . . . . . . . . . . . . . . . . . . . . . . . . . . . . . . .70
Transitions . . . . . . . . . . . . . . . . . . . . . . . . . . . . . . . . . . . . . . . . . . . . . . . .70
Cut Transition . . . . . . . . . . . . . . . . . . . . . . . . . . . . . . . . . . . . . . . . . .71
Fade Transition . . . . . . . . . . . . . . . . . . . . . . . . . . . . . . . . . . . . . . . .71
Wipe Transitions . . . . . . . . . . . . . . . . . . . . . . . . . . . . . . . . . . . . . . .71
Slide Transitions . . . . . . . . . . . . . . . . . . . . . . . . . . . . . . . . . . . . . . .72
Setting Page Duration . . . . . . . . . . . . . . . . . . . . . . . . . . . . . . . . . . . . . . .72
Timed Duration . . . . . . . . . . . . . . . . . . . . . . . . . . . . . . . . . . . . . . . .73
Infinite Duration . . . . . . . . . . . . . . . . . . . . . . . . . . . . . . . . . . . . . . .73
Scroll and Crawl . . . . . . . . . . . . . . . . . . . . . . . . . . . . . . . . . . . . . . . . . . .73
Using Backgrounds . . . . . . . . . . . . . . . . . . . . . . . . . . . . . . . . . . . . . . . . . . . .75
7 Working with Titles and Lines
Typing Titles . . . . . . . . . . . . . . . . . . . . . . . . . . . . . . . . . . . . . . . . . . . . . . . . . .78
Memory Warning . . . . . . . . . . . . . . . . . . . . . . . . . . . . . . . . . . . . . . . . . .79
Creating Tabular Columns . . . . . . . . . . . . . . . . . . . . . . . . . . . . . . . . . . .80
Typing Special and Accented Characters . . . . . . . . . . . . . . . . . . . . . .81
Editing Existing Titles . . . . . . . . . . . . . . . . . . . . . . . . . . . . . . . . . . . . . . . . . . .81
Making Simple Text Changes . . . . . . . . . . . . . . . . . . . . . . . . . . . . . . . .81
Reversing Text Changes . . . . . . . . . . . . . . . . . . . . . . . . . . . . . . . . . . . . .82
Marking Text . . . . . . . . . . . . . . . . . . . . . . . . . . . . . . . . . . . . . . . . . . . . . . . . . .82
Marking Pages and Lines . . . . . . . . . . . . . . . . . . . . . . . . . . . . . . . . . . . .83
Shortcuts for Marking Items . . . . . . . . . . . . . . . . . . . . . . . . . . . . . .83
Working with Marked Text . . . . . . . . . . . . . . . . . . . . . . . . . . . . . . . . . .83
Deleting Marked Text . . . . . . . . . . . . . . . . . . . . . . . . . . . . . . . . . . .84
Replacing Marked Text . . . . . . . . . . . . . . . . . . . . . . . . . . . . . . . . . .84
Moving and Copying Marked Text . . . . . . . . . . . . . . . . . . . . . . . .84
Making Multiple Copies . . . . . . . . . . . . . . . . . . . . . . . . . . . . . . . . .85
Positioning Titles on a Page . . . . . . . . . . . . . . . . . . . . . . . . . . . . . . . . . . . . .86
Horizontal Positioning . . . . . . . . . . . . . . . . . . . . . . . . . . . . . . . . . . . . . .86
Vertical Positioning . . . . . . . . . . . . . . . . . . . . . . . . . . . . . . . . . . . . . . . .87
Other Positioning Methods . . . . . . . . . . . . . . . . . . . . . . . . . . . . . . . . . .87
Text Attributes . . . . . . . . . . . . . . . . . . . . . . . . . . . . . . . . . . . . . . . . . . . . . . . .88
Specifying Text Attributes . . . . . . . . . . . . . . . . . . . . . . . . . . . . . . . . . . .88
Copying Text Attributes . . . . . . . . . . . . . . . . . . . . . . . . . . . . . . . . . . . . .88

Contents
iv
8 Working with Menus
Menu Structures . . . . . . . . . . . . . . . . . . . . . . . . . . . . . . . . . . . . . . . . . . . . . . .90
The Color Menus . . . . . . . . . . . . . . . . . . . . . . . . . . . . . . . . . . . . . . . . . . . . . .91
Custom Colors . . . . . . . . . . . . . . . . . . . . . . . . . . . . . . . . . . . . . . . . . . . . .91
The Pattern Menus . . . . . . . . . . . . . . . . . . . . . . . . . . . . . . . . . . . . . . . . . . . . .93
Mixing Video with a Background Pattern . . . . . . . . . . . . . . . . . . . . . .94
Selecting Rainbow and Pixel Patterns . . . . . . . . . . . . . . . . . . . . . . . . .95
9 Working with Fonts
Font & Size Menu . . . . . . . . . . . . . . . . . . . . . . . . . . . . . . . . . . . . . . . . . . . . . .99
Style Menu . . . . . . . . . . . . . . . . . . . . . . . . . . . . . . . . . . . . . . . . . . . . . . . . . .100
Letter Menus . . . . . . . . . . . . . . . . . . . . . . . . . . . . . . . . . . . . . . . . . . . . . . . . .102
Outline Menus . . . . . . . . . . . . . . . . . . . . . . . . . . . . . . . . . . . . . . . . . . . . . . .102
Font Samples . . . . . . . . . . . . . . . . . . . . . . . . . . . . . . . . . . . . . . . . . . . . . . . .102
10 Working with Borders
Border Menus . . . . . . . . . . . . . . . . . . . . . . . . . . . . . . . . . . . . . . . . . . . . . . . .106
Creating Complex Borders . . . . . . . . . . . . . . . . . . . . . . . . . . . . . . . . . . . . .107
Removing Borders . . . . . . . . . . . . . . . . . . . . . . . . . . . . . . . . . . . . . . . . . . . .109
11 Working with Backgrounds
Choosing Page Backgrounds . . . . . . . . . . . . . . . . . . . . . . . . . . . . . . . . . . .112
Background Pattern Types . . . . . . . . . . . . . . . . . . . . . . . . . . . . . . . . . . . . .113
Solid Patterns . . . . . . . . . . . . . . . . . . . . . . . . . . . . . . . . . . . . . . . . . . . .113
Pixel Patterns . . . . . . . . . . . . . . . . . . . . . . . . . . . . . . . . . . . . . . . . . . . .114
Rainbow Gradient Patterns . . . . . . . . . . . . . . . . . . . . . . . . . . . . . . . . .114
Video Background Patterns . . . . . . . . . . . . . . . . . . . . . . . . . . . . . . . .115
12 Playing and Recording Projects
Playback Procedures . . . . . . . . . . . . . . . . . . . . . . . . . . . . . . . . . . . . . . . . . .118
Playback Concepts . . . . . . . . . . . . . . . . . . . . . . . . . . . . . . . . . . . . . . . . . . .118
About Marked Pages . . . . . . . . . . . . . . . . . . . . . . . . . . . . . . . . . . . . . .118
About Page Attributes . . . . . . . . . . . . . . . . . . . . . . . . . . . . . . . . . . . . .118
Playback Options . . . . . . . . . . . . . . . . . . . . . . . . . . . . . . . . . . . . . . . . . . . . .119
Playing All Pages . . . . . . . . . . . . . . . . . . . . . . . . . . . . . . . . . . . . . . . . .119
Playing Selected Pages . . . . . . . . . . . . . . . . . . . . . . . . . . . . . . . . . . . .119
Video Billboards . . . . . . . . . . . . . . . . . . . . . . . . . . . . . . . . . . . . . .120
Pausing Playback . . . . . . . . . . . . . . . . . . . . . . . . . . . . . . . . . . . . . . . . .120
Controlling Playback Direction . . . . . . . . . . . . . . . . . . . . . . . . . . . . .121
Playing Pages Manually . . . . . . . . . . . . . . . . . . . . . . . . . . . . . . . . . . . .121
Manually Controlling Non-Infinite Pages . . . . . . . . . . . . . . . . . .122
Stopping Playback . . . . . . . . . . . . . . . . . . . . . . . . . . . . . . . . . . . . . . . .123
Playing and Recording a Project . . . . . . . . . . . . . . . . . . . . . . . . . . . . . . . .124

Contents
v
A Personal TitleMaker Demo
Running a Locked Demo . . . . . . . . . . . . . . . . . . . . . . . . . . . . . . . . . . . . . .128
Using the Demo as a Boilerplate . . . . . . . . . . . . . . . . . . . . . . . . . . . . . . . .128
B International Character Sets
Standard . . . . . . . . . . . . . . . . . . . . . . . . . . . . . . . . . . . . . . . . . . . . . . . . . . . .132
Cyrillic . . . . . . . . . . . . . . . . . . . . . . . . . . . . . . . . . . . . . . . . . . . . . . . . . . . . . .133
Czech/Slovak . . . . . . . . . . . . . . . . . . . . . . . . . . . . . . . . . . . . . . . . . . . . . . . .134
Baltic . . . . . . . . . . . . . . . . . . . . . . . . . . . . . . . . . . . . . . . . . . . . . . . . . . . . . . .136
Greek . . . . . . . . . . . . . . . . . . . . . . . . . . . . . . . . . . . . . . . . . . . . . . . . . . . . . . .138
Polish . . . . . . . . . . . . . . . . . . . . . . . . . . . . . . . . . . . . . . . . . . . . . . . . . . . . . . .139
Croatian, Slovenian, Albanian . . . . . . . . . . . . . . . . . . . . . . . . . . . . . . . . . .140
Cryllic Keyboard Layout . . . . . . . . . . . . . . . . . . . . . . . . . . . . . . . . . . . . . . .141
Greek Keyboard Layout . . . . . . . . . . . . . . . . . . . . . . . . . . . . . . . . . . . . . . . .142
C Building and Using a GPI Device
Instructions for Building a GPI Trigger . . . . . . . . . . . . . . . . . . . . . . . . . . . .144
Using a GPI Trigger Device . . . . . . . . . . . . . . . . . . . . . . . . . . . . . . . . . . . . .145
Glossary
Index

®
Notes

CHAPTER 1
Introduction
W
elcome toVideonics PersonalTitleMaker (PTM–1),and
thank you for buying Videonics products.
PersonalTitleMaker helps you quickly and easily create
titles you can place in your video productions.
This chapter contains important information about Per-
sonalTitleMaker,including:
•
A brief description of major features.
•
How to contactVideonics.
•
An inventory of package contents.
•
Description of the contents of this User Guide.
Please take a few moments to read the material so that you
can enjoy all PersonalTitleMaker benefits.
POWER
DEMO
tab
new
line
OK
delete undo
posn
page
up
page
down
caps
lock
shift shift
cmd PLAY PLAY
accent
FONT &
SIZE STYLE COLOR PATTERN COLOR PATTERN COLOR STYLE COLOR PATTERN IN OUT copy move mark
start
page
index new
page
mark
end
1234567890-=
QWE R T YU I O P [ ] \
ASDFGHJKL; '
ZXCVBNM, . /
1
2
!
!
@# $%^ &
*
()_+
{}
:
<>?
?
"
FONT LETTER OUTLINE BORDERS BACKGROUND EFFECTS
X
^
~"v
0
{}|
¢£¥® • Œ «»©
™
Æ
‘’
ß
Ç
“”
§
√★◆■♥

Personal TitleMaker User Guide
2
M
AJOR
F
EATURES
Logical Work Organization
— Organize your work by pages within
projects.Pages can contain multiple titles (or,lines of text).Assign
names to your projects for easy identification.PersonalTitleMaker
automatically numbers pages sequentially within each project.
Classical Fonts
— PersonalTitleMaker comes with seven different
built-in fonts.Easily apply a font to any line of text.Also adjust such fac-
tors as letter spacing,doubling the height and/or width of characters,
applying different colors and patterns to text,displaying outlines
around characters,and much more.
Extensive Set of Transitions
— Choose from a wide assortment of
slides,wipes,fades,scrolls,and crawls to have your pages enter and
leave the screen with that extra bit of“flair”that gives projects a profes-
sional touch.
Easy Set Up and Use
— No complicated configurations needed.Just
plug PersonalTitleMaker into a wall outlet,then into your input and
output devices,and you’re ready to get creative.Run the demo to see
what you can do,work through the brief tutorial,then start creating
your own productions.
Menu-Driven Interface
—Apply any number of special,creative
effects just by pressing a key and selecting what you want from a menu.
If you change your mind or don’t like the results,repeat the process
and try any of the other numerous options.
Composite and S-Video Support
— PersonalTitleMaker provides
jacks for connecting Composite (RCA-type) or S-Video (Y/C) devices.
NTSC and PAL Versions
— PersonalTitleMaker is available in NTSC
format for U.S.and Japanese standards,and in PAL format for Euro-
pean and other applications.
International Language Character Sets
— In addition to the stan-
dard set of characters,you can access several others,including Polish,
Greek,and others.See Appendix B,
International Character Sets
,for
complete information.
Built-In Demo
—The built-in demonstration project shows what you
can do with PersonalTitleMaker and how to do it.You can even use the
demo as a starting point for producing your own projects.

Chapter 1 Introduction
3
Memory Capacity
— PersonalTitleMaker stores more than 4,000 char-
acters.Character storage is supported by a replaceable lithium battery.
All characters remain in memory even when you turn off or unplug Per-
sonalTitleMaker.So,all titles you create can be retained until you are
ready to remove them.(See “About the Lithium Battery”on page 32 for
more information about the battery and replacement procedures.)
GPI (General Purpose Interface) Support
— Use a GPI device to
control PersonalTitleMaker from a remote location.If you don’t have a
GPI device,this manual contains instructions for building your own
special version.
P
ERSONAL
T
ITLE
M
AKER
P
ACKAGE
C
ONTENTS
Your PersonalTitleMaker package contains the following items:
•
PersonalTitleMaker (PTM–1) unit
•
Power Supply
•
This User Guide
•
Product Registration Card
If anything is missing,contact the dealer where you purchased Per-
sonalTitleMaker for the necessary replacements

Personal TitleMaker User Guide
4
C
ONTACTING
V
IDEONICS
Videonics provides technical and general support for all its products.
The following table provides information for contacting us with your
suggestions,questions,and problems.
Table 1: Videonics Contacts
Department Contact Information
Corporate Headquarters 1370 Dell Avenue
Campbell, CA 95008
Main Phone Number (408) 866-8300
Main Fax Number (408) 866-4859
Product Information (800) 338-3348
Information via E-Mail Info@Videonics.com
Technical Support (408) 370-9963
Support via E-Mail Helpline@Videonics.com
Compuserve GO VIDEONICS
Compuserve ID 72662,3115
Internet World Wide Web http://www.videonics.com
International Offices Contact Videonics for your
local distributor

Chapter 1 Introduction
5
A
BOUT
THIS
U
SER
G
UIDE
This User Guide contains the chapters,appendixes,and other sections
shown in the following table.
Table 2: User Guide Contents
Section or Chapter Description
Chapter 1
Introduction
Basic overview of Personal
TitleMakerfeatures,description
of package contents,
description of manual, and so
forth.
Chapter 2
Installation Procedures
Instructions for setting up
Personal TitleMaker to work
with your video equipment.
Chapter 3
Getting Started
Instructions for starting and
stopping Personal TitleMaker,
an orientation to the keyboard,
and basic concepts.
Chapter 4
Personal TitleMaker Tutorial
A brief, step-by-step series of
lessons designed to acquaint
you with basic operations.
Chapter 5
Working with Projects
Describes Personal TitleMaker
projects and how to manage
them.
Chapter 6
Working with Pages How to create and manage
Personal TitleMaker pages.
Chapter 7
Working with Titles and Lines Describes how to work with the
basic production elements –
titles and lines.
Chapter 8
Working with Menus Menus give you quick access to
special features. This chapter
explains basics of working with
menus.
Chapter 9, Working with Fonts How to apply font attributes to
titles and lines.

Personal TitleMaker User Guide
6
Conventions
The User Guide employs the conventions described in this section.
Tips,Notes,Cautions,andWarnings use the following formats.
Tip
A tip provides information you might find useful for doing various
tasks and procedures.
Chapter 10
Working with Borders How to apply borders around
pages, titles, and lines.
Chapter 11
Working with Backgrounds How to create backgrounds for
Personal TitleMaker pages.
Chapter 12
Playing and Recording Projects Putting it all together. How to
play and record your Personal
TitleMaker projects to your
output device.
Appendix A
Personal TitleMaker Demo Detailed instructions for using
the built-in Personal TitleMaker
demonstration program.
Appendix B
International Character Sets Explains which sets of
international language
characters are available and
how to use them.
Appendix C
Building and Using a GPI
Device
Instructions for building and
using a General Purpose
Interface device for remotely
controlling Personal TitleMaker.
Glossary Definitions of terms frequently
used in conjunction with
Personal TitleMaker and video
editing procedures.
Index Standard index to topics in this
manual.
Table 2: User Guide Contents (Continued)
Section or Chapter Description

Chapter 1 Introduction
7
Note
Notes contain information to supplement the other information
contained throughout the guide.
CAUTION
Cautions warn that if you continue with what you are doing
there is a danger of losing information.
WARNING!
Warnings mean stop what you are doing because there
is danger of losing information or possibly damaging
your equipment.
Personal TitleMaker Keys
When referencing the various keys and other controls on the Personal
TitleMaker keyboard,they appear in boldface,small caps letters.For
example,the PLAY key can be found on the keyboard.
In some cases you use two keys together to perform a function,such as
using the CMD (command) key in combination with some other key.A
plus (+) symbol indicates this.For example,you might be asked to
enter CMD+NEW PAGE.This means press and hold down the CMD key,
press the NEW PAGE key,then release both of them.
cmd new
page
+

®
Notes

CHAPTER 2
Installation Procedures
This chapter explains how to set up PersonalTitleMaker in
conjunction with your video equipment.
The basic,typical configuration includes:
•An input device
•The PersonalTitleMaker
•An output device
In addition to these devices,you also need the proper
cables for connecting the equipment.The PersonalTitle-
Maker package does not contain such cables.If you do not
have what you need,visit your local electronics store and
purchase the necessary cables.
If you have difficulties using your equipment after setting it
up,see “Troubleshooting” at the end of this chapter.
00:00

Personal TitleMaker User Guide
10
CAUTION IMPORTANT — Do not mix device types
when connecting equipment. That is, if an
input device is Composite, the output
device must also be Composite. Do not
connect both a Composite and S-Video device at the same
time. If you mix device types, the warning message shown
here appears.
When connecting PersonalTitleMaker to a power source for extended
periods,the unit might feel warm to the touch.This is normal.
When you turn off power to the unit,video routes from the video input
device to the video output device,but no titles are added.This elimi-
nates the need to disconnect PersonalTitleMaker when you do not
need titles.Simply turn the unit off and video passes straight through.

Chapter 2 Installation Procedures
11
BASIC CONFIGURATION
The following illustration shows the basic configuration for the Per-
sonalTitleMaker and video equipment.
Device Types
Use either Composite or S–Video devices as input and output.The two
types of devices have different connectors and,therefore,require the
proper cables.Make sure you have the cables you need before pro-
ceeding with the setup,and make sure you have the right types of
cables for each device.
Composite devices use an RCA-type jack.S–Video devices use aY/C
jack.
Know which types of devices you are using so that you can make the
proper connections to PersonalTitleMaker.
00:00
Video Monitor
Output Device Input Device
Personal TitleMaker
Composite S-Video
RCA jack Y/C jack

Personal TitleMaker User Guide
12
Input Devices
The input device provides the video signal to which
you add titles.Use any device that can play a video
tape,such as a camcorder orVCR.The input device
does not need to have recording capabilities.
Output Devices
The output device displays and,optionally,records
the video program to which you add titles.To perma-
nently record titles with the video,the output device
must be able to record.You might use aVCR or camcorder for this pur-
pose.
You can use a video monitor (that is,a television set) as the output
device.In this case,you can display the titles with the input video on
the monitor,but you cannot record the program.
A useful configuration is to attach a video monitor to
the output device.This allows you to view the titles
and video as they are recorded.The video monitor is
optional,but recommended.
Personal TitleMaker Connectors
Examine the rear of the PersonalTitleMaker and locate the four jacks
shown here.
Also locate the power jack located at the opposite end of the rear
panel.
00:00
00:00
Composite IN
S–Video IN
Composite OUT
S–Video OUT
Table of contents
Other Videonics Media Converter manuals
Popular Media Converter manuals by other brands

ADF Web
ADF Web HD67C58-B2 user manual

Balluff
Balluff BAE SA-FF-055-RS quick start guide

Hitachi
Hitachi Microlok II Installation, operation and troubleshooting manual

Speaka Professional
Speaka Professional SP-5587128 operating instructions

Z3 Technology
Z3 Technology Z3-MVE-20 User instructions

Danfoss
Danfoss VLT AQUA Drive Series Design guide

SMAR
SMAR IF302 Operation, maintenance & instruction manual

Elium
Elium IRD 1080 operating instructions

AJA
AJA FS2 Installation and operation guide

Televes
Televes 554912 Safety instructions

evertz
evertz 7700 Series manual

Extron electronics
Extron electronics SDI to Analog Video Converter SDI-AVR 100 Specifications