Videonics MXPro DV User manual

MXPro
User Guide

STATEMENT OF WARRANTY
Videonics, Inc. warrants this product against defects in
materials or workmanship as follows:
For a period of TWO years from the date of purchase,
Videonics Inc. will repair or replace the unit, at our
option, without charge for parts or labor. After the period
of TWO years you must pay all parts and labor charges.
The limited warranty is extended only to the original pur-
chaser and is valid only to consumers in the United States
and Canada. It does not cover damage or failure caused by
or attributable to Acts of God, abuse, misuse, improper or
abnormal usage, faulty installation, improper mainte-
nance, lightning, or other incidences of excessive voltage,
or any repairs or tampering by other than a Videonics-
authorized repair facility. It does not cover replacement of
batteries or other consumable parts, transportation costs,
or damage in transit. This warranty will become void if
the serial number or model number identification has
been wholly or partially removed or erased. Repair or
replacement under the terms of this warranty do not
extend the terms of this warranty. This warranty can not
be modified by any agent of Videonics, Inc. unless in writ-
ing and signed by an officer of Videonics, Inc.
Should this product prove defective in workmanship or
material, the consumer's sole remedies shall be such repair
or replacement as provided by the terms of this warranty.
Under no circumstances shall Videonics, Inc. be liable for
any loss or damage, direct, consequential, or incidental,
arising out of the use of or inability to use this product.
Some states do not allow limitations on how long an
implied warranty lasts or the exclusions or limitations of
incidental or consequential damages, so the above limita-
tions or exclusions may not apply to you. This warranty
gives you specific legal rights. You may also have other
rights which vary from state to state.
To obtain warranty service, call or write Videonics Hel-
pLine for a Return Authorization (RA) number. Please
mark the RA number clearly on the outside of the pack-
age. Include a copy of your sales receipt, a brief descrip-
tion of the symptoms, your name, address, phone number
and any special shipping instructions. Then deliver or
ship the product, postage or shipping costs prepaid, to a
Videonics-authorized repair facility. For the name of the
nearest repair facility, contact Videonics, Inc. HelpLine.
See “Contacting Videonics” on page 8 for instructions.
DISCLAIMER
Television screens are simulated and subject to change
without notice. This device is not to be used for the unau-
thorized copying of copyrighted material.
TRADEMARKS
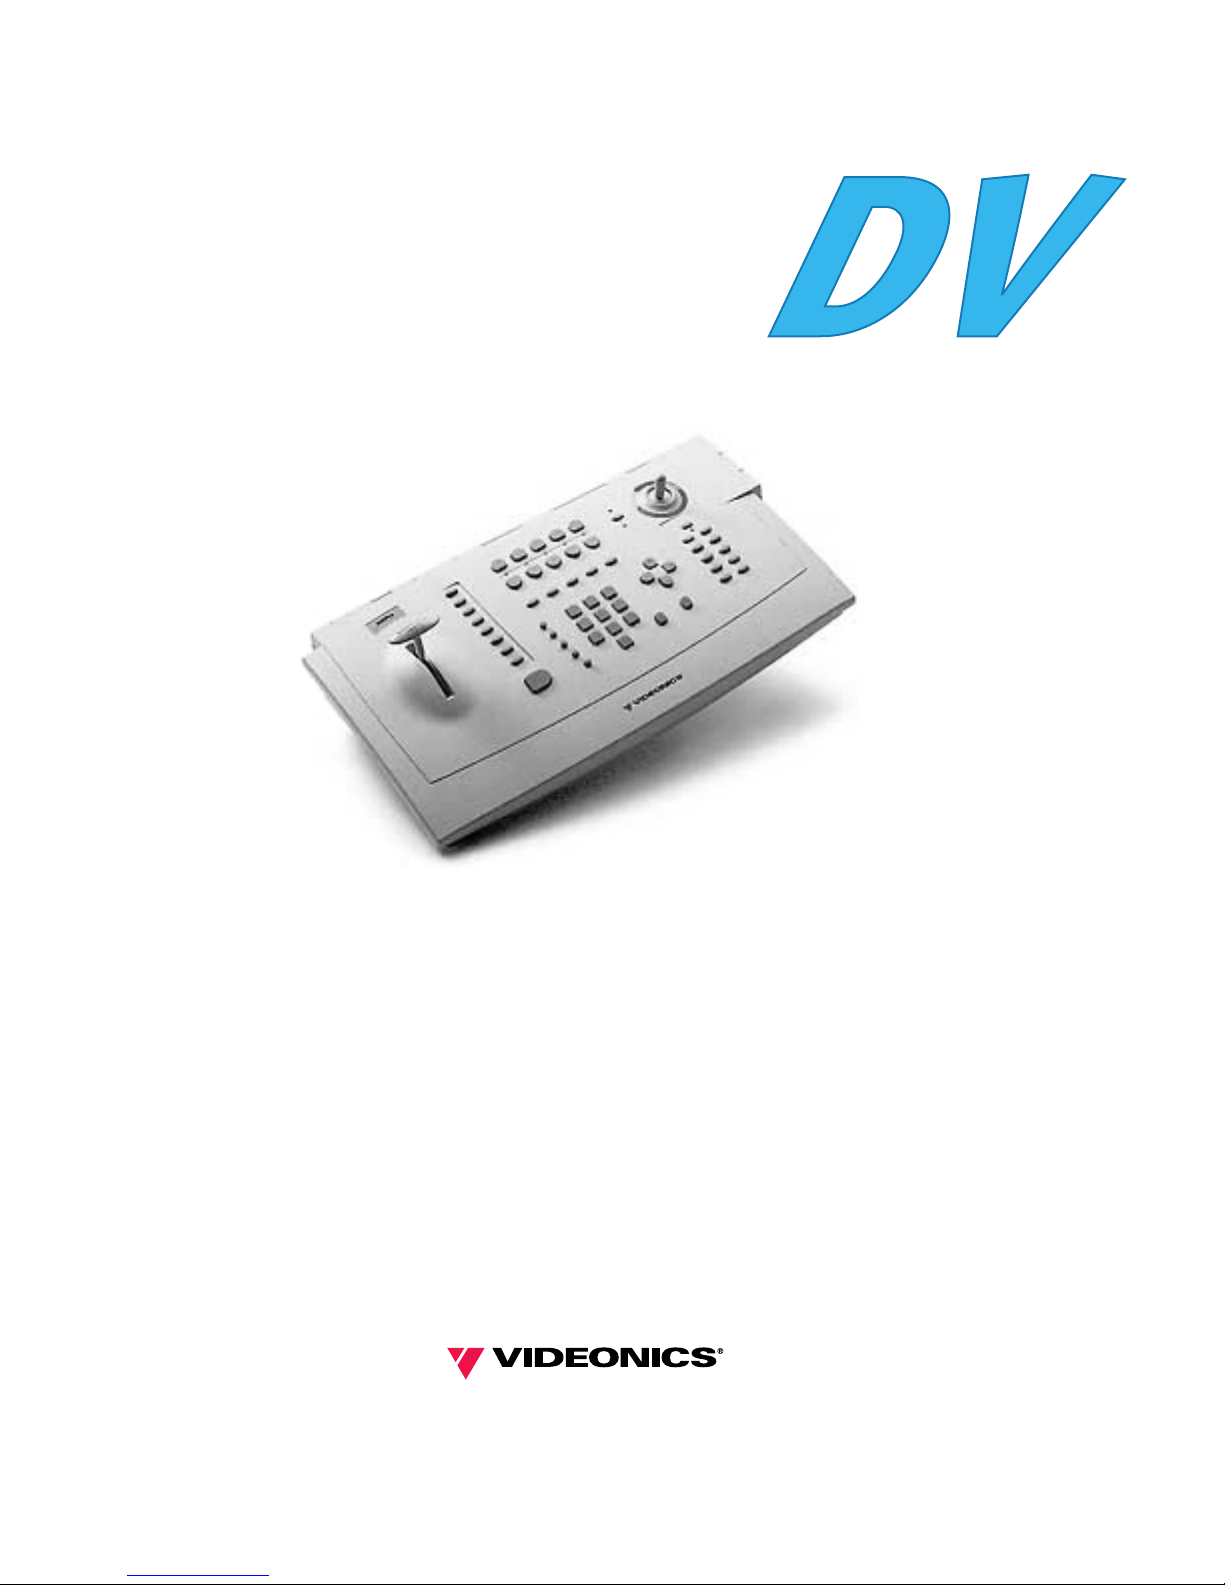
MXPro, MXProDV, the Videonics logo, Thumbs Up, MX-
1, and Videonics Video TitleMaker are trademarks or regis-
tered trademarks of Videonics, Inc. Hi8 and i.LINK are
trademarks of Sony Corporation. FireWire is a registered
trademark of Apple Computer. VHS is a registered trade-
mark of JVC. Other product and brand names might be
trademarks or registered trademarks of their respective
companies and are hereby acknowledged.
Videonics MXProDV User Guide, © 1999. No part of this
book may be reproduced in hard copy, electronically, or
by any other means without the expressed, written per-
mission of Videonics, Inc.
FCC Statement
This equipment has been tested and found to comply
with the limits for a Class A digital device, pursuant to
part 15 of the FCC Rules. These limits are designed to pro-
vide reasonable protection against harmful interference
when the equipment is operated in a commercial environ-
ment. This equipment generates, uses, and can radiate
radio frequency energy and, if not installed and used in
accordance with the instruction manual, might cause
harmful interference to radio communications. Operation
of this equipment in a residential area is likely to cause
harmful interference, in which case the user must correct
the interference at his/her own expense.
MANL-0771-01

Declaration of Conformity
Application of Council Directive(s)
Standards to which conformity is declared
Importer's Name
Type of Equipment
Name of Equipment
Model No.
Serial No.
Year of Manufacture
Place
Position
Test Engineer
Full Name
(Signature)
Parminder Gillon
Date
73/23/EEC, 89/336/EEC
EN60950, EN55022 Class A, AN50082-1
Manufacturer's Name
Manufacturer's Address
Importer's Address
Videonics GmbH
Industriestrasse 2
90765 Furth/Bay, Germany
Video Mixer
MXPro DV
MX-3000 PAL
1999
Campbell, California, USA
March 25, 1998
I, the undersigned, hereby declare that
the equipment specified above conforms
to the above directive(s) and standard(s).
Videonics
1370 Dell Avenue
Campbell, CA 95008, USA

NOTES

CONTENTS
1I
NTRODUCTION
Major Features • 4
Common Uses for MXProDV • 6
MXProDV Package Contents • 7
About this User Guide • 8
Contacting Videonics • 11
2Q
UICK
S
TART
Quick Start Steps • 16
Setting Up • 16
The Preview Screen • 17
Running the Demo • 18
Cutting Between Sources • 18
Borders and Solid Color Backgrounds • 18
Setting up a Transition • 19
Running Transitions • 19
Using CUT Transitions • 20
Choosing Transitions • 20
Using Transition Categories • 21
Other Features • 21
3I
NSTALLING
MXP
RO
DV
Sources and Output • 26
Preview and Program Monitors • 28
Preview Monitor • 28
Program Monitor • 28
Number of Monitors • 28
Understanding MXProDV Connectors • 29
Power Connector • 31
Cables and Adapters • 31
Installation Examples • 33
Correlating Inputs to MXProDV Jacks • 33
Using Headphones • 34
VCR Selector Switches • 34
General Notes • 35
Post Production Configuration • 36
Live Broadcast Configuration • 38
Using a Microphone with MXProDV • 40
4B
ASIC
O
PERATIONS
Starting and Stopping MXProDV • 44
Understanding the Keyboard • 44
Using the Preview Screen • 46
Changing the Display Configuration • 47
Input Source Previews • 47
Active Source Highlights • 48
Color Selector • 48
Transitions Menu • 49
Selected Transition • 49
Using CURRENT and NEXT Sources • 49
Selecting Sources • 51
Using the Video/Audio Selector • 51
Swapping Sources • 52
Simple Cuts • 52
Swapping Between Two Sources • 52
Working with Colors • 53
Identifying Colors • 53
Using Color Backgrounds • 54
Changing Colors and Styles • 54
Creating Custom Colors • 54
Using Borders • 55
Changing Border Styles • 56
5T
RANSITIONS
Basic Transition Concepts • 62
Transition Categories and Menus • 64
Basic Transitions Category • 65
Edges Transitions Category • 65
Trailing Transitions Category • 65
Shapes Transitions Category • 65
User Transitions Category • 65
Changing User Transitions Menu • 66
Selecting Transition Sources • 67
Setting the CURRENT Source • 67
Setting the NEXT Source • 67
Selecting Transitions • 68
Using the Transitions Menu • 68
Using Transition Numbers • 69
Adjusting Transitions • 70
Changing Transition Speed • 70
Changing Transition Direction • 70
Running Transitions • 72
Running Transitions Automatically • 72
Running Transitions Manually • 72
6I
NPUT
E
FFECTS
Input Effects Menu • 76
Special Key Combinations • 77
Using Input Effects • 78
B&W • 79
B&W Neg • 79
Posterize • 79
Flip Horizontal • 79
Mosaic • 80
Color Correct • 80
Color Neg • 81
Chromakey • 81
Flip Vertical • 81
Strobe • 81

CONTENTS
7F
UNCTIONS
Demo • 86
Running a Locked Demo • 86
Display • 87
Setup • 89
Force Field Freeze • 90
GPI Out Mode • 90
Comb Filter • 90
2/4-Channel Audio Output • 90
Black Level • 92
Route • 92
Defaults • 92
Changing the Routing • 93
Example: Changing the Routing • 95
Routing Audio thru Color/Background Channels • 95
Learn • 96
Compose • 96
PIPs • 96
Audio Mix • 96
Freeze • 97
Field and Frame Freezes • 97
Major Freeze Functions • 97
Freeze Examples • 98
Freeze and Transitions • 99
8 PIP
S
Single PIP • 104
Background Tile • 104
Foreground Tile • 104
Using Other Effects with Single PIPs • 106
Multi-PIP • 107
Using Freeze Effect with Multi-PIPs • 108
9C
OMPOSE
Basic Composition Steps • 112
Backgrounds • 112
Foreground Tiles • 113
Creating Color Tiles and Lines • 113
Creating Moving Video Tiles • 113
Creating Still Image Tiles • 113
Manipulating Tiles • 114
Positioning Tiles • 114
Sizing Tiles • 114
Composition Rules • 115
Creating a Composed Image • 115
Playing the Composition • 116
Exiting from Compose Mode • 117
10 C
HROMAKEY
Preparing the Background Footage • 122
Preparing the Keyed Footage • 123
Preparing the Chromakey Footage • 123
Performing the Chromakey • 125
Fine-Tuning Key Colors • 125
Ending Chromakey • 125
11 L
EARN
M
ODE
Learned Environments • 130
Learned Scripts • 131
Using Learn Mode • 132
Other Useful Information • 133
Aborting a Playback Session • 133
12 W
ORKING
WITH
A
UDIO
Audio Devices You Can Use • 138
Ways You Can Control Audio • 138
Controlling Audio Transitions • 138
VIDEO/AUDIO Selector • 138
Selecting Audio Sources • 139
Ways to Use Audio • 139
Audio Accompanies Video • 139
Continuous Audio • 140
Using the Audio Mixer • 141
Audio Mixer Controls • 142
Using Background Audio • 142
Using the Analog Audio Adjustments Function • 143
Selecting Automatic Adjustments • 143
Analog Audio Level Meters • 144
Selecting Manual Levels • 144
Selecting Audio Delay • 144
Using Headphones • 144
13 A
DVANCED
O
PERATIONS
Using Titles • 148
Using Color Bars • 148
Performing Roll Edits • 149
Cutting Between Scenes • 149
A/A Roll Edits • 149
A/B Roll Edits • 150
Transitions TO and FROM Solid Colors • 151
Transitions to Modified Sources • 151
Operating in Live Environments • 152
Security Monitoring • 152
Using a GPI Device • 152
Instructions for Building a GPI Trigger • 152
Using a GPI Trigger Device • 154
Calibrating the T-BAR • 154
Resetting MXProDV Factory Defaults • 155

CONTENTS
Appendixes & Back Matter
AT
RANSITIONS
L
IST
159
Basic Transitions • 160
Edge Transitions • 167
Trailing Transitions • 168
Shape Transitions • 169
Default User Transitions • 172
BT
IME
B
ASE
C
ORRECTOR
173
Dual TBC Mode • 173
Vertical Interval Data • 173
TBC Technical Information • 174
CV
IDEO
Q
UALITY
175
Preview Image Quality • 175
Video Scaling Artifacts • 176
Freeze Quality • 176
Upside-Down Video • 176
Video Processing Artifacts • 177
DT
ECHNICAL
S
PECIFICATIONS
179
E MXP
RO
DV D
IFFERENCES
181
DV Support Added • 181
Default Routing Changed / No Auto Detect • 182
Setup Menu Differences • 182
Route Menu Differences • 183
Index

NOTES


CHAPTER 1
I
NTRODUCTION
W
elcome to
MXProDV
, and thank you for buying Videonics products.
This chapter contains:
• Brief descriptions of major MXProDV features
• Typical uses for the MXProDV
• How to contact Videonics
• An inventory of package contents
• Description of the contents of this User Guide
Please take a few moments to read the material so you can take full advantage
of all MXProDV benefits.

MXP
RO
DV U
SER
G
UIDE
C
HAPTER
1
4
M
AJOR
F
EATURES
MXProDV contains features found on most video mixers. In addition, it contains the
special features described in this section.
FireWire
TM
In and Out
— MXProDV has three FireWire (1394, i.LINK
TM
) connectors,
two for DV (Digital Video) input and one for DV output. Each FireWire connection
carries both audio and video data simultaneously. DV audio inputs can be either 32
kHz or 48 kHz: 44.1 kHz audio is not supported.
Fast Cuts
—With two DV and two analog inputs, MXProDV can cut from one source
to another almost instantly.
Superb Video Quality
— To ensure highest video quality, MXProDV uses 10-bit
(4:2:2) video technology for Y/C applications, and 8-bit 4:2:2 for composite applica-
tions. DV inputs and outputs conform to the DV standard at 4:1:1 (NTSC) and 4:2:0
(PAL).
Four Input Synchronized Switcher
— MXProDV provides four input channels and
can mix DV and analog sources. This makes MXProDV useful in live production set-
tings where up to four cameras or other sources might be in use. MXProDV synchro-
nizes the inputs, so picture disruptions do not occur when switching between
sources.
Picture-in-Picture (PIPs)
— PIP allows
multiple pictures to share the screen in
various configurations. For example,
one source might take the entire back-
ground while another image appears
inside a separate, smaller window, both
sharing the screen at the same time.
You can use up to 16 images in a PIP
configuration.
Effects Generator
— Use a variety of effects to enhance a source or transition
between sources. Select from over 500 effects, including natural shapes (diamonds,
stars, and so forth), fancy edges, and borders. And, you can build your own custom
menu for quick access to those effects you use most often.
Time Base Corrector (TBC)
— MXProDV automatically corrects the output’s time
base. MXProDV stabilizes the output signal even when the input sources are not sta-
ble.
Chromakey
— Keying replaces
parts of one picture with
another, based on their color.
Here the solid background
behind Kong is replaced by the
picture of the bridge. The chro-
makey version shows Kong con-
templating the bridge.
Frame Synchronizer and Digital Video Mixer
— Mix any two input sources together
using a variety of transitions — wipes, dissolves, flips, and so forth. With the frame
synchronizer you can mix independent video signals.

I
NTRODUCTION
M
AJOR
F
EATURES
5
Compose
— MXProDV provides a video
painting system you can use to com-
bine video stills, color shapes, and mov-
ing video on one screen. You can create
a screen that contains a video still of a
football coach (with a surrounding red
border), combined with a moving video
of the players in action on the field.
Audio Mixer
— MXProDV provides sophisticated audio control. You can change the
sound along with the video, or play a constant sound while the video plays. Audio
can come from a video source or from external audio devices.
Four-Channel DV Audio
— MXProDV lets you input and output two-channel or four-
channel DV audio.
CD Quality Audio
— With two-channel output MXProDV’s DV audio is 48 kHz, 16-
bit audio; four-channel audio is 32 kHz, 12-bit audio.
Connectivity
— MXProDV provides multiple video/audio outputs, including one
FireWire output, two Y/C Program outputs, two composite Program outputs, one
composite Preview output, two sets of stereo audio outputs, and a Headphone out-
put.
Joystick
— The joystick gives you fine control over color adjustments and positioning
of PIP (picture-in-picture), compose, and the chromakey cursor.
Color Correction
— Apply true RGB color correction to any or all input sources.
Color correction parameters can be set separately for each channel.
Input Effects
— Apply special effects such as flips, mosaics, and others to the signals
coming in from any input source.

MXP
RO
DV U
SER
G
UIDE
C
HAPTER
1
6
C
OMMON
USES FOR MXPRODV
Multiple-Source Video Production — In a video production setup, you can connect
one or more video sources (VCRs, camcorders, video disc players, cameras, title gen-
erators, computer graphics systems, and so forth) to MXProDV’s four input channels.
The Program output can then be sent to a VCR or directly to a monitor.
You determine what is sent to the output. While the original inputs play, you can
switch between any of MXProDV’s channels. You can use dissolves or other tran-
sitions to go from one channel to another. You can add special effects to any
channel, and use advanced features such as compose and chromakey to enhance
the production.
Single-Source Use — MXProDV supports A/A roll, a method for creating interesting
transitions with a single source. Its digital effects (such as picture freeze, posteriza-
tion, and mosaic) give added life to productions. You can use MXProDV with a titler
to mix and superimpose titles. Time base correction improves the picture (especially
when making multiple-generation copies) by removing the jitter common to most
VCRs.
Live Video — In live production setups, MXProDV processes events as they occur.
Good coverage requires seeing the events from different vantage points—which
means you need multiple input sources. MXProDV gives you the ability to connect
up to four sources simultaneously. For example, at a sporting event, camera one
might focus on the playing field, camera two on the team benches, camera three on
the announcer, and camera four on the scoreboard. Using MXProDV you can easily
switch between the sources whenever necessary.
MXProDV is not an edit controller — that is, it does not control VCRs, camcord-
ers, and similar devices. You can control the sources manually, or use external
edit controllers such as those manufactured by Videonics.

INTRODUCTION MXPRODV PACKAGE CONTENTS 7
MXPRODV PACKAGE CONTENTS
The MXProDV package contains the items shown below. Check your package against
the illustration.
POWER ADAPTER AND CORD
USER GUIDE
Product registration card
and other information
MXProDV
If your package doesn’t
contain all of the items
shown here, contact the
dealer where you
purchased the MXProDV
for the necessary
replacements.

MXPRODV USER GUIDE CHAPTER 1
8
ABOUT THIS USER GUIDE
This User Guide contains the chapters, appendixes, and other sections shown in the
following table.
Table 1: User Guide Contents
CHAPTER DESCRIPTION
Chapter 1
Introduction Basic overview of MXProDV features, descrip-
tion of package contents, description of man-
ual.
Chapter 2
Quick Start Brief steps to setting up MXProDV with your
equipment. Provided for people quite familiar
with connecting video equipment.
Chapter 3
Installing MXProDV Instructions for setting up MXProDV to work
with your video equipment.
Chapter 4
Basic Operations Explains most common procedures and func-
tions used with MXProDV.
Chapter 5
Transitions Complete description of and instructions for
using MXProDV transitions. Also see Appendix
A, Transitions List.
Chapter 6
Input Effects How to use various effects with video input
material.
Chapter 7
Functions Descriptions of and instructions for using
MXProDV’s built-in functions.
Chapter 8
PIPs Instructions for using the picture-in-picture
functions.
Chapter 9
Compose How to create composed images consisting of
rectangles, lines, still images, and/or moving
images.
Chapter 10
Chromakey Instructions for creating chromakey images
where specific colors (such as a blue screen)
can be keyed out and replaced with a video
sequence or other image.
Chapter 11
Learn Mode How to use MXProDV’s Learn Mode for
“recording” your mixing steps then playing
them back.
Chapter 12
Working with Audio How to use audio sources (tapes, CDs, and so
forth) with MXProDV.
Chapter 13
Advanced Operations Descriptions of operations used infrequently,
but still of substantial use for mixing video
programs.
Appendix A
Transitions List Complete list of transitions available with
MXProDV, along with their assigned code
numbers and descriptions.

INTRODUCTION ABOUT THIS USER GUIDE 9
Conventions The User Guide employs the conventions described in this section.
Tips, Notes, Cautions, and Warnings use the following formats.
TIP
A tip provides useful information for doing various tasks and procedures.
NOTE
Notes contain information to supplement the other information contained
throughout the guide.
CAUTIONCAUTION
Cautions warn that if you continue with what you are doing there is a danger of
losing information.
WARNING
Warnings mean stop what you are doing because there is danger of losing
information and, possibly, damaging your equipment.
MXProDV Buttons When referencing the various buttons (keys) and other controls on the MXProDV
keyboard, they appear in uppercase, boldface characters. For example, the keyboard
contains the PLAY button and T-BAR.
Appendix B
Time Base Corrector Explains the time-base corrector feature built
into MXProDV.
Appendix C
Video Quality Discusses issues concerning the level of quality
in videos — that is, what to expect and what
you can do to improve quality.
Appendix D
Technical Specifications MXProDV product specifications.
Appendix E
MXProDV Differences Summarizes operational differences between
MXProDV, MXPro, and Videonics MX-1 Video
Mixers.
Glossary Definitions of terms frequently used in con-
junction with MXProDV and video mixing
procedures.
Index Standard index to topics in this manual.
Table 1: User Guide Contents (continued)
CHAPTER DESCRIPTION

MXPRODV USER GUIDE CHAPTER 1
10
In some cases you use two buttons together to perform a function. This is normally
done using the shift button in combination with some other button. A plus (+) sym-
bol indicates this. For example, you might be asked to enter SHIFT+PIPS to start Mul-
tiPIP mode. This means press and hold down the SHIFT button, press the PIPS button,
then release both.
Sources,
Channels, and
Outputs
The terms Source, Channel, and Output appear extensively throughout this guide. It’s
important to understand the differences between them.
A Source is a physical device, such as a VCR, that provides a video and/or audio sig-
nal.
A Channel is an internal MXProDV video signal path. The video and/or audio signal
originating from a source travels along one of the channels.
An Output displays or records a mixed signal (such as the video on one channel, a
transition, and the video on another channel) on an output device. The output
device might be a recording VCR or a live broadcast signal.
SHIFT
PIPs

INTRODUCTION CONTACTING VIDEONICS 11
CONTACTING VIDEONICS
Videonics provides technical and general support for all of its products. The follow-
ing table provides information for contacting us with your suggestions, questions,
and problems.
Table 2: Videonics Contacts
DEPARTMENT CONTACT INFORMATION
Corporate Headquarters 1370 Dell Avenue
Campbell, CA 95008
Main Phone Number (408) 866-8300
Main Fax Number (408) 866-4859
Product Information (800) 338-3348
Technical Support, North America (408) 370-9963
Internet World Wide Web http://www.videonics.com
International Offices Contact Videonics for your local distributor
International Support Contact Videonics for your local distributor

NOTES
Table of contents
Other Videonics Mixer manuals