manuals.online logo
Brands
  1. Home
  2. •
  3. Brands
  4. •
  5. Videx
  6. •
  7. Intercom System
  8. •
  9. Videx 4843 User manual

Videx 4843 User manual

66250250 - V4.1 - 31/03/21Art.4842 .. 4845 - Installation instructions - 1 -
4000 Series
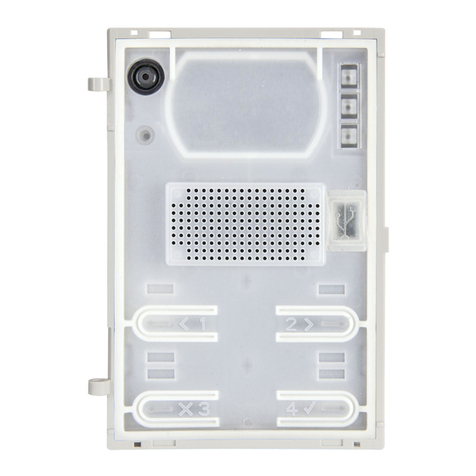
DESCRIPTION
Push button modules allow the expansion of the number of call
buttons. Available in versions with 2, 3, 4 or 5 call push buttons.
Each button has its own connection terminals, but the module
can be congured to have a single common terminal for all but-
tons. The common terminals conguration can be selecting on
the 4 jumpers, accessible from the rear of the module.
Depending on the number of push buttons available, the module
can have 2 or 4 illumination LED’s for the card name holder. Look-
ing at the module from the front, push buttons are numbered as
shown in the drawing. Each button has the relevant terminals:
button 1-terminals 1,1C, button 2-terminals 2,2C etc.
AVAILABLE VERSIONS
1
2
Art.4842
2 call button
1
3
2
Art.4843
3 call button
1
3
2
4
Art.4844
4 call button
1
3
2
4
5
Art.4845
5 call button
COMMON TERMINAL SETTING
Settings referred to the module with the maximum number of
push buttons: Art.4845 – 5 push buttons.
The settings shown are for all buttons common together to 1C
or all buttons individual, but you can choose any combination
of this for each button.
2C
4C
3C
5C
1C
All push button common terminals are linked to
common terminal 1C.
2C
4C
3C
5C
1C Each button has its own common terminal.
HOW TO REMOVE/INSERT THE CARD NAME HOLDER
• To avoid damage to the module front plate, mask the side that
will be in contact with the screwdriver blade;
• Insert the screwdriver (at side) into the card-holder hole as
shown in Fig. 1;
• Move the screwdriver to the left as shown in Fig. 2 to extract
the card name holder;
• Edit the card name then replace it inside the holder and ret:
insert the holder inside its housing from the left or right side
then push the other side until it clips into place. Fig. 1 Fig. 2
ADHESIVE GASKET PLACEMENT
Apply the Yseal as shown in Fig. 3.
ANTITAMPERING LOCKS FIXING
Fit the anti-tampering locks Was shown in Fig. 4.
Y
G
Fig. 3
W
Fig. 4
CONNECTION TERMINALS SIGNALS
–12Vdc power input for illumination LED’s supply
+
1C Push button 1 common
1Push button 1
2C Push button 2 common
2Push button 2
3C Push button 3 common
3Push button 3
4C Push button 4 common
4Push button 4
5C Push button 5 common
5Push button 5
TECHNICAL SPECIFICATIONS
Power Supply: 12Vdc
Power Consumption: 45mA max
Working Temperature: -20 +60 °C
CLEANING OF THE PLATE
Use a clean and soft cloth. Use moderate warm water or non-ag-
gressive cleansers.
Do not use:
• abrasive liquids;
• chlorine-based liquids;
• metal cleaning products.
Art.4842 .. 4845 Button expansion modules
66250250 - V4.1 - 31/03/21
- 2 -
Serie 4000
Art.4842 .. 4845 - Istruzioni di installazione
DESCRIZIONE
I moduli pulsantiera permettono di espandere il numero di chia-
mate e sono disponibili in versione da 2, 3, 4 e 5 pulsanti.
Ciascun pulsante dispone del proprio morsetto comune, ma
all’occorrenza il modulo può essere congurato per avere un
solo morsetto comune. La congurazione avviene tramite i 4
jumper accessibili nella parte posteriore del modulo.
A seconda del numero di pulsanti presenti, il modulo può essere equi-
paggiato con 2 o 4 LED d’illuminazione cartellini. Guardando il modu-
lo frontalmente, i pulsanti sono numerati come mostrato nel disegno.
A ciascun pulsante corrispondono i relativi morsetti: pulsante
1 - morsetti 1,1C, pulsante 2 - morsetti 2,2C ecc.
VERSIONI DISPONIBILI
1
2
Art.4842
2 pulsanti
1
3
2
Art.4843
3 pulsanti
1
3
2
4
Art.4844
4 pulsanti
1
3
2
4
5
Art.4845
5 pulsanti
IMPOSTAZIONE COMUNE PULSANTI
I settaggi si riferiscono al modulo col numero massimo di pul-
santi: Art.4845 – 5 pulsanti di chiamata.
Le impostazioni mostrate sono relative alla congurazione con-
temporanea di tutti i pulsanti del modulo, ma è possibile sceg-
liere singolarmente per ciascun pulsante se collegare il relativo
morsetto comune al morsetto 1C.
2C
4C
3C
5C
1C
I comuni di tutti i pulsanti sono collegati al mor-
setto comune 1C.
2C
4C
3C
5C
1C Ogni pulsante ha il proprio comune.
RIMOZIONE/INSERIMENTO DEL PORTACARTELLINO
• Per evitare ammaccature della placca frontale, proteggere il lato che verrà in
contatto con la lama del cacciavite utilizzando una striscia di nastro isolante;
• Inserire il cacciavite (lato piatto della lama) nell’apposita fessura del por-
ta cartellino come mostrato in Fig. 1;
• Fare leva con il cacciavite come mostrato in Fig. 2 per rimuovere il por-
ta-cartellino (fare attenzione a non ammaccare la placca);
• Modicare il cartellino e riporlo all’interno del porta-cartellino quindi
riposizionare lo stesso al suo posto inserendolo nel suo alloggiamento
dal lato destro o sinistro e premendo il lato rimasto libero no all’aggan-
cio (compiendo un movimento contrario a quello fatto per estrarlo).
Fig. 1 Fig. 2
APPLICAZIONE GUARNIZIONE ADESIVA
Applicare la guarnizione adesiva Ycome mostrato in Fig. 3.
INSERIMENTO FERMI ANTIEFFRAZIONE
Inserire i fermi anti-erazione Wcome mostrato in Fig. 4.
Y
G
Fig. 3
W
Fig. 4
SEGNALI MORSETTERIA DI CONNESSIONE
–Ingresso 12Vdc per LED d’illuminazione cartellini
+
1C Comune pulsante 1
1Pulsante 1
2C Comune pulsante 2
2Pulsante 2
3C Comune pulsante 3
3Pulsante 3
4C Comune pulsante 4
4Pulsante 4
5C Comune pulsante 5
5Pulsante 5
SPECIFICHE TECNICHE
Tensione d’alimentazione: 12Vdc
Assorbimento: 45mA max
Temperatura di lavoro: -20 +60 °C
PULIZIA DELLA PLACCA
Usare un panno morbido e pulito. Usare acqua tiepida o un de-
tergente non aggressivo.
Non usare:
• prodotti abrasivi;
• prodotti contenenti cloro;
• prodotti per la pulizia dei metalli.
Art.4842 .. 4845Moduli d'espansione pulsantiera
66250250 - V4.1 - 31/03/21
- 3 -
66250250 - V4.1 - 31/03/21
- 4 -
66250250 - V4.1 - 31/03/21
- 5 -
66250250 - V4.1 - 31/03/21
- 6 -
66250250 - V4.1 - 31/03/21
- 7 -
DISPOSAL
In accordance with the Legislative Decree no. 49 of 14 March 2014 “Implementation of the Directive 2012/19/EU on waste
electrical and electronic equipment (WEEE)”.
The crossed-out bin symbol on the equipment or on the packaging indicates that when the product reaches the end of
its lifetime, it must be collected separately from mixed municipal waste. The user must, therefore, dispose of the equip-
ment at the end of its lifetime in the suitable waste collection centres or bring it to the retailer during the purchase of a
new equipment of equivalent type at the ratio of one-to-one. Furthermore, the user is allowed to dispose of the WEEEs
of very small size (domestic appliances without any external dimension exceeding 25 cm (9.84 inches) for free to the
retailers, without any purchase obligation. The correct waste disposal of the WEEEs contributes to their reuse, recycling
and recovery and avoids potential negative eects on the environment and human health due to the possible presence
of dangerous substances within them.
SMALTIMENTO
Ai sensi del Decreto Legislativo 14 marzo 2014, n° 49 “Attuazione della direttiva 2012/19/UE sui riuti di apparecchiature
elettriche ed elettroniche (RAEE)”.
Il simbolo del cassonetto barrato riportato sull’apparecchiatura o sulla sua confezione indica che il prodotto alla ne della
propria vita utile deve essere raccolto separatamente dagli altri riuti urbani misti. L’utente dovrà, pertanto, conferire l’appa-
recchiatura giunta a ne vita presso gli idonei centri di raccolta dierenziata oppure riconsegnarla al rivenditore al momento
dell’acquisto di una nuova apparecchiatura di tipo equivalente, in ragione di uno a uno. L’utente ha, inoltre, la possibilità di
conferire gratuitamente presso i distributori, senza alcun obbligo di acquisto, per i RAEE di piccolissime dimensioni (per le
apparecchiature di tipo domestico con nessuna dimensione esterna superiore a 25 cm).
L’adeguata raccolta dierenziata dei RAEE contribuisce al loro riutilizzo, riciclaggio e recupero ed evita potenziali eetti nega-
tivi sull’ambiente e sulla salute umana dovuti alla eventuale presenza di sostanze pericolose al loro interno.
ÉLIMINATION
Conformément au décret législatif n ° 49 du 14 mars 2014 relatif à l’«Application de la directive 2012/19 / UE relative aux
déchets d’équipements électriques et électroniques (DEEE)».
Le symbole de la poubelle barrée sur l’équipement ou sur son emballage indique que le produit en n de vie utile doit être
collecté séparément des autres déchets municipaux en mélange. L’utilisateur doit donc remettre l’équipement en n de
vie aux centres de collecte appropriés ou le restituer au revendeur lors de l’achat d’un nouveau type d’équipement équi-
valent, dans le rapport de un à un. De plus, l’utilisateur a la possibilité de conférer gratuitement aux distributeurs, sans au-
cune obligation d’achat, de très petits DEEE (pour les appareils ménagers sans dimensions extérieures supérieures à 25 cm).
La collecte séparée adéquate des DEEE contribue à leur réutilisation, leur recyclage et leur valorisation et évite les éventuels
eets négatifs sur l’environnement et la santé humaine en raison de la présence possible de substances dangereuses dans
ceux-ci.
ELIMINACIÓN
De conformidad con el Decreto legislativo n. 49 de 14 de marzo 2014 “Aplicación de la Directiva 2012/19/UE relativa a resi-
duos de aparatos eléctricos y electrónicos (RAEE)”.
El símbolo del contenedor tachado indicado sobre los aparatos o sobre los embalajes señala que el producto al nal de su
vida útil debe ser recogido separadamente de otros residuos municipales mezclados. Por tanto, el usuario deberà conferir los
aparatos al nal de su vida útil en los apropriados centros de recogida selectiva o devolverlos al revendedor al momento de
la compra de nuevos aparatos equivalentes, en una relación de uno a uno. Además, el usuario tiene la posibilidad de entre-
gar sin cargo a los distribuidores, sin ninguna obligación de compra, los RAEEs muy pequeños (para electrodomésticos sin
dimensiones externas superiores a 25 cm).
La recogida selectiva apropriada de los RAEEs contribuye a su reutilización, reciclaje y valorización y evita potenciales impactos
negativos sobre el medio ambiente y la salud humana debidos a la possible presencia de substancias peligrosas dentro de ellos.
ELIMINAÇÃO
De acordo com o Decreto Legislativo n.º 49 de 14 de março de 2014“Implementação da Diretiva 2012/19/UE relativa
aos resíduos de equipamentos elétricos e eletrónicos (REEE)”.
O símbolo do caixote do lixo riscado no equipamento ou na embalagem indica que quando o produto atinge o fim
da sua vida útil, deve ser recolhido separadamente dos resíduos urbanos mistos. O utilizador deve, portanto, elimi-
nar o equipamento no final da sua vida útil nos centros de recolha de resíduos adequados ou levá-lo ao vendedor
durante a compra de um novo equipamento de tipo equivalente, na proporção de um para um. Além disso, o utili-
zador pode eliminar gratuitamente os REEE de dimensões muito reduzidas aos vendedores, sem qualquer obrigação
de compra.(só aparelhos domésticos sem qualquer dimensão externa que exceda 25 cm, ou seja 9,84 polegadas).
A correta eliminação dos REEE contribui para a sua reutilização, reciclagem e recuperação e evita potenciais efeitos
negativos sobre o ambiente e a saúde humana devido à possível presença de substâncias perigosas no seu interior.
VERWIJDERING
In overeenstemming met het Wetsbesluit nr. 49 van 14 maart 2015 “Implementatie van de Richtlijn 2012/19/EU
inzake afgedankte elektrische en elektronische apparaten (AEEA)”.
Het doorgekruiste vuilnisbaksymbool op het apparaat of de verpakking geeft aan dat het product aan het einde van
zijn levensduur niet samen met het gewone huisvuil weggegooid mag worden. De gebruiker moet het apparaat aan
het einde van zijn levensduur inleveren bij een gepast inzamelpunt of de winkel waar hij een nieuw apparaat van
een gelijksoortig type zal kopen. De gebruiker kan tevens AEEA’s van een zeer klein formaat (huishoudapparaten
met een buitenafmeting kleiner dan 25 cm (9,84 inch) gratis en zonder enige aankoopverplichting bij handelaars
inleveren. Een juiste verwijdering van AEEA’s draagt bij tot hergebruik, recycling en terugwinning, en voorkomt
potentiële negatieve effecten op het milieu en de menselijke gezondheid door de mogelijke aanwezigheid van
gevaarlijke stoffen.
MANUFACTURER
FABBRICANTE
FABRICANT
FABRICANTE
FABRIKANT
FABRICANTE
  

VIDEX ELECTRONICS S.P.A.
Via del Lavoro, 1
63846 Monte Giberto (FM) Italy
Tel (+39) 0734 631669
Fax (+39) 0734 632475
www.videx.it - inf[email protected]
CUSTOMER SUPPORT
SUPPORTO CLIENTI
SUPPORTS CLIENTS
ATENCIÓN AL CLIENTE
KLANTENDIENST
APOIO AO CLIENTE
 
VIDEX ELECTRONICS S.P.A.
www.videx.it - technical@videx.it
Tel: +39 0734-631669
Fax: +39 0734-632475
UK Customers only:
VIDEX SECURITY LTD
www.videxuk.com
Tech Line: 0191 224 3174
Fax: 0191 224 1559
Main UK oce:
VIDEX SECURITY LTD
1 Osprey Trinity Park
Trinity Way
LONDON E4 8TD
Phone: (+44) 0370 300 1240
Fax: (+44) 020 8523 5825
www.videxuk.com
[email protected]
Northern UK oce:
VIDEX SECURITY LTD
Unit 4-7
Chillingham Industrial Estate
Chapman Street
NEWCASTLE UPON TYNE - NE6 2XX
Tech Line: (+44) 0191 224 3174
Phone: (+44) 0370 300 1240
Fax: (+44) 0191 224 1559
Greece oce:
VIDEX HELLAS Electronics
48 Filolaou Str.
11633 ATHENS
Phone: (+30) 210 7521028
(+30) 210 7521998
Fax: (+30) 210 7560712
www.videx.gr
[email protected]
Danish oce:
VIDEX DANMARK
Hammershusgade 15
DK-2100 COPENHAGEN
Phone: (+45) 39 29 80 00
Fax: (+45) 39 27 77 75
www.videx.dk
[email protected]
Benelux oce:
NESTOR COMPANY NV
E3 laan, 93
B-9800 Deinze
Phone: (+32) 9 380 40 20
Fax: (+32) 9 380 40 25
www.videx.be
[email protected]
Dutch oce:
NESTOR COMPANY BV
Business Center Twente (BCT)
Grotestraat, 64
NL-7622 GM Borne
www.videxintercom.nl
info@videxintercom.nl
The product is CE marked demonstrating its conformity and is for distribution with-
in all member states of the EU with no restrictions. This product follows the provi-
sions of the European Directives 2014/30/EU (EMC); 2014/35/EU (LVD); 2011/65/EU
(RoHS): CE marking 93/68/EEC.
Il prodotto è marchiato CE a dimostrazione della sua conformità e può essere distri-
buito liberamente all’interno dei paesi membri dell’Unione Europea UE.
Questo prodotto è conforme alle direttive Europee: 2014/30/UE (EMC); 2014/35/UE
(LVD); 2011/65/UE (RoHS): marcatura CE 93/68/EEC.
Le produit est marqué CE à preuve de sa conformité et peut être distribué librement
à l’intérieur des pays membres de l’union européenne EU.
Ce produit est conforme aux directives européennes 2014/30/EU (EMC) ; 2014/35/
EU (LVD) ; 2011/65/EU (RoHS): marquage CE 93/68/EEC.
El producto lleva la marca CE que demuestra su conformidad y puede ser distribuido
en todos los estados miembros de la unión europea UE.
Este producto cumple con las Directivas Europeas 2014/30/EU (EMC); 2014/35/EU
(LVD); 2011/65/EU (RoHS): marca CE 93/68/EEC.
Het product heeft de CE-markering om de conformiteit ervan aan te tonen en is be-
stemd voor distributie binnen de lidstaten van de EU zonder beperkingen. Dit pro-
duct volgt de bepalingen van de Europese Richtlijnen 2014/30/EU (EMC); 2014/35/
EU (LVD); 2011/65/EU (RoHS): CE-markering 93/68/EEG.
O produto tem a marca CE que demonstra a sua conformidade e destina-se a dis-
tribuição em todos os estados membros da UE, sem restrições. Este produto segue
as disposições das Diretivas Europeias 2014/30/UE (EMC); 2014/35/UE (LVD);
2011/65/UE (RoHS): marcação CE 93/68/CEE.
  
      CE 
    
     
    
    
 
  (RoHS)  EU// ;(EU (LVD// ;(EU (EMC// 
EEC// CE  

This manual suits for next models

4

Other Videx Intercom System manuals

Videx VK6N Series User manual

Videx

Videx VK6N Series User manual

Videx 6358 System manual

Videx

Videx 6358 System manual

Videx ESVKX System manual

Videx

Videx ESVKX System manual

Videx 4000 Series 4384 User manual

Videx

Videx 4000 Series 4384 User manual

Videx 3000 Series User manual

Videx

Videx 3000 Series User manual

Videx Kristallo KRA038 User manual

Videx

Videx Kristallo KRA038 User manual

Videx VK4KX System manual

Videx

Videx VK4KX System manual

Videx Audiokit 4K Series User manual

Videx

Videx Audiokit 4K Series User manual

Videx VRDK1 (25H) User manual

Videx

Videx VRDK1 (25H) User manual

Videx 4000 Series User manual

Videx

Videx 4000 Series User manual

Videx 3000 Series User manual

Videx

Videx 3000 Series User manual

Videx CVK8K/6000 User manual

Videx

Videx CVK8K/6000 User manual

Videx Kristallo Series User manual

Videx

Videx Kristallo Series User manual

Videx VRVK Series System manual

Videx

Videx VRVK Series System manual

Videx 800 Series User manual

Videx

Videx 800 Series User manual

Videx VRVK Series System manual

Videx

Videx VRVK Series System manual

Videx 25H/SP/DDA/2W User manual

Videx

Videx 25H/SP/DDA/2W User manual

Videx GSM4K/4G User manual

Videx

Videx GSM4K/4G User manual

Videx Kristallo Series User manual

Videx

Videx Kristallo Series User manual

Videx Kristallo Series User manual

Videx

Videx Kristallo Series User manual

Videx 4212V User manual

Videx

Videx 4212V User manual

Videx ESVK 6388 Series System manual

Videx

Videx ESVK 6388 Series System manual

Videx 4812 User manual

Videx

Videx 4812 User manual

Videx S6200MV User manual

Videx

Videx S6200MV User manual

Popular Intercom System manuals by other brands

Viking E-20 product manual

Viking

Viking E-20 product manual

Linear AM-KP installation instructions

Linear

Linear AM-KP installation instructions

Aiphone IX-DVF-4A Installation and programming guide

Aiphone

Aiphone IX-DVF-4A Installation and programming guide

SLI SECO-LARM ENFORCER SD-6176-SSVQ manual

SLI

SLI SECO-LARM ENFORCER SD-6176-SSVQ manual

Door Knox VDP102 manual

Door Knox

Door Knox VDP102 manual

Bticino 366311 installation manual

Bticino

Bticino 366311 installation manual

SSS Siedle Basic CVB 850-1 Product information

SSS Siedle

SSS Siedle Basic CVB 850-1 Product information

TCS IVH4222-0140 instruction manual

TCS

TCS IVH4222-0140 instruction manual

golmar Rock Series installation manual

golmar

golmar Rock Series installation manual

WHD VoiceBridge manual

WHD

WHD VoiceBridge manual

Aiphone RELAY RY-18L instructions

Aiphone

Aiphone RELAY RY-18L instructions

Viking K-1775-BN-IP product manual

Viking

Viking K-1775-BN-IP product manual

Aiphone IBG-1GD instructions

Aiphone

Aiphone IBG-1GD instructions

Security Brands Ridge 2.0 quick start guide

Security Brands

Security Brands Ridge 2.0 quick start guide

Leitronic AG EXICALL EN70 Use instruction

Leitronic AG

Leitronic AG EXICALL EN70 Use instruction

Farfisa ZHeroS ZH1151W manual

Farfisa

Farfisa ZHeroS ZH1151W manual

SkyBell 2.0 installation guide

SkyBell

SkyBell 2.0 installation guide

Fanvil i23 user manual

Fanvil

Fanvil i23 user manual

manuals.online logo
manuals.online logoBrands
  • About & Mission
  • Contact us
  • Privacy Policy
  • Terms and Conditions

Copyright 2025 Manuals.Online. All Rights Reserved.