VIEGA • Viega... The global leader in plumbing and heating systems.
301
N.
Main,
Floor
9
•
Wichita,
KS
67202
•
Ph:
877-Viega-NA
•
Fax:
800-976-9817
•
E-Mail:
[email protected] •
www.viega.com
Product Instructions
Basic Digital Snow Melt Control II
PI-PR-17023 05/08 4 of 5
Programming
Turn the timer knob clockwise past
2 to power up the digital setpoint
control. Press "MENU" button on the
control to adjust settings:
At any point during the programming
you may press the "HOME" button
to return back to the sensor viewing.
1. Press "MENU", then press the
right arrow button when the
"Program Screen" appears
2. When the "Relay Screen"
appears, press right arrow
button to select Relay 1
3. Select Setpoint 1 by pressing
the right arrow button
4. Use the up and down
arrows to adjust the Setpoint 1
to 38°F (this is the maximum
slab temperature setting of the
snow melt system)
5. Once the setpoint has been
adjusted press the right arrow
to accept and to display the
"Relay 1" menu
6. Select "Diffrntl" by pressing the
right arrow button
7. Using the up and down arrows,
adjust the differential to 2°F,
then press the right arrow button
to accept and return to the menu
8. Once you have completed
these steps either press the
"HOME" key or scroll down
using the down arrow to
"EXIT" and then press the
right arrow button
Once all programming is
complete the conguration
can be locked to prevent any
unauthorized changes.
To Lock or Unlock the
keypad simply press and hold
the "MENU" and "HOME"
buttons simultaneously for ve
seconds.
Turn the timer back to zero to
reset the system to automatic
operation.
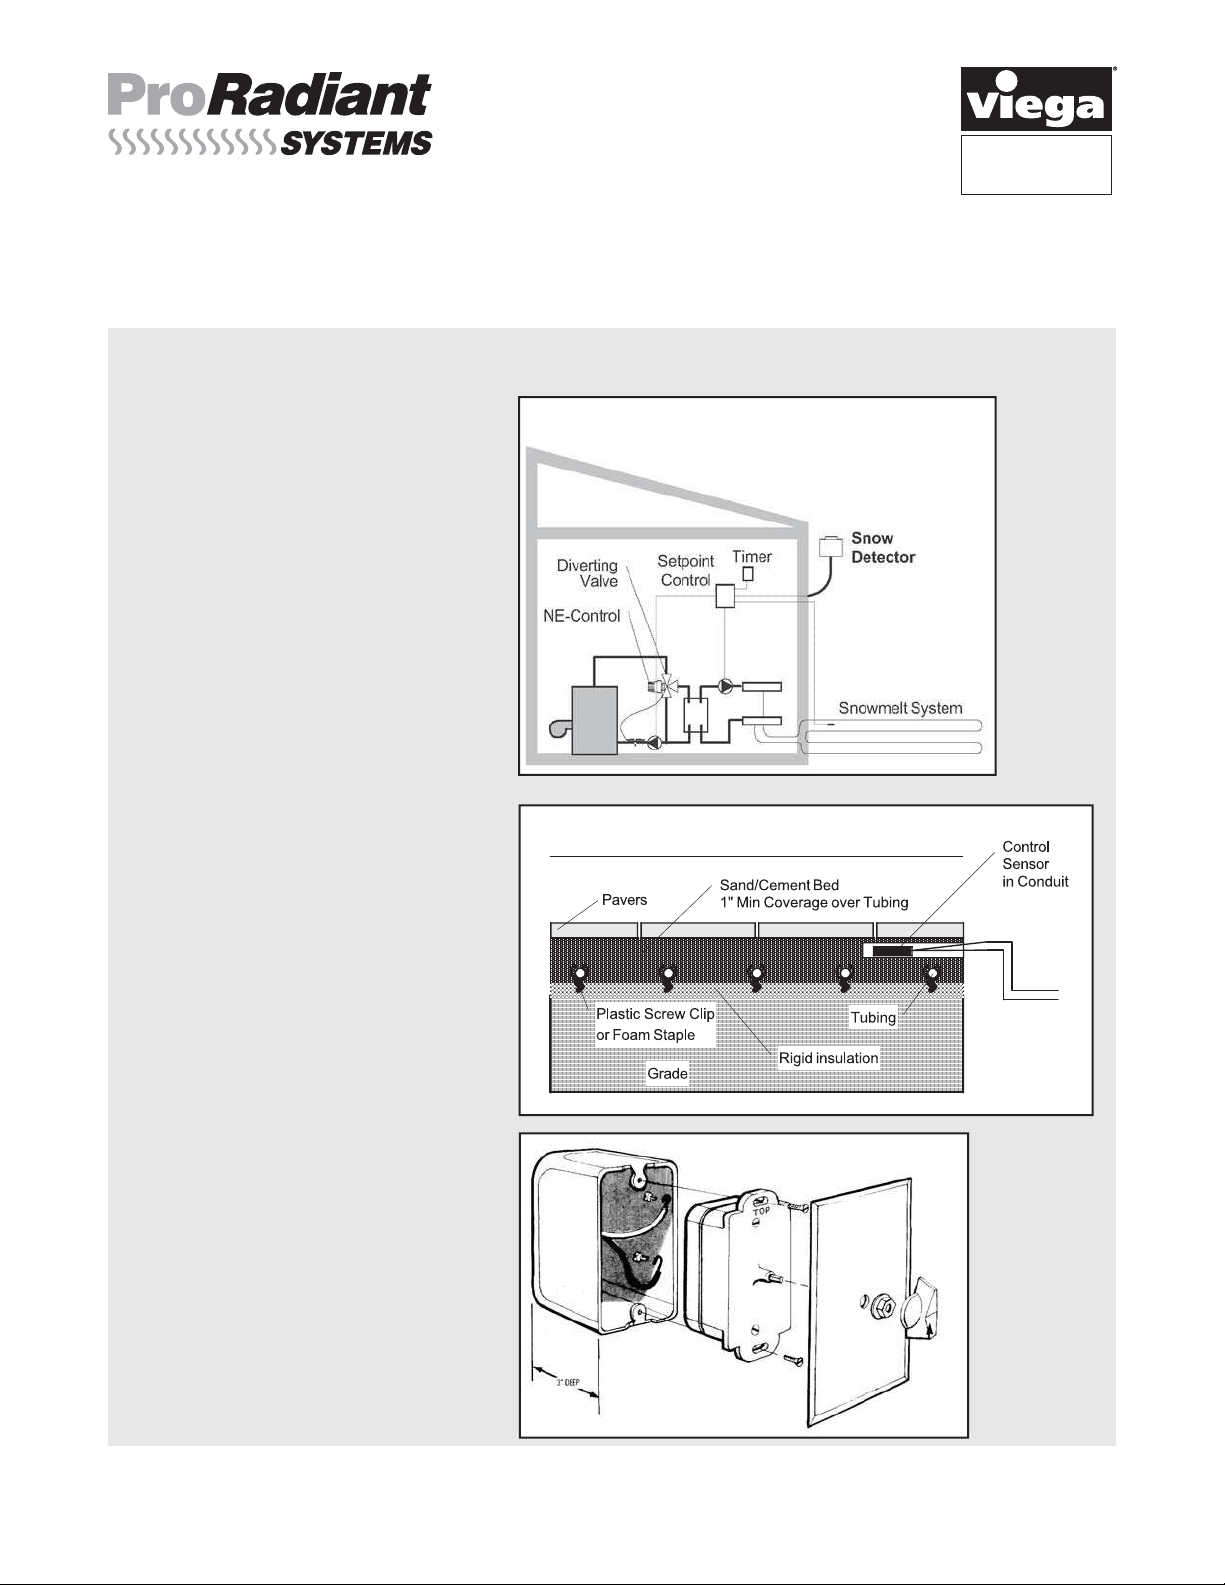
Operation
The snow melting system will be
automatically activated when low
temperature and precipitation are
detected. The system will then
operate until the temperature rises
and/or the precipitation stops plus
a ve hour purge time to ensure
melting of all slab areas. During
operation, the setpoint control
limits the maximum slab
temperature at the setpoint
(38°F recommended) to ensure
melting while preventing the slab
from overheating.
To turn the snow melting system
on manually, turn the knob of the
timer clockwise to the desired time
period (at least 2 hours). The timer
will automatically turn the system
off at the end of this time period
(unless system has been activated
automatically by the snow
detector).