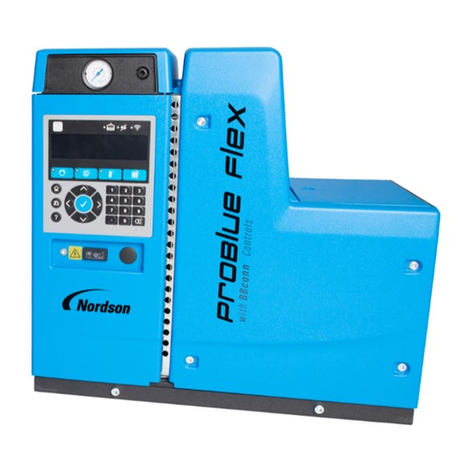
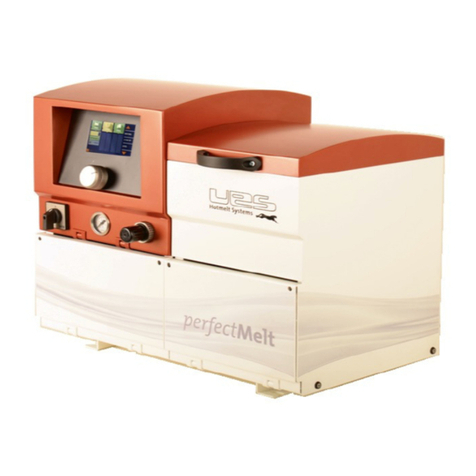
Nordson ProBlue Flex User manual

ProBlue Flex Adhesive Melter
Using the OLED User Interface
Customer Product Manual
Part 1128351_02
Issued 6/20
NORDSON CORPORATION DULUTH, GEORGIA USA
www.nordson.com
This document contains important safety information.
Be sure to read and follow all safety information in this
document and any other related documentation.

Part 1128351_02 E2020 Nordson Corporation
All rights reserved
Nordson Corporation welcomes requests for information, comments, and inquiries about its products. General information
about Nordson can be found on the Internet using the following address: http://www.nordson.com.
Address all correspondence to:
Nordson Corporation
Attn: Customer Service
11475 Lakefield Drive
Duluth, GA 30097
Notice
This is a Nordson Corporation publication which is protected by copyright. Original copyright date 2020.
Nopartofthisdocument may be photocopied, reproduced, or translated to another language without the prior written
consent of NordsonCorporation. Theinformationcontained in this publication is subject to change without notice.
Trademarks
4800 INTEGRA, Allegro, Apogee, Artiste, Asymtek, Automove, Avex, BaitGun, BKG, Blue Box, BM-32, BM-58, BM-63, Bowtie,
Build‐A‐Part, CF, Century, CleanSleeve, CleanSpray, Color‐on‐Demand, ColorMax, Conexis, Connections to Life, Contour, ControlCoat,
Coolwave, Cross‐Cut, CrystallCut, Dage, Dial‐A‐Dose, Dima, DispenseJet, DispenseMate, DuraBlue, DuraDrum, DuraPail, e.dot,
e-stylized, EasyCoat, Easymelt, Ecodry, Econo‐Coat, EDI, EFD, Eliminator, Encore, Equatherm, Excel 2000, Fibrijet, Flextrak, Fluidmove,
FoamMelt, FoamMelt - stylized, FoamMix, Freedom, Fulfill, HDLV, Heli‐flow, iControl, iDry, iFlow, IntelliJet, Isocore, Iso‐Flo, iTrax, KISS,
LeanCell, LogiComm, March, Matrix, MatriX, Maverick, Measuring the Invisible, MEG, Meltex, MicroCoat, MicroMark, Micromedics,
Micro‐Meter, Microshot, Millennium, MiniBlue, Mini Squirt, NexJet, No-Drip, Nordson, Nordson - stylized, Nordson and Arc, NYTVision,
OptiMix, Optima, Optimum, Package of Values, Paragon, PermaFlo, PICO, PicoPulse Plasmod, Poly-Check, Polymer Solution Casting,
PorousCoat, Posi‐Dose, PowderGrid, Precisecoat, PrintPlus, ProBlue, ProBlue Liberty, Prodigy, Pro‐Flo, Program‐A‐Bead,
Program‐A‐Shot, Program‐A‐Stream, Program‐A‐Swirl, Pro‐Meter, Pulsar, Quantum, Ratio‐Pak, RBX, RediSet, Rhino, Saturn,
Saturn with Rings, Scoreguard, Sealant Equipment & Engineering, Inc., SEE (and design), See‐Flo, SelectCharge, SelectCoat,
Select Cure, Servo‐Flo, Shot‐A‐Matic, Signature - stylized, Slautterback, Smart‐Coat, Smart-Gun, SolderPlus, Spectrum, Speed‐Coat,
StediFlo, Stratablend, SureBead, Sure Coat, SureWrap, Symphony, Tip-Seal, TRAK, Tribomatic, Trilogy, TrueBlue, TrueCoat, Turbo,
Ultra, u‐TAH, Value Plastics, Vantage, Vention Medical, Vention Medical Advancing Your Innovations For Health, VersaBlue, Versa‐Coat,
VersaDrum, VersaPail, Versa‐Spray, VP stylized, When you expect more., X-Plane, Xaloy, Xaloy - stylized, YesTech, and
2 Rings (design) are registered trademarks of Nordson Corporation.
Accubar, Active Nozzle, Advanced Plasma Systems, AeroDeck, AeroWash, AirShield, AltaBlue, AltaSlot, Alta Spray, ATS, Auto‐Flo,
Autoflex, AutoScan, Axiom, Best Choice, Better Dispensing, Blue Series, Bravura, CanPro, Champion, Check Mate, Classic IX,
ClassicBlue, CleanCoat, Cobalt, Concert, ContourCoat, Control Weave, Controlled Fiberization, CPX, cScan+, cSelect, Cyclo‐Kinetic,
DispensLink, Dry Cure, DuraBraid, DuraCoat, DuraPUR, e.dot+, Emerald, E‐Nordson, Easy Clean, EasyOn, EasyPW, Eclipse, EcoBead,
EdgeControl, Equalizer, EquiBead, FillEasy, FillSentry, FlexSeam, Flow Coat, FluxPlus, G‐Net, G‐Site, Genius, Get Green with Blue,
Horizon, Inspire, iON, Iso‐Flex, iTrend, JetStream, Lacquer Cure, LightTite, LoadermoveTouch, Maxima, Mesa, MicroDot, MicroFin,
MicroMax, MicroSpray, Mikros, MiniEdge, Minimeter, MiniPUR, Multifill, MultiScan, Myritex, Nano, OmniScan, OptiStroke, Optix,
Partnership+Plus, PatternJet, PCI, PharmaLok, PicoDot, PicoTouch, Pinnacle, PowderPilot, Powder Port, Powercure, Process Sentry,
Pulse Spray, PURBlue, PUReOne, PURJet, Qadence, Ready Coat, RediCoat, RollVIA, Royal Blue, SelectSeries, Sensomatic,
Shaftshield, SheetAire, Smart, Smart Tune, Smartfil, SolidBlue, Spectral, SpeedKing, Spray Works, StediTherm, StrokeControl, Summit,
SureFoam, SureMix, SureSeal, SwirlCoat, TAH, TradePlus, ThruCoat, ThruCure, ThruWave, Trio, TruFlow, Ultraflex, Ultrasaver,
Ultrasmart, Unity, UNITYMotion, Universal, Ultra FoamMix, UltraMax, ValueMate, Versa, VersaPUR, Vista, VP Quick Fit,
VP Quick‐Fit stylized, WaferLock, Web Cure, 781Mini, and 787Mini aretrademarks of NordsonCorporation.
Designations and trademarks stated in this document may be brands that, when used by third parties for their own purposes,
could lead to violation of the owners' rights.
Table of Contents i
Part 1128351_02
E2020 Nordson Corporation
Table of Contents
OLED User Interface 1.......................................
Safety Alert Symbols 1.........................................
Responsibilities of the Equipment Owner 2......................
Safety Information 2.............................................
Instructions, Requirements, and Standards 2.......................
User Qualifications 3............................................
Applicable Industry Safety Practices 3..........................
Intended Use of the Equipment 3..................................
Instructions and Safety Messages 4...............................
Installation Practices 4...........................................
Operating Practices 4...........................................
Maintenance and Repair Practices 5..............................
Equipment Safety Information 5................................
Equipment Shutdown 6..........................................
Relieving System Hydraulic Pressure 6..........................
De‐energizing the System 6....................................
Disabling the Applicators 6....................................
General Safety Warnings and Cautions 7..........................
Other Safety Precautions 10.......................................
First Aid 10......................................................

Table of Contents
ii
Part 1128351_02 E2020 Nordson Corporation
Safety Labels and Tags 11......................................
Basic Operations 13............................................
Additional Information 13..........................................
About the Home Screen 14........................................
Navigation Controls 14.........................................
Using the Master Controls 16......................................
About the System Status and LED Indicators 18......................
About the System Status Colors 20...............................
Common Operator Tasks 22......................................
Starting the Melter 23.............................................
Shutting Down the Melter 23....................................
Switching the Master Heater and Pump Controls On/Off 24.............
Monitoring the Tank Adhesive Level 25.............................
Manually Filling the Melter Tank 26................................
Manually Initiating the Automatic Fill System 27...................
Managing Heated Zones 28.......................................
Enabling/Disabling and Changing Zone Set Point Temperatures 28...
Managing System Air Pressure 31..................................
Manually Adjusting System Air Pressure 31........................
Electronically Adjusting System Air Pressure 32....................
Defining Manual and Electronic Pressure Monitor and Adjust Settings 33
Defining Manual Pressure Adjust Alert Settings 33..................
Defining Electronic Pressure Settings and Monitoring Alert Settings 34
Electronic Pressure Alert and Monitoring 34.....................
Electronic Pressure Control Settings 35.........................
Defining Pressure Runup Settings and Monitoring Alert Settings 36...
Pressure Runup Output Settings 36............................
Pressure Runup Alert Threshold Settings 38.....................
Pressure Runup Pressure Limits 39............................
Pressure Runup General Settings 39...........................
About Loading and Saving a Recipe 40.............................
Loading a Recipe 42.........................................
Saving/ SaveAs a Recipe 42..................................
Viewing the Event Log 43.........................................
System Settings 44.............................................
Additional Information 44..........................................
Defining Tank-Only Level Sensing Settings 45.......................
Enabling/Disabling Low Level Alerts and Settings 45...............
Enabling/Disabling Empty Stop 46...............................
Enabling/Disabling Lid Open Alerts and Settings 47................
Defining Level and Fill Settings 48..................................
Melt-on-Demand and Tank Systems with Optional Fill Settings 48....
Maximum Fill Time and Target Fill Level Settings 48.............
Defining Temperature Settings 49..................................
Defining SmartMelt Settings 49..................................
Defining Setback Settings 50....................................
Manually Entering/Exiting Setback 50.............................
Defining Automatic System Setback 51...........................
Defining Manual Setback - Auto Exit Time 52......................
Defining Ready Delay 53........................................
Bypassing Ready Delay 53...................................
Defining Global Temperature Settings 54
..........................
Enabling/Disabling Heaters On Upon Startup 54....................
Defining the Over/Under Temperature Thresholds 55...............
Defining Temperature Setback 55................................

Table of Contents iii
Part 1128351_02
E2020 Nordson Corporation
Enabling and Disabling Auto Pump 56..............................
Enabling and Disabling Auto Pump 56............................
About Adhesive Tracking System (ATS) 57..........................
Theory of Operation 58.........................................
ATS Product Setup 58............................................
Calibrating the Flow Meter 59....................................
Defining Product and Trigger Settings 60..........................
Using the Teach Mode 62.......................................
Defining Adhesive Flow Monitoring Alarms 63......................
Monitoring and Viewing Adhesive Flow Output 64.....................
Exporting Flow Report 65.......................................
Exporting Flow Reports 65.........................................
Troubleshooting Adhesive Flow Monitoring 66.......................
Understanding the ATS PCA Board LEDs 66.......................
General and Flow Control Alarms 69.............................
About User Management 71.......................................
More About User Management 71................................
Setting up User Management 72.................................
Setting up User Management and Modifying Password Codes 72..
Resetting Password Codes to Default 72........................
Modifying the Timeout Intervals 72.............................
About System I/O 73.............................................
Assigning Inputs 73............................................
About Remote Recipe Inputs 75..................................
Assigning Remote Recipe Inputs 77..............................
Assigning Outputs 78..........................................
Assigning Light Tower Outputs 79...............................
Setting Up Shift Schedules 80......................................
Viewing and Modifying an Existing Shift Schedules 81..............
About Managing Recipes 82.......................................
Importing and Exporting Recipes 82..............................
Setting Up Heat Schedule 83....................................
Viewing and Modifying an Existing Heat Schedule 84...............
About System Preferences 85.....................................
Defining Network Access 86.......................................
Setting Up Networking 86.......................................
Setting Up WiFi 87.............................................
Accessing the Graphical User Interface 88.........................
Defining PLC Access 90...........................................
Defining PLC Communications 91................................
Connecting Profinet, Ethernet/IP and Modbus TCP 92...............
Importing and Exporting .PLC File 94.............................

Table of Contents
iv
Part 1128351_02 E2020 Nordson Corporation
Tool Settings 95................................................
Additional Information 95..........................................
Backing Up and Restoring the Melter 96............................
Resetting to Factory Defaults 97...................................
Setting Up Maintenance Reminders 98.............................
Managing the Maintenance System 99............................
Setting Up Component Maintenance Notifications 99...............
Resetting and Snoozing Maintenance Notifications 100..............
Viewing Maintenance History 101.................................
Managing System Configuration 102.................................
Changing the Melter Software Version 103.........................
Upgrading and Downgrading the Melter Software Version 103........
Restoring to a Previous Version 104...............................
Managing Licenses 104.........................................
Adding a New License 105.......................................
Viewing System and Configuration Information 106..................
Viewing Original Factory Nameplate Information 106................
Viewing Accessory Information 107...............................
Updating the Configuration Code 107.............................
Performing Basic Melter Maintenance 108...........................
Draining or Purging the Melter 108................................
Preparing to Drain 108........................................
Forcing the Fill System to Activate Automatic Fill System 110.........
AutoTuning Heated Zones 111...................................
Calibrating the Tank Level Sensor 112.............................
Troubleshooting 113.............................................
Additional Information 113..........................................
Viewing the Event Log 114.........................................
Exporting the Event Log 115.....................................
Heater Sub System Alarms 116....................................
Troubleshooting Heated Zone Alerts and Faults 118.................
Fill System Alarms 120...........................................
Electronic Pressure Adjust Alarms 122..............................

OLED User Interface 1
Part 1128351_02
E2020 Nordson Corporation
OLED User Interface
Read this section before using the equipment. This section contains
recommendations and practices applicable to the safe installation, operation,
and maintenance (hereafter referred to as “use”) of the product described in
this document (hereafter referred to as “equipment”). Additional safety
information, in the form of task‐specific safety alert messages, appears as
appropriate throughout this document.
WARNING! Failure to follow the safety messages, recommendations, and
hazard avoidance procedures provided in this document can result in
personal injury, including death, or damage to equipment or property.
Safety Alert Symbols
The following safety alert symbol and signal words are used throughout this
document to alert the reader to personal safety hazards or to identify
conditions that may result in damage to equipment or property. Comply with
all safety information that follows the signal word.
WARNING! Indicates a potentially hazardous situation that, if not avoided,
can result in serious personal injury, including death.
CAUTION! Indicates a potentially hazardous situation that, if not avoided,
can result in minor or moderate personal injury.
CAUTION! (Used without the safety alert symbol) Indicates a potentially
hazardous situation that, if not avoided, can result in damage to equipment or
property.

OLED User Interface
2
Part 1128351_02 E2020 Nordson Corporation
Responsibilities of the Equipment Owner
Equipment owners are responsible for managing safety information, ensuring
that all instructions and regulatory requirements for use of the equipment are
met, and for qualifying all potential users.
Safety Information
SResearch and evaluate safety information from all applicable sources,
including the owner‐specific safety policy, best industry practices,
governing regulations, material manufacturer's product information, and
this document.
SMake safety information available to equipment users in accordance with
governing regulations. Contact the authority having jurisdiction for
information.
SMaintain safety information, including the safety labels affixed to the
equipment, in readable condition.
Instructions, Requirements, and Standards
SEnsure that the equipment is used in accordance with the information
provided in this document, governing codes and regulations, and best
industry practices.
SIf applicable, receive approval from your facility's engineering or safety
department, or other similar function within your organization, before
installing or operating the equipment for the first time.
SProvide appropriate emergency and first aid equipment.
SConduct safety inspections to ensure required practices are being
followed.
SRe‐evaluate safety practices and procedures whenever changes are
made to the process or equipment.

OLED User Interface 3
Part 1128351_02
E2020 Nordson Corporation
User Qualifications
Equipment owners are responsible for ensuring that users:
Sreceive safety training appropriate to their job function as directed by
governing regulations and best industry practices
Sare familiar with the equipment owner's safety and accident
prevention policies and procedures
Sreceive equipment‐ and task‐specific training from another qualified
individual
NOTE: Nordson can provide equipment‐specific installation,
operation, and maintenance training. Contact your Nordson
representative for information
Spossess industry‐ and trade‐specific skills and a level of experience
appropriate to their job function
Sare physically capable of performing their job function and are not
under the influence of any substance that degrades their mental
capacity or physical capabilities
Applicable Industry Safety Practices
The following safety practices apply to the use of the equipment in the
manner described in this document. The information provided here is not
meant to include all possible safety practices, but represents the best safety
practices for equipment of similar hazard potential used in similar industries.
Intended Use of the Equipment
SUse the equipment only for the purposes described and within the limits
specified in this document.
SDo not modify the equipment.
SDo not use incompatible materials or unapproved auxiliary devices.
Contact your Nordson representative if you have any questions on
material compatibility or the use of non‐standard auxiliary devices.

OLED User Interface
4
Part 1128351_02 E2020 Nordson Corporation
Instructions and Safety Messages
SRead and follow the instructions provided in this document and other
referenced documents.
SFamiliarize yourself with the location and meaning of the safety warning
labels and tags affixed to the equipment. Refer to Safety Labels and Tags
at the end of this section.
SIf you are unsure of how to use the equipment, contact your Nordson
representative for assistance.
Installation Practices
SInstall the equipment in accordance with the instructions provided in this
document and in the documentation provided with auxiliary devices.
SEnsure that the equipment is rated for the environment in which it will be
used. This equipment has not been certified for compliance with the
ATEX directive nor as nonincendive and should not be installed in
potentially explosive environments.
SEnsure that the processing characteristics of the material will not create a
hazardous environment. Refer to the Safety Data Sheet (SDS) for the
material.
SIf the required installation configuration does not match the installation
instructions, contact your Nordson representative for assistance.
SPosition the equipment for safe operation. Observe the requirements for
clearance between the equipment and other objects.
SInstall lockable power disconnects to isolate the equipment and all
independently powered auxiliary devices from their power sources.
SProperly ground all equipment. Contact your local building code
enforcement agency for specific requirements.
SEnsure that fuses of the correct type and rating are installed in fused
equipment.
SContact the authority having jurisdiction to determine the requirement for
installation permits or inspections.
Operating Practices
SFamiliarize yourself with the location and operation of all safety devices
and indicators.
SConfirm that the equipment, including all safety devices (guards,
interlocks, etc.), is in good working order and that the required
environmental conditions exist.
SUse the personal protective equipment (PPE) specified for each task.
Refer to Equipment Safety Information or the material manufacturer's
instructions and SDS for PPE requirements.
SDo not use equipment that is malfunctioning or shows signs of a potential
malfunction.

OLED User Interface 5
Part 1128351_02
E2020 Nordson Corporation
Maintenance and Repair Practices
SAllow only personnel with appropriate training and experience to operate
or service the equipment.
SPerform scheduled maintenance activities at the intervals described in
this document.
SRelieve system hydraulic and pneumatic pressure before servicing the
equipment.
SDe‐energize the equipment and all auxiliary devices before servicing the
equipment.
SUse only new Nordson‐authorized refurbished or replacement parts.
SRead and comply with the manufacturer's instructions and the SDS
supplied with equipment cleaning compounds.
NOTE: SDSs for cleaning compounds that are sold by Nordson are
available at www.nordson.com or by calling your Nordson representative.
SConfirm the correct operation of all safety devices before placing the
equipment back into operation.
SDispose of waste cleaning compounds and residual process materials
according to governing regulations. Refer to the applicable SDS or
contact the authority having jurisdiction for information.
SKeep equipment safety warning labels clean. Replace worn or damaged
labels.
Equipment Safety Information
This equipment safety information is applicable to the following types of
Nordson equipment:
Shot melt and cold adhesive application equipment and all related
accessories
Spattern controllers, timers, detection and verification systems, and all
other optional process control devices

OLED User Interface
6
Part 1128351_02 E2020 Nordson Corporation
Equipment Shutdown
To safely complete many of the procedures described in this document, the
equipment must first be shut-down. The level of shut-down required varies by
the type of equipment in use and the procedure being completed.
If required, shut-down instructions are specified at the start of the procedure.
The levels of shut-down are:
Relieving System Hydraulic Pressure
Completely relieve system hydraulic pressure before breaking any hydraulic
connection or seal. Refer to the melter‐specific product manual for
instructions on relieving system hydraulic pressure.
De‐energizing the System
Isolate the system (melter, hoses, applicators, and optional devices) from all
power sources before accessing any unprotected high‐voltage wiring or
connection point.
1. Turn off the equipment and all auxiliary devices connected to the
equipment (system).
2. To prevent the equipment from being accidentally energized, lock and
tag the disconnect switch(es) or circuit breaker(s) that provide input
electrical power to the equipment and optional devices.
NOTE: Government regulations and industry standards dictate specific
requirements for the isolation of hazardous energy sources. Refer to the
appropriate regulation or standard.
Disabling the Applicators
NOTE: Adhesive dispensing applicators are referred to as “guns” in some
previous publications.
All electrical or mechanical devices that provide an activation signal to the
applicators, applicator solenoid valve(s), or the melter pump must be
disabled before work can be performed on or around an applicator that is
connected to a pressurized system.
1. Turn off or disconnect the applicator triggering device (pattern controller,
timer, PLC, etc.).
2. Disconnect the input signal wiring to the applicator solenoid valve(s).
3. Reduce the air pressure to the applicator solenoid valve(s) to zero; then
relieve the residual air pressure between the regulator and the applicator.

OLED User Interface 7
Part 1128351_02
E2020 Nordson Corporation
General Safety Warnings and Cautions
Table 1 contains the general safety warnings and cautions that apply to
Nordson hot melt and cold adhesive equipment. Review the table and
carefully read all of the warnings or cautions that apply to the type of
equipment described in this manual.
Equipment types are designated in Table 1 as follows:
HM = Hot melt (melters, hoses, applicators, etc.)
PC = Process control
CA = Cold adhesive (dispensing pumps, pressurized container, and
applicators)
Table 1 General Safety Warnings and Cautions
Equipment
Type Warning or Caution
HM
WARNING! Hazardous vapors! Before processing any polyurethane
reactive (PUR) hot melt or solvent‐based material through a compatible
Nordson melter, read and comply with the material's SDS. Ensure that
the material's processing temperature and flashpoints will not be
exceeded and that all requirements for safe handling, ventilation, first
aid, and personal protective equipment are met. Failure to comply with
SDS requirements can cause personal injury, including death.
HM
WARNING! Reactive material! Never clean any aluminum component
or flush Nordson equipment with halogenated hydrocarbon fluids.
Nordson melters and applicators contain aluminum components that
may react violently with halogenated hydrocarbons. The use of
halogenated hydrocarbon compounds in Nordson equipment can
cause personal injury, including death.
HM, CA WARNING! System pressurized! Relieve system hydraulic pressure
before breaking any hydraulic connection or seal. Failure to relieve the
system hydraulic pressure can result in the uncontrolled release of hot
melt or cold adhesive, causing personal injury.
Continued...

OLED User Interface
8
Part 1128351_02 E2020 Nordson Corporation
General Safety Warnings and Cautions (contd)
Table 1 General Safety Warnings and Cautions (contd)
Equipment
Type Warning or Caution
HM
WARNING! Molten material! Wear eye or face protection, clothing that
protects exposed skin, and heat‐protective gloves when servicing
equipment that contains molten hot melt. Even when solidified, hot melt
can still cause burns. Failure to wear appropriate personal protective
equipment can result in personal injury.
HM, PC
WARNING! Equipment starts automatically! Remote triggering devices
are used to control automatic hot melt applicators. Before working on
or near an operating applicator, disable the applicator's triggering
device and remove the air supply to the applicator's solenoid valve(s).
Failure to disable the applicator's triggering device and remove the
supply of air to the solenoid valve(s) can result in personal injury.
HM, CA, PC
WARNING! Risk of electrocution! Even when switched off and
electrically isolated at the disconnect switch or circuit breaker, the
equipment may still be connected to energized auxiliary devices.
De‐energize and electrically isolate all auxiliary devices before
servicing the equipment. Failure to properly isolate electrical power to
auxiliary equipment before servicing the equipment can result in
personal injury, including death.
HM, CA, PC
WARNING! Risk of fire or explosion! Nordson adhesive equipment is
not rated for use in explosive environments and has not been certified
for the ATEX directive or as nonincendive. In addition, this equipment
should not be used with solvent‐based adhesives that can create an
explosive atmosphere when processed. Refer to the SDS for the
adhesive to determine its processing characteristics and limitations.
The use of incompatible solvent‐based adhesives or the improper
processing of solvent‐based adhesives can result in personal injury,
including death.

OLED User Interface 9
Part 1128351_02
E2020 Nordson Corporation
Warning or Caution
Equipment
Type
HM, CA, PC
WARNING! Allow only personnel with appropriate training and
experience to operate or service the equipment. The use of untrained
or inexperienced personnel to operate or service the equipment can
result in injury, including death, to themselves and others and can
damage the equipment.
HM
CAUTION! Hot surfaces! Avoid contact with the hot metal surfaces of
applicators, hoses, and certain components of the melter. If contact
can not be avoided, wear heat‐protective gloves and clothing when
working around heated equipment. Failure to avoid contact with hot
metal surfaces can result in personal injury.
HM
CAUTION! Some Nordson melters are specifically designed to
process polyurethane reactive (PUR) hot melt. Attempting to process
PUR in equipment not specifically designed for this purpose can
damage the equipment and cause premature reaction of the hot melt. If
you are unsure of the equipment's ability to process PUR, contact your
Nordson representative for assistance.
HM, CA
CAUTION! Before using any cleaning or flushing compound on or in
the equipment, read and comply with the manufacturer's instructions
and the SDS supplied with the compound. Some cleaning compounds
can react unpredictably with hot melt or cold adhesive, resulting in
damage to the equipment.
HM
CAUTION! Nordson hot melt equipment is factory tested with Nordson
Type R fluid that contains polyester adipate plasticizer. Certain hot melt
materials can react with Type R fluid and form a solid gum that can
clog the equipment. Before using the equipment, confirm that the hot
melt is compatible with Type R fluid.

OLED User Interface
10
Part 1128351_02 E2020 Nordson Corporation
Other Safety Precautions
SDo not use an open flame to heat hot melt system components.
SCheck high-pressure hoses daily for signs of excessive wear, damage, or
leaks.
SNever point a dispensing handgun at yourself or others.
SSuspend dispensing handguns by their proper suspension point.
First Aid
If molten hot melt comes in contact with your skin:
1. Do NOT attempt to remove the molten hot melt from your skin.
2. Immediately soak the affected area in clean, cold water until the hot melt
has cooled.
3. Do NOT attempt to remove the solidified hot melt from your skin.
4. In case of severe burns, treat for shock.
5. Seek expert medical attention immediately. Give the SDS for the hot melt
to the medical personnel providing treatment.

OLED User Interface 11
Part 1128351_02
E2020 Nordson Corporation
Safety Labels and Tags
Figure 1 illustrates the location of the product safety labels and tags affixed to
the equipment. Table 2 provides an illustration of the hazard identification
symbols that appear on each safety label and tag, the meaning of the
symbol, or the exact wording of any safety message.
4
3
2
5
1
6
7
Figure 1 Location of Safety Labels

OLED User Interface
12
Part 1128351_02 E2020 Nordson Corporation
Safety Labels and Tags (contd)
Table 2 Safety Labels and Tags
Item Part Label Description
1. 242867 TAG, WARNING, .78x.78
2. 1100256
TAG,WARNING,HOT
ADH/HYD PRESS,1.6X6.5
3. 178475 TAG, CAUTION, HOT
SURFACE
4. 1025795
TAG, WARNING,
HAZARDOUS VOLTS,
DURABLUE
5. 1024721 90 P.S.I 6.2 BAR TAG,MAXIMUM AIR
PRESSURE,1.55X.287
6. 1127475 TAG, WARNING, BURN
HAZARD. HOT ADHESIVE.
POWER OFF FILL SYSTEM
BEFORE SERVICING
7. 1087951 TAG,WARNING,HYD
PRESSURE, TRIANGLE
ONLY

OLED User Interface 13
Part 1128351_02
E2020 Nordson Corporation
Basic Operations
WARNING! Allow only personnel with appropriate training and experience to
operate or service the equipment. The use of untrained or inexperienced
personnel to operate or service the equipment can result in injury, including
death, to themselves and others, and damage to the equipment.
The following is a list for accomplishing operator‐level tasks:
1. Filling the melter tank.
2. Starting the melter.
3. Monitoring and adjusting melter operation.
4. Shutting the melter down.
Before proceeding with the next set of tasks make sure the melter is fully
installed and connected as described in the accompanying Installation
Guide (P/N 1128353).
Additional Information
This section presents operating procedures in their most commonly used
form. Procedural variations or special considerations are explained in the
additional information table that follows most procedures. Where applicable,
some table entries also contain cross‐reference information. Additional
information tables are indicated by the symbol shown to the left.

OLED User Interface
14
Part 1128351_02 E2020 Nordson Corporation
About the Home Screen
When you start the melter, the splash screen appears for a brief moment,
then the Home screen appears .
Navigation Controls
Use the Home screen to navigate, monitor and change melter settings.
NOTE: You can order your melter with additional options from the factory,
but you can also upgrade your melter at any time.
See Figure 2 for the location of the Navigation controls.
1
2
3
4
Figure 2 Navigation buttons
Other manuals for ProBlue Flex
2
Table of contents
Other Nordson Melting Machine manuals

Nordson
Nordson 3500V Series Parts list manual

Nordson
Nordson 3500 Series Parts list manual

Nordson
Nordson VersaBlue VBN 50 User manual

Nordson
Nordson EP 30 User manual

Nordson
Nordson ProBlue 1028303 User manual

Nordson
Nordson 3100V Series Reference guide

Nordson
Nordson AltaBlueA4TP Reference guide

Nordson
Nordson 3930 User manual

Nordson
Nordson Mesa Fulfill Reference guide

Nordson
Nordson ProBlue Flex User manual