manuals.online logo
Brands
  1. Home
  2. •
  3. Brands
  4. •
  5. Viking
  6. •
  7. Oven
  8. •
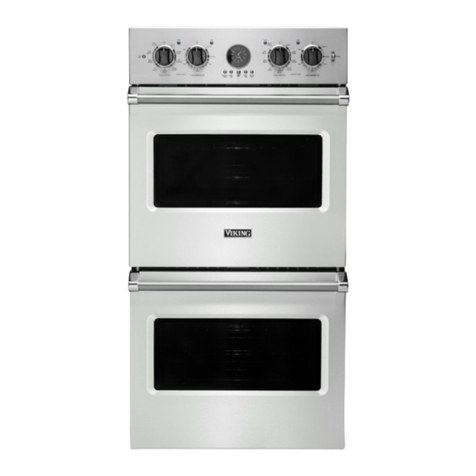
  9. Viking Designer Select DEDO127 User manual

Viking Designer Select DEDO127 User manual

Other manuals for Designer Select DEDO127

3

This manual suits for next models

62

Other Viking Oven manuals

Viking F20554 EN User manual

Viking

Viking F20554 EN User manual

Viking RVSOE330WH User manual

Viking

Viking RVSOE330WH User manual

Viking MVSOC530SS User manual

Viking

Viking MVSOC530SS User manual

Viking VERO3200** User manual

Viking

Viking VERO3200** User manual

Viking MVSOE630 User manual

Viking

Viking MVSOE630 User manual

Viking DEDO127(T) User manual

Viking

Viking DEDO127(T) User manual

Viking Professional VESO166BR User manual

Viking

Viking Professional VESO166BR User manual

Viking Designer DSOE305T User manual

Viking

Viking Designer DSOE305T User manual

Viking RVSOE330 User manual

Viking

Viking RVSOE330 User manual

Viking Designer DDOE301SS User manual

Viking

Viking Designer DDOE301SS User manual

Viking VCTSO5200SS User manual

Viking

Viking VCTSO5200SS User manual

Viking Professional VGSO166SS User manual

Viking

Viking Professional VGSO166SS User manual

Viking RDSOE306 User manual

Viking

Viking RDSOE306 User manual

Viking Professional VESO166BR User manual

Viking

Viking Professional VESO166BR User manual

Viking VCSO210SS User manual

Viking

Viking VCSO210SS User manual

Viking Double Ovens User manual

Viking

Viking Double Ovens User manual

Viking DrawerMicro VMOD241SS User manual

Viking

Viking DrawerMicro VMOD241SS User manual

Viking VESO5272WH User manual

Viking

Viking VESO5272WH User manual

Viking M0706VR User manual

Viking

Viking M0706VR User manual

Viking Designer Select DESO127 User manual

Viking

Viking Designer Select DESO127 User manual

Viking VGSO260TLSS User manual

Viking

Viking VGSO260TLSS User manual

Viking Combi Steam/Convect VSOC530SS User manual

Viking

Viking Combi Steam/Convect VSOC530SS User manual

Viking VESO5302WH User manual

Viking

Viking VESO5302WH User manual

Viking VEDO5302SS User manual

Viking

Viking VEDO5302SS User manual

Popular Oven manuals by other brands

Brandt FC 222 user manual

Brandt

Brandt FC 222 user manual

aumate TOA20M04N-1E instruction manual

aumate

aumate TOA20M04N-1E instruction manual

Maytag CWE4100AC - 24" Single Electric Wall Oven Dimension Guide

Maytag

Maytag CWE4100AC - 24" Single Electric Wall Oven Dimension Guide

Kernau KBO 1076 S PT B instruction manual

Kernau

Kernau KBO 1076 S PT B instruction manual

Bosch HB 37 N Series User manual and installation instructions

Bosch

Bosch HB 37 N Series User manual and installation instructions

Electrolux EOD5420AA user manual

Electrolux

Electrolux EOD5420AA user manual

Mx Onda MX-HC2183 instruction manual

Mx Onda

Mx Onda MX-HC2183 instruction manual

Daewoo F6EV19SM2 Service manual

Daewoo

Daewoo F6EV19SM2 Service manual

Blodgett MT3870 Specifications

Blodgett

Blodgett MT3870 Specifications

GE ZET2F owner's manual

GE

GE ZET2F owner's manual

GE JK3000DF3WW owner's manual

GE

GE JK3000DF3WW owner's manual

eka EKF 523 NT Operating and instruction manual

eka

eka EKF 523 NT Operating and instruction manual

AEG Electrolux E3191-5 user manual

AEG Electrolux

AEG Electrolux E3191-5 user manual

Pratica Rocket Express quick start guide

Pratica

Pratica Rocket Express quick start guide

FM RX203 instruction manual

FM

FM RX203 instruction manual

Bosch HBN331 9B Series instruction manual

Bosch

Bosch HBN331 9B Series instruction manual

NEFF B95M42N0MK Instructions for use

NEFF

NEFF B95M42N0MK Instructions for use

Miele H 5961 B User instructions

Miele

Miele H 5961 B User instructions

manuals.online logo
manuals.online logoBrands
  • About & Mission
  • Contact us
  • Privacy Policy
  • Terms and Conditions

Copyright 2025 Manuals.Online. All Rights Reserved.

Viking Range Corporation
111 Front Street
Greenwood Mississippi 38930 USA
(662) 455-1200
For product information
call 1-888-VIKING1 (845-4641)
or visit the Viking Web site at
vikingrange.com
F20363A (062007J)
Viking Installation Guide
Professional & Designer Series
Built-In Electric Single and Double O ens
3
IMPORTANT–Please Read and Follow!
WARNING
The use of cabinets for storage above
the oven may result in potential
fire or burn hazard.
WARNING
ELECTRICAL GROUNDING
INSTRUCTIONS –
This oven must be electrically grounded
in accordance with local codes or in the
absence of local codes with the
National Electrical Code
ANSI/NFPA 70 – latest edition.
WARNING
Frame grounded by a
4-conductor cable assembly.
See pages 18-19.
DO NOT USE AN EXTENSION CORD
WITH THIS APPLIANCE. SUCH USE MAY
RESULT IN FIRE ELECTRICAL SHOCK OR
OTHER PERSONAL INJURY.
WARNING
The misuse of the oven door(s) (e.g.
stepping sitting or leaning on them)
can result in hazards or injuries and
damage to the product. WARNING
The oven is heavy – use extreme care
when handling!
WARNING
DO NOT use the handle or oven door
to lift the oven. Remove door before
installation to ensure that it is
not used to lift the unit. Make sure pins
are inserted into hinges before
removing door to prevent injury to
hands and/or fingers
WARNING
This appliance should not be used for
space heating. This information is based
on safety considerations.
•Before beginning read these instructions
thoroughly and carefully.
•Do not remove permanently affixed labels
warnings or plates from the
product as this may void the warranty.
•Observe all local and national codes
requirements and ordinances.
•Installation must conform with local codes or in
the absence of codes the National Electrical
Code ANSI/NFPA 70 – latest edition.
•IN MASSACHUSETTS: This appliance must be
installed by a Massachusetts licensed plumber or
electrician.
•IN CANADA: Installation must be in accordance
with the current CSA C22.1 Canadian Electrical
Codes Part 1 and/or local codes.
•Installers should leave these instructions with the
consumer who should retain them for the local
inspector’s use and for future
reference.
S te Preparat on It is recommended that a thorough site inspection be
conducted PRIOR to unpacking and moving this appliance.
Note: Wiring diagram is located on top of oven or in control panel.
3
Table of Contents
Important Information_________________________________________________ 3
Warnings ____________________________________________________________ 3
Dimensions–Professional Single ________________________________________ 4
Specifications & Electrical Requirements–Professional Single________________ 5
Dimensions–Designer Single ___________________________________________ 6
Specifications & Electrical Requirements–Designer Single__________________ 7
Cutout Dimensions–Professional Single Built-In___________________________ 8
Cutout Dimensions–Professional Single Undercounter _____________________ 8
Cutout Dimensions–Designer Single Built-In _____________________________ 9
Cutout Dimensions–Designer Single Undercounter _______________________ 9
Dimensions–Professional Double _______________________________________ 10
Specifications & Electrical Requirements–Professional Double ______________ 11
Dimensions–Designer Double __________________________________________ 12
Specifications & Electrical Requirements–Designer Double _________________ 13
Cutout Dimensions–Professional Double Built-In _________________________ 14
Cutout Dimensions–Designer Double Built-In ____________________________ 15
General Information __________________________________________________ 16
Recommendations for Unpacking ______________________________________ 16
Recommendations for Moving _________________________________________ 16
Site Preparation ______________________________________________________ 17
Installation Procedure _________________________________________________ 17
Performance Checklist ________________________________________________ 21
Final Preparation _____________________________________________________ 23
Service & Parts _______________________________________________________ 23
Wiring Diagrams______________________________________________________ 24
5
Specifications & Electrical Requirements
Professional Single Oven
Description VESO127/527–27 Wide VESO130/530–30 Wide
Overall Width 26 1/2” (67.3 cm) 29 1/2” (74.9 cm)
Overall Height 28 3/4” (73.0 cm)
Overall Depth to edge of door—25 9/16” (64.9 cm)
with door open—45 3/4” (116.2 cm)
Cutout Width 25 1/2” (64.8 cm) 28 1/2” (72.4 cm)
Cutout Height 28 1/8” (71.4 cm)
Cutout Depth 24” (61.0 cm)
Electrical Requirements 4-wire ground 240VAC 30 amp electrical connection
Unit equipped with No.10 ground wire in unit. Fuse separately.
Maximum Amp Usage 24.0 amps—240 VAC
20.8 amps—208 VAC
Oven Interior Width 22 7/16” (57.0 cm) 25 7/16” (64.6 cm)
Oven Interior Height 16 1/2” (41.9 cm)
Oven Interior Depth 16 13/16” (42.7 cm)
Oven Volume (measured to AHAM standard)* 3.6 cu. ft. 4.1 cu. ft.
Oven Volume (total oven cavit ) 4.2 cu. ft. 4.8 cu. ft.
Approximate Shipping Weight 237 lbs. (108 kg) 261 lbs. (118 kg)
*The AHAM Standard for measuring oven capacit subtracts the door plug and convection baffle dimension from the total oven volume.
5
Dimensions–Single Oven (Professional Series)
25–9/16”
(
64.9 cm)
20
–
1/2”
(52.1cm)
45
–
3/4”
(116.2cm)
29
–
1/2”
(74.9 cm)
28
–
3/4”
(73.0cm)
25–9/16”
(
64.9cm)
20
–
1/2”
(52.1cm)
45
–
3/4”
(116.2cm)
26
–
1/2”
(67.3cm)
28
–
3/4”
(73.0cm)
8”
(
20.3cm)
8
–
5/16”
(21.1cm)
3
–
7/8”
(9.8cm)
8”
(
20.3cm)
8
–
5/16”
(21.1cm)
3
–
7/8”
(9.8cm)
30” Wide
Rating Label
Location
27” Wide
Rating Label
Location
7
Designer Single Oven
Description DESO127(T)/527(T)–27 Wide DESO130(T)/530(T)–30 Wide
Overall Width 26 1/2” (67.3 cm) 29 1/2” (74.9 cm)
Overall Height 29 1/4” (74.3 cm)
Overall Depth to edge of door—25 11/16” (65.2 cm)
with door open—46” (116.8 cm)
Cutout Width 25 1/2” (64.8 cm) 28 1/2” (72.4 cm)
Cutout Height 28 1/8” (71.4 cm)
Cutout Depth 24” (61.0 cm)
Electrical Requirements 4-wire ground 240VAC 30 amp electrical connection
Unit is equipped with No.10 ground wire in conduit.
Should be fused separately.
Maximum Amp Usage 24.0 amps—240 VAC
20.8 amps—208 VAC
Oven Interior Width 22 7/16” (57.0 cm) 25 7/16” (64.6 cm)
Oven Interior Height 16 1/2” (41.9 cm)
Oven Interior Depth 16 13/16” (42.7 cm)
Oven Volume (measured to AHAM standard)* 3.6 cu. ft. 4.1 cu. ft.
Oven Volume (total oven cavit ) 4.2 cu. ft. 4.8 cu. ft.
Approximate Shipping Weight 237 lbs. (108 kg) 261 lbs. (118 kg)
*The AHAM Standard for measuring oven capacit subtracts the door plug and convection baffle dimension from the total oven volume.
Specifications & Electrical Requirements
7
Dimensions–Single Oven
(Designer Series–Mechanical and Touch Control Models)
20
–
1/4”
(51.4cm)
26–1/2”
(67.3cm)
29–1/4”
(74.3cm)
46”
(116.8cm)
25–11/16”
(65.2cm)
20
–
1/4”
(51.4 cm)
29–1/2”
(74.9cm)
29–1/4”
(74.3cm)
46”
(116.8cm)
8”
(
20.3cm)
8
–
5/16”
(21.1cm)
3
–
7/8”
(9.8cm)
25–11/16”
(65.2cm)
8”
(
20.3cm)
8
–
5/16”
(21.1cm)
3
–
7/8”
(9.8cm)
30” Wide
27” Wide
Rating Label
Location
Rating Label
Location
9
Cutout Dimensions–Single Oven
(Designer Series–Mechanical and Touch Control Models)
28–1/8”
(71.4cm)
17”
(43.2cm)
25–1/2”
(64.8cm)
24”
(61.0cm)
5”Min.
(12.7 cm)
4”
(
10.2cm)
Junction
Box
Location
Makesure walls
areperpendicular
28–1/8”
(71.4cm)
17”
(43.2cm)
24”
(61.0cm)
Make surewalls
areperpendicular
5”Min.
(12.7 cm)
4”
(
10.2cm)
Junction
Box
Location
28–1/2”
(72.4cm)
5”Min.
(12.7 cm)
4”
(10.2cm)
Junction
Box
Location
4–3/4”
(12.1cm)
28–1/2”
(72.4cm)
24”
(61.0cm)
28–1/8”
(71.4 cm)
Makesure
wallsare
perpendicular
25–1/2”
(64.8cm)
24”
(61.0cm
)
28–1/8”
(71.4cm)
5”Min.
(12.7 cm)
4”
(10.2cm
)
Junction
Box
Location
Makesure
wallsare
perpendicular
4–3/4”
(12.1 cm)
27” Wide Built-In 30” Wide Built-In
27” Wide Undercounter 30” Wide Undercounter
9
Cutout Dimensions–Single Oven(Professional Series)
28–1/8”
(71.4cm)
17”
(43.2cm)
25–1/2”
(64.8cm)
24”
(61.0cm)
5”Min.
(12.7 cm)
4”
(
10.2cm)
Junction
Box
Location
Makesure walls
areperpendicular
28–1/8”
(71.4cm)
17”
(43.2cm)
24”
(61.0cm)
Make sure walls
areperpendicular
5”Min
(12.7 cm
4”
(
10.2cm)
Junction
Box
Location
28–1/2”
(72.4cm)
5”Min
(12.7 cm
4”
(10.2cm
Junction
Box
Location
4–3/4”
(12.1 cm)
28–1/2”
(72.4 cm)
24”
(61.0cm)
28–1/8”
(71.4cm)
Makesure
walls are
perpendicular
25–1/2”
(64.8cm)
24”
(61.0cm
)
28–1/8”
(71.4cm)
5”Min.
(12.7 cm)
4”
(10.2cm
)
Junction
Box
Location
Make sure
walls are
perpendicular
4–3/4”
(12.1 cm)
27” Wide Built-In 30” Wide Built-In
27” Wide Undercounter 30” Wide Undercounter
11
Specifications & Electrical Requirements
Professional Double Oven
Description VEDO127/527–27 Wide VEDO130/530–30 Wide
Overall Width 26 1/2” (67.3 cm) 29 1/2” (74.9 cm)
Overall Height 51 1/4” (130.2 cm)
Overall Depth to edge of door—25 9/16” (64.9 cm)
with door open—45 3/4” (116.2 cm)
Cutout Width 25 1/2” (64.8 cm) 28 1/2” (72.4 cm)
Cutout Height 50 5/8” (128.6 cm)
Cutout Depth 24” (61.0 cm)
Electrical Requirements 4-wire ground 240VAC 50 amp electrical connection
Unit is equipped with No.10 ground wire in conduit.
Should be fused separately.
Maximum Usage 40.0 amps—240 VAC
34.7 amps—208 VAC
Oven Interior Width–both ovens 22 7/16” (57.0 cm) 25 7/16” (64.6 cm)
Oven Interior Height–both ovens 16 1/2” (41.9 cm)
Oven Interior Depth–upper oven 16 13/16” (42.7 cm)
Oven Interior Depth–lower oven VEDO127 VEDO527 VEDO130 VEDO530
19 1/2” (49.5 cm) 16 13/16” (42.7 cm) 19 1/2” (49.5 cm) 16 13/16”(42.7 cm)
Oven Volume–upper oven
(measured to AHAM standard)* 3.6 cu. ft. 4.1 cu. ft.
Oven Volume–upper oven
(total oven cavit ) 4.2 cu. ft. 4.8 cu. ft.
Oven Volume–lower oven VEDO127 VEDO527 VEDO130 VEDO530
(measured to AHAM standard)* 4.0 cu. ft. 3.6 cu. ft. 4.5 cu. ft. 4.1 cu. ft.
Oven Volume–lower oven
(total oven cavit ) 4.2 cu. ft. 4.8 cu. ft.
Approximate Shipping Weight 360 lbs. (163 kg) 402 lbs. (182 kg)
*The AHAM Standard for measuring oven capacit subtracts the door plug and convection baffle dimension from the total oven volume.
11
Dimensions–Double Oven (Professional Series)
25–9/16”
(
64.9 cm)
20
–
1/2”
(52.1cm)
45
–
3/4”
(116.2cm)
29–1/2”
(74.9cm)
51
–
1/4”
(130.2cm)
25–9/16”
(
64.9cm)
20
–
1/2”
(52.1cm)
45
–
3/4”
(116.2cm)
26
–
1/2”
(67.3cm)
51
–
1/4”
(130.2cm)
27” Wide
30” Wide
Rating Label
Location
(behind door)
13
Specifications & Electrical Requirements
Designer Double Oven
Description DEDO127(T)/527(T)–27 Wide DEDO130(T)/530(T)–30 Wide
Overall Width 26 1/2” (67.3 cm) 29 1/2” (74.9 cm)
Overall Height 51 3/4” (131.4 cm)
Overall Depth to edge of door—25 11/16” (65.2 cm)
with door open—46” (116.8 cm)
Cutout Width 25 1/2” (64.8 cm) 28 1/2” (72.4 cm)
Cutout Height 50 5/8” (128.6 cm)
Cutout Depth 24” (61.0 cm)
Electrical Requirements 4-wire ground 240VAC 50 amp electrical connection
Unit is equipped with No.10 ground wire in conduit.
Should be fused separately.
Maximum Usage 40.0 amps—240 VAC
34.7 amps—208 VAC
Oven Interior Width–both ovens 22 7/16” (57.0 cm) 25 7/16” (64.6 cm)
Oven Interior Height–both ovens 16 1/2” (41.9 cm)
Oven Interior Depth–upper oven 16 13/16” (42.7 cm)
Oven Interior Depth–lower oven DEDO127 DEDO527 DEDO130 DEDO530
19 1/2” (49.5 cm) 16 13/16” (42.7 cm) 19 1/2” (49.5 cm) 16 13/16” (42.7 cm)
Oven Volume–upper oven
(measured to AHAM standard)* 3.6 cu. ft. 4.1 cu. ft.
Oven Volume–upper oven
(total oven cavit ) 4.2 cu. ft. 4.8 cu. ft.
Oven Volume–lower oven DEDO127 DEDO527 DEDO130 DEDO530
(measured to AHAM standard)* 4.0 cu. ft. 3.6 cu. ft. 4.5 cu. ft. 4.1 cu. ft.
Oven Volume–lower oven
(total oven cavit ) 4.2 cu. ft. 4.8 cu. ft.
Approximate Shipping Weight 360 lbs. (163 kg) 402 lbs. (182 kg)
*The AHAM Standard for measuring oven capacit subtracts the door plug and convection baffle dimension from the total oven volume.
13
Dimensions–Double Oven
(Designer Series–Mechanical and Touch Control Models)
25–11/16”
(65.2cm)
26–1/2”
(67.3cm)
)
51
–
3/4”
(131.4cm)
46”
(116.8cm)
20–1/4”
(51.4cm)
29–1/2”
(74.9cm)
51–3/4”
(131.4cm)
46”
(116.8cm)
25–11/16”
(65.2 cm)
20–1/4”
(51.4cm)
27” Wide
30” Wide
Rating Label
Location
(behind door)
16
50–5/8”
(128.6 cm)
15”
(38.1 cm)
min.to floor
25
–
1/2”
(64.8cm)
24”
(61.0cm)
5” Min.
(12.7cm)
4”
(10.2 cm)
Junction
Box
Location
50–5/8”
(128.6 cm)
15”
(38.1cm)
min.to floor
28–1/2”
(
72.4cm)
24”
(61.0cm
)
5”Min.
(12.7cm
)
4”
(10.2cm)
Junction
Box
Location
Makesure walls
areperpendicular
Make sure walls
areperpendicular
27” Wide Built-In
30” Wide Built-In
Cutout Dimensions–Double Oven
(Designer Series–Mechanical and Touch Control Models)
15
Cutout Dimensions–Double Oven (Professional Series)
50–5/8”
(128.6cm)
15–1/4”
(38.7cm)
min.to floor
25–1/2”
(64.7cm)
24”
(61.0cm)
5” Min.
(12.7cm
)
4”
(10.2 cm)
Junction
Box
Location
50–5/8”
(128.6 cm)
28–1/2”
(72.4cm)
24”
(61.0cm)
5”Min.
(12.7cm)
4”
(10.2 cm)
Junction
Box
Location
Makesure walls
areperpendicular
Makesure walls
areperpendicular
15–1/4”
(38.7cm)
min.to floor
27” Wide Built-In
30” Wide Built-In
18
Site Preparation
Note: It is recommended that a thorough
site inspection be conducted PRIOR to
unpacking and moving this appliance.
•WARNING: DO NOT use the handle or
oven door to lift the oven. Remove door
before installation to ensure that it is not
used to lift the unit. Make sure pins are
inserted into hinges before removing door
to prevent personal injury to hands and/or
fingers. Do not l ft or carry the door by
the handle.
• Confirm available access to adequate
power – see electrical requirements.
–Single oven units require a 30 amp circuit
–Double oven units require a 50 amp
circuit
• It is recommended that 3/4” or larger
material be utilized to create a support
platform for this appliance.
Installation
•BE SURE that support for this appliance is
perpendicular to the front facing of the
wall or cabinet before you perform the
installation.
• Use of a hydraulic lift is recommended for
the installation of double oven units.
• All openings in the wall behind the
appliance or in the floor under the
appliance should be sealed.
• Keep appliance area clear and free from
combustible materials gasoline and other
flammable vapors.
•WARNING: DO NOT USE AN
EXTENSION CORD WITH THIS
APPLIANCE. SUCH USE MAY RESULT IN
FIRE ELECTRICAL SHOCK OR OTHER
PERSONAL INJURY.
1
2
Installation Procedure
Remove wooden brace on front of pallet. Open door completely. Place pin in pin hole.
17
General Information
• All openings in the wall behind the
appliance or in the floor under the
appliance should be sealed.
• Keep appliance area clear and free from
combustible materials gasoline and other
flammable vapors.
• Disconnect the electrical supply prior to
servicing or cleaning.
• When removing the appliance for cleaning
or service disconnect AC power supply
and carefully remove the appliance by
pulling forward.
•CAUTION: The oven is heavy – use care
when handling!
• Electrical requirements are listed in the
product specifications under the electrical
requirements section.
Recommendations for
Unpacking
• Products are shipped on pallets with foam
footings and corrugated inner-packing and
exterior hoods.
• Products are anchored to the pallet using
metal straps that are screwed to the
bottom of the product and the pallet.
• DO NOT remove protective packaging
until you are ready to perform the
installation.
• To remove the packaging first remove the
staples located at the bottom perimeter of
the corrugated cover.
• Remove the corrugated cover by lifting it
off the product and remove the inner-
packing.
• Detach the product from the metal anchor
strip by removing the attachment screw.
• DO NOT remove the protective wrapping
from the product control panel until the
product is installed.
Recommendations for
Moving
• The appliance is heavy – use extreme care
when handling!
•WARNING: DO NOT use the handle or
oven door to lift the oven. Remove door
before installation to ensure that it is not
used to lift the unit. Do not l ft or carry
the door by the handle.
• Only proper equipment should be used to
move products.
• ALWAYS take steps to protect flooring at
the installation location when moving
products.
19
Lift oven into position. Push oven straight in.
Attach screws to the side of the framing.
Note: 2 screws for single ovens
4 screws for double ovens (screws not included)
Replace racks.
8b
Neutral
Green
White
Black
Red
W r ng opt on 2*
(connect the white to the incoming neutral
attach green to grounded junction box)
8c
Neutral Green
White
Black
Red
W r ng opt on 3*
(connect the white to the incoming neutral
attach green to suitable ground)
9
10
11
12
*Note: Check local code to see which wiring option should be used when grounding the unit.
Installation Procedure (continued)
19
Unscrew pallet screws from side of oven. W r ng opt on 1*
(connect the white and green to the incoming neutral)
3
Remove hinge trim screws. Take off hinge trim.
4
5
Lift door up and out. Repeat for all doors.
Close until pins stop door.
6
Remove racks.
7
Neutral Green
White
Black
Red
8a
*Note: Check local code to see which wiring option should be used when grounding the unit.
Installation Procedure (continued)