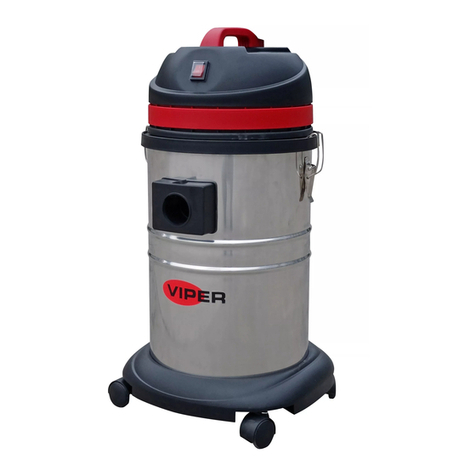
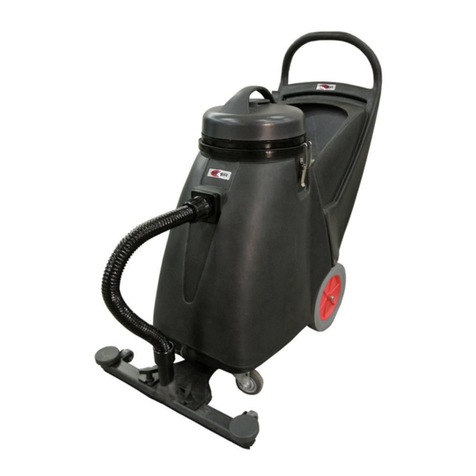
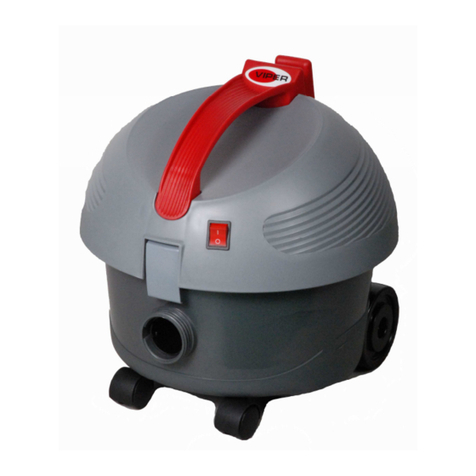
Viper LSU135 User manual

1
LSU135
LSU135LSU135
LSU135/LSU135P
/LSU135P/LSU135P
/LSU135P/LSU155
/LSU155/LSU155
/LSU155/LSU155P
/LSU155P/LSU155P
/LSU155P/LSU255
/LSU255/LSU255
/LSU255/
//
/
LSU255P/
LSU255P/LSU255P/
LSU255P/LSU275
LSU275LSU275
LSU275/LSU275P
/LSU275P/LSU275P
/LSU275P/LSU375/
/LSU375//LSU375/
/LSU375/LSU295/
LSU295/LSU295/
LSU295/LSU395
LSU395LSU395
LSU395
Wet And Dry Vacuum Cleaner
Wet And Dry Vacuum CleanerWet And Dry Vacuum Cleaner
Wet And Dry Vacuum Cleaner(
((
(干湿两用吸尘器
干湿两用吸尘器干湿两用吸尘器
干湿两用吸尘器)
))
)
OWNER
OWNEROWNER
OWNER’S MANUAL
S MANUALS MANUAL
S MANUAL(
((
(使用说明书
使用说明书使用说明书
使用说明书)
))
)
中文 操作指引......................................................3-7. 8-10
English Operation Instructions.................................3-7. 11-13
VA80089
VA80089 VA80089
VA80089
Rev.2012(
Rev.2012(Rev.2012(
Rev.2012(1
11
11
11
1-
--
-12
1212
12)
))
)

2

3
19
18
13
1
4
5
6
12
14
15
16
17
10
11
20 2
3
9
7
8
F1

4
1
6
7
8
9
10
11
12
13
14
20 15 16
21
24
17
26
18
19
23
22
25
4
3
2
5
F 2

5
LSU135
LSU155
ON
ON
LSU375
1.
2.
3.
LSU395
LSU255
LSU275
ON
F3
F3 F3
F3
LSU135
LSU155
ON
ON
LSU375
1.
2.
3.
LSU395
LSU255
LSU275
ON
F4
F4 F4
F4

6
LSU
LSULSU
LSU135
135 135
135 &
& &
& LSU
LSULSU
LSU155
155155
155线 路 图
线 路 图线 路 图
线 路 图(
((
(图
图图
图7
7 7
7 /
/ /
/ Figure
FigureFigure
Figure7
77
7)
))
)
LSU
LSULSU
LSU255
2 5 5 2 5 5
2 5 5 &
& &
& L S U
L S UL S U
L S U 2 7 5
275275
2 7 5 线 路 图
线 路 图线 路 图
线 路 图 (
((
( 图
图图
图 8
88
8 /
//
/Figure
Figure Figure
Figure 8
88
8 )
))
)
F5
F5F5
F5

7
Product Specification Parameter/规格参数
规格参数规格参数
规格参数 (表
表表
表1/Form 1)
Model
No.
Capacit
y (L)
Volta e (V) Frequency
(Hz)
Power(W)
Vacuum
(mmH2O)
Air Flow
(ltr/min)
Noise
(dBA)
LSU135 35 220~240V 50/60 1000 1840 1869 74
LSU155 55 220~240V 50/60 1000 1923 2152 74
LSU255 55 220~240V 50/60 2000 2005 3115 78
LSU275 75 220~240V 50/60 2000 2005 3115 78
LSU375 75 220~240V 50/60 3000 2020 3540 79
LSU295 95 220~240 50/60 2000 2005 3115 78
LSU395 95 220~240V 50/60 3000 2020 3540 79
LSU
LSULSU
LSU375
375 375
375 &
& &
& LSU
LSULSU
LSU395
395 395
395 线 路 图
线 路 图线 路 图
线 路 图(
((
(图
图图
图9
9 9
9 /
/ /
/ Figure
Figure Figure
Figure 9
99
9)
))
)

洁净。
尘袋干燥,
尘隔和
每次使用前应确保桶内无污水,尘隔过滤器 ,,请使用
8
介绍
介绍介绍
介绍:
::
:
此说明书用于了解威霸及掌握干湿两用吸尘器的操作。
在操作使用前,应通读本说明书。
此机器是做干湿两用吸水吸尘机,属于商用吸尘器。
机器结构描述
机器结构描述机器结构描述
机器结构描述
LSU135 结构名称描述
结构名称描述结构名称描述
结构名称描述,
,,
,部件图参考第三
部件图参考第三部件图参考第三
部件图参考第三页
页页
页”F1”图
图图
图.
1.电源线 2.机头手柄 3.电源开关 4.机头总成 5.浮杯 6.吸尘过滤器 7.长耙 8.尘扫 9.吸尘软管
10.吸管座按扭 11.吸管座 12.水桶搭扣 13.延长钢管 14.不锈钢桶 15.桶底座 16.万向轮 17.静电
接地链 18.吸尘耙 19.吸水耙 20.电源线放置挂勾
LSU155/LSU255/LSU275/LSU375/LSU395 结构名称描述
结构名称描述结构名称描述
结构名称描述,
,,
,部件图参考第四
部件图参考第四部件图参考第四
部件图参考第四页
页页
页”F2”
图
图图
图.
1.电源线 2.机头手柄 3.电源开关 4. 浮杯 5.电源线放置挂勾 6.机头总成 7.浮杯架 8.吸尘过滤
器 9.底座扶手 10. 水桶搭扣 11.桶身把手 12.吸管座按扭 13.吸管座 14.后大轮 15.万向轮 16.
水桶底座 17.放污管 18.污水管夹 19.污水管堵头 20.长耙 21.尘扫 22.延长钢管 23.吸尘耙 24.
吸水耙 25.吸尘软管 26.不锈钢桶
操作说明
操作说明操作说明
操作说明
吸尘
吸尘吸尘
吸尘:
::
:吸尘时
吸尘时吸尘时
吸尘时,
,,
,应确保桶内无污水
应确保桶内无污水应确保桶内无污水
应确保桶内无污水,
,,
,尘袋
尘袋尘袋
尘袋和尘隔
和尘隔和尘隔
和尘隔干燥洁净
干燥洁净干燥洁净
干燥洁净,
,,
,吸尘时用带毛条的干
吸尘时用带毛条的干吸尘时用带毛条的干
吸尘时用带毛条的干
式吸尘耙
式吸尘耙式吸尘耙
式吸尘耙。
。。
。
为保证良好过滤效果
使用时若发生吸力下降应清理机器。此时应关闭红色电源开关,拔下电源插头,水桶搭扣,取
下吸尘机机头部分,方可清理尘隔。为防止灰尘泄漏,不可拆卸吸尘机软管,不可将尘隔取出,
此时轻轻拍打吸尘过滤器,待灰尘沉积于桶内后,方可将尘隔过滤器取出,再将桶清理干净,
倒净尘袋内的灰尘。如灰尘过滤器污渍严重,可用水冲洗表面或者用水轻轻揉搓附着的灰尘(清
洗干净后,再晒干使用)再装好机头,锁紧水桶搭扣,插上电源插头,按下红色电源开关,便
可继续使用。若吸尘机吸力仍然较低,请检查吸尘机软管是否有阻塞的现象。
(
((
(吸尘控制和操
吸尘控制和操吸尘控制和操
吸尘控制和操
作
作作
作图片参考第五
图片参考第五图片参考第五
图片参考第五页
页页
页“
““
“F
FF
F3
33
3”
””
”图
图图
图)
))
)
当吸尘耙很难到达和吸尘的地方,如间隙,空间比较狭小的地方等,应更换使用长耙
(
((
(操作图
操作图操作图
操作图
片参考第六
片参考第六片参考第六
片参考第六页
页页
页“
““
“F5
F5F5
F5”
””
”图
图图
图)
))
)
当需要清洁窗帘及床单沙发时,考虑更换使用尘扫
(
((
(操作图片参考第六
操作图片参考第六操作图片参考第六
操作图片参考第六页
页页
页“
““
“F6
F6F6
F6”
””
”图
图图
图)
))
)
吸水
吸水吸水
吸水:
::
:吸水时必须使用
吸水时必须使用吸水时必须使用
吸水时必须使用带橡胶条的
带橡胶条的带橡胶条的
带橡胶条的吸水耙
吸水耙吸水耙
吸水耙。
。。
。
中文
中文中文
中文
干湿两用吸尘器
干湿两用吸尘器干湿两用吸尘器
干湿两用吸尘器

9
干湿两用吸尘吸水机在作吸水使用时,应确保桶内无灰尘。
使用时应取出尘袋和尘隔过滤器,将桶内清理干净,装上机头,锁紧水桶搭扣,插上电源,取
下吸管上吸尘用的干式吸尘耙,再换上吸水用,带橡胶水刮的专用吸水耙,按下红色开开关便
可。如果在吸水过程中,有许多泡沫需要吸收,建议使用尘隔过滤器来吸水以免泡沫进入机头(控
制和操作图片参考第五页“F4”图)
水满时,浮杯会上浮并堵住机头进气口,此时,机器无法正常吸水(吸力基本为零),且噪声突
然变大,应关闭电源开关,将机器推到下水管排水处,打开污水管将桶内污水排出干净。
保修条例
保修条例保修条例
保修条例
威霸系列工业吸尘吸水机产品在使用半年之内(自购买发票之日起计算),如发生非人为因素引
起的故障,经我司检验属实,可免费修理或更换零部件(易损件除外),但以下情况不属保修范
围:
1、 不正确操作造成产品损坏;
2、 自行拆卸更改产品及人为损坏;
3、 产品外观人为损坏变形。
若发生产品质量及操作问题,请及时与我公司分销点售点服务部联系。
维护与保养
维护与保养维护与保养
维护与保养
注意
注意注意
注意:
::
:保养
保养保养
保养、
、、
、维护本机时
维护本机时维护本机时
维护本机时,
,,
,必须拔除电源线插头
必须拔除电源线插头必须拔除电源线插头
必须拔除电源线插头
4、 确保电源线无损伤或损坏。
5、 使用完毕,清理整机,确保桶内无污水,污物或灰尘。
6、 使用完毕,应用力拍打或用毛刷清理、清洁尘袋、灰尘过滤器。
7、 尘袋,灰尘过滤器清洗干净之后,再次使用前必须彻底干燥。
8、 电机碳刷因过度使用而磨损,应进行更换。
9、 使用时必须确保使用电压与机器铭牌标识相符。
10、 如果电源线损坏,为避免危险,必须联系售后服务部进行更换。
警告
警告警告
警告
使用电器设备任何时候都应注意安全,为确保设备安全运行,应对设备进行必要的定期维护与
保养。
疏于维护与保养、未及时更换失效的零件而导致的任何安全事故本公司概不负责。
如下物质切勿使用本吸尘机
有害粉尘、灼热物质(譬如:燃烧的烟头,热灰等,易燃易爆的液体(石油,溶剂,酸碱等腐
蚀液体),易燃易爆的粉尘(譬如:镁或者铝粉等)
干湿两用吸尘器
干湿两用吸尘器干湿两用吸尘器
干湿两用吸尘器
中文
中文中文
中文

10
电源线
电源线电源线
电源线
若外接插座与本机电源线附带的插头不配,必须剪掉本机附带的插头并安装合适的插头,
电源线内电线的色标与下列规则相符:
蓝色电线 中性线(零线)
棕色电线 火线
蓝色线与标示为“N”的端子连接,棕色线与标示为“L”的端子连接机器、
零件或配件若有更改,恕不另行通知。
电路连接图
电路连接图电路连接图
电路连接图:
::
:
电路连接图参考第五页和第六页“Figure7/Figure8/Figure9“。
产品规格参数
产品规格参数产品规格参数
产品规格参数
规格参数表参考第六页”Form1”.
中文
中文中文
中文
干湿两用吸尘器
干湿两用吸尘器干湿两用吸尘器
干湿两用吸尘器

condition.
in a clean and dry
emptied of any liquid before that the container is
must be used. Always ensure
The use of absorbing dirt filter assembly
11
INTRODUCTION
This manual will help you get the most from VIPER wet & dry vacuum cleaner.
Read it thoroughly before operating the machine.
This is a wet and dry vacuum cleaner machine,used for water suction and dust suction on the
floor.It is recommended for commercial use.
MACHINE STRUCTURE DESCRIPTION
LSU135 Structure Description(
((
(Refer to page Three”F1”)
))
)
1.Power Cord 2.Machine Head Handle 3.Power Switch 4.Machine Head Assembly 5.Float
Cup 6.Absorbing Dirt Filter Assembly 7.Crevice Tool 8.Dusting Tool 9.Soft Absorbing Tube
10.Absorb Tube Base Pressing Button 11.Absorb Tube Base 12.Tank Catch 13.Extension Iron
Tube 14.Tank 15.Tank Bottom Base 16.Caster 17.Ground Chain 18.Dry Pick-up Tool 19.Wet
Pick-up Tool 20.Power Cord Storage Hanger
LSU155/LSU255/LSU275/LSU375/LSU395 (Refer to page Four”F2”)
))
)
1.Power Cord 2.Machine Head Handle 3.Power Switch 4. Foam Guard 5.Power Cord Storage
Hanger 6.Machine Head Assembly 7.Float Cup Bracket 8.Absorbing Dust Filter Assembly
9.Bottom Base Handle 10.Tank Catch 11.Tank Handle Lift 12.Absorb Tube Press
Button13.Absorb Tube Base 14.Rear Wheel 15.Caster 16.Tank Bottom Base 17.Drain Hose
18.Drain Hose Clamp 19.Drain Hose Block Head 20.Crevice Tool 21.Dusting Tool
22.Extension Iron Tube 23.Dry Pick-up Tool24.Wet Pick-up Tool 25. Soft Absorb Tube 26.
Tank
Operation Instructions
Dry Operation
using for dry pick-up and that the cloth filter is
When the machine suction force is reducing or machine noise is becoming bigger. Switch off
the machine and remove the power cord plug, loosen tank catch of tank‘s sides, take down
machine head assembly. Shake and clean the absorbing filter assembly .This should be done
while the hose is still connected to avoid dust exiting from the open dirt container connection.
Having shaken the filter, allow a few moments for the dust to settle. Remove absorbing dust
En lish
Wet And Dry Vacuum Cleaner

12
filter assembly from machine and empty container. If the filter’s surface appears to be heavily
contaminated it is advisable to brush the filter material clean with an ordinary soft household
brush. This ensures continued peak performance. Having emptied container, replace
absorbing dust filter assembly, placed machine head assembly and lock tank catch. You are
now ready to start again. If the above ways can’t resolve the lower suction, please check if soft
hose has blocking
(Dry Control and Operation can be referred Page Five”F3”)
Use crevice tool to operate if dry pick-up tool is difficult to reach and operate , eg.gap
(Control
and Operation can be referred Page Six”F5”)
Use Dusting tooling if clean curtain
(Control and Operation can be referred Page
Six”F6”)
Wet Operation
Assure to empty any dry dust before using the machine for wet pick-up.
Always be sure to use wet pick-up tool with rubber blades.
If there is much water bubble to absorb, suggest to use Absorbing Dirt Filter Assembly for wet
pick-up, which will prevent water bubble into machine head.
(Wet Control and Operation
can be referred Page Five”F4”)
When the machine water is maximun or tank is full, machine has no suction and noise become
bigger, Switch off the power cord. Remove the power head and float valve assembly.
Pull the machine to sewer and empty the liquid from the container.
MAINTENANCE
Machine can provide free of repairing and replacing parts if purchasing time is within half a
year and non-fault beyond control.
If have product quality problem, please contact the nearest authorized service center.
Viper don’t consider free of repairing and replacing parts if the below cause:
Improper operation make machine be fault.
Replace parts and cause fault by sabotage.
Machine structure is damaged by sabotage.
Attention!!! Before performing any cleaning and maintenance on
the vacuum cleaner, always disconnect the plug from the source of electricity.
Make sure that the cable is not cut or damaged.
Wet And Dry Vacuum Cleaner
English

13
Clean the tank, do not let it stand for a long time with dust or dirty water.
The cloth dust bag can be washed and must be dried again before re-use
The motor is built for maintenance-free operation and does not need any particular service.
The carbon brushes may need to be replaced due to normal wear and tear caused by using
the vacuum cleaner over time, and they can be replaced only by our authorized service
centers.
WARNING
As with all electrical equipment care and attention must be exercised at all times during its use,
in addition to ensuring that routing and preventative maintenance is carried out periodically in
order to ensure its safe operation.
Failure to carry out maintenance as necessary, including the replacement of parts to the
correct standard could render this equipment unsafe and he manufacturer can accept no
responsibility or liability in this respect.
WARNING
The following material must not be picked up by the vacuum cleaner:
hazardous dust, hot materials(burning cigarettes, hot ash ,etc.), flammable,
explosive, aggressive liquids(e.g. Petrol, solvents, acids, alkalis ,etc.), flammable explosive
dust(e.g. magnesium or aluminum dust, etc.)
IMPORTANT:
::
:If the socket outlets are not suitable for the plug
supplied with the appliance. It should be cut off and an appropriate plug fitted. The wires in this
main lead are colored in accordance with the following code.
Blue-Neutral Brown-Live.
As the colors of the wires in the mains lead of this appliance may not correspond with the
colored markings identifying the terminals of the plug proceed as follows. The wire, which is
colored blue, must be connected to the terminal, which is marked which the letter N or colored
black. The Wire, which is colored brown, must be connected to the terminal, which is marked
with the letter L or colored red.
The manufacturer reserves the right to modify the machine and the included accessories
without prior notice.
Wiring diagram refer to page6 and page7”Figure7/figure8/Figure9.
Product Specification Parameter
Product Specification can be referred to Page 7 “Form1”.
English
Wet And
Dry Vacuum Cleaner

14
Carried Standard: QB1562-1992
VIPER INDUSTRIAL PRODUCTS VIPER CLEANING EQUIPMENT CO.,LTD
P.O.BOX 104 HAMILTON, MI 49419 LIANG BIAN, LIAO BU, DONG GUAN,
(866) 418-4737 GUANG DONG, CHINA
(866) 41-VIPER TEL:(0769) 83283988
FAX:(0769) 83280104
Other manuals for LSU135
3
This manual suits for next models
10
Table of contents
Other Viper Vacuum Cleaner manuals

Viper
Viper GTR1500-EU User manual

Viper
Viper SHOVELNOSE SN18WD User manual

Viper
Viper TP20WD User manual

Viper
Viper GV35 User manual

Viper
Viper MAMBA Series User manual

Viper
Viper CAR275 User manual

Viper
Viper SN18WD-U User manual

Viper
Viper AS4325B User manual

Viper
Viper Rocket TS13 II HEPA User manual

Viper
Viper DSU8 User manual

Viper
Viper BARRACUDA User manual

Viper
Viper GVD10-EU User manual

Viper
Viper BARRACUDA CUDA26 User manual

Viper
Viper Shovelnose User manual

Viper
Viper CAR275 User manual

Viper
Viper MAMBA MB53CV User manual

Viper
Viper ECO15 User manual

Viper
Viper 75L User manual

Viper
Viper LSU135 User manual
Viper
Viper WOLF130 User manual