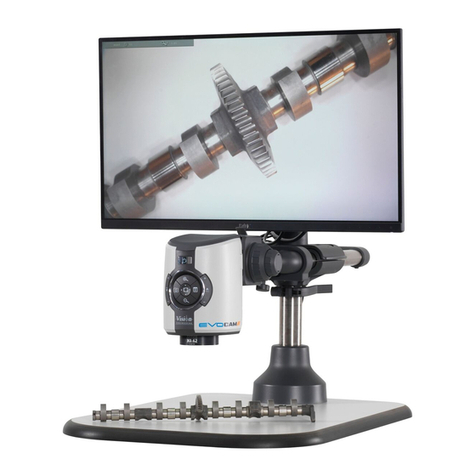
Vision Engineering Mantis User manual

User Guide
Compact with Universal Stand


3
www.visioneng.com/support Mantis Compact with Universal Stand - User Guide
English
Table of Contents
English 4 - 6
Français 7 - 9
Deutsch 10 - 12
Italiano 13 - 15
Español 16 - 18
日本語 19 - 21
中文 22 - 24
한국어 25 - 27
Русский 28 - 30

4 Mantis Compact with Universal Stand - User Guide www.visioneng.com/support
Packing Contents
Assembly
1Secure the universal mount to the work
surface using the G-clamp provided or by
using appropriate screws located in the
holes of the Mount.
2Place the universal arm on top of the
universal mount and lower it on to the
spigot until it is fully mounted.
3Loosen the upper retaining bolt in the
universal arm. Remove the lower retaining
bolt . Carefully place the locating hook of
the Mantis viewing head over the upper
retaining bolt of the universal arm.
Replace the lower retaining bolt , ensuring that the
bolt passes through the lower locating mount of the
Mantis viewing head.
Tighten the upper and lower retaining bolts then re-seat the universal arm
rubber gaiter .
4Remove the red transit plug from the underneath of the viewing head.
5Fit and lock the chosen objective lens into the objective seat.
6Ensuring the power adapter is suitable for your supply voltage, connect the power adapter plug to a
suitable power outlet and its output connector to the base of the universal arm.
7Connect the output lead at the top of the universal arm to the rear of the viewing head. Do not attempt to connect
the power adapter directly to the Viewing Head
Universal mount
G-clamp
Counter balanced boom stand
Viewing head
Power adapter
Objective lens
English
Desiccant Replacement
The desiccant removes excess moisture from the optical
head.
Disconnect the power supply from the bottom of
the head.
Remove the screw securing the desiccant cover
and lift the cover off.
Replace the desiccant.
LED Arrays
Remove the desiccant cover .
Remove the two crosshead screws that secure the
LED array and remove the array complete with
filters .
Routine Maintenance

5
www.visioneng.com/support Mantis Compact with Universal Stand - User Guide
Overview
Turn on the power switch and place the subject be-
neath the Mantis viewing head.
Focus
The aim of the universal stand products is that the height of
the instrument is set to a comfortable viewing position and the
subject is then lifted (normally by hand) into focus. Thus maintaining
optimum ergonomics.
To set the height of the instrument, ensure the friction clamp is
loosened then move the viewing head up or down until the required
viewing position is obtained and tighten the friction clamp.
Eye Spacing
Adjust the eye spacing control to obtain a comfortable stereo
view.
Note: Adjusting the eye spacing is very important for viewing
comfort and must be adjusted for each Mantis user.
Changing Lenses
To change the objective lens, twist and remove lens . Store the lens in the supplied container.
Fit and lock the chosen objective lens into the objective seat.
Head Counterbalance
When a lens has been changed, it may be necessary to adjust the head counterbalance. Adjust the counterbalance
screw (clockwise for lighter lenses or counter-clockwise for heavier ones) until the viewing head does not drift up or
down when unsupported.
Ergonomic Viewing
An ergonomic posture will unsure that users fully benefit from the advantages provided by the Mantis optical technology.
In setting up your Mantis, firstly arrange your workspace, paying attention to the heights of the chair and table.
When seated with a straight back, your eyes should be comfortably lined up with the Mantis viewing head. Forearms
should be supported by the work surface.
Operation
English
General Care
When not in use, cover your Mantis with the dust cover provided.
Remove dust with a soft brush or cleaning cloth.
The Mantis lenses should be cleaned with a lens cleaning cloth.
Keep accessories in a dust-free environment when not in use.
Service
Service and repair work must only be carried out by service engineers authorised by Vision Engineering.
This product is warranted to be free from defects in material and workmanship for a period of one year from the date of invoice to the original purchaser.
If during the warranty period the product is found to be defective, it will be repaired or replaced at facilities of Vision Engineering or elsewhere, all at the op-
tion of Vision Engineering. However, Vision Engineering reserves the right to refund the purchase price if it is unable to provide replacement, and repair is not
commercially practicable or cannot be timely made. Parts not of Vision Engineering manufacture carry only the warranty of their manufacturer. Expendable
components such as fuses carry no warranty.
This warranty does not cover damage in transit, damage caused by misuse, neglect, or carelessness, or damage resulting from either improper servicing or
modification by other than Vision Engineering approved service personnel. Further, this warranty does not cover any routine maintenance work on the product
described in the user guide or any minor maintenance work which is reasonably expected to be performed by the purchaser.
No responsibility is assumed for unsatisfactory operating performance due to environmental conditions such as humidity, dust, corrosive chemicals, deposition
of oil or other foreign matter, spillage, or other conditions beyond the control of Vision Engineering.
Except as stated herein, Vision Engineering makes no other warranties, express or implied by law, whether for resale, fitness for a particular purpose or other-
wise. Further, Vision Engineering shall not under any circumstances be liable for incidental, consequential or other damages.
Warranty

6 Mantis Compact with Universal Stand - User Guide www.visioneng.com/support
English
Mantis Compact Product Family
Objective Lenses Working Distance Field of View
x4 96mm 27.5mm
x6 73mm 19.2mm
Objective Lenses
Lighting Data
LUX intensity measured at subject plane with colour correction filters.
20 LEDs 9,400 LUX 10,000 hours
Power Supply
9V DC external plug transformer
Accessories
Lens protection caps
Floating Stage (for each bench stand)
Dust Cover
Replacement LED Array
Specification

7
www.visioneng.com/support Mantis Compact avec statif universel – Guide d’utilisation
Français
Contenu des colis
Montage
1Fixer l’embase sur le plan de travail avec le serre-joint fourni ou en la vissant au travers des trous réservés à cet usage.
2Placer le bras articulé sur l’embase en l’enfonçant au maximum sur l’axe.
3Desserrer le boulon supérieur sur le bras articulé. Enlever le boulon du bas . Placer délicatement le crochet de
fixation de la tête Mantis sur le boulon
supérieur du bras articulé.
Replacer le boulon du bas , en
s’assurant qu’il passé dans le trou prévu
à cet effet dans la tête Mantis.
Serrer le boulon du haut et mettre en
place le manchon en caoutchouc .
4Retirer la pièce rouge destinée au transport sous la
tête.
5Insérer et verrouiller l’objectif choisi sous la
tête.
6S’assurer que l’alimentation correspond à la
tension secteur, la brancher à la prise
murale et dans le connecteur situé sur la base du bras
articulé.
7Connecter le cable situé en haut du bras à l’arrière de la tête. Ne
jamais tenter de connecter l’alimentation secteur directement sur la
tête.
Embase
Serre joint
Bras articulé
Tête de projection
Alimentation secteur
Objectif
Remplacement du dessiccant
Le dessiccant enlève l’excès d’humidité de la tête.
Déconnecter l’alimentation de la tête.
Retirer la vis du cache dessiccant et ôter le cou-
vercle. .
Remplacer le dessiccant.
LED Arrays
Retirer le cache du dessiccant .
Remove the two crosshead screws that secure the
Retirer les 2 vis cruciformes qui tiennent le support
des LED et retirer l’ensemble avec les filtres .
Remonter dans l’ordre inverse.
Maintenance de routine

8 Mantis Compact avec statif universel – Guide d’utilisation www.visioneng.com/support
Français
Général
Presser l’interrupteur de puissance et placer un sujet
sous la tête.
Mise au point
Le but du statif universel (bras articulé) est d’être réglé
confortablement à la bonne hauteur des yeux et ensuite de prendre
le sujet à la main et de le focaliser, offrant ainsi une ergonomie
optimale.
Pour régler la hauteur de l’instrument, s’assurer que la vis de
friction est desserrée, puis ajuster la tête en bas ou en haut
jusqu’à la bonne hauteur, puis resserrer la vis.
Ecartement des yeux
Ajuster le bouton d’écartement des yeux pour obtenir une vision
stéréoscopique confortable.
Note: Ajuster l’écartement des yeux est très important pour le
confort de vision et doit être fait pour chaque utilisateur.
Changement d’objectif
Pour changer d’objectif, le tourner et le retirer . Le replacer dans sa boite.
Enfoncer et tourner le nouvel objectif dans son réceptacle.
Contrepoids de la tête
Quand on change un objectif il peut être nécessaire de régler le contrepoids. Ajuster la vis (dans le sens horaire pour un
objectif léger et vice versa) jusqu’à ce que la tête reste immobile lorsqu’elle n’est pas tenue.
Vision ergonomique
Une posture ergonomique est nécessaire pour tirer avantage de la technologie optique de la Mantis.
En réglant votre Mantis porter attention à l’espace de travail, en particulier à la hauteur de la chaise et de la table.
En étant assis avec le dos droit, les yeux doivent être à hauteur de la tête Mantis et les avant bras reposer sur la table.
Utilisation
Ce produit est garanti exempt de défauts dans le matériel et la fabrication pendant une période d'un an de la date de la facture à l'acheteur final.
Si pendant la période de garantie le produit s'avère défectueux, il sera réparé ou remplacé chez Vision Engineering ou ailleurs, au choix de Vision Engineering.
Cependant, Vision Engineering se réserve le droit de rembourser le prix d'achat s'il ne peut pas fournir le remplacement, si ce n'est pas commercialement
faisable ou si le produit ne peut être dépanné. Les parties qui ne sont pas fabriquées par Vision Engineering sont garantis par leur fabricant. Les composants
consommables tels que des fusibles ne portent aucune garantie.
Cette garantie ne couvre pas des dommages en transit, des dommages provoqués par l'abus, la négligence, ou l'inattention, ou des dommages résultant de
l'entretien inexact ou de la modification par d’autre que le personnel de service approuvé par Vision Engineering. De plus, cette garantie ne couvre aucun
travail d'entretien courant sur le produit décrit dans le guide d'utilisateur ou aucun travail mineur d'entretien qui est raisonnablement attendu être effectué par
l'acheteur.
Aucune responsabilité n'est assumée d’un fonctionnement insuffisant du aux conditions environnementales telles que l'humidité, la poussière, les produits
chimiques corrosifs, le dépôt d'huile ou d'autres corps étrangers, le débordement, ou d'autres conditions indépendantes de la volonté de Vision Engineering.
Excepté comme indiqué ci-dessus, Vision Engineering n’appliquera aucune autre garantie de quel ordre que ce soit. De plus, Vision Engineering ne sera, en
aucune circonstance, rendu responsable de dommages fortuits, consécutifs ou autres.
Garantie
Conseils
Quand la Mantis n’est pas utilisée elle doit être recouverte d’une housse.
Enlever la poussière avec un brosse douce ou un chiffon propre.
Les objectifs doivent être nettoyés avec un nettoyant pour verres de lunettes.
Garder les accessoires à l’abri de la lumière.
Dépannage
Le dépannage et les réparations doivent être effectués par du personnel agréé Vision Engineering.

9
www.visioneng.com/support Mantis Compact avec statif universel – Guide d’utilisation
Français
Famille de produit Mantis Compact
Objectifs Distance de travail Champ visuel
x4 96mm 27,5mm
x6 73mm 19,2mm
Objectifs
Spécifications D’éclairage
Intensité lumineuse mesurée sur un sujet plan avec filtres correcteurs
20 LEDs 9,400 LUX 10,000 heures
Alimentation
Adaptateur secteur externe 9V DC
Accessoires
Verres de protection des objectifs
Platine flottante (pour statif de table)
Housse de protection
Ensemble de LED de remplacement
Spécifications

10 Mantis Compact mit Universalständer - User Guide www.visioneng.com/support
Deutsch
Packungsinhalt
Aufbauanleitung
1Die Universalhalterung wird am Arbeitstisch
befestigt, entweder durch Klemmung der
mitgelieferten Montageklemme, oder mit
drei entsprechenden Schrauben
(Schrauben nicht im Lieferumfang).
2Die Unterseite des Universalständers wird
mit der Universalhalterung in Deckung
gebracht und über den Führungsbolzen der
Halterung geschoben bis der Ständer plan aufliegt.
3Den oberen Haltebolzen im
Universalständer lösen. Dann den darunter
liegenden Haltebolzen entfernen. Führen
Sie nun den Fixierhacken des Mantis
Projektionskopfes vorsichtig über den oberen
Haltebolzen des Universalständers.
Fixieren Sie nun den Projektionskopf am
Universalständer durch Einschrauben des Haltbolzens
, welcher durch die untere Bohrung der Mantis
Kopfhalterung zu führen ist.
Beide Haltebolzen festziehen und Gummischutz des Universalständers am
Befestigungssteg der Mantis Kopfhalterung überstülpen.
4Rote Transportkappe der Objektivaufnahme an der Unterseite des
Projektionskopfes entfernen.
5Drehen Sie das Objektiv mit einer viertel Umdrehung gegen den Uhrzeigersinn in die
Objektivaufnahme.
6Vergewissern Sie sich, dass Sie das passende Steckernetzteil mit entsprechnender Netzspannung vorfinden. Netzteil
anschließen und Klinkenstecker in die dafür vorgesehene Buchse am Universalständer fügen.
7Verbinden Sie das Niederspannungskabel am Universalständer mit der Eingangsbuchse an der Rückseite des
Projektionskopfes. Verbinden Sie auf keinen Fall das Steckernetzteil direkt mit dem Projektionskopf.
Universalhalterung
Montageklemme
Universalständer
Projektionskopf
Steckernetzteil
Objektiv
Wartung
Luftfeuchtigkeitskontrolle
Der Projektionskopf ist mit einer
Luftentfeuchtungspatrone ausgerüstet. Bei Verfärbung
der Patrone, diese austauschen.
Trennen Sie das Niederspannungskabel vom
Projektionskopf.
Lösen Sie die Schraube der Entfeuchtungsabdeckung
und entfernen Sie die Abdeckung.
Ersetzen Sie die Luftentfeuchtungspatrone.
LED-Beleuchtung
Entfernen Sie die Luftentfeuchtungsabdeckung .
Lösen Sie die zwei Kreuzschlitzschrauben der
Beleuchtungseinheit und entfernen Sie die
gesamte Einheit inklusive Filter .
Ersetzen Sie die LED-Einheit.

11
www.visioneng.com/support Mantis Compact mit Universalständer - User Guide
Deutsch
Betrachtung eines Objektes
Betätigen Sie den Netzschalter und platzieren Sie das
zu betrachtende Objekt unterhalb des Objektivs.
Fokussierung
Der richtige Fokuspunkt wird frei Hand durch Auf-/
Abbewegung des Objektes, oder bei aufgelegtem Objekt durch
Heben und Senken des Projektionskopfes, gefunden.
Durch Lösen oder festigen des Klemmhebels , besteht die
Möglichkeit den Universalständer in der Höhe zu arretieren.
Justage des Augenabstandes
Über den Drehregler wird die Optik auf den Augenabstand des
Betrachters eingestellt, bis Sie ein optimales 3-dimensionales Stereobild
erhalten.
Anmerkung: Die Justage des Augenabstandes ist entscheidend
für komfortables Betrachten und muss von jedem Benutzer
durchgeführt werden.
Objektivwechsel
Durch eine kurze Drehung wechseln Sie das Objektiv . Objektiv in mitgelieferter Dose
aufbewahren.
Befestigen Sie das gewählte Objektiv wieder durch eine kurze Drehung in die Objektivaufnahme.
Kopf-Ständer Gewichtsausgleich
In Ausnahmefällen ist es notwendig die Federspannung des Universalständers zu justieren. Drehen Sie die Schraube
unterhalb der Kopfaufnahme, (im Uhrzeigersinn für weniger Gewicht oder entgegen für mehr Gewicht) sodass der
Projektionskopf nicht selbstständig auf- oder abgleitet.
Ergonomische Betrachtung
Eine ergonomische Körperhaltung ist die Voraussetzung, um Ermüdung und Verspannungen zu verhindern. Mantis bietet
diese Voraussetzungen durch seine okularlose optische Technologie.
Um alle ergonomischen Vorzüge des Mantis Betrachtungssystems nutzen zu können, richten Sie Ihre Sitzposition so ein,
dass Sie in aufrechter Körperhaltung komfortabel in den Projektionskopf blicken.
Bedienung
Pflegehinweise
Decken Sie das Gerät, falls nicht im Gebrauch, mit einer Staubschutzhülle ab.
Entfernen Sie Staub mit einem weichen Tuch.
Objektive sollten mit entsprechenden Linsenputztüchern gereinigt werden.
Zubehör in staubfreier Umgebung, oder Behältern aufbewahren.
Service
Service und Reparaturen werden durch die Vision Engineering Serviceabteilung durchgeführt.
Vision Engineering übernimmt für die gelieferte Ware eine einjährige Garantie auf Material und Fabrikation, beginnend mit dem Tag der Rechnungsstellung an
den Käufer.
Sollte während der Garantiezeit ein Fehler auftreten, wird dieser nach freier Wahl von Vision Engineering im Herstellwerk oder an einem anderen geeigneten
Ort beseitigt. Vision Engineering behält sich das Recht vor den Kaufpreis zurück zu erstatten, wenn eine Ersatzlieferung nicht möglich oder eine Reparatur auf
kommerzieller Basis in angemessener Zeit nicht durchführbar ist. Teile, die nicht von Vision Engineering hergestellt sind unterliegen den Garantiebestimmungen
des Fremdherstellers. Verschleißteile, wie z.B. Lampen oder Sicherungen sind von der Garantie ausgenommen.
Von Vision Engineering wird keine Haftung übernommen für Transportschäden, Schäden die durch Missbrauch, Achtlosigkeit oder Nachlässigkeit entstehen,
sowie für Schäden die durch unsachgemäße Wartung oder Veränderungen durch nicht von Vision Engineering autorisiertes Wartungspersonal entstehen.
Ferner sind alle routinemäßigen Instandhaltungsarbeiten, beschrieben in der Bedienungsanleitung, sowie alle anderen geringfügigen, rechtmäßig zumutbaren
Instandhaltungsarbeiten durch den Käufer, von der Garantie ausgenommen.
Vision Engineering übernimmt keine Verantwortung für fehlerhafte Funktionen der Geräte, die auf Umwelteinflüsse wie Feuchtigkeit, Staub, ätzende
Chemikalien, Ablagerung von Öl oder anderen Fremdstoffen zurückzuführen sind und sich der Kontrolle von Vision Engineering entziehen.
Mit Ausnahme der beschriebenen Garantiebestimmungen, übernimmt Vision Engineering keine andere ausdrückliche oder implizierte gesetzliche Garantie,
weder für Verkäuflichkeit oder Eignung für einen besonderen Zweck. Ferner ist Vision Engineering unter keinen Umständen haftpflichtig für eventuelle
Folgeschäden oder andere unvorhersehbare Schäden am Produkt oder Personen.
Garantie

12 Mantis Compact mit Universalständer - User Guide www.visioneng.com/support
Deutsch
Objektive Arbeitsabstand Bildausschnitt
x4 96mm 27,5mm
x6 73mm 19,2mm
Objektive
Beleuchtung
Beleuchtungsstärke (LUX) gemessen auf der Objektebene mit
farbkorrigiertem Filter.
20 LEDs 9.400 LUX 10.000 Std.
Netzversorgung
Externes Steckernetzteil 9V DC
Zubehör
Schutzgläser für Objektive
Verschiebetisch (für Tischstativ)
Staubschutzhülle
LED Ersatzeinheit
Technische Daten
Produktfamilie Mantis Compact

13
www.visioneng.com/support Mantis Compact con Stativo Universal – Manuale d’uso
Italiano
Contenuto confezione
Assemblaggio
1Fissare la base universal al banco di lavoro
usando il morsetto a G oppure utilizzando viti
appropriate da posizionare nei fori della base.
2Posizionare lo Stativo Universal sulla parte
alta della base universal quindi inserirlo sul
perno fino in fondo.
3Allentare il perno di fissaggio superiore nello
Stativo Universal. Rimuovere il perno di
fissaggio inferiore .
Posizionare con cura il gancio di fermo della
testa sul perno di fissaggio superiore dello
Stativo Universal.
Riposizionare il perno di fissaggio inferiore ,
assicurandosi che il perno attraversi il foro inferiore di
fissaggio nella Testa Mantis.
Stringere il perno di fissaggio superiore ed inferiore, quindi riposizionare la
guaina in gomma dello Stativo Universal .
4Rimuovere il tappo provvisorio rosso da sotto la Testa.
5Inserire e bloccare l’obiettivo nel suo alloggiamento.
6Assicurarsi che l’alimentatore corrisponda alla vostra tensione elettrica, collegare l’alimentatore ad
un’adeguata presa di corrente ed il suo connettore alla base dello Stativo Universal.
7Collegare il connettore per l’alimentazione sulla cima dello Stativo Universal al retro della Testa. Non tentare di
collegare l’alimentatore direttamente alla testa.
Base universal
Morsetto a G
Stativo Universal
Testa
Alimentatore esterno
Obiettivo
Sostituzione Essiccante
L’essiccante rimuove l’eccesso d’umidità dalla testa ottica.
Scollegare l’alimentazione dalla base della Testa.
Rimuovere la vite che blocca il coperchio dell’essic-
cante e sollevarlo per rimuoverlo.
Sostituire l’essiccante.
Blocco LED
Rimuovere il coperchio dell’essiccante .
Rimuovere le due viti a stella che fermano il blocco
LED e rimuovere il blocco completo di filtri .
Per riassemblare l’unità eseguire questa procedura
al contrario .
Manutenzione ordinaria

14 Mantis Compact con Stativo Universal – Manuale d’uso www.visioneng.com/support
Italiano
Veduta generale
Accendere l’interruttore e posizionare il soggetto
sotto la Testa Mantis.
Messa a Fuoco
Lo scopo dello Stativo Universal è regolare l’altezza dello stru-
mento in una posizione di osservazione confortevole e quindi solle-
vare il soggetto (in genere manualmente) per effettuare la messa a
fuoco, mantenendo così l’ergonomia ottimale.
Per regolare l’altezza dello strumento, assicurarsi che la leva per la
regolazione sia allentata quindi alzare o abbassare la Testa fino al
raggiungimento della posizione di ispezione richiesta e stringere
nuovamente la leva per la regolazione.
Distanza interpupillare
Sistemare il dispositivo di regolazione della distanza interpupil-
lare per ottenere una visione stereo confortevole.
Nota: Regolare la distanza interpupillare è molto importante per avere una buona visione e deve
essere regolata per ogni utilizzatore del Mantis.
Sostituzione Obiettivo
Per cambiare obiettivo, svitarlo e rimuoverlo Riporre la lente nell’apposito contenitore fornito.
Inserire ed avvitare l’obiettivo nel suo alloggiamento.
Precaricamento della Testa
Quando viene sostituito l’obiettivo, può essere necessario regolare il precarico della Testa. Regolare la vite di precarico (in
senso orario per le lenti più leggere o in senso anti-orario per quelle più pesanti) fino a che la Testa non si sposti lenta-
mente verso l’alto e verso il basso, se non sostenuta.
Visione ergonomica
Una posizione ergonomica garantirà all’utilizzatore di sfruttare a pieno i benefici forniti dalla tecnologia ottica del Mantis.
Nell’installare il vostro Mantis, predisponete prima l’area di lavoro, ponendo particolare attenzione all’altezza della sedia e
del tavolo.
Stando seduti con la schiena eretta i vostri occhi devono essere comodamente allineati con la Testa Mantis. L’avambraccio
deve poggiare sul piano di lavoro.
Funzionamento
Cura Generale
Quando non utilizzato, coprire il Mantis con la copertina anti-polvere .
Rimuovere la polvere con un pennello morbido o un panno.
Le lenti Mantis possono essere pulite con un apposito panno pulisci lenti.
Quando non utilizzati, tenere gli accessori in un ambiente privo di polvere.
Assistenza
Assistenza e riparazioni devono essere eseguite esclusivamente da personale tecnico autorizzato da Vision Engineering.
Questo prodotto è garantito da eventuali difetti di materiali o fabbricazione per un anno dalla data di acquisto.
Se, durante il periodo di garanzia, il prodotto dovesse risultare difettoso, verrà riparato o sostituito nei laboratori Vision Engineering altrove, a discrezione di
Vision Engineering. In ogni caso, Vision Engineering si riserva il diritto di rimborsare il costo dell'acquisto se non sarà in grado di sostituirlo, se la riparazione non
dovesse risultare fattibile per motivi commerciali o se il prodotto non fosse riparabile in modo tempestivo. I particolari non prodotti da Vision Engineering sono
coperti soltanto dalla garanzia della casa produttrice. I particolari di consumo (come lampade e fusibili) non sono coperti da garanzia.
La garanzia non copre i danni provocati dal trasporto, da un uso improprio o errato, da negligenza, da danni causati da modifiche o interventi effettuati da
personale addetto all'assistenza non autorizzato da Visione Engineering. Inoltre, la presente garanzia non copre la manutenzione di routine descritta nel manu-
ale d'uso né interventi di manutenzione che sono abitualmente compito dell'acquirente.
Vision Engineering declina ogni responsabilità in caso di danni riconducibili a condizioni ambientali quali umidità, polvere, prodotti chimici corrosivi, deposito di
olii o altre sostanze estranee, perdite o altre condizioni che esulano dal controllo di Vision Engineering.
Salvo che nei casi summenzionati, Vision Engineering non rilascia altre garanzie, espresse o implicite per legge, riguardo a rivendita, idoneità a particolari utilizzi
o altro. Inoltre, Vision Engineering declina ogni responsabilità per danni accidentali, incidentali o altro.
Garanzia

15
www.visioneng.com/support Mantis Compact con Stativo Universal – Manuale d’uso
Italiano
Obiettivi Distanza di lavoro Campo visivo
x4 96mm 27,5mm
x6 73mm 19,2mm
Obiettivi
Informazioni illuminazione
Intensità in lux misurata su soggetto piano con filtri di correzione del colore
20 LEDs 9.400 LUX 10.000 ore
Tensione elettrica
Alimentatore esterno 9V DC
Accessori
Tappi proteggi lente
Tavolino mobile (per stativo a colonna)
Copertina anti-polvere
Blocco LED di ricambio
Dati Tecnici
Mantis Compact – Gruppo Prodotto

16 Guía usuario para Mantis Compact con plataforma universal www.visioneng.com/support
Español
Contenidos
Montaje
1Fijar el acoplamiento universal a la superficie
de trabajo mediante la abrazadera tipo G-
clamp o mediante los tornillos apropiados
en los agujeros de la base.
2Coloque el brazo universal en la parte
superior del acoplamiento universal y
deslícelo por la barra hasta que encaje
correctamente.
3Suelte el tornillo superior del brazo
universal y extraiga el tornillo inferior .
Coloque con cuidado el gancho del cabezal
de la Mantis sobre el tornillo superior del
brazo universal.
Reemplace el tornillo inferior , asegurándose de que
el tornillo pase por la parte inferior del cabezal Mantis.
Apriete los tornillos superior e inferior y vuelva a colocar el fuelle de goma del
brazo universal .
4Retire el enchufe rojo debajo del cabezal.
5Coloque el objetivo elegido en el lugar correspondiente.
6Asegúrese de que el adaptador es compatible con la fuente de energia, conecte el enchufe a la fuente y
al brazo universal.
7Conecte el cable de la parte superior del brazo universal a la parte trasera del cabezal. No intente conectar la fuente
de alimentación directamente al Cabezal de vision.
Acoplamiento universal
Abrazadera G
Soporte con plataforma de contrapesado
Cabezal de visión
Cargador
Lente Objetivo
Cambio de desecante
El desecante previene del exceso de humedad en el
cabezal óptico.
Desconecte la fuente de energía desde el
interruptor del cabezal.
Suelte los tornillos de seguridad de la funda del
desecante y quite la funda.
Cambie el cartucho desecante .
Batería de leds
Sáquelo del envoltorio .
Suelte los tornillos de seguridad que protegen la
batería de leds y saque el juego complete con los
filtros .
Para volver a montarla, proceda en modo inverso a este proceso.
Mantenimiento rutinario

17
www.visioneng.com/support Guía usuario para Mantis Compact con plataforma universal
Español
Generalidades
Conecte el interruptor principal y coloque el objeto
debajo del Cabezal de visión Mantis.
Enfoque
El objetivo de la base universal es conseguir una altura
cómoda para la utilización del instrumento y la posibilidad de elevar
el objeto (habitualmente con la mano) para el enfoque. Este hecho
optimiza la ergonomía.
Para ajustar la altura del instrumento, asegúrese de que el enganche
de seguridad está suelto, a continuación mueva el cabezal hacia
arriba o hacia abajo hasta alcanzar la posición optima y vuelva a apretar el
enganche.
Distancia interpupilar
Ajuste la distancia interpupilar o entre ojos para obtener una
posición cómoda de trabajo.
Aviso: Este ajuste es muy importante para poder trabajar con comodidad y debe ser modificado
para cada usuario de la Mantis.
Cambio de la lente
Para cambiar la lente, girar y sacar la lente . Guardar la lente en su estuche original.
Colocar la lente elegida en el objetivo.
Contrapeso del cabezal
Al efectuar el cambio de una lente, puede ser necesario contrapesar el balanceo del cabezal. Ajuste el tornillo del balanceo
(en el sentido de las agujas del reloj para lentes ligeras y en el sentido contrario para las mas pesadas) hasta que el cabezal no
suba ni baje.
Visión Ergonómica
Una postura ergonómica ofrecerá al usuario beneficiarse de todas las ventajas que ofrece la tecnología óptica de Mantis.
A la hora de colocar su Mantis, lo primero es elegir el lugar de trabajo, teniendo en cuenta la altura de la silla y la mesa.
Cuando esté sentado con la espalda recta, sus ojos deberían estar a la altura del cabezal Mantis. Los antebrazos deberían
apoyarse en la superficie de trabajo .
Operación
Cuidados generales
Cuando no lo esté utilizando, cubra su mantis con la funda protectora.
Quite el polvo con un cepillo suave o un paño.
Las lentes de Mantis deben limpiarse con un paño para limpiar lentes.
Mantenga los accesorios en fundas protectoras del polvo cuando no los esté utilizando.
Servicio
El servicio y la reparación de Mantis solo podrá realizarse por personal autorizado por Vision Engineering.
Este producto tiene una garantía de un año desde la fecha de compra en defectos de material y de fabricación.
Si durante el periodo de garantía un producto es defectuoso, este será reparado o cambiado en una planta de Vision Engineering o en otro lugar, a elección de
Vision Engineering. De hecho, Vision Engineering se reserva el derecho de rembolsar el dinero si no puede reemplazarlo, y repararlo no es comercialmente
viable o temporalmente posible. Las partes que no son de Vision Engineering dependen de la garantía de su fabricante. Los componentes perecederos como
los fusibles no tienen garantía.
Esta garantía no cubre daños ocasionados en el transporte, daños por uso incorrecto, negligencia o falta de cuidado, o daños ocasionados por servicio in-
apropiado o modificaciones por personas ajenas al personal autorizado por Vision Engineering. Además esta garantía no cubre los trabajos rutinarios de man-
tenimiento del producto descritos en el libro de instrucciones o cualquier trabajo de mantenimiento inferior que corresponde al comprador.
No se asume ninguna responsabilidad por funcionamiento insatisfactorio o condiciones medioambientales como humedad, polvo, productos químicos corro-
sivos, derrames de aceite u otros líquidos, o condiciones parecidas fuera del control de Vision Engineering.
A excepción de lo que aparece aquí, Vision Engineering no garantiza otros aspectos expresados o implícitos por ley, como la reventa, el mantenimiento particu-
lar u otros aspectos. Además, Vision Engineering bajo ninguna circunstancia se responsabiliza de incidentes, consecuencias u otros daños .
Garantía

18 Guía usuario para Mantis Compact con plataforma universal www.visioneng.com/support
Español
Lentes objetivo Distancia de trabajo Campo de visión
x4 96mm 27,5mm
x6 73mm 19,2mm
Lentes
Datos alumbrado
Intensidad Lux medida en el plano con filtros correctores del color
20 LEDs 9,400 LUX 10,000 horas
Fuente alimentación
Transformador externo 9V DC
Accesorios
Protectores para lentes
Mesa flotante (para soporte banco)
Protección contra el polvo
Batería de leds de recambio
Datos técnicos
Familia de producto Mantis Compact

19
www.visioneng.com/support マンティス コンパクト ユニバーサルスタンド - ユーザーガイド
日本語
構成
組立
1ユニバーサル マウントをGクランプ又は3
本のネジで作業台に固定します。
2カウンターバランス スタンドをユニ
バーサル マウントに挿し込みます。
3カウンターバランス スタンドの上部取付
けボルトをゆるめます。下部取付けボルトを
外します。ビューイング ヘッド後部のフッ
クをカウンターバランス スタンドの上
部取付けボルトに掛けます。カウンターバ
ランス スタンドの下部取付けボルトを
ビューイング ヘッド後部下側の穴に通しま
す。上部及び下部のボルトを締め、ゴムカバーを
かけます
4ビューイング ヘッド下部のレンズキャップを外します。
5対物レンズを選択し、静かに挿し込んで回し、ロックします。
6ACアダプタケーブルのプラグをカウンターバランス スタンド下部のコネクタに接続しま
す。
7カウンターバランス スタンド上部から出ている電源コードを、ビューイング ヘッド後部のソケットに接続しま
す。
注)
AC
アダプタ ケーブルのプラグを直接ビューイング ヘッドに接続しないで下さい。
ユニバーサル マウント
Gクランプ
カウンターバランス スタンド
ビューイング ヘッド
ACアダプタ
対物レンズ
乾燥剤の交換
乾燥剤はビューイング ヘッド内の湿気を除去します。
ビューイング ヘッドの電源コードを外します。
ネジを緩めカバーを外します。
乾燥剤を交換します。
LEDアレイの交換
ネジを緩めカバーを外します。
LEDアレイを固定している2本のネジを外し、
フィルタが付いた状態で交換します
取外しと逆の順序で組立ててください。
定期保守

20 マンティス コンパクト ユニバーサルスタンド - ユーザーガイド www.visioneng.com/support
日本語
はじめに
電源スイッチを入れ、試料をビューイング ヘッド
の下に置きます。
焦点調整
ユニバーサルスタンドの特長は、作業者に合った見やすいポジ
ションに簡単にセットができることです。通常は試料を手に持ち
焦点を合わせます。ビューイング ヘッドの高さ調整は、高さ固定
ノブを緩めてからおこなってください。焦点が合ったら高さ固
定ノブを締めます。
眼幅調整
眼幅調整ツマミを回し個人の眼幅に合わせます。
注)この調整が不良の場合は良好な立体像が得られません。
レンズの交換
対物レンズをまわして外します。レンズはレンズケースに収納してください。使用する対物レ
ンズを挿し込み、静かにまわして固定します。
ビューイング ヘッドのカウンターバランス
対物レンズを交換するとカウンターバランスの調整が必要になる場合があります。カウンターバランス調整ネジ
(軽いレンズは時計回り、重いレンズは反時計回り)でビューイング ヘッドが安定するよう調整します。
人間工学に基いた観察姿勢
マンティスを使用することにより、人間工学に基いた楽な姿勢での観察が可能になります。マンティスを設置する場
合、作業台や椅子の高さに注意してください。椅子に座り背を伸ばした状態で、像がビューイング ヘッドを通して水
平に見え、ひじが作業台に着くように椅子及び作業台の高さを調節してください
使用方法
記載のお買い上げ日より1年間、本製品の取扱説明書等にしたがって正しくお使いいただいているにもかかわらず、万一故障した場合には無料で修理い
たします。お買い上げ店を通じて修理を依頼してください。
本書は再発行いたしませんので紛失しないよう大切に保存してください。
この保証書は本書に明示した期間、条件の下において無料修理をお約束するものです。従ってお客様の法律上の権利を制限するものではありません。
本書は日本国内においてのみ有効です。
保証書
使用上の注意
使用しないときはカバーを掛けてください。
本体の汚れを落とすときは、やわらかいブラシまたは布地をご使用ください。
レンズのクリーニングはレンズ専用布をご使用ください。
付属レンズは、ホコリの少ない場所に保管してください。
修理
機器の修理はヴィジョン・エンジニアリングの認定ショップで行っています。
お買い上げ日
お 客 様 名
販 売 店 名
Other manuals for Mantis
1
Table of contents
Languages:
Other Vision Engineering Microscope manuals
Vision Engineering
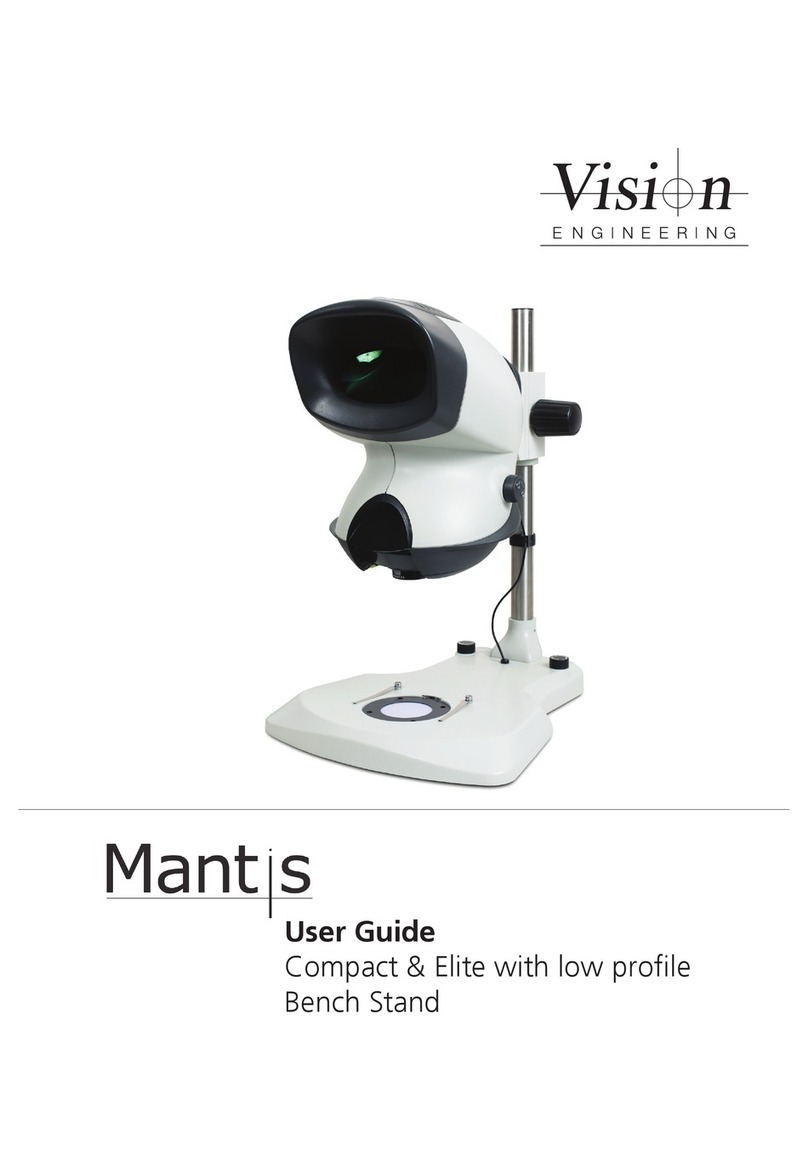
Vision Engineering Mantis Compact User manual
Vision Engineering
Vision Engineering Mantis Compact User manual
Vision Engineering
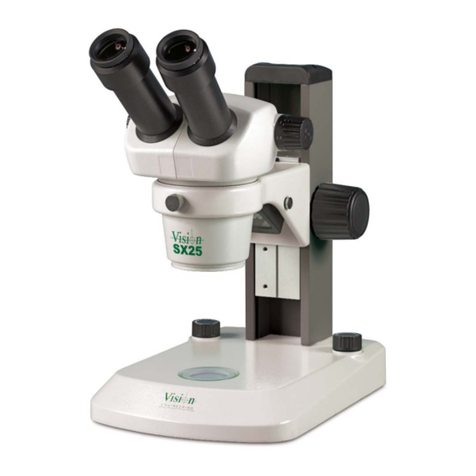
Vision Engineering SX25 User manual
Vision Engineering
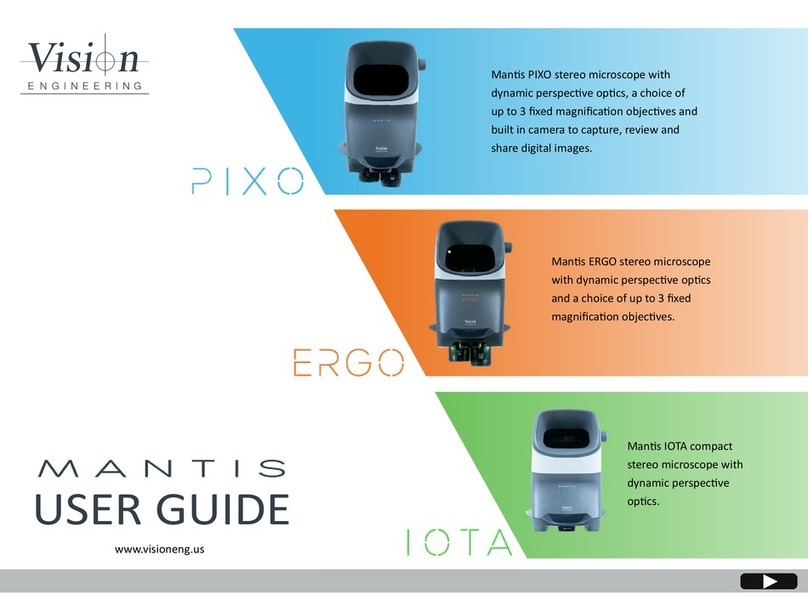
Vision Engineering MANTIS PIXO User manual
Vision Engineering
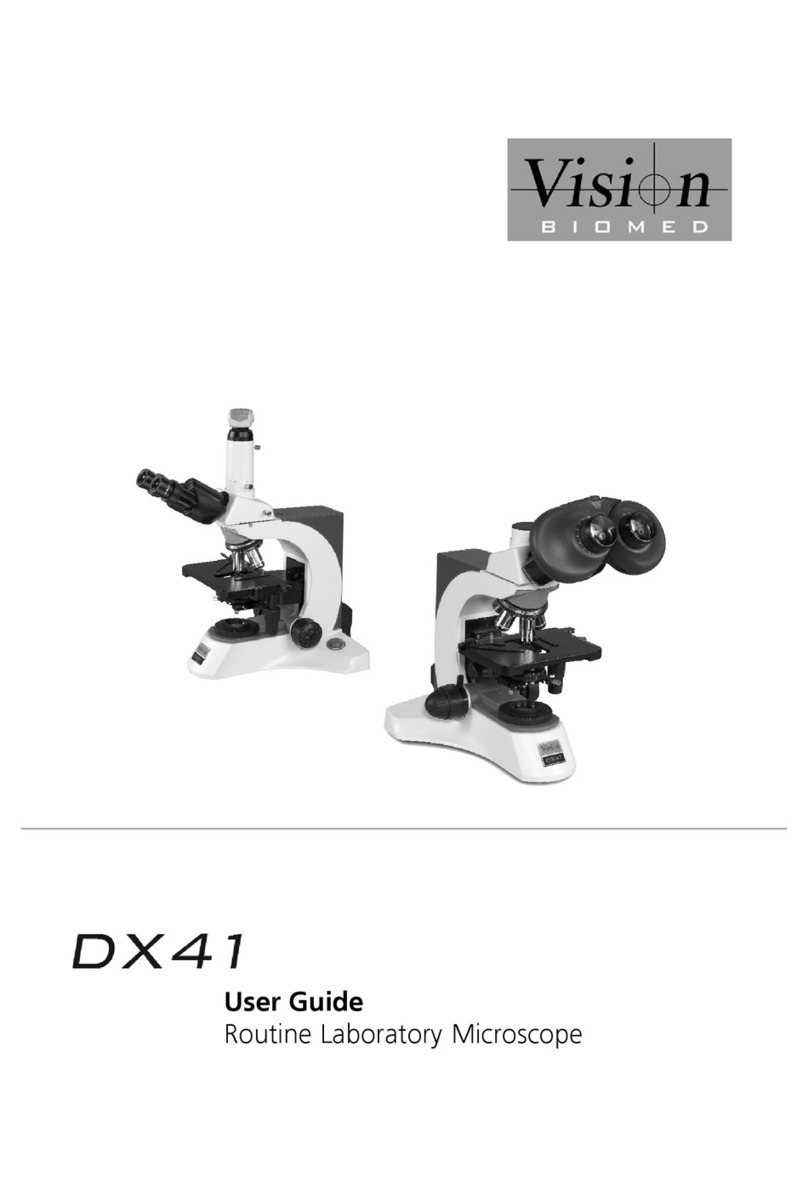
Vision Engineering DX41 User manual
Vision Engineering
Vision Engineering TIM5 User manual
Vision Engineering
Vision Engineering Mantis Elite User manual
Vision Engineering
Vision Engineering SX 45 User manual
Vision Engineering
Vision Engineering Mantis Troubleshooting guide
Vision Engineering
Vision Engineering Ergo 80 User manual

