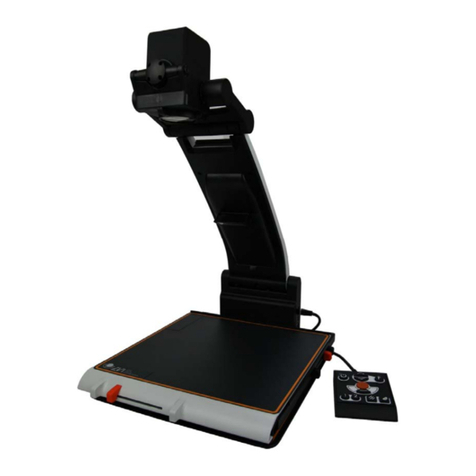
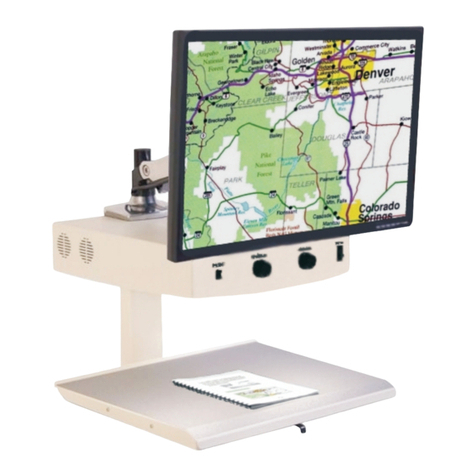
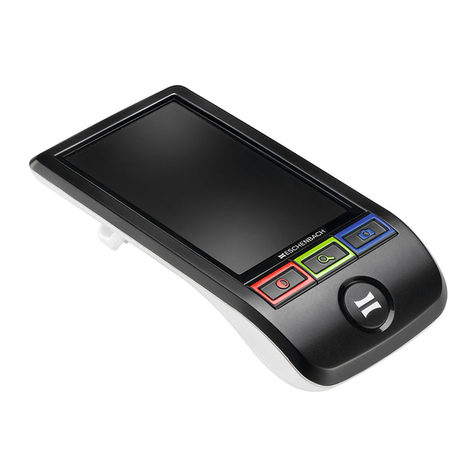
Vision Technology InSight 1808 User manual

InSight 1808
Owner’s Manual
www.visiontechnology.com
Made in U.S.A.
®
™
Copyright © Vision Technology, Inc.
™
Desktop Video Magnifier
07/04/08

®
™
Thank you for choosing a Vision Technology desktop video
magnification system. You have selected a precision-engineered
product designed to give years of performance and reading
enjoyment. You have selected the finest video magnifier available
in the marketplace.
Vision Technology has designed, developed and fabricated new
cutting-edge components for their product lines, including
innovative portable products and distance viewing products.

®
™
InSight™ 1808 provides independence with the freedom to
view phtographs, write, enjoy reading and hobbies.
InSight™ 1808 includes the following features:
> S Video, RCA Composite video and VGA video output
allows the choice of CRT television, flatscreen
television or computer monitor. Note:VGA video
output is the factory default setting.
> XY table with internal storage compartment
> Auto Focus creates the clearest view without any
need to make adjustments
> Memory Presets allows the user to customize
magnification and mode settings
> Optional KVM switch for computer compatibility
> Optional monitor bracket assembly
Overview

®
™

®
™
Table Of Contents
1
Table of Contents 1
Important Information 2
Unpacking and Set Up 3-4
Storage Compartment 5
Optional Monitor Bracket Assembly 6-7
Control Panel 8
Customization of Settings 9
Effects Package Option 10
Trouble Shooting 11
Specifications 12
Warranty and Product Registration 13
Warranty Service Information 14
Table of Contents

®
™
Vision Technology is not responsible for damage incurred
during shipment. In the event of damage to the shipping
carton or its contents, immediately notify Vision Technology.
Keep the original shipping carton and all packing materials in
the event the unit needs to be returned for service or repairs.
Do not attempt to repair, service or modify this unit. There are
no serviceable parts inside. Any changes or modifications not
expressly approved or performed by Vision Technology, Inc.
will void the limited warranty on this unit.
Complete the product registration form and return it
immediately to activate the warranty. The product
registration form is located on page 10 of the owners manual.
Client Services and Technical Support are available Monday
through Friday 8:00 AM - 4:30 PM, Central Standard Time.
We can be reached at 1-800-560-7226.
2
Important Information

®
™
3
Place the Video Magnifier on a sturdy work surface, such
as a desk or table. Use a chair that allows you to view and
work with the Video Magnifier comfortably.
What’s in the Box?
Power Supply and Electrical Cord.
Connect the power supply to a wall outlet and connect the
power jack to the back of the Video Magnifier. Connect the
video cord to a video input port on the monitor or television,
and connect the opposite end to the back of the Video
Magnifier
Press the power button on the monitor or television.
Press the red button to power up the Video Magnifier. It
takes approximately 10 seconds for the camera to initialize,
before displaying an image.
Check the spring loaded locking mechanism located on the
rear of the center post.
Unpacking and Set Up
Power Supply RCA Video Cord S - VIdeo Cord Owners Manual

®
™
4
Unpacking and Set Up
Main Power in Port
RCA video in port VGA video in port
S- video in port

®
™
5
Storage Compartment

1. Remove the two screws
located in the center top
portion of the InSight 1808 unit.
These same screws will be used
in mounting the bracket to the
top of the unit.
2. Place the short portion of the
bracket on top of the Insight
1808. Align the pilot holes
located on the base“short
portion” of the bracket with the
holes on the cover of the InSight
1808. Fasten the bracket to the
top of the InSight 1808 with
same two screws removed
in step one.
®
™
6
Optional Monitor Bracket Assembly

FOUNDED 1992 / Made In the U.S.A.
3. Power supply cord and a VGA
cable are inclusive with the
purchase of new monitors.
Connect the power supply cord
and VGA cable to the monitor.
4. Align the four screw holes
located on the back of the
monitor with the slotted holes
on the bracket.With the
machine screws provided
thread the screws through the
bracket and into the monitor.
VERY IMPORTANT THAT
ONLY THE MACHINE SCREWS
PROVIDED ARE USED FOR
MOUNTING THE BRACKET TO
THE MONITOR.
FOUNDED 1992 / Made In the U.S.A.
®
™
7
Optional Monitor Bracket Assembly

®
™
Tap the power switch to power the
Video Magnifier on or off. An audible beep
occurs when tapping the power switch and
the reading lights illuminate.
When powered on, the lock button locks and
unlocks the reading table. Powering off the
Video Magnifier automatically unlocks the
table.
Tapping the mode button cycles through
photo, high contrast and reverse high
contrast modes.
Brightness button brightens and darkens all
modes. Press the left side to decrease the
contrast. Press the right side to increase the
contrast.
Plus button increases the magnification.
Minus button decreases the magnification.
8
Control Panel

®
™
Hold both sides of brightness button- this allows the choice
in setting VGA or S-Video/ RCA-Video. There are two
audible beeps indicating the selection has been made.
Hold down the mode button when powering up the
machine to turn the auditory beep on or off.
In order to return to factory setting hold down the right side
of the brightness (contrast) button while powering up the
machine.
To save a zoom and mode preference hold the MODE
button and the left side of the brightness (contrast) button
simultaneously. The next time the system is powered on
the camera will automatically return to the saved zoom and
mode preference.
+
+
+
9
Customization of Settings

®
™
10
Effects Package Option
Accessing Color Combinations
1. There are eight color combinations to choose from.
2. In order to access color combinations hold the MODE button in mode two
“high contrast” or mode three “reverse high contrast” viewing mode. When you have
determined your selection of a color combination release the mode button.
3. When cycling through the various color combinations release and tap the
MODE button to resume no effects (standard operation). No effects (standard
operation) is mode one “photo mode”, mode two “high contrast”, mode three “reverse
high contrast”.
Color Combinations
Mode two “high contrast” shows the following combinations: Blue background/
yellow print, white background/ blue print, black background/ yellow print, black
background/ green print.
Mode three “reverse high contrast” shows the following combinations: Yellow
background/ blue print, blue background/ white print, yellow background/ black
print, green background/ black print.
Line Markers
Window Shading
Accessing Line Markers and Window Shading
1. In order to access line markers or window shading simultaneously hold the PLUS and
MINUS buttons then release. “EP” will display in the upper left portion of the screen.
2. Pressing the MODE button will cycle in this order; No effects (standard operation),
horizontal line markers, vertical line markers, horizontal window shading and vertical
window shading.
3. To size the window shading or position the line markers, press the PLUS or MINUS
buttons accordingly.
NOTE: Powering off the unit will reset the viewing modes to standard operation.

®
™
11
Trouble Shooting
SYMPTOM CAUSE SOLUTION
Video Magnifier
does not power on
A. No power to system
B. Defective power supply
C. Membrane wire harness
not connected or com-
pletely connected
Restore power at outlet.
Replace power supply
Service Required
Video interference/
Running lines.
A. Damaged E-Prom
B. Disconnected wire har-
ness
Service Required
Service Required
Irregular sounding
beep.
A. Electrical surge
B. Defective power supply
C. Camera wire harness
partially connected
D. Damaged E-prom
Replug power cord
Replace power supply
Service Required
Service Required
Control panel dead A. Membrane wire harness
not connected or com-
pletely connected
B. Membrane ribbon cable
damaged
Service Required
Service Required
Lock button not
locking table
A. Solenoid spacer cap is
not in place
B. Membrane wire harness
not connected or com-
pletely connected
Service Required
Service Required

®
™
Features
Autofocus
Ball bearing table movement
Audible Feedback
Magnification
2x - 65x
Illumination
LED Lighting
Power Supply
Input Voltage 100-240 V AC
Frequency 50-60 hz
12
Specifications
Product Dimensions
Height 13”
Width 19”
Depth 18”
Weight 18 lbs.
Transportation Carton
Height 16”
Width 23”
Depth 23”
Reading Table
Unrestricted workspace
Internal Storage compartment
Video Output
RCA Composite
S-Video
VGA
Optional Effects Package
Color Combinations
Line Markers
Window Shading

®
™
Warranty and Product Registration
13
Limited 2 Year Warranty: Vision Technology warrants your Vision Technology product against defects in material or
workmanship for a period of 2 years.
You must complete and sign the Warranty Regtistration form, along with providing a copy of the original sales
receipt and mail them to Vision Technology within 30 days from the purchase date to activate this Limited Warranty.
This Limited Warranty extends to the original consumer purchase and for use only by that consumer. This Limited
Warranty applies to the product only while the product remains in the possession of the original consumer
purchaser. This Limited Warranty does not extend to commercial users.
Vision Technology will, at its option, repair or replace the defective product or part. Replacement parts may be
new, repaired, refurbished or comparable as determined by Vision Technology at its discretion. This exchange is
done without charge to you for parts and labor. All products with replacement or refurbished parts, are covered
only for the original warranty period. When the Limited Warranty on the original product expires, the warranty on
the replacement or refurbished parts also expires. After 2 years from the date of purchase, the customer pays for
the replacement of all parts and for all labor charges.
Your warranty does NOT cover:
Product repair because of failure to follow instructions and warnings in the owner’s manual, accident, misuse,
abuse, lightning damage, unauthorized repair, failure to provide reasonable and necessary maintenance, improper
packaging or transit by someone other than Vision Technology, acts of God, or other cause not within the control of
Vision Technology, Inc.
Labor, parts and transportation charges for service calls not involving defective materials or workmanship.
Labor, parts and freight charges for factory service not involving defective materials or workmanship. A product
used for commercial or institutional purposes. Any modifications or other changes to the product, including but
not limited to software or hardware modification in any way other than as expressly authorized by Vision
Technology will void this Limited Warranty. Incidental or consequential damages resulting from the product.
Upgrades. Shipping Cartons.
Warranty Registration requires the following:
(1) A copy of the original sales receipt
(2) Serial number recorded
(3) Print your name and Primary phone number
(4) Signature
Serial Number:
Print your name and Phone number:
Signature:
Mail To:
Vision Technology, Inc.
Warranty Registration
8501 Delport Drive
Saint Louis, MO 63114-5905
< CUT HERE > < CUT HERE > < CUT HERE >
Warranty Registration Form

®
™
Warranty Service Information
14
Warranty Service:
Warranty service will be provided by Vision Technology. If you believe you need service for your product, contact Vision
Technology at 800-560-7226. A representative will go through a diagnostic checklist with you. If it is determined that
the product needs to be returned for service, you will receive a return authorization number. You will be responsible for
the cost of shipping the product for warranty service; Vision Technology will be responsible for the costs of return
shipment (via UPS GROUND).
All warranty repairs or service require:
(1) Return authorization number.
(2) A copy of the original sales reciept.
(3) Product repacked and returned in its original shipping carton.
Out-of-Warranty Service:
To obtain out-of-warranty service contact Vision Technology at 800-560-7226.
®
™
< CUT HERE > < CUT HERE > < CUT HERE >
Warranty Registration Form

®
™
15

8501 Delport Drive
Saint Louis MO 63114
800-560-7226
Made in U.S.A.
Copyright © Vision Technology, Inc.
Discover more innovative Vision Technology®
low vision products
www.visiontechnology.com
®
™
Table of contents
Other Vision Technology Magnifier manuals
